How To Add Clouds To A Sky In Photoshop
Clouds can make or break a scene in photography. Having clouds with just the ‘right’ texture can build mood and add an interesting element to what might otherwise be dead space.
In this tutorial, we’re going to look at how to generate clouds in Photoshop and then how to seamlessly blend them into a night cityscape scene, or any scene, to increase drama.
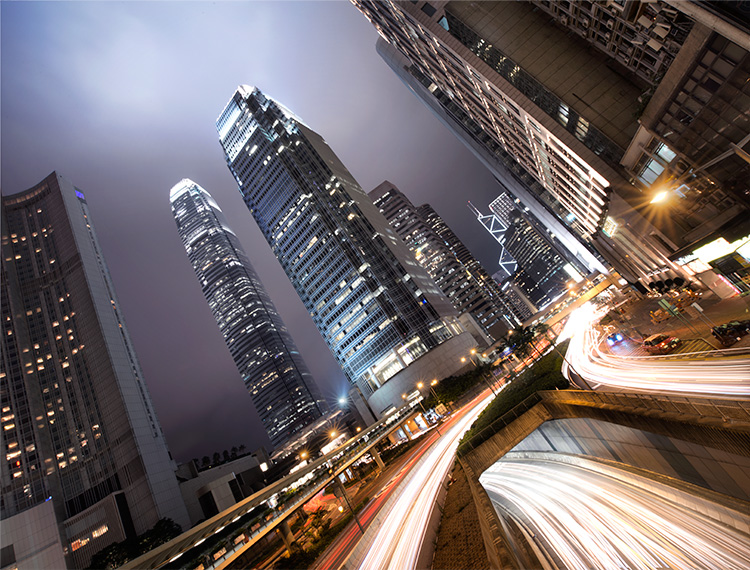
We’ll go from this image, with a flat sky… 
To this image, with some gentle cloud texture….
How To Add Clouds To A Sky In Photoshop
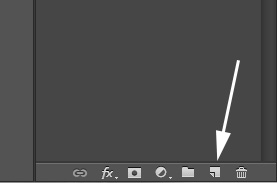
1. Open a new layer. Go down to the bottom of the layers panel and click on the Create a new layer button. Or go to Layer>New>Layer.
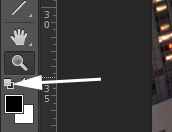
2. Change your foreground colours to black and white. At the bottom of the utilities bar to the left, you can see the foreground and background colours. Above the colours you will see a smaller version of this, but in black and white. Press that to restore your foreground colours to black and white.
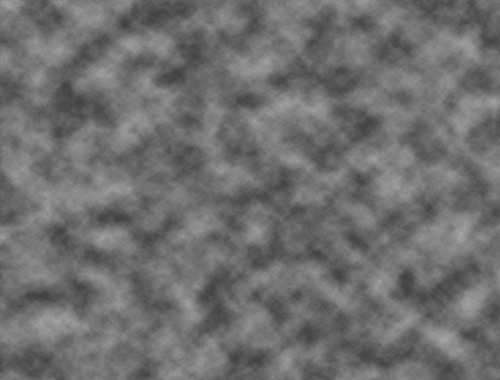
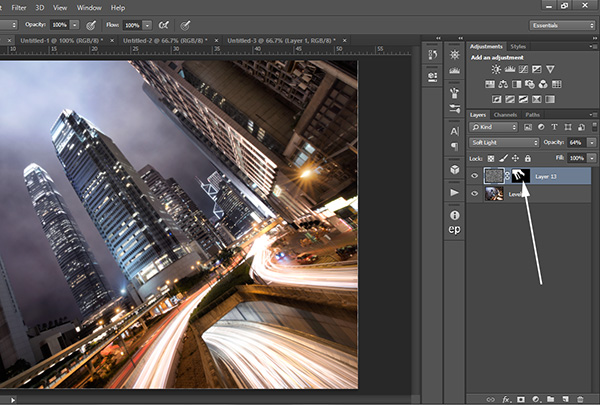
3. Create some clouds. With the new layer selected, go to Filter>Render>Clouds. The new layer will now resemble something that looks like clouds.
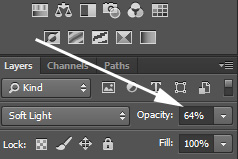
4. Change the blend mode. With the new layer still selected, go up to the Blend Mode and choose Soft Light or Overlay (Soft Light was used here). You will now see that the cloud layer has been applied to the normal layer and created various shades of contrast throughout.

5. Change cloud size. If you feel the clouds are too small or tightly compacted, choose the zoom tool and zoom out. Then go to Edit>Free Transform. Now drag the bottom left-hand corner to the bottom left so that you are stretching the clouds and making them bigger.
6. Change opacity. If the effect is too strong, lower the opacity of this layer. Here I used 64%.
7. Mask out buildings. Finally, we have to mask out the clouds layer from the buildings. Create mask by clicking on the Add a mask button, left of the Add new layer button on your layers panel. With a black paintbrush, and a brush opacity of about 60%, begin masking out the areas. Since we’ve used the blend mode here to blend the clouds, we don’t have to be 100% accurate. But take your time and gently brush away unwanted areas. If you don’t know what masking is, check out this tutorial: What is Masking In Photoshop?
And that’s it! How To Add Clouds To A Sky In Photoshop. We now have a more dramatic sky that adds to the mood of the entire image.
I hope you’ve enjoyed this tutorial. Please feel free to share it with friends if you think it will be useful to others.
Recent Articles on Shutter…Evolve
How To Add Warmth To a Sunset or Sunrise
Advantages Of Having A Photography Blog
Use Blend Modes In Photoshop To Beautifully Enhance Your Photos
Enter your email below and join our community of more than 100,000 photographers who have also
Subscribed to our newsletter.
Downloaded our FREE Photoshop Course.
Got our FREE Easy Panel for Photoshop.
And, have our FREE Essential Guide To Luminosity Masks E-Book.
To go directly to any of our products, simply click on the image below.


Shutter Evolve Complete Product Range
How To Add Clouds To A Sky In Photoshop