
Awesome Vignette To Add Mood
Today we are going to look at an amazing way to shift the entire balance of light in an image, which will make a vignette to add more mood and push the viewers’ eyes to our objects of interest. We will also see a fantastic little technique for reducing banding very quickly and naturally in your photos. In the tutorial video, there’s a couple of extra tips including, how to reduce banding and a sneak peek at our post-processing techniques. To create this style of vignette in our tutorial please follow our step-by-step guide.
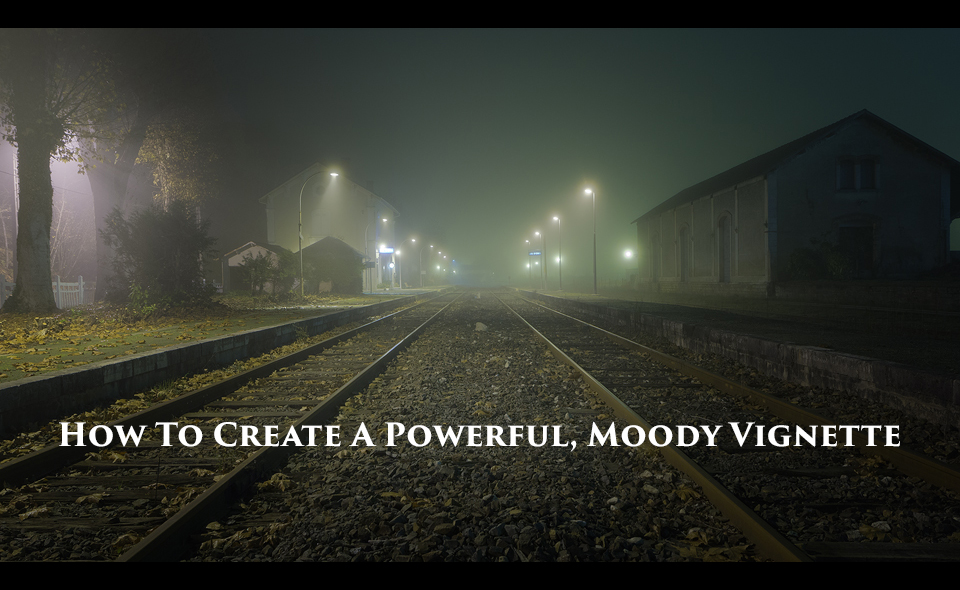
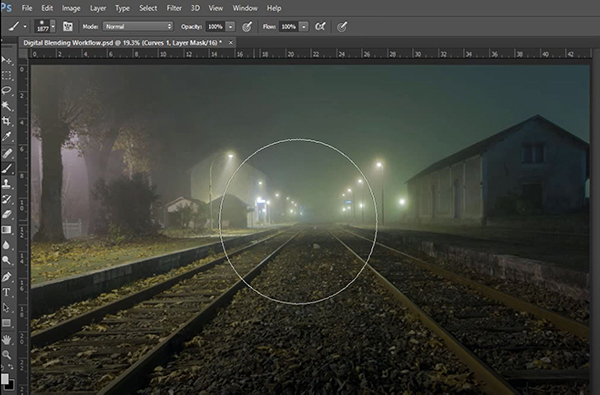
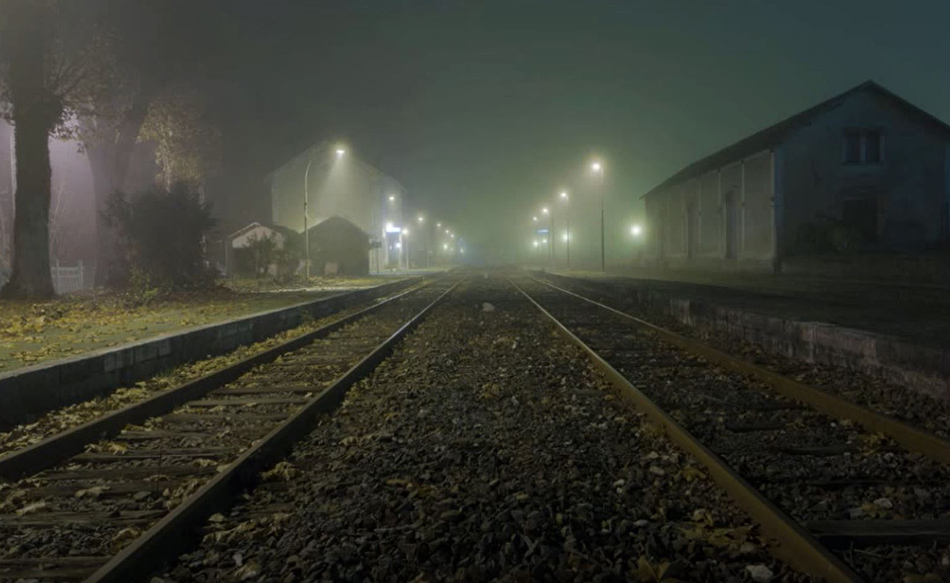
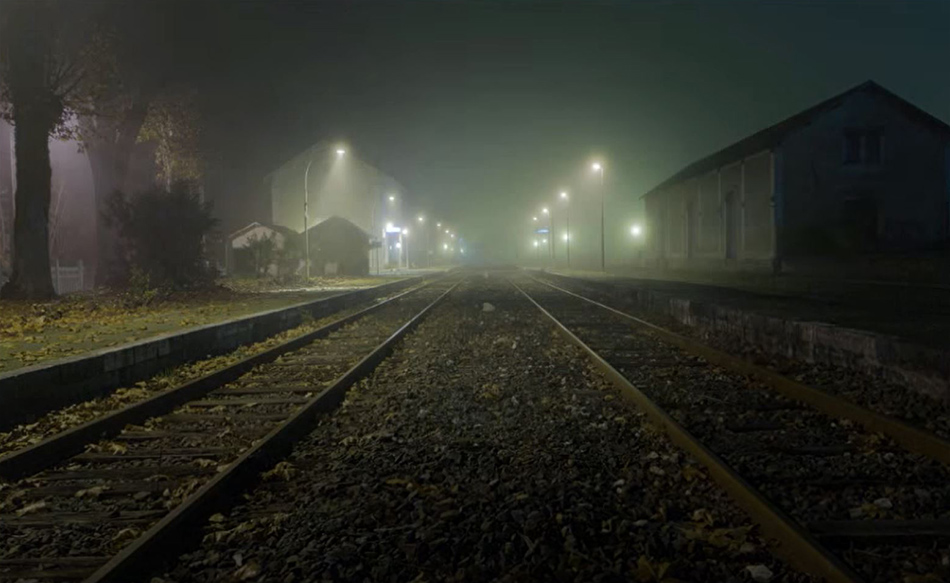
You can see the final image here: A Spooky Country Train Station
Step-By-Step guide to creating a Vignette in Photoshop
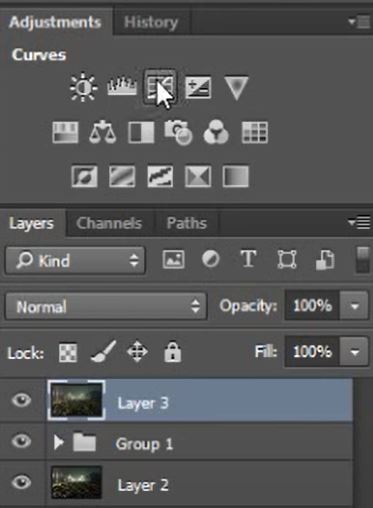
1. With your image open in Photoshop add a Curves Layer. You can do this by going to Layer>New Adjustment Layer>Curves or, by clicking on the Curves layer icon in the adjustments panel.
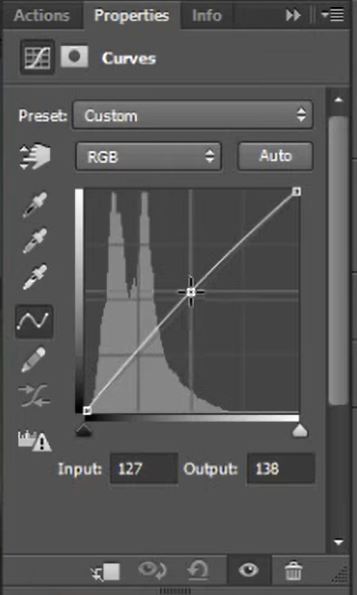
2. Raise the curve to lighten your image slightly.
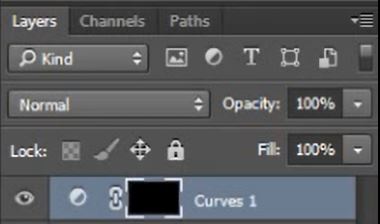
3. With the Curves Layer thumbnail selected press Crtl+I on a PC or Cmd+I on a Mac to hide the layer.
4. Select the Brush Tool and with a white foreground colour, manually paint in the area you want to brighten and bring attention to.
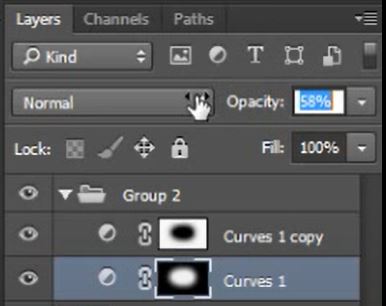
5. Duplicate the curves layer by pressing Crtl+J on a PC or Cmd+J on a Mac.
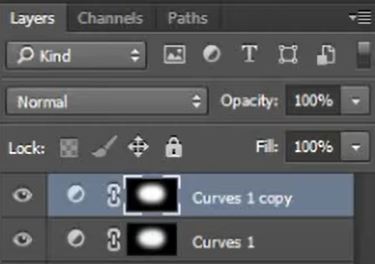
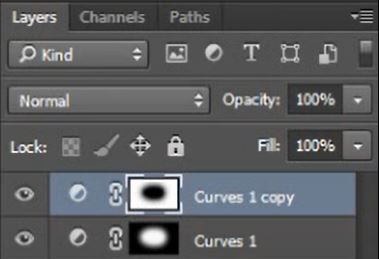
6. Invert the layer mask by pressing Crtl+I on a PC or Cmd+I on a Mac. Now we will only be affecting the outside of the mask.
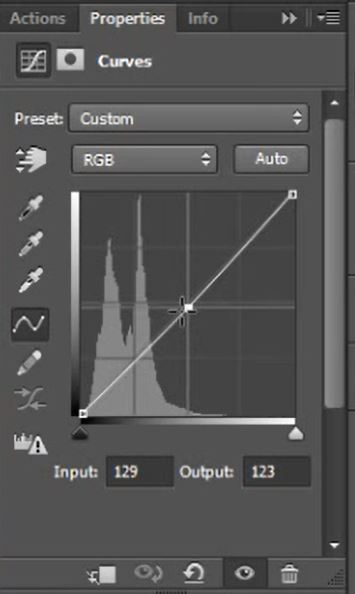
7. Go back to the curves adjustment and raise the curve. You should see the peripherals of the image darken.
8. On reflection, is either of the curves adjustments are too strong. To reduce their effects, simply lower their opacity until the balance is here you want it.
Now that we’ve used a vignette to add more mood lets compare the before and after.
Thank you for reading our article. If you would like a great tool to help you edit your images in Potoshop but don’t have Raya Pro, don’t worry. We have our FREE Easy Panel to now include built-in masks and adjustments. You can download our FREE Photoshop Extension “Easy Panel” HERE.
If you liked this article, you will definitely like our article on The Power of Vignettes.
There are other ways to create a more orthodox or uniformed vignettes, instead of the manual ones that we prefer. Here is a good article from a very useful website CREATING A VIGNETTE EFFECT IN PHOTOSHOP
Enter your email below and join our community of more than 100,000 photographers who have also
Subscribed to our newsletter.
Downloaded our FREE Photoshop Course.
Got our FREE Easy Panel for Photoshop.
And, have our FREE Essential Guide To Luminosity Masks E-Book.
To go directly to any of our products, simply click on the image below.


