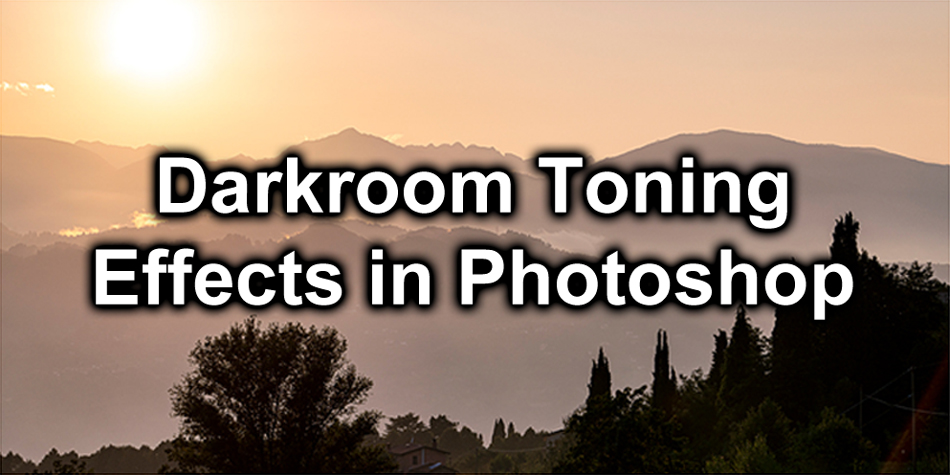
Darkroom Toning Effects in Photoshop
This Darkroom Toning Effects in Photoshop Article is by Martin Sproul, If you would like to write for us, please read here.
Photoshop gives you the ability to add toning effects to your images that emulate the darkroom toning effects. In this article, I am going to show you how to easily create the toning effects using Photoshop and therefore negate the need to get involved in all those dangerous chemicals.
Convert to Black and White
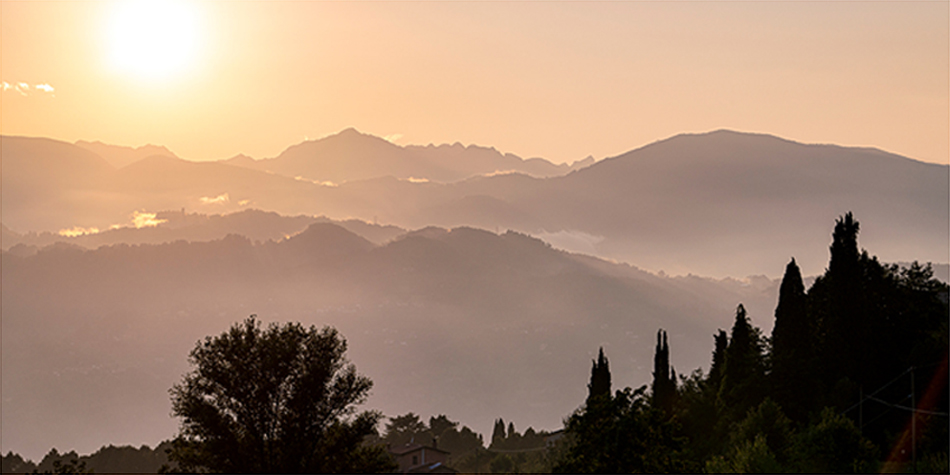
In this example, I am going to add the toning effects to a black and white image. I usually apply these toning effects to a black and white image. The effect can also be applied to a colour image, but for this example, I am going to use a black and white image.
There are many ways to convert a colour image to black and white using Photoshop, but I am not going to get bogged down with that for this tutorial. To turn the colour image to black and white, I am going to add a black and white adjustment layer: –
1. In the Layers panel, click on the Create new fill or adjustment layer icon and select Black & White from the list of options;
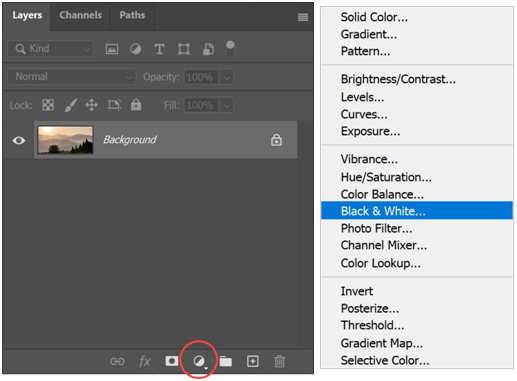
2. A new Black & White adjustment layer will be added to the top of the Layers panel, and the Properties dialogue box will open;
3. You can use the Properties dialogue to adjust the look of the black and white.
Enter your email below and join our community of more than 100,000 photographers who receive regular tutorials and have also

Subscribed to our newsletter,
Downloaded our FREE Photoshop Course
Got our FREE Easy Panel for Photoshop
And have our FREE Essential Guide To Luminosity Masks E-Book
Gradient Map Adjustment Layer
To create the toning effect, I am going to add a Gradient Map adjustment layer on top of the Black & White adjustment layer I created in the last step. Now, for some reason best known to Adobe, the Photographic Toning gradient maps are no longer loaded by default. They are installed with Photoshop, but you need to manually load them to this list of available gradient maps. Let me show you what I mean.
The default list of Gradient Maps
Firstly, let me show you how to add a gradient map to your image before I show you how to load the Photographic Toning gradients.
To add a Gradient Map adjustment layer: –
1. In the Layers panel, click on the Create new fill or adjustment layer icon and select Gradient Map from the list of options;
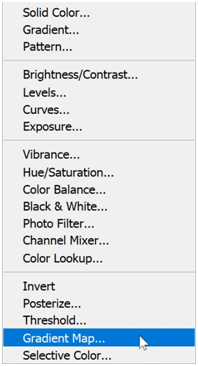
2. A new Gradient Map adjustment layer will be added to the top of the Layers panel, and the Properties dialogue box will open. The Gradient Map that Photoshop applies to the image is a gradient made from the current foreground and background colours. We can ignore this because we are going to change the gradient in the next steps;
3. In the Properties panel for the Gradient Map, click on the small down arrow to the right of the gradient. This will reveal a list of default gradients. Click on a few of these Gradient Maps to see their effect on your image;
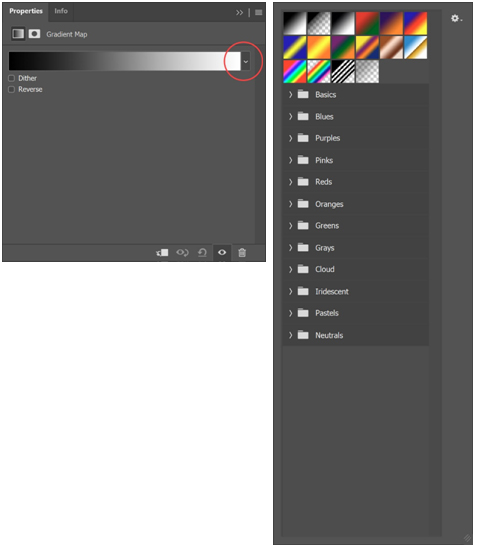
4. Most of these Gradient Maps will produce a funky look. This is not the toning effect we are going for. However, the gradients we are looking for are not loaded by default.
We will now add the gradients we need to create our desired toning effects.
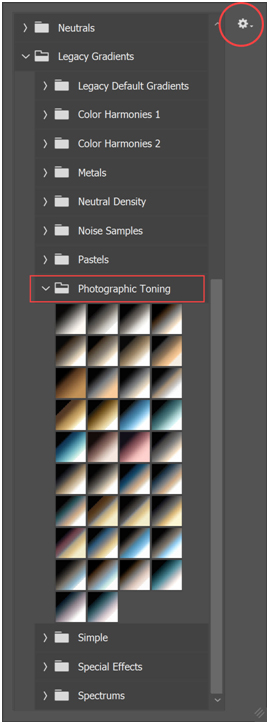
Photographic Toning gradients
To gain access to the Photographic Toning gradients, we first need to open the Gradients panel: –
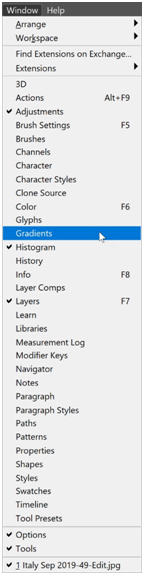
1. Open the Gradients Panel by selecting Window > Gradients from the top menu;
2. The Gradient Panel will open. If the Gradients Panel is floating on the screen, I prefer to dock it on the right along with the Adjustments panel;
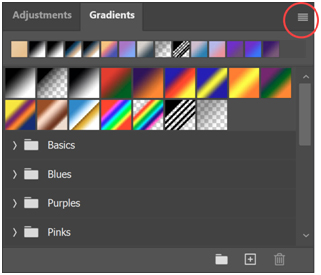
We need to load a set of gradients called Legacy Gradients. A quick scroll up and down the list of available gradient sets reveals that Legacy Gradients is not loaded. To load the Legacy Gradients: –
3. Click on the menu at the top right of the Gradients Panel and choose Legacy Gradients from the list of options;
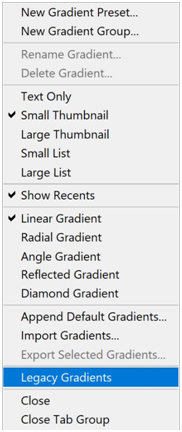
4. Nothing happens. Or it appears that nothing has happened, but if you now scroll the list of gradient sets, you will see Legacy Gradients at the bottom of the list.

Enter your email below and join our community of more than 100,000 photographers who receive regular tutorials and have also
Subscribed to our newsletter,
Downloaded our FREE Photoshop Course
Got our FREE Easy Panel for Photoshop
And have our FREE Essential Guide To Luminosity Masks E-Book
Add a Photographic Toning Gradient Map
Now that we have loaded the Legacy Gradients to our list of available gradients, we can return to the Properties panel for the gradient map we added earlier. We are finally going to create the toning effect on our black and white image: –
1. If the Properties panel is not open for the Gradient Map adjustment layer, double-click on the adjustment layer icon to the left of the Gradient Map adjustment layer;
2. With the Properties panel open, click on the click on the small down arrow to the right of the gradient. This will reveal a list of all the available gradients, including our newly added set of Legacy Gradients;
3. Expand the Legacy Gradients set to reveal additional sets of gradients. Expand the Photographic Toning set to unveil a collection of gradients specifically designed to create toning effects;
4. In this example, I am going to select Sepia-Selenium 1 by clicking on its thumbnail.
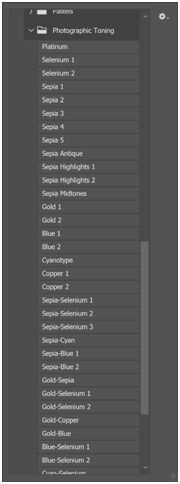
Display the gradient names
You can change the way Photoshop displays the gradients to show the names of the gradients: –
1. In the list of gradients view, click on the small cogwheel at the top-right of the dialogue;

2. Choose Text Only from the list of options;
3. The gradients will now display as a list of names;
4. I chose Sepia-Selenium 1 for this example image.
Adjust the appearance of the Gradient Map
With the Gradient Map applied, you can now adjust the appearance and intensity of the effect: –
To reduce the strength of the Gradient Map effect: –
1. Select the Gradient Map layer by clicking on it once;
2. Click on the Opacity slider to the top-right of the Layers panel and slide to the left;
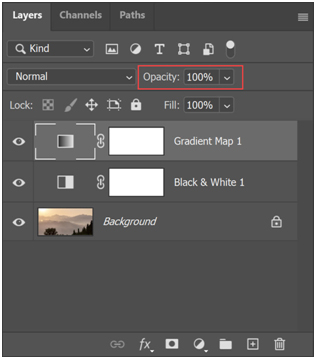
3. This will fade the effect of the Gradient Map and reveal more of the black and white layer underneath.
If you do not create the Black & White adjustment layer, the underlying colour image will gradually be revealed as the opacity is reduced. Turn off the Black & White adjustment layer and reduce the opacity of the Gradient Map layer to see the effect this has. It may be a toning effect that suits your image.
To adjust the appearance of the Gradient Map: –
1. Select the Black & White adjustment layer by clicking on it once;
2. This will open the Properties panel. If the Properties panel does not open, double-click on the Black & White adjustment layer icon;

3. Adjust the sliders in the Properties panel for the Black & White adjustment layer;
4. This will have a profound effect on the overall appearance of the image.
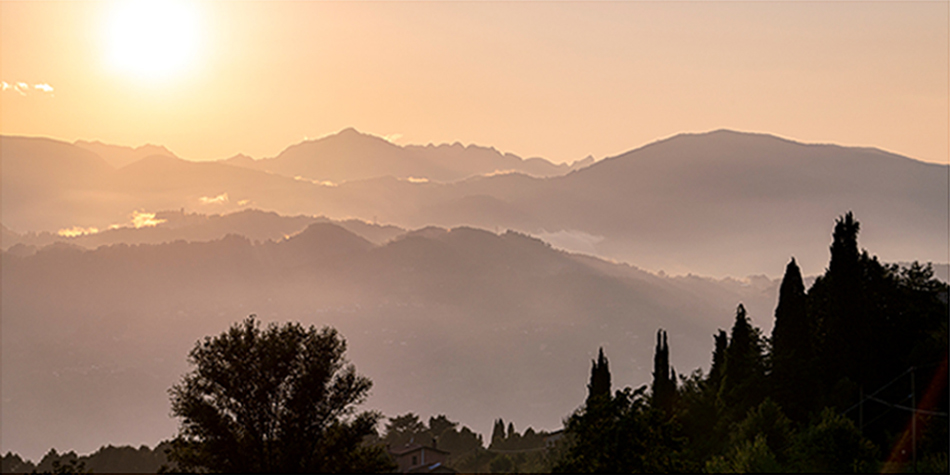
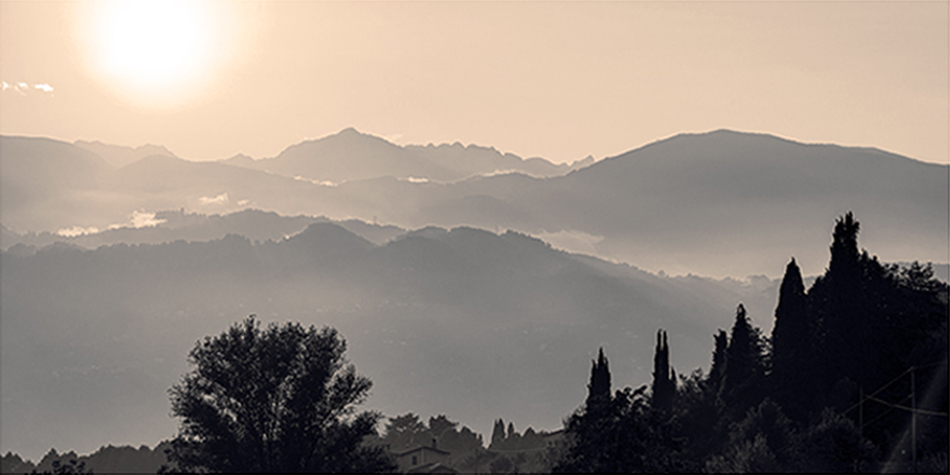
Please see the below and after effect of Toning and the subtle change to the mood of the image.
Toning effect in photoshop – Conclusion
Using these Gradient Maps to apply toning effects to your images is a fast way to apply a pleasant tone to your images. The Photographic Toning set of gradients is ideally suited for this technique. Using them ensures you will have a consistent tone if you are applying it to more than one image.
If this is a technique that you think may be useful to you, I encourage you to experiment with the different gradients. Also, try out the effect on both colour and black and white images.
About the Author – Martin Sproul – f:stop Training
Martin runs run a photography website and workshops in Tuscany. At f:stop Training, they have photography training and workshops that will enable you to take full control of your camera and become more creative and skilled in your photography. F:stop provide photography training and workshops for all, regardless of your existing knowledge. If you are new to photography, want to get started but don’t know where to begin or you’d like to progress beyond the basics, F:Stop can help with their range of one-day photography training courses and workshops.
Thank you for reading this article Darkroom Toning effect in photoshop, You might also be interested in the articles below. Be sure to sign up for our newsletter for more tutorials and great offers.
Enter your email below and join our community of more than 100,000 photographers who have also
Subscribed to our newsletter.
Downloaded our FREE Photoshop Course.
Got our FREE Easy Panel for Photoshop.
And, have our FREE Essential Guide To Luminosity Masks E-Book.
Other tutorials for photographic Toning
Here we have an in-depth tutorial to Photo Re-Touch Using Photographic Toning Effect in Photoshop CS6.
Thank you for reading this article, be sure to sign up for our newsletter for more tutorials and great offers.