Histogram Tips To Take Better Photos
When you’re first starting out in photography. The histogram is something that’s commonly overlooked, but it definitely shouldn’t be. It’s an incredibly powerful visual indicator that we can use to balance our exposures correctly. By setting your shot up according to the histogram you are able to capture the fullest dynamic range and hugely reduce the risk of overexposing and underexposing your images. It’s easy to ignore the histogram when we don’t understand what it represents. We will explain what the histogram is, then we’ll go over Ian Worths 3 Histogram Tips To Take Better Photos.

What Is The Histogram
Essentially it is a visual display of the tonal values of the scene that your camera is/was pointing at. Most cameras these days have a histogram display on them. If you’re not sure where to the histogram on your camera or if it has one, a quick google search will reveal all, I’m sure. The tonal values are represented in sort of a line graph style. With black or 0% brightness on the far left and white or 100% brightness on the far right. Everything between is in grayscale from black to white (left to right). The line graph peaks and troughs depending on how many pixels are sitting within a tonal range. So, if your image is dark, you will find a peak to the left of the histogram, as that is where most pixels will reside.
Dark Image (under-exposed) 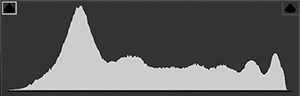
Balanced Image 
Bright Image (over-exposed)
Enter your email below and join our community of more than 100,000 photographers who receive regular tutorials and have also

Subscribed to our newsletter,
Downloaded our FREE Photoshop Course
Got our FREE Easy Panel for Photoshop
And have our FREE Essential Guide To Luminosity Masks E-Book
3 Histogram Tips To Take Better Photos
1. Balance Your Histogram In-Camera
For this, it is best to be shooting in Manual mode. Shooting in manual mode will give you the most control over Aperture, ISO and Shutter speed. By adjusting these you can quickly and expertly balance out your histogram before taking your photos. You can also balance the histogram in Aperture Priority and Shutter Priority by using exposure compensation, however, depending on your camera, this can sometimes involve switching in and out of Live View to make adjustments then check adjustments which is not ideal. It’s best to stick with Manual mode when balancing your histogram in-camera.
2. Choosing the Correct Histogram Profile
I’m not going to repeat what Ian talks about in the video. In a nutshell, the view that you see when your camera is in live view mode might not be the same as what your camera captures. This is primarily because what is shown in live view is a generated JPEG and is affected by your cameras profile settings or creative style. But, when shooting in RAW the data captured is more neutral or standard. So check your profile set up first.
3. How To Balance The Histogram In Post-Processing
What we are looking for in our histogram is a spread across the whole tonal range. To capture the full dynamic range there must be a black point and a white point in our images. So the “line graph” should touch both sides of the histogram ever so slightly. With the majority of peaks in the centre of the histogram. If there is too much data to the left or right information will be lost in your image, this is referred to as clipping.
It’s not always possible to capture the entire dynamic range but we can recover it in post-processing, especially if we shoot in RAW. The histogram is split into five different sections which can all be manipulated in Lightroom, Adobe Camera Raw, and Photoshop to a degree. The 5 sections of the histogram are:
- Blacks
- Shadows
- Exposure/Midtones
- Highlights
- Whites

In post-processing, don’t try to force the histogram to bulge in the centre. This would have a horrible and extreme effect on your image. Instead, try reducing the number of pixels that occupy the Black and White sections by playing around with the corresponding sliders or by dragging the histogram as shown in the video.
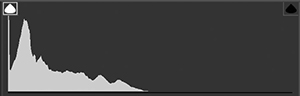
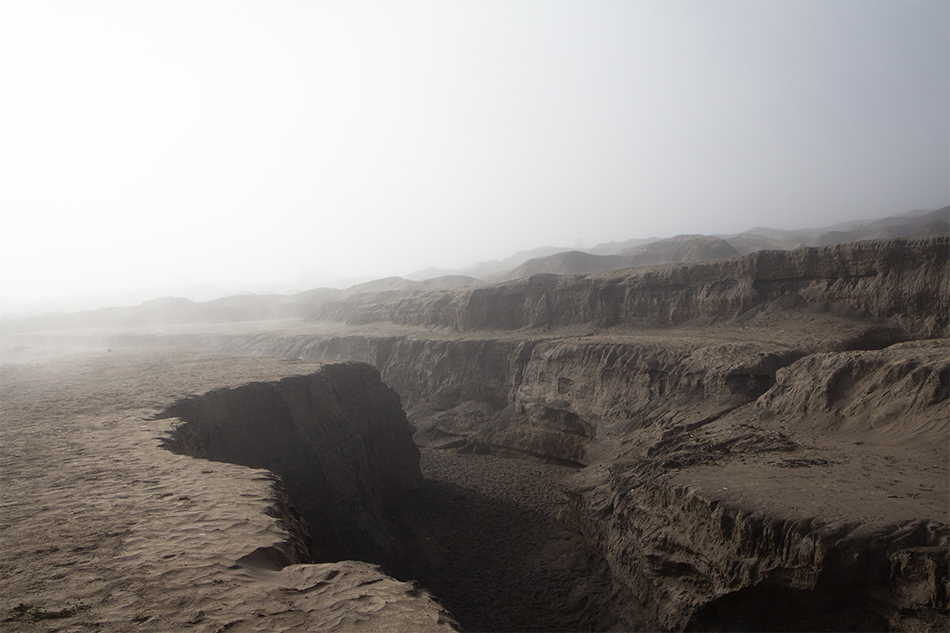
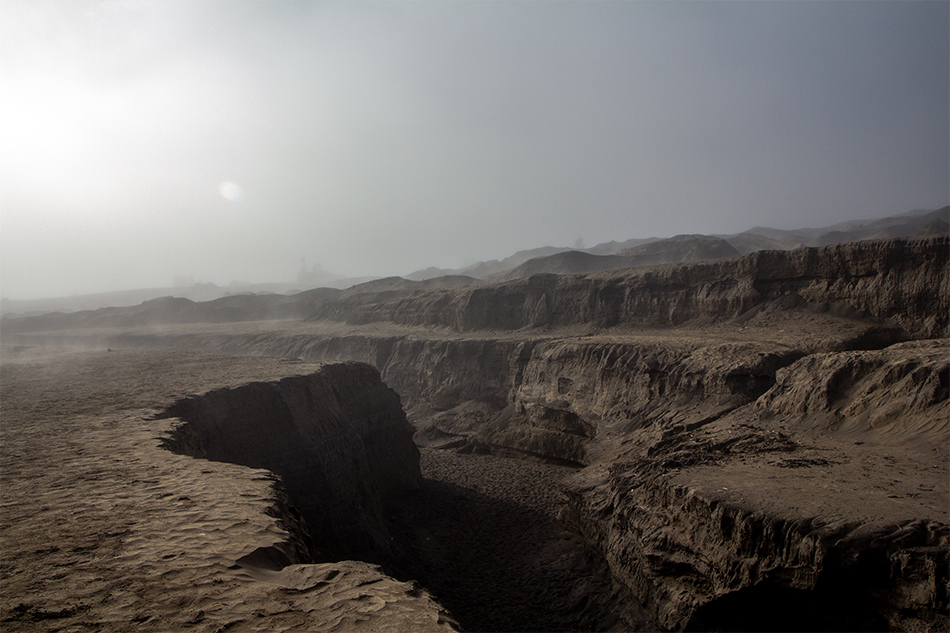
Here we have an image Kawah Bromo lava gorge. The image on the left is the unedited RAW files straight out of the camera. The image on the right is the same image after adjusting the Blacks, Shadows, Exposure, Highlights, and Whites sliders in ACR to balance the Histogram.
[compare]
[/compare]
We hugely lowered the whites and slightly increased the blacks to give us a black point which was missing from the original image. This now means that we have the entire dynamic range from black to white in our image. The majority of changes were made in the shadows and highlights, with only a slight lowering of exposure. Immediately the image is more balanced with quite a lot of information recovered. Quite impressive when you consider we didn’t need to go to extremes. When editing this I rarely even looked at the actual image itself, instead, I was focusing on what changes were being made to the histogram. We now have a fantastic foundation to continue through our usual editing workflow.
Thank you for reading this article on Histogram Tips To Take Better Photos, be sure to sign up for our newsletter for more tutorials and great offers.

Enter your email below and join our community of more than 100,000 photographers who have also
Subscribed to our newsletter.
Downloaded our FREE Photoshop Course.
Got our FREE Easy Panel for Photoshop.
And, have our FREE Essential Guide To Luminosity Masks E-Book.
FREE Photoshop Course

The Art Of Photography

Raya Pro for Photoshop

Other Articles That Might Interest You
Here’s How Your Histograms Should Look
Demystifying the Histogram
Why Histograms Are So Important In Photography
Understanding Histograms