How To Make A Panorama In Photoshop
When we reach the summit and take it all in there’s no better feeling. The difficulty comes when we try to express what we have experienced to viewers who haven’t been there or seen the things that we photographers have seen. Being surrounded by nature’s beauty is a real treat and something that should be shared. Panoramas are perfect for capturing epic scenes. They show an incredibly wide field of view, but it has to be done right in-camera, even more so than in post-processing. In this tutorial, we’ll not only teach you how to make a panorama in Photoshop, but we’ll also give you hints on how to get it right in camera and how to handle multiple raw files to stitch together to make a panorama image.

If you wish to experiment with this, I would really appreciate it if you included my name (Duke McIntyre) and www.shutterevolve.com when you publish your image. If you post your published image on our Facebook page I’d be happy to check it out.
Taking Photographs To Make A Panorama Image
A panorama is an image made up of multiple images that are then stitched together to create one image with a wide field of view. They’re used to portray epic scenes and are a great option if your wide-angle lens just isn’t wide enough. In order to make a panorama in Photoshop, it is essential that you have captured the correct images in the camera.
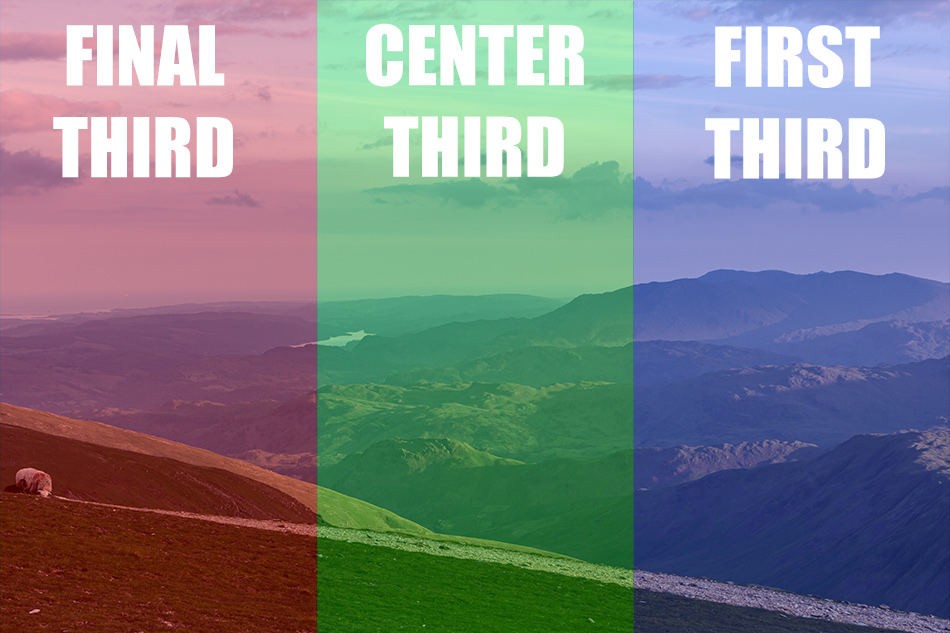
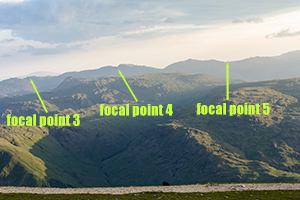
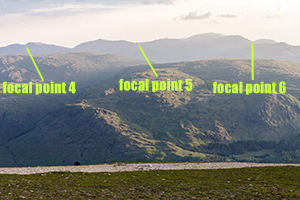
Make sure your images overlap.
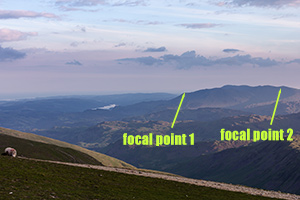
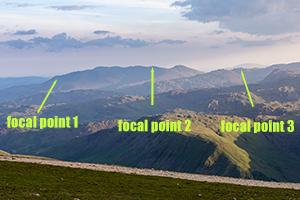
Point your camera so that the end of the subject that you’re trying to capture is positioned in the centre third of your shot. Take your first shot, then point the camera so that the same point is now in the final third from the edge of your frame, and take the next shot. Repeat this process until you have captured the scene entirely. So, if I’m shooting from left to right my final third will be on the left side of the frame, because this is the third that my focal point will be in last.
As I pan the camera around from left to right, I pick up new focal points along the way. All of the focus points will move from the first third, into the center third, then into the final third, and eventually out of the frame as I continue panning and picking up new focal points. This will be repeated until the last point that I want to capture is in the center third.


Having good overlapping images really helps Photoshop determine how to align all of the exposures and where to stitch them together to make a panorama image.
– Tutorial continued below –
Enter your email below and join our community of more than 100,000 photographers who receive regular tutorials and have also

Subscribed to our newsletter,
Downloaded our FREE Photoshop Course
Got our FREE Easy Panel for Photoshop
And have our FREE Essential Guide To Luminosity Masks E-Book
How To Handle Multiple Raw Files To Stitch Together
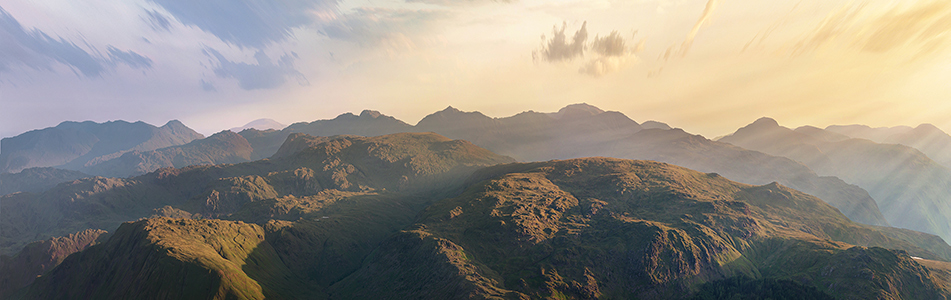
We always like to shoot in Raw as this gives us much more control over the metadata in an image which we can use for really accurately editing images. The scene where this panorama was shot was on the summit of Helvellyn in England’s famous Lake District. On the top of this mountain on a clear day, you can see for miles around toward Wales and into Scotland.
It was in the evening as the sun was setting with a lot of cloud cover, so the opportunities to capture the sun caressing the land were few and far between. When it did come there was a vast difference in the scene from left to right. The sun was setting to the right which made that part of the scene quite soft, bright, and hazy. Whereas the left side of the scene was sharp, darkening, and contrasting. Without being able to access the metadata of each image it would have been much more difficult to balance all 8 of the images used to make the panorama.
Each exposure was adjusted individually to complement the next. This would ensure a balance throughout the entire image. I took 3 exposures (bracketed images) for each shot and consistently chose the most balanced exposures to take into Photoshop.
1. Open Photoshop and stay on the home screen.
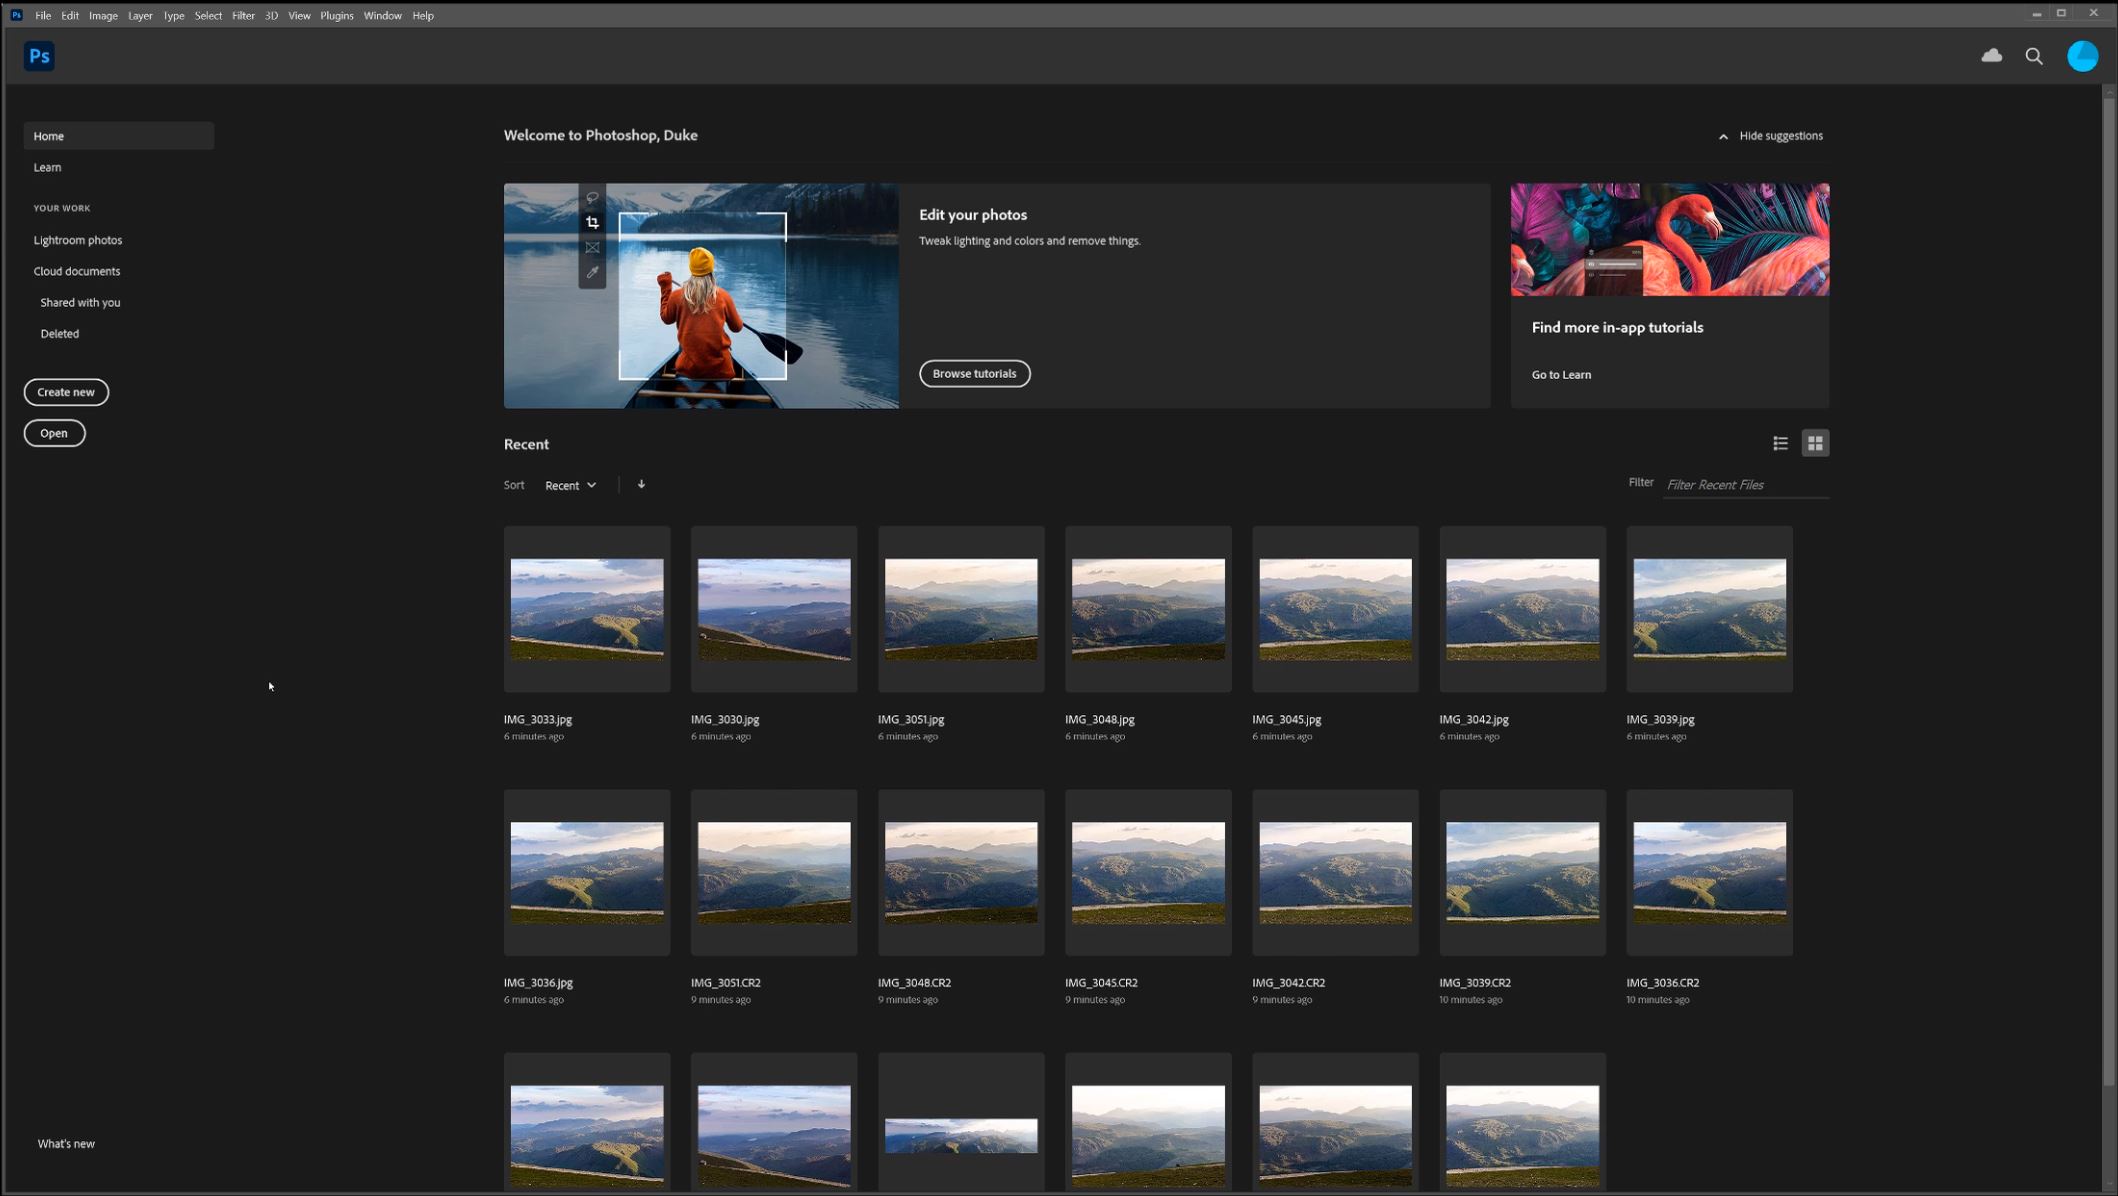
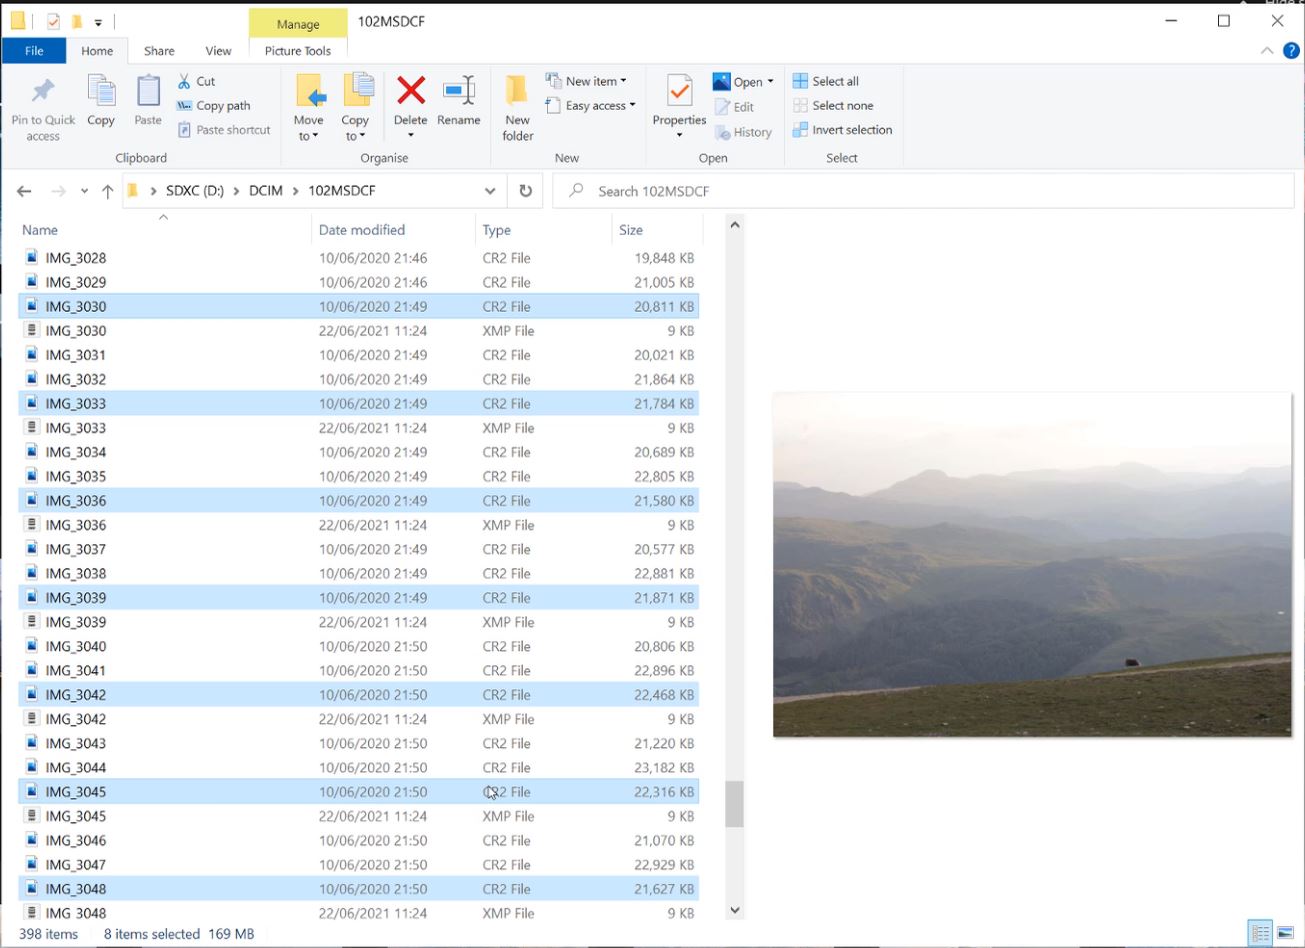
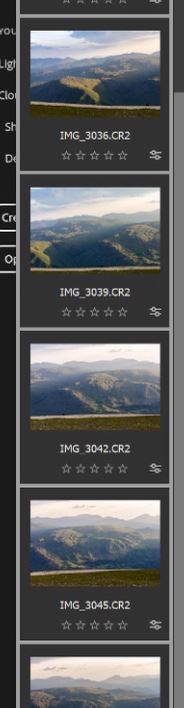
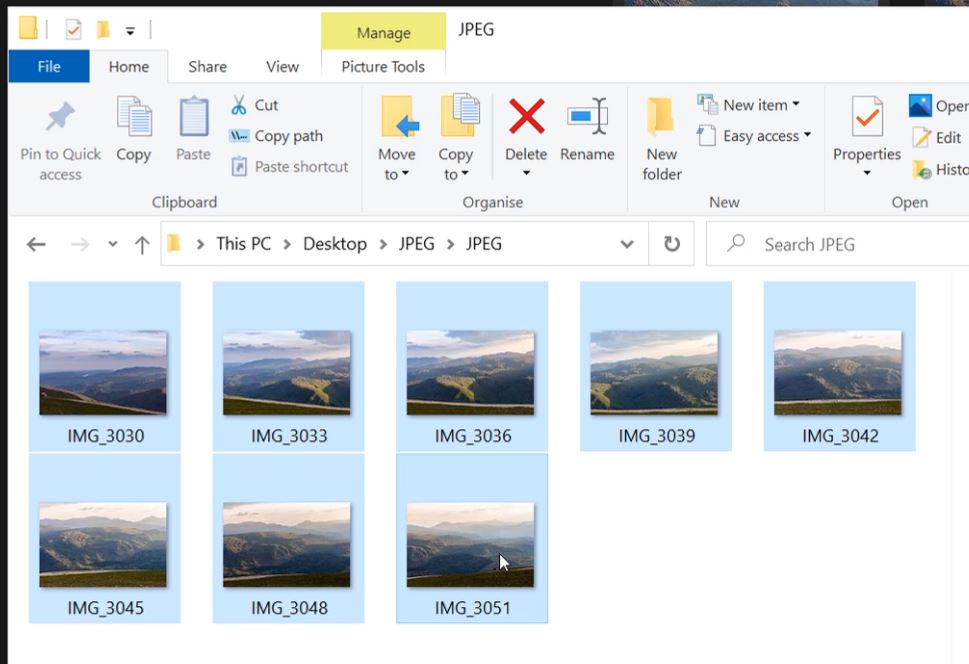
2. Open the folder where your images are stored and select all of the images that you want to take into photoshop.
3. Drag & Drop all of the images onto the Photoshop home screen.
4. If these are RAW files they will open Abobe Camera Raw. If they aren’t RAW files, the images will open in Photoshop and you can skip the rest of this section and go straight to the section below on How To Make A Panorama In Photoshop.

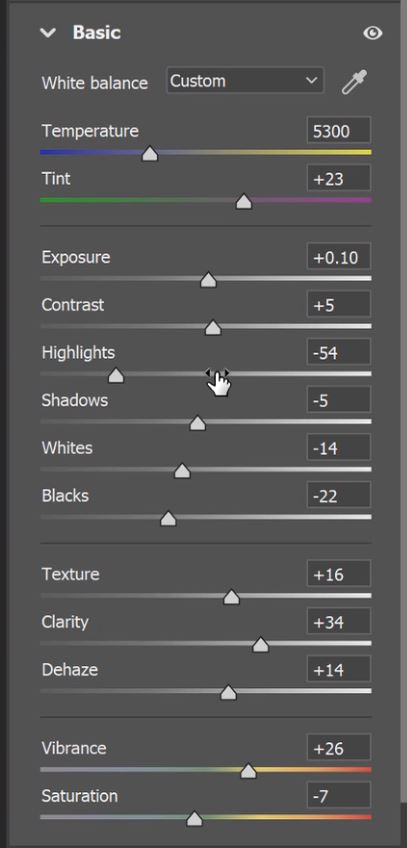
5. Click on each individual image and try to balance them all.
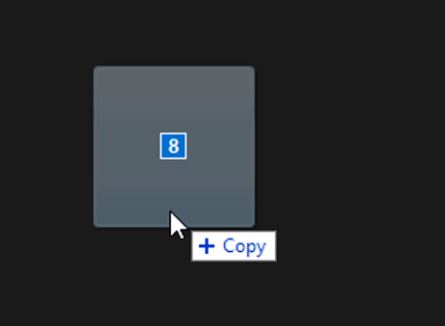
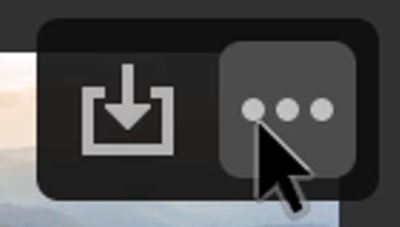
6. Once you have finished editing all of the exposures, click on the three dots on one of the image thumbnails.
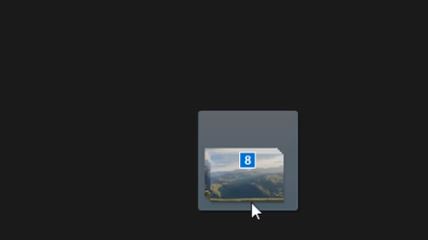
7. Some options will appear, from them choose Select all.
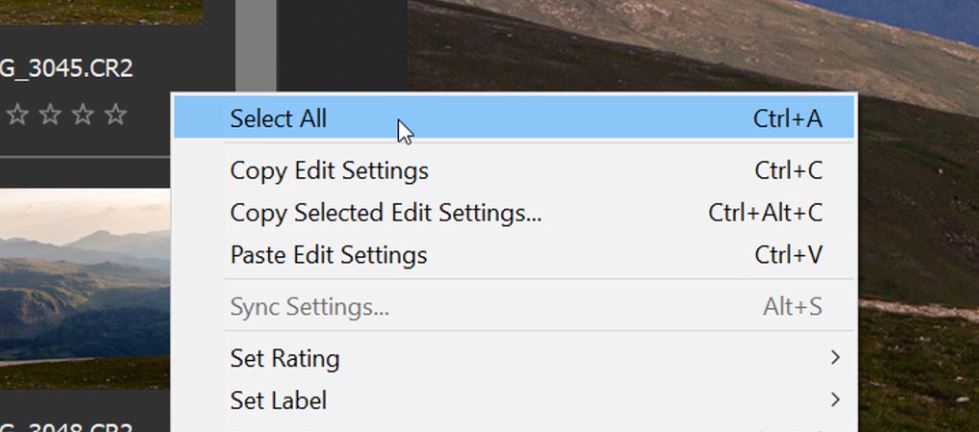
8. If all of the images are selected there will be boxes around all of the thumbnails in the image strip.
9. Click on Open to take the images into Photoshop.

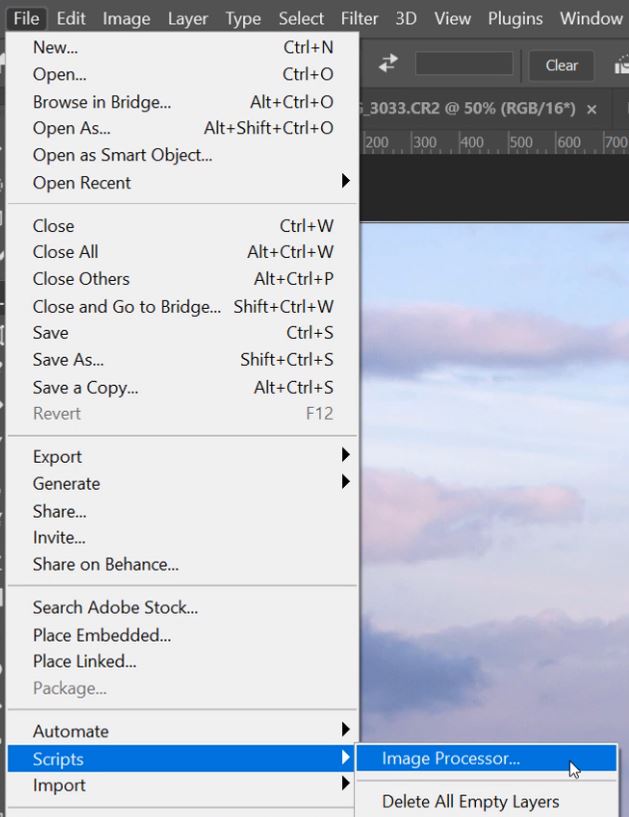
10. We need to save the images before we make a panorama photo. Seeing as the base editing has been done we can go right ahead by selecting File>Scripts>Image Processor.
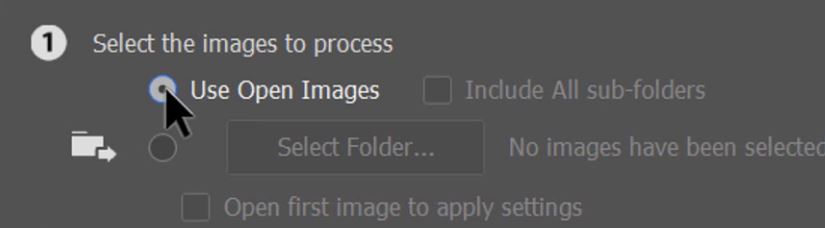
11. The first button we need to select is the Use Open Images radio button.
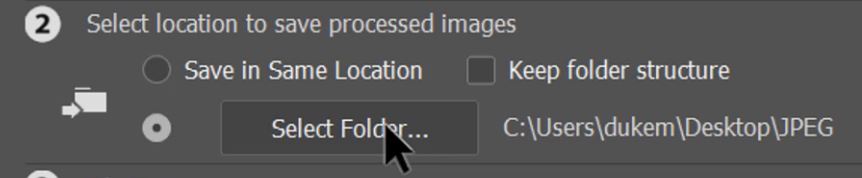
12. Now select the location that you want to save these images to.
13. Tick the box to Save as JPEG, and choose the Quality that you want. You can also convert Profile to sRGB which is recommended for online images.
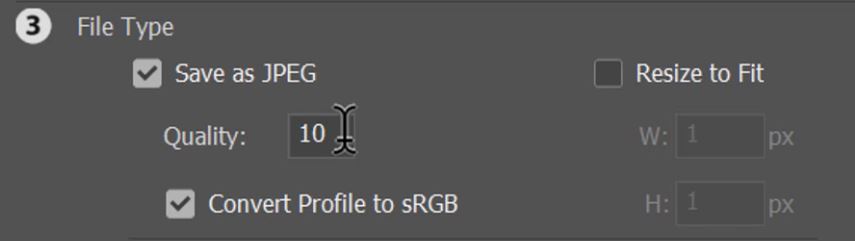
14. When you have ticked all the various options, click Run. This will save all of the open images as JPEG’s in the selected destination folder.

15. Once this image processor has finished saving the images as JPEG files you need to close all of the image windows by clicking on the little x in each tab.

16. If you are prompted to save any changes, just click no and continue closing all of the windows until you’re back to the Photoshop home screen.

Enter your email below and join our community of more than 100,000 photographers who receive regular tutorials and have also
Subscribed to our newsletter,
Downloaded our FREE Photoshop Course
Got our FREE Easy Panel for Photoshop
And have our FREE Essential Guide To Luminosity Masks E-Book
How To Make A Panorama In Photoshop
1. Open Photoshop and stay on the home screen.
2. Open the folder where your images JPEG images are stored and select all of the images that you want to take into photoshop.
3. Drag & Drop all of the images onto the Photoshop home screen.
4. The images will open in Photoshop.
5. If you haven’t edited any of the images you can continue with the steps below. If you have edited the images in Photoshop you will need to save the edited images before using them to create a panorama in photoshop.
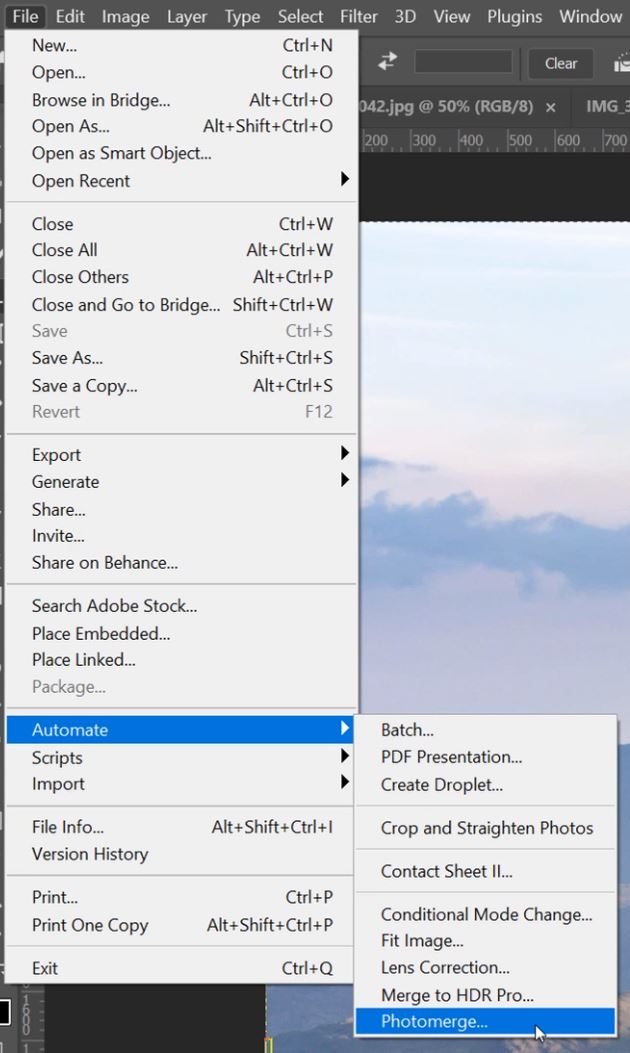
6. Once all of the images are open in Photoshop go to the following menu option, File > Automate > Photomerge.
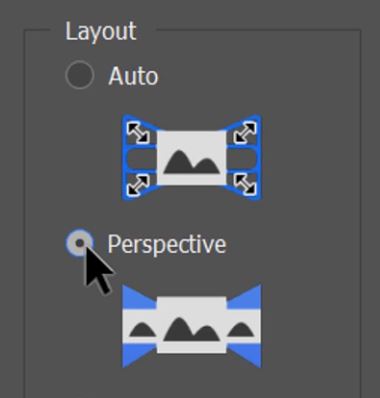
7. For the Layout I chose Perspective but feel free to try other options, Auto works very well for most scenarios.
8. Make sure the tick box to Blend Images Together is selected.

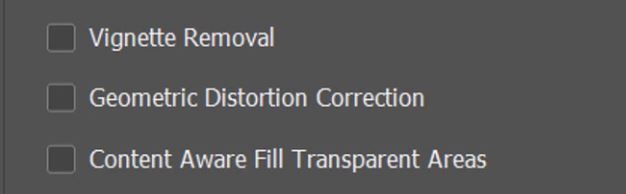
9. You can also choose to remove vignettes, fix geometric distortion, and fill any transparent areas using Content-Aware fill.
10. The last option to select, is to use the open images to create a panorama with. Click on the Add Open Files button.
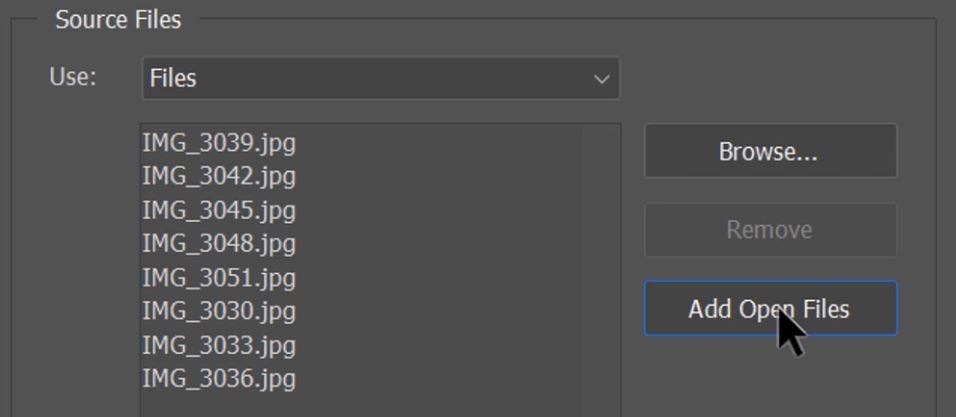
11. The final thing to do to stitch the images and make a panorama is to click OK.

12. Spend some time editing your panorama and crop the image to give you the best composition possible and to cut out and transparent space.