How To Record An Action In Photoshop
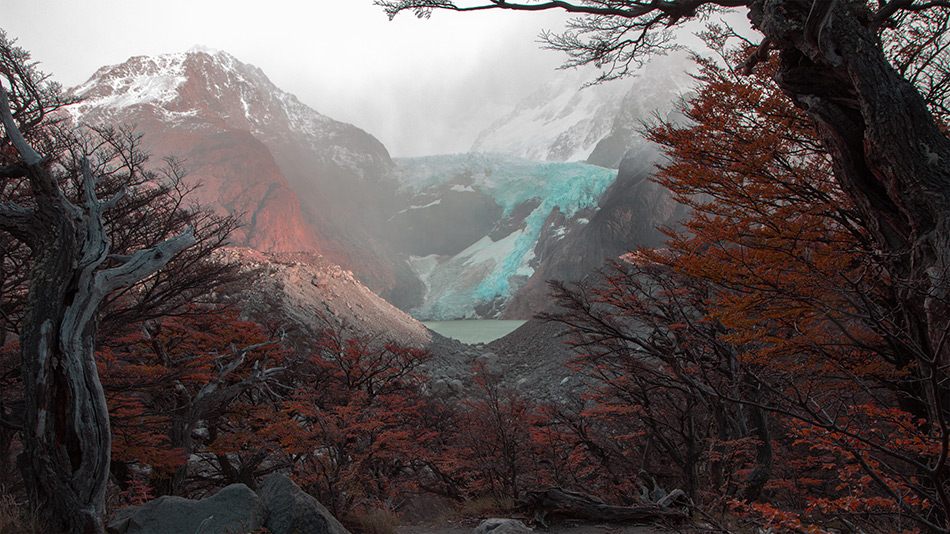
Actions in Photoshop can be a great time saver. They can be super simple or extremely complex. If you carry out the same adjustments on every image, instead of repeating these step for every edit, record them as an action once. A recorder action can be replayed as often as you like and the results will be identical. As an extreme example of this, if you like to turn portraits into sketches, this can take a long time and many processes. Record it once as an action and the next time you need to turn a portrait into a sketch it will take as little as three mouse clicks. Or, if you love to turn green leaves red and add mood to landscapes, a simple adjustment action like this one can be recorded. Follow this tutorial to learn how to record an action in photoshop.

Step-by-step Guide How To Record An Action In Photoshop
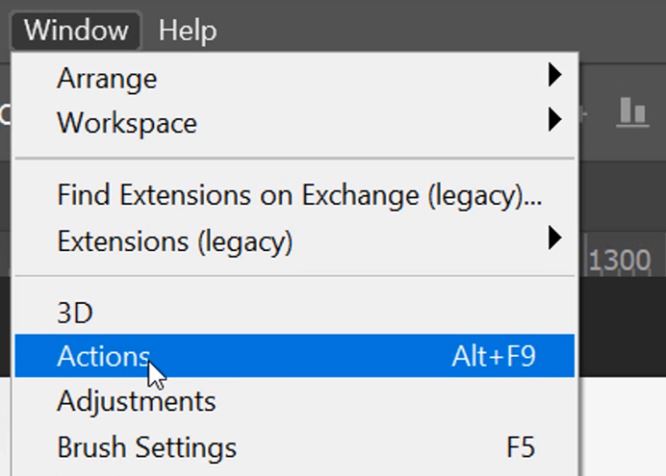
1. Open the Actions panel by going to the Windows menu and selecting Actions from the dropdown list.
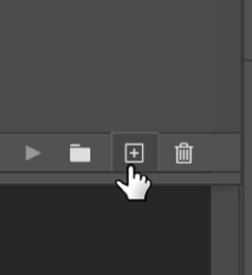
2. Make a new folder for your action by clicking on the Add New Set icon.

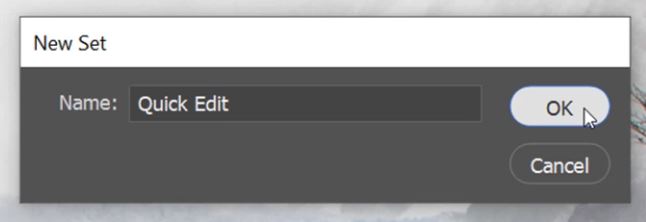
3. Give your new folder/set a name and click OK.
– Tutorial continued below –
Enter your email below and join our community of more than 100,000 photographers who receive regular tutorials and have also

Subscribed to our newsletter,
Downloaded our FREE Photoshop Course
Got our FREE Easy Panel for Photoshop
And have our FREE Essential Guide To Luminosity Masks E-Book
4. Once you make a folder/set you can add all of your new actions to the same folder, so you don’t have to make a folder for each action.

5. To start to make a new action click on the Create New Action icon
6. Give the new action a name and when you’re ready press Record.
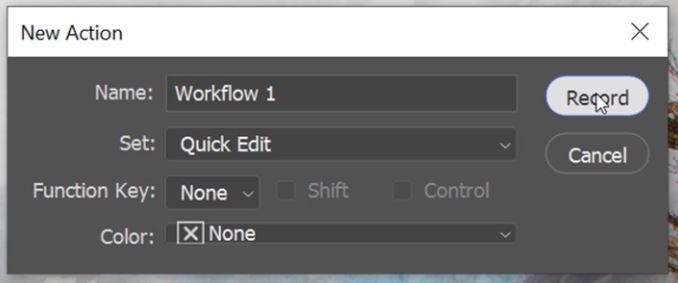
7. Now your action is being recorded, and the record icon should now be red.

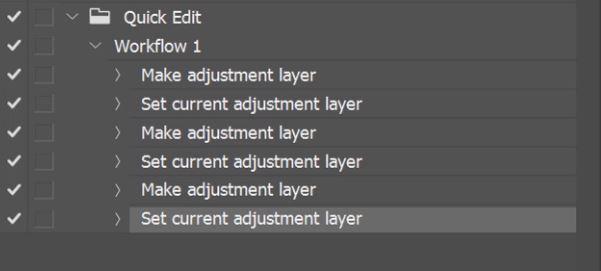
8. The first adjustment I made was to add a Curves Adjustment.
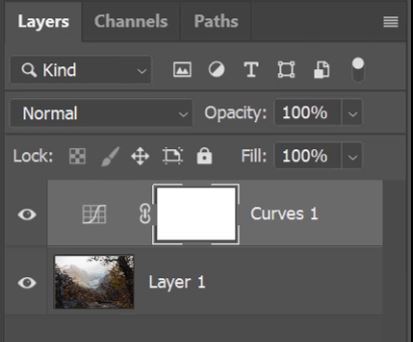
9. This can now be seen in the Actions panel as it is being recorded.

10. Even the specific adjustments that you make are recorded, and you can see these adjustments by clicking on the little arrow to the left of the action.
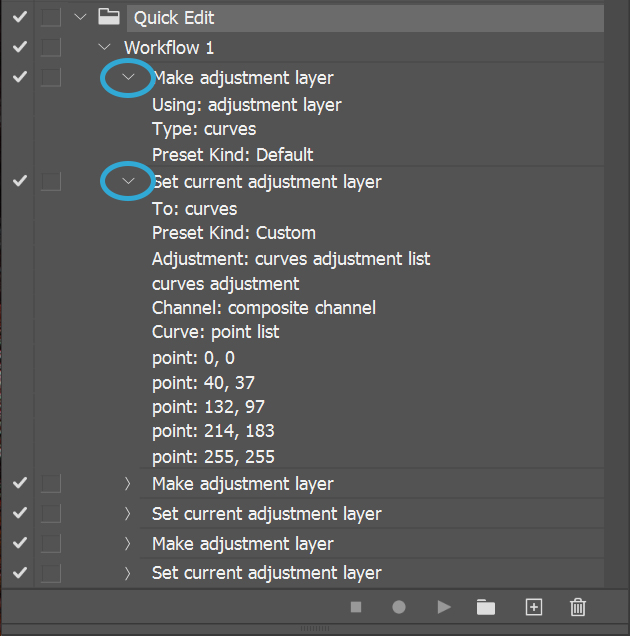
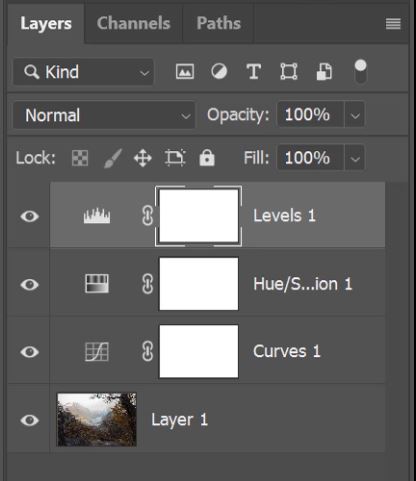
11. I went on to add a Hue and Saturation adjustment and a Levels adjustment.
12. Each time I added something it was added to the recording.
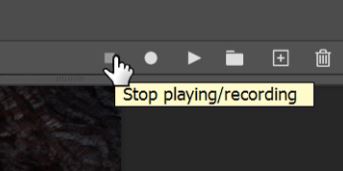
13. Once you have finished with your adjustments, filters, or any other change made in your workflow, click on the Stop Playing / Recording icon.
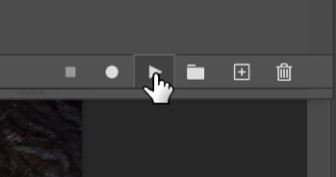
14. When you want to repeat the action simply click on the action in the action panel.

15. And, press the Play Selection icon at the bottom of the Actions panel.
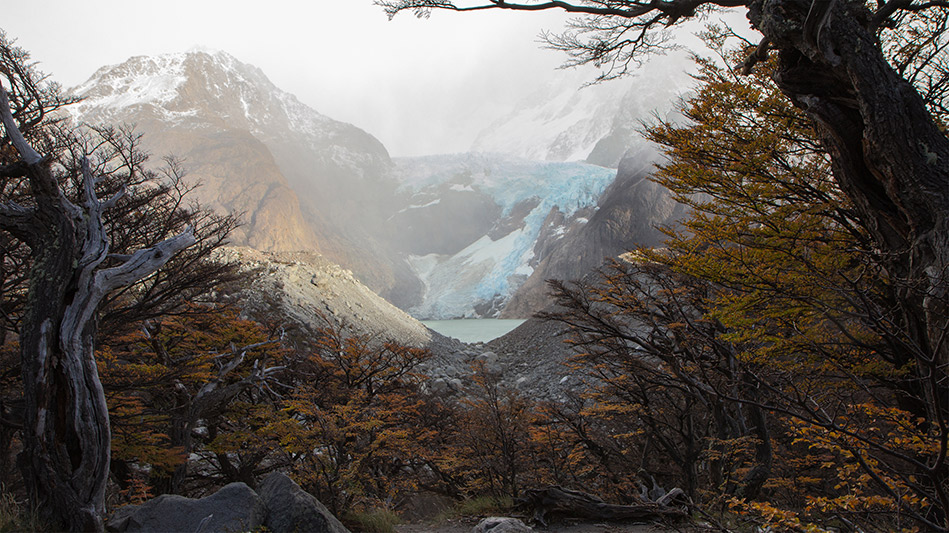
Here is the result of the action that I created. If you would like to download the action for free click on the button under the before and after images.
Thank you for reading this article on How To Record An Action In Photoshop, be sure to sign up for our newsletter for more tutorials and great offers.

Enter your email below and join our community of more than 100,000 photographers who have also
Subscribed to our newsletter.
Downloaded our FREE Photoshop Course.
Got our FREE Easy Panel for Photoshop.
And, have our FREE Essential Guide To Luminosity Masks E-Book.
FREE Photoshop Course

The Art Of Photography

Raya Pro for Photoshop

If you enjoyed Recording An Action In Photoshop, here are some other articles that might interest you
Using Actions to Automate Tasks in Photoshop
How To Use Actions In Photoshop
Advanced Photoshop Actions
How To Use Photoshop Actions