Sky Replacement Photoshop 2021
On the 20th of October 2020, Photoshop released a new update for CC users. One of the new features is Sky Replacement Photoshop. Why is this a big deal? People have been replacing skies in photoshop for years. As we know, there are always more ways than one to achieve an objective in photoshop. I’ve seen a lot of tutorials on this particular subject and some of them are pretty terrible. One of the best tutorials was one we recently reviewed by Joshua Cripps with our Landscape photography composite blending tutorial. Now Photoshop has its own Sky replacement tool only time will tell if it is effective. It is very simple to use and produces some very good results. Follow our 2-Minute Photoshop Tutorial and read on to find out more about the individual sliders and what they do.

Sky Replacement Photoshop Tutorial
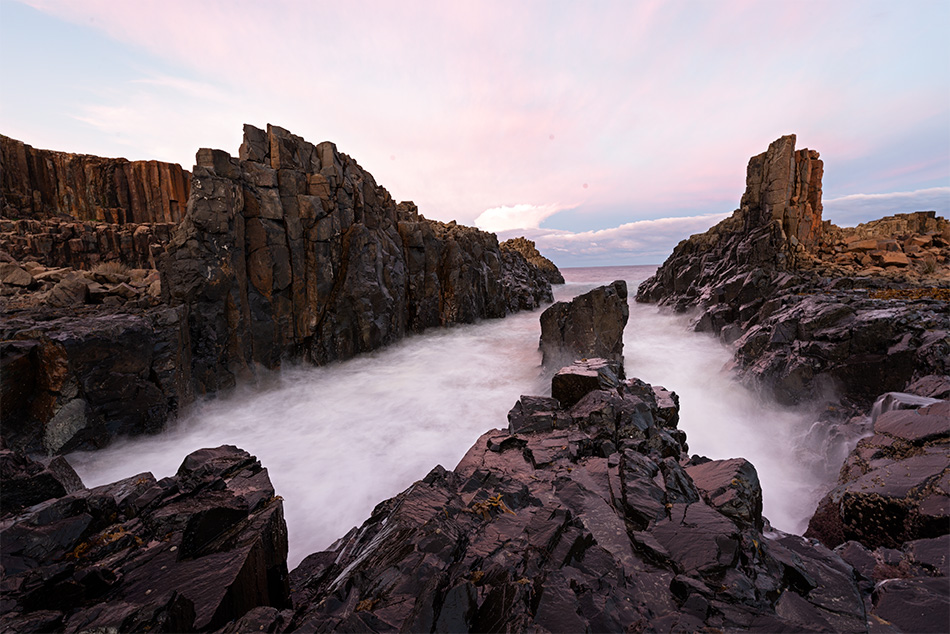
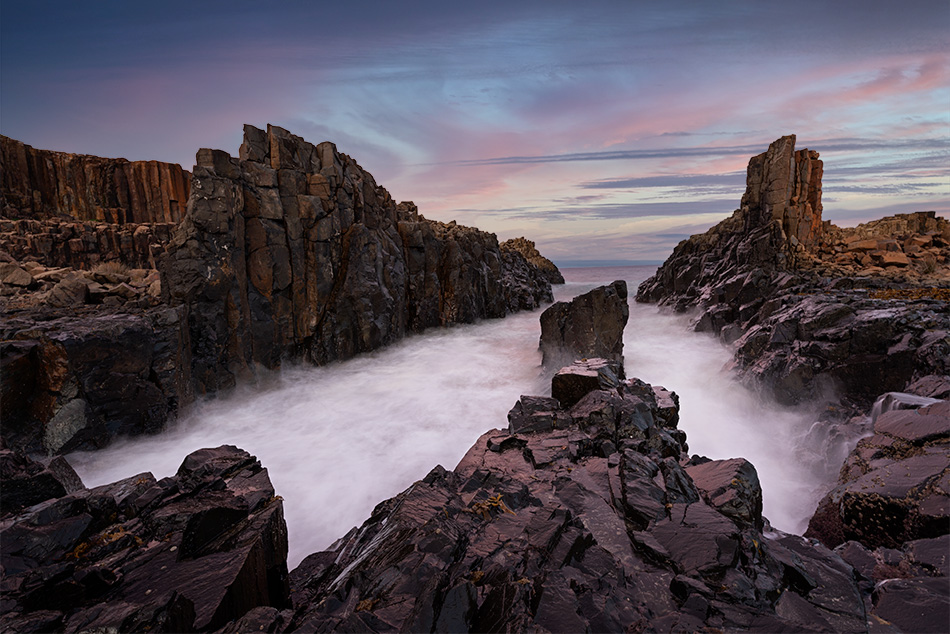
In this tutorial, we chose a particularly easy image to demonstrate with. There is a very clear defining line that separates the foreground from the sky. I have had a play around with this feature with a more difficult subject, a lone tree against a busier sky, and I was pleasantly surprised. Photoshops Sky Replacement feature does a very good job, and it’s very quick.
1. Load up your image in Photoshop and go to Edit>Sky Replacement.

2. When the dialogue box appears you will notice a thumbnail image of a sky at the top.
3. To the right of the thumbnail there is a small downward arrow, click on that arrow.

4. There are three folders; Blue Skies, Spectacular, and Sunset,
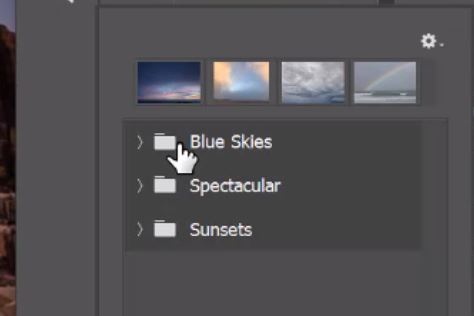
5. Click on the down arrow to see the various skies within those folders.

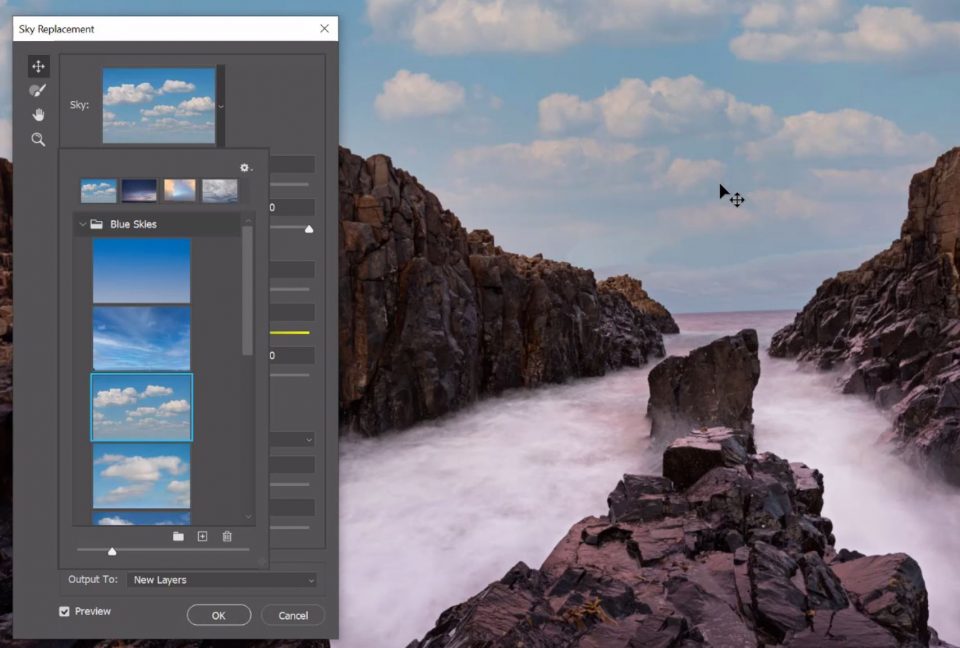
6. To select a sky simply click on it and you can preview it in real-time.
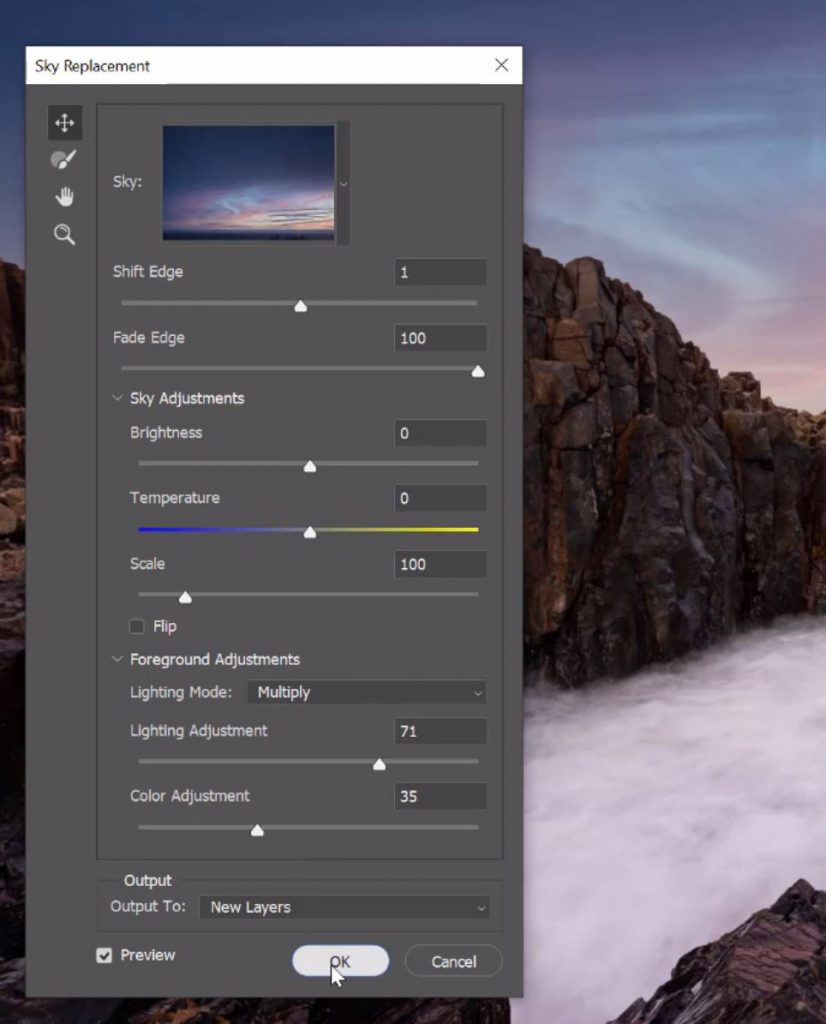
7. There are various sliders that you can play with that will adjust the sky. We will explain more about these sliders below.
8. Once you’re happy with your selection, click OK and it will be allied in various layers.
9. If you change your mind and don’t like the new sky you can simply delete the layers that were added with the Sky replacement and start again.
After a little over just 1 minute of playing around with Sky Replacement in Photoshop, look at the results
Enter your email below and join our community of more than 100,000 photographers who receive regular tutorials and have also

Subscribed to our newsletter,
Downloaded our FREE Photoshop Course
Got our FREE Easy Panel for Photoshop
And have our FREE Essential Guide To Luminosity Masks E-Book
What do the Photoshop Sky Replacement Sliders Do?
When you apply a sky replacement it creates a series of layers. The sliders in Photoshops 2021 Sky Replacement feature affects how these masks are made and applied. In preview mode, this shows you exactly how the sky will be applied before you apply it.
Shift Edge
The shift edge slider is quite self-explanatory. Sliding left will contract the edge of the sky and allow some of the original sky to blend into the replacement. Adversely, sliding the slider to the right will expand the skies edge and bleed it into your foreground.
Fade Edge
This is like a feathered edge. You might not have seen this in the example above, there is a tiny bit of the original sky. If the slider is fully to the left, there will be no fade and the sky replacement edge will be harsh which might be what you want. Sliding the slider to the right will fade out or feather the edge which will allow some of your original sky to blend with its replacement.
Brightness
Sliding this adjustment will darken your sky. As you guessed, sliding it right will darken the new sky. This adjustment is great for balancing your sky replacement with the foreground of your image.
Temperature
Showing a Blue zone to the left, and a Yellow zone to the right. Sliding into the blue will reduce the temperature. To add more warmth to the sky take the slider to the right into the yellow zone.
Scale
The scale slider is used to balance the proportionality of the sky. Depending on your image you might need a sky that has an appearance of being closer or further away. Sliding the slider will zoom in or out of the sky to change its scale.
Flip
This time we have a tick box. Toggling this tick box will flip the sky on the vertical. If your original image has a light source to the left but the sky has a light source from the right, you will need to align these to make the sky replacement look more natural.
Lighting Mode
ThisLighting Mode allows you to switch between blend modes to change the way the light adjustment is applied to the foreground.
Lighting Adjustment
Very similar to the brightness slider. However, the lighting adjustment slider affects the image foreground to help balance the foreground to the sky.
Colour Adjustment
What a fantastic inclusion. Playing with this slider will help to balance the colours of your foreground by colour grading from the sky replacement. This helps to give a really natural blend in your composite image.
Output
You can choose how this Sky Replacement will be generated. The choice is either as, New Layers or as a Duplicated Layer.
Preview
Toggle this on and off to see instantly the before and after. This little box can show you the difference to your image before the new sky replacement is applied. It also shows you in real-time the effect that each adjustment slider, menu, and button makes.
Thank you for reading this article on Photoshop Sky Replacement, You might also be interested in the articles below. Be sure to sign up for our newsletter for more tutorials and great offers.
Enter your email below and join our community of more than 100,000 photographers who have also
Subscribed to our newsletter.
Downloaded our FREE Photoshop Course.
Got our FREE Easy Panel for Photoshop.
And, have our FREE Essential Guide To Luminosity Masks E-Book.
Other Methods or examples on how to swap Skies in Photoshop
As mentioned at the start of this tutorial there are more ways than one to swap a sky in photoshop. Here is one example by PetaPixel.
Here you will find a comprehensive Step-by-Step Guide to Sky Replacement Using Photoshop.