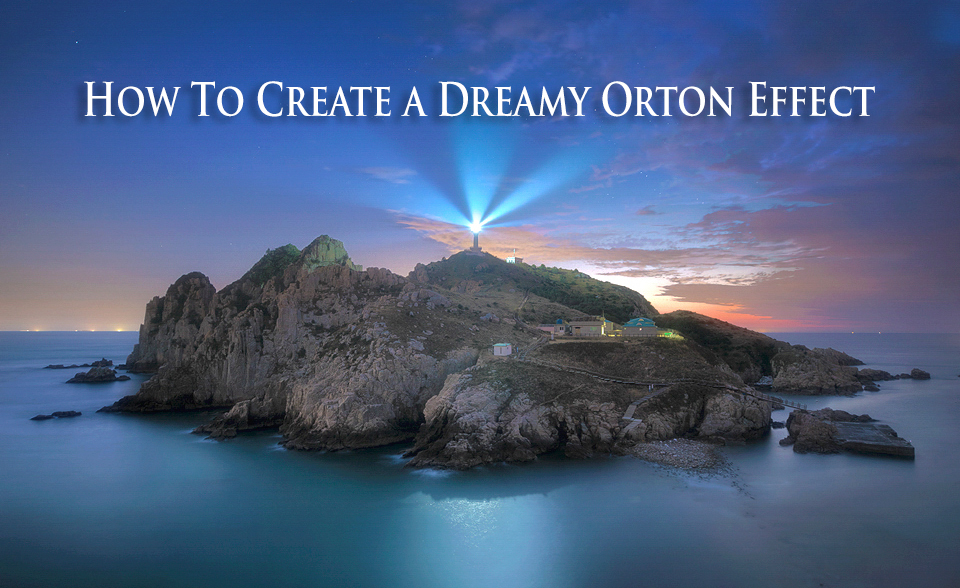

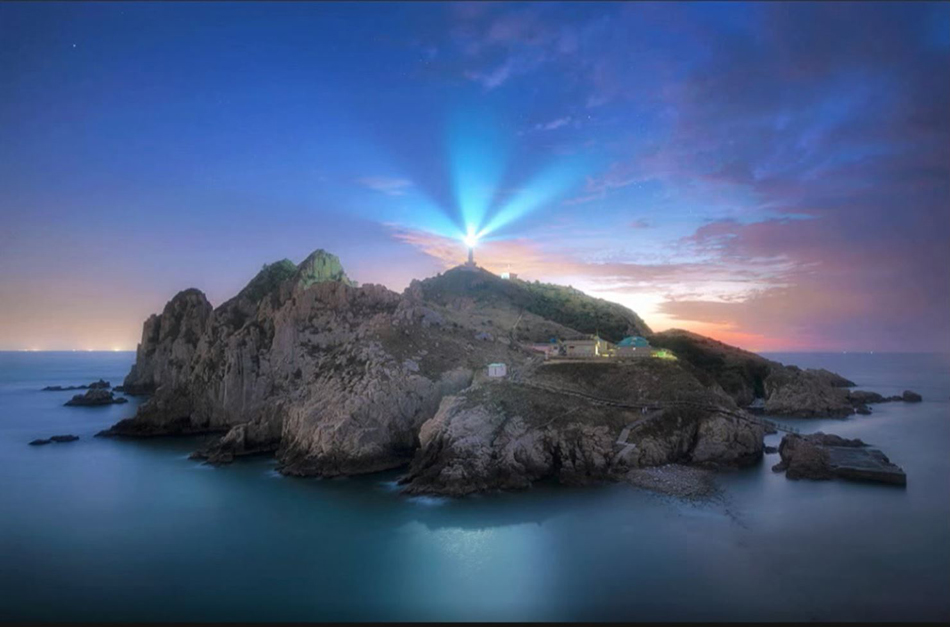
How To Create a Dreamy Orton Effect
In today’s tutorial, we are going to look at how to easily make an Orton effect in your images, which in recent years has become popular once again, especially in landscape photography. This will create a beautiful dreamy effect on your photos.
We’ll also look at how to add certain effects to the Orton effect layer, and also how to protect our highlights from becoming overexposed when applying the Orton Effect.
How to Create a Dreamy Orton Effect in Photoshop
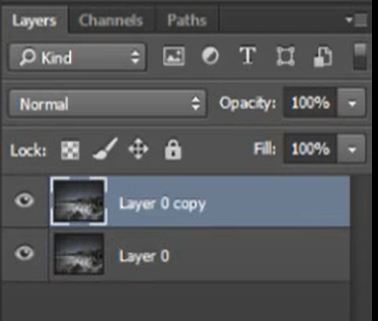
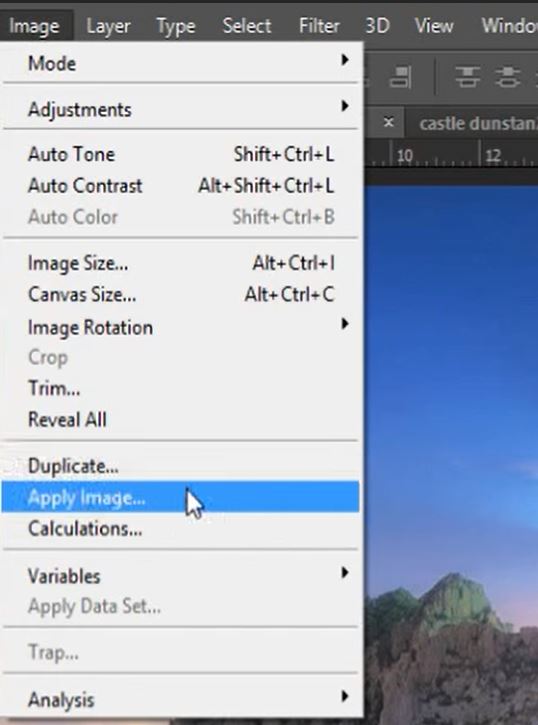
1. Duplicate your background image by pressing Ctrl+J on a PC or Cmd+J on a Mac. Or, go to Layer>Duplicate Layer.
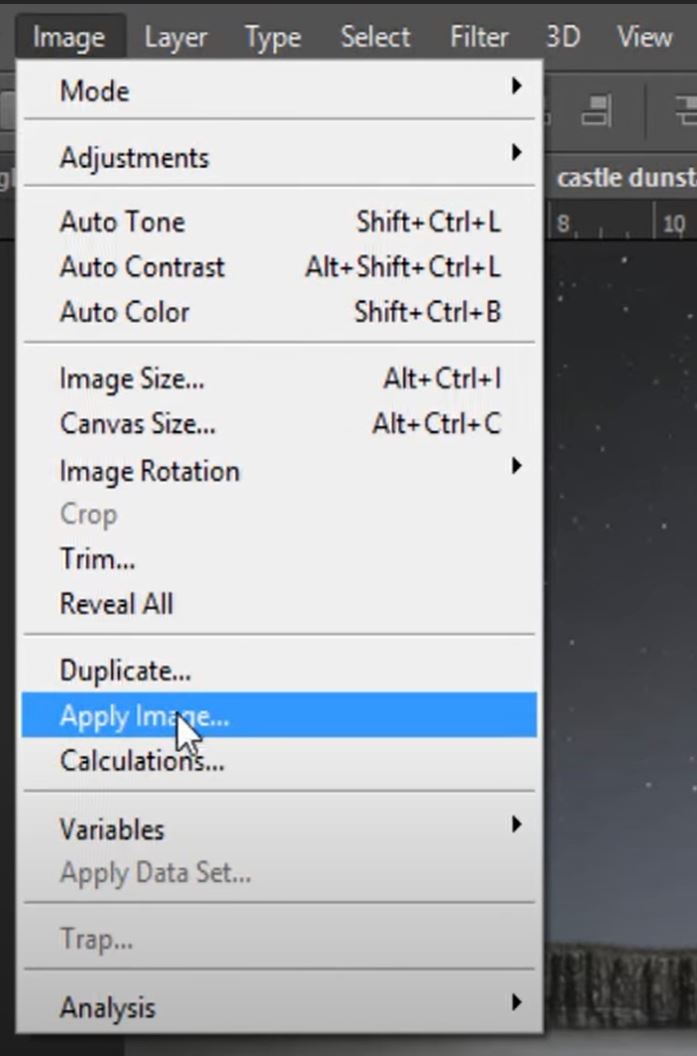
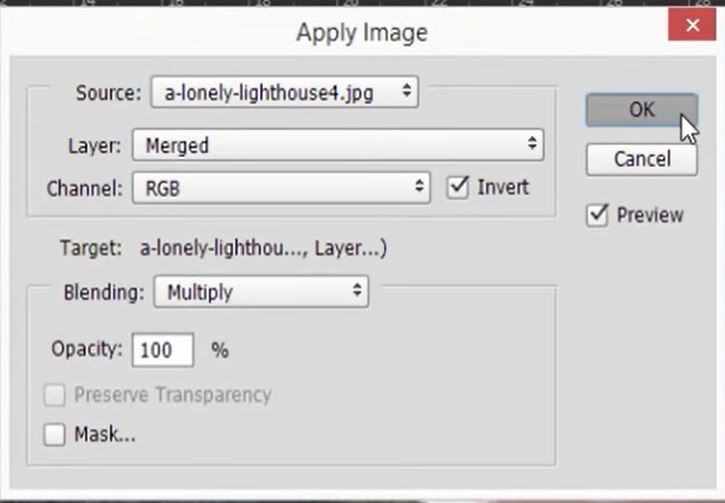
2. Then go to Image>Apply Image and Click OK.
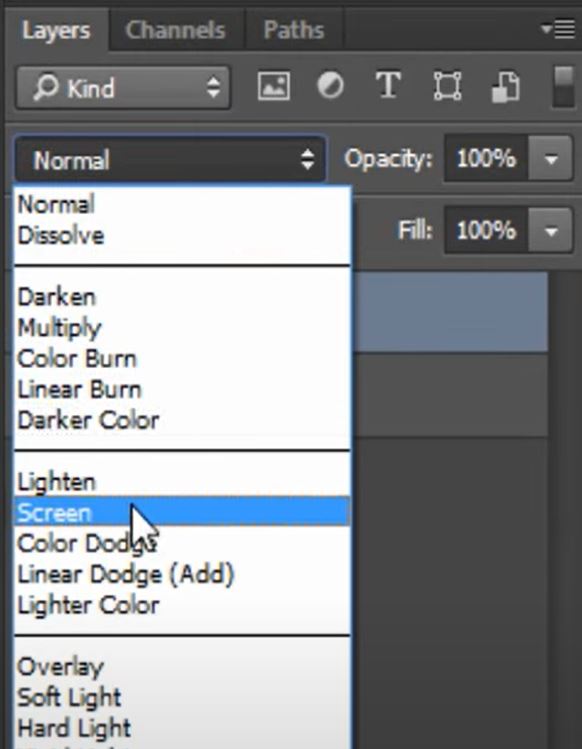
3. Change the Blend Mode to Screen.
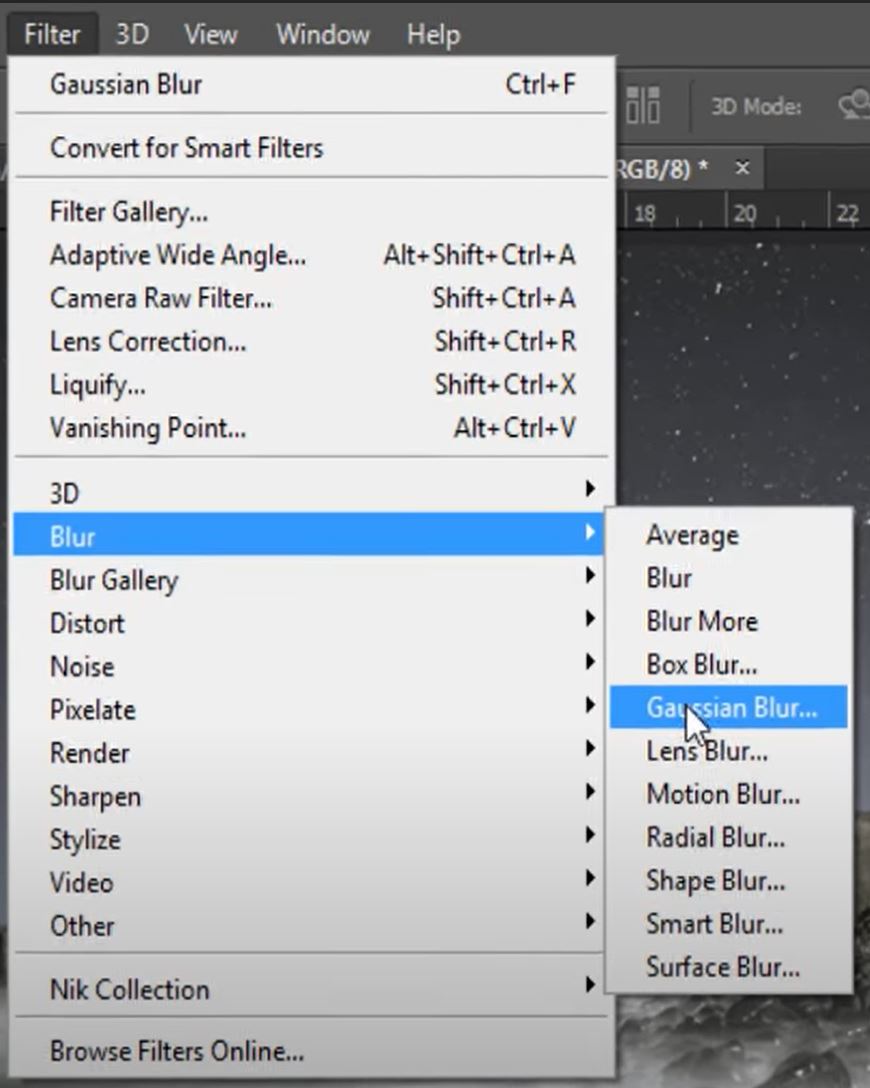
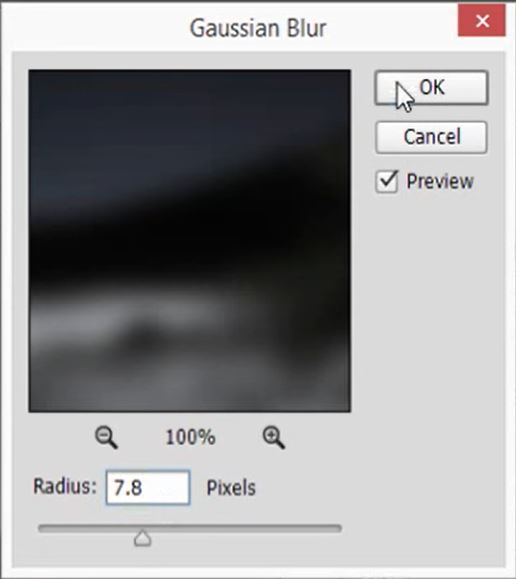
4. Go to Filter>Blur>Gaussian Blur. As you adjust your radius you will immediately see the effect on the image.
5. When you’re happy with the strength of the effect click OK to apply it.
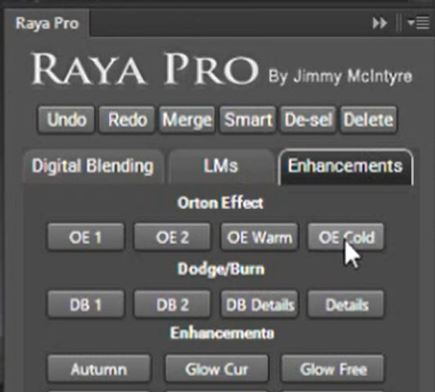
Create an Orton Effect Using Raya Pro.
In older versions of Raya Pro the Orton Effect feature can be found under the Enhancements section.
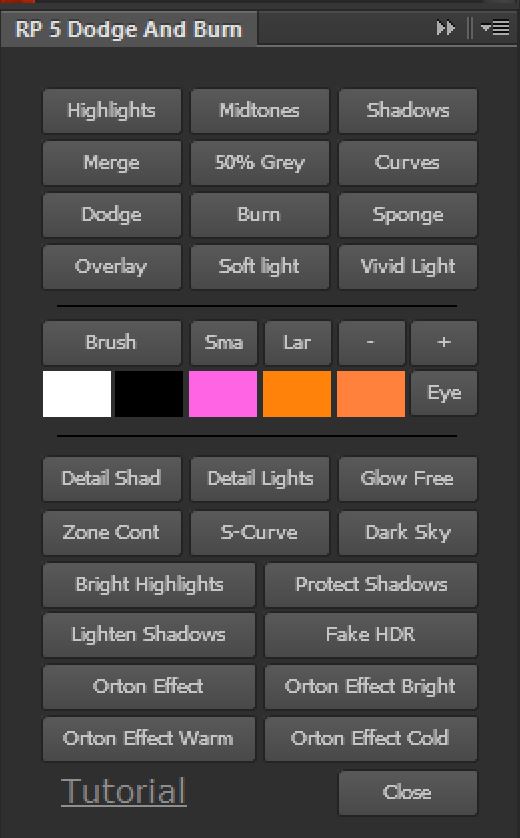
In newer versions of Raya Pro the Orton Effect can be found in the Dodge and Burn panel.
How To Further Enhance Your Orton Effects.
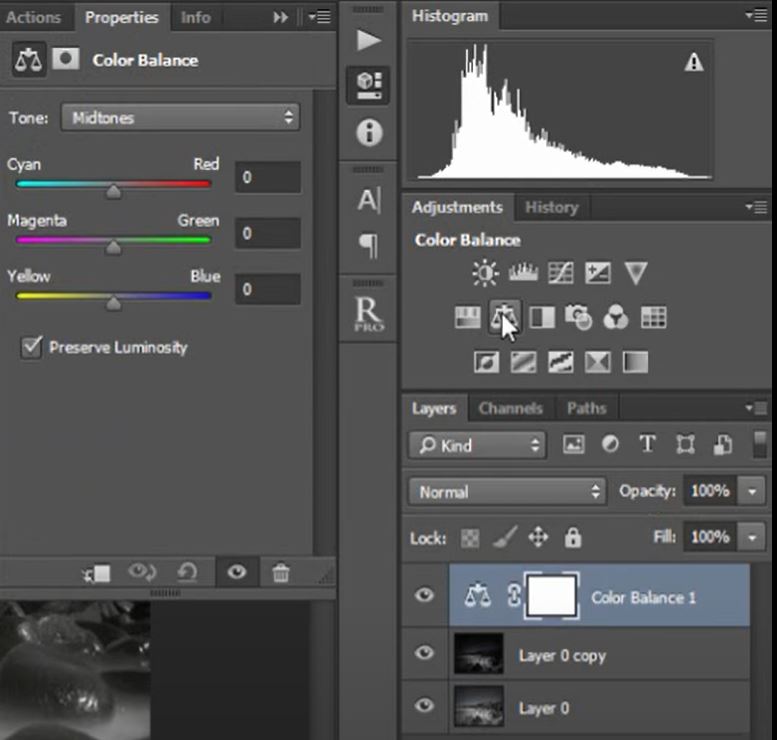
Adding a Colour Balance Layer
1. Either click on the Colour Balance layer icon in the Adjustment Panel or, go to Layer>New Adjustment Layer>Colour Balance.
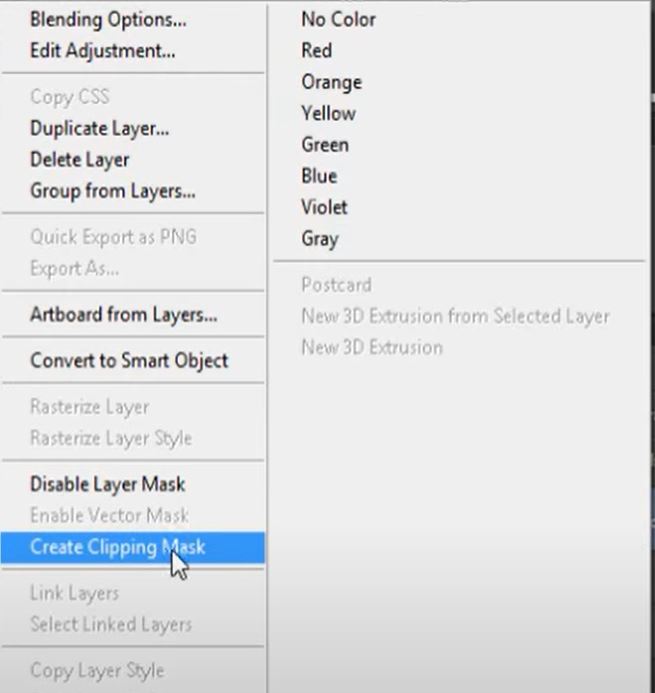
2. Right-click on the colour balance layer and select Create Clipping Mask. You can also do this by going to Layer>Create Clipping Mask or by pressing Crtl+Alt+G on a PC or Cmd+Opt+G on a Mac.
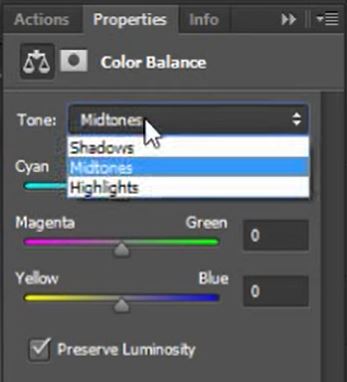
3. Select which tone you wish to change. Shadows, Midtones, or Highlights can be selected.
4. Adjust the sliders to change the colour tints within the selected tone.

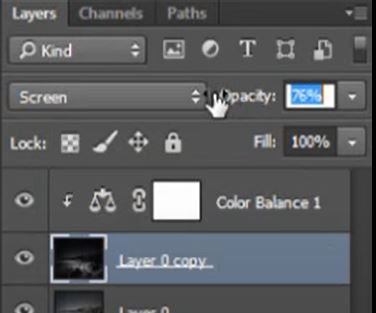
5. If the colour effect is too strong you can correct this by reducing the opacity of the Colour Balance Layer.
NOTE. When you create an Orton Effect Cold or Warm using Raya Pro a colour layer is applied which can be painted over with whichever colour you like.
Preserving the Highlights In An Orton Effect
1. If your Otron Effect layer doesn’t have a mask you will need to add one. Go to Layer>Layer Mask>Reveal All or, click not he Mask icon at the bottom of the layers panel.
2. With the mask selected go to Image>Apply Image.
3. When the Apply Image Dialog box appears make sure you tick the box next to ‘Invert’ then click OK.
NOTE. Raya Pro users, with the white mask selected, choose Apply to Shadows in older versions. In newer versions in the Raya Pro Hub select Shadows.

Thank you for reading our article. If you would like to create easy Orton Effect and don’t have Raya Pro, don’t worry. We’ve updated our FREE Easy Panel to now include a FREE Orton Effect. You can download our FREE Photoshop Extension “Easy Panel” HERE.
I found this great article which will answer exactly, What is the Orton Effect?
Enter your email below and join our community of more than 100,000 photographers who have also
Subscribed to our newsletter.
Downloaded our FREE Photoshop Course.
Got our FREE Easy Panel for Photoshop.
And, have our FREE Essential Guide To Luminosity Masks E-Book.
To go directly to any of our products, simply click on the image below.


