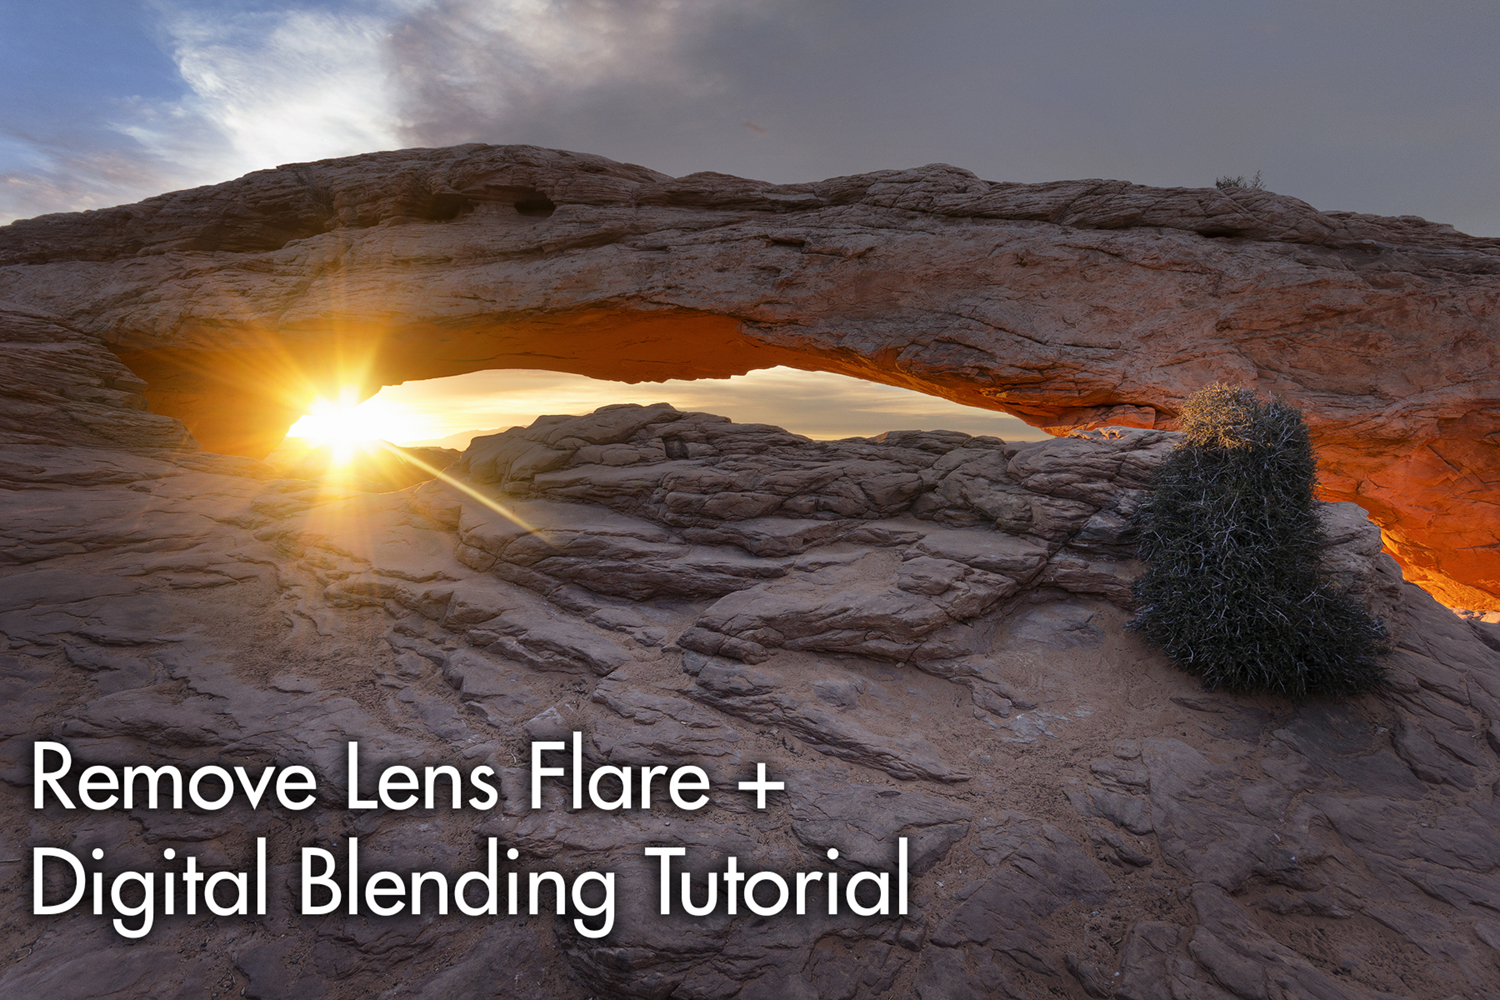
How To Remove Lens Flare In Photoshop and Full Luminosity Mask Workflow
I started creating this video tutorial to show you how to remove lens flare in photoshop. However, the process was so quick, I decided to extend the tutorial to a full Digital Blending workflow using Luminosity Masks. Under the video, you will see the written lens removal tutorial, for those of you who prefer text-based tutorials.

To take your processing to the next level, check out our best-selling Luminosity Mask Tutorial – The Art of Digital Blending course has had some great feedback, read what our students are saying in their reviews.
For more video tutorials, feel free to subscribe to my youtube channel.
Lens Flare Photoshop
Lens flare can both enhance and destroy an image. Knowing how to control or avoid it is an essential skill for any photographer. Sometimes I choose to add lens flare in post-processing, like in this image of the Petronas Towers, but I always try to avoid it while shooting. Adding lens flare in post-processing gives you far more control over its location, size, colour etc. This article will show you how to remove lens flare in Photoshop, but it is important to get everything right in camera first.
Even without the use of a filter, removing lens flare is a simple procedure. While we can do a relatively clean job using the Clone or Rubber Stamp in Photoshop, it’s much more effective to get it right in camera and then clean it up in PS.
Please note, while this tutorial is focusing on flare from the sun, lens flare can come from any strong light source. This process can still work with flare from other types of light source.
How to get it right in camera?
As we already know, lens flare is caused by a disruptive source of light. It seems logical, then, to block that light – we could just put something in front of it…like a thumb!
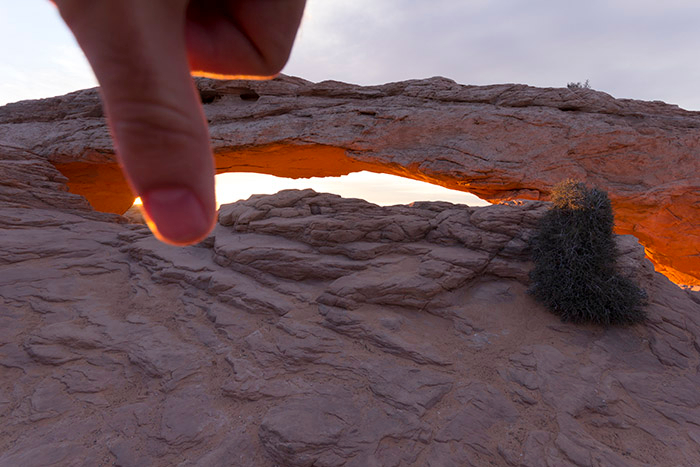
The image above has no lens flare, I’m sure you’ll agree. It does have an ugly thumb in it which we wouldn’t be happy to include in the final image.
Here is the same image without the ugly thumb:
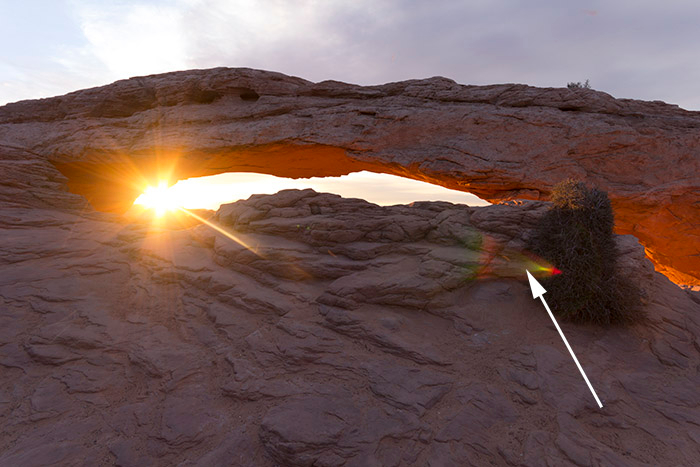
We now have a vibrant, over-exposed sun, but also the unwanted flare to go with it, the biggest of which is on top of the bush to the right. All we have to do now is combine the two in Photoshop.
Important points while shooting
A tripod or solid surface for the camera to rest on is absolutely vital for this. You must focus manually and set the White Balance manually – something I failed to do in the above image. If you have both on auto, the two images may differ slightly, making the blending process more complicated. It’s also important to set the shutter speed so that the images come out evenly exposed.
Set up your shot, enabling auto-bracketing if you’re doing HDR. Focus manually through Live view. Take the shot with the sun and lens flare. Next, keeping all settings the same and without moving the camera, set the timer to 10 (or 7) seconds. While the camera is counting down, put your thumb in front of the sun, using the Live View screen as your guide. Check the images to make sure you’re free from flare.
How to remove lens flare in Photoshop
This is the easy part. Take all of your images (flare and non-flare) and import them into Photoshop. Let’s say we’ve named the first ones ‘medium-flare’ and ‘medium-no-flare’. Medium-flare would be your medium exposure that had the sun and lens flare in it. Medium-no-flare is the medium exposure with the ugly thumb. (1) Place Medium-flare on top of Medium-no-flare. (2) With Medium-flare selected, create a white layer mask. Now select the (3) Paint Brush, make sure that the (4) foreground colour is set to black, (5) opacity is at 100%, and (6) run the brush over the areas affected by the lens flare.
For this image I actually replaced the entire foreground because flare was present throughout and since my White Balance was a tiny bit off, it would have looked patchy if I selectively painted the foreground.
(7) Now go to Layer>Flatten Image and save this as a Tiff file. Do the exact same thing with your other exposures.
This is the visual representation of the process described above:

And here is the medium exposure with both layers combined
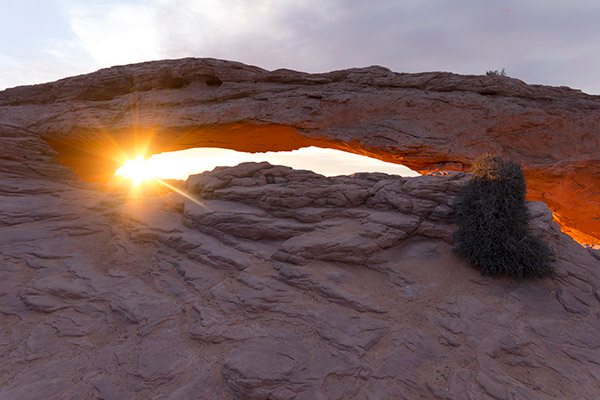
Eh, voila, it’s like magic but without any of the cool magic stuff! That is how to remove lens flare in Photoshop, provided some foresight was used while taking the shots.
And finally, with the work of Luminance Masks to blend the 3 exposures (A video tutorial for which can conveniently be bought here – luminance masks tutorial), this is the final image, completely free from lens flare. I increased the strength of the sun to add energy to the image.
How to Remove Lens Flare in Photoshop – Alternative Tutorials on the Web
Thank you for reading the Tutorial on How To Remove Lens Flare In Photoshop, be sure to sign up for our newsletter for more tutorials and great offers.

Enter your email below and join our community of more than 100,000 photographers who have
- Subscribed to our newsletter.
- Downloaded our FREE Photoshop Course.
- Use our FREE Easy panel in Photoshop.
Also you can now download our Photoshop course for beginners for FREE, click HERE.
FREE Photoshop Course

The Art Of Photography

Raya Pro

To go directly to any of our products, simply click on the image below.


