
Advanced Sky Replacement on Photoshop 2021
This Advanced Sky Replacement Article is by Grey Chow, If you would like to write for us, please read here.
Sky replacement is the most trending and controversial topic on social media now.
It started with Luminar software from Skylum where they make it easier for everyone to replace the sky with only a few clicks and playing around with a few sliders. Then, Adobe has also included the Sky Replacement feature on their latest update for Photoshop 2021.
Today I want to share with you how this Sky Replacement works in detail on Photoshop 2021. Also, how to import your skies. On top of that, I will also make a comparison with the Sky Replacement feature from Luminar 4. Without wasting any more time, let’s start.
Enter your email below and join our community of more than 100,000 photographers who receive regular tutorials and have also

Subscribed to our newsletter,
Downloaded our FREE Photoshop Course
Got our FREE Easy Panel for Photoshop
And have our FREE Essential Guide To Luminosity Masks E-Book
Sky replacement on Photoshop 2021
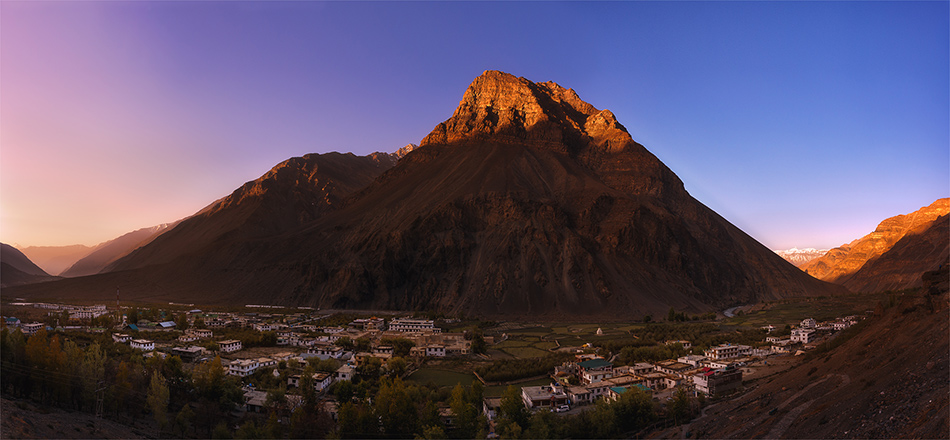
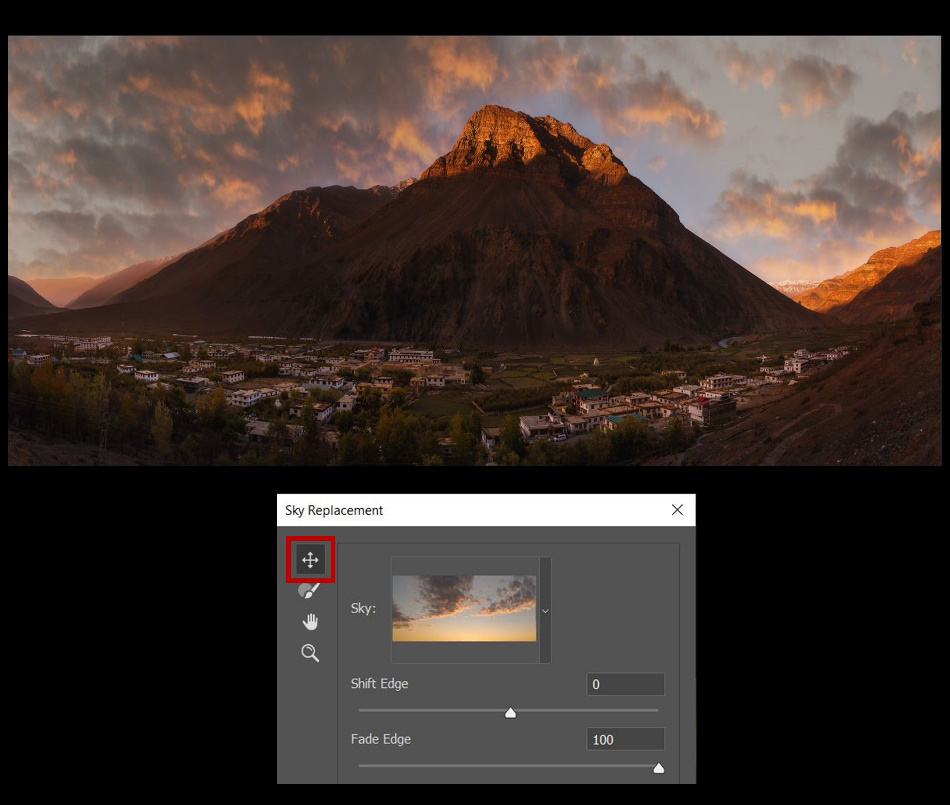
As you can see in the below screenshot, I already have a photo imported into Photoshop. It is a panorama photo of a small village in Northern India.
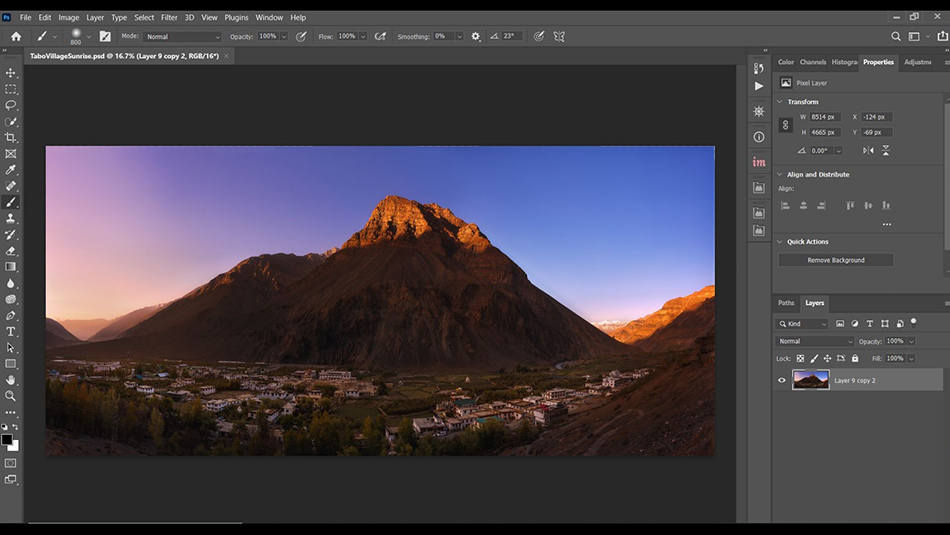
The scene is beautiful, but the sky is a bit dull, so I’m going to replace the sky with a more dramatic one.
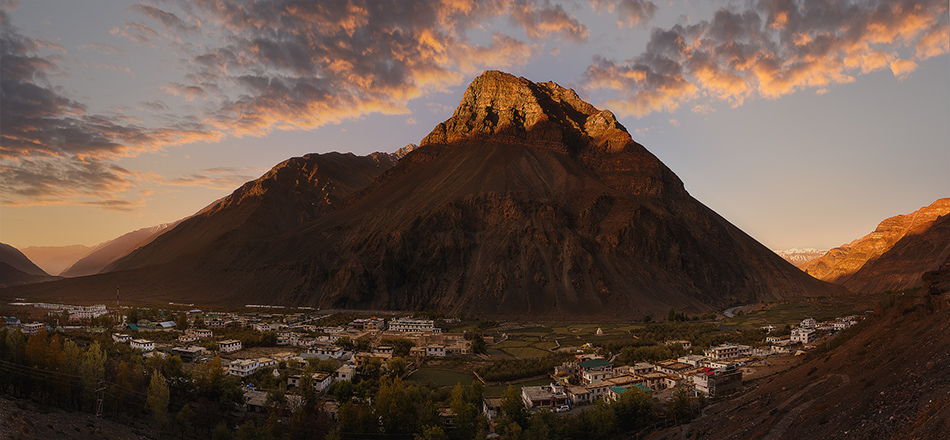
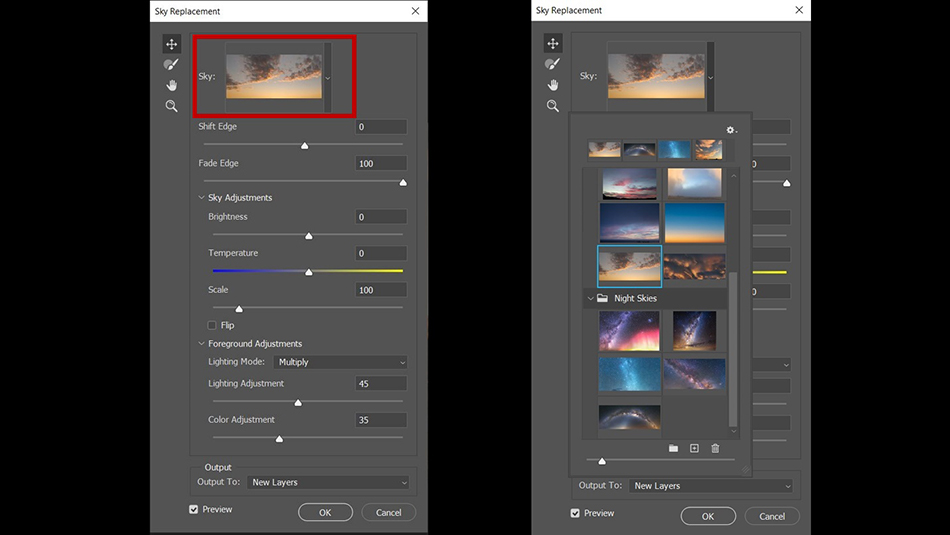
To open the Sky Replacement feature, go to Menu Edit > Sky Replacement. This will open up a Sky Replacement properties panel. Automatically, Photoshop will load the sky that’s previously used and replace the current one. Here’s the result after replacing the sky using only the default setting.
If you want to choose another sky, you can click on the Sky picture here to open up a catalogue of the skies. You can then choose a sky from either the included images or add one of your own.
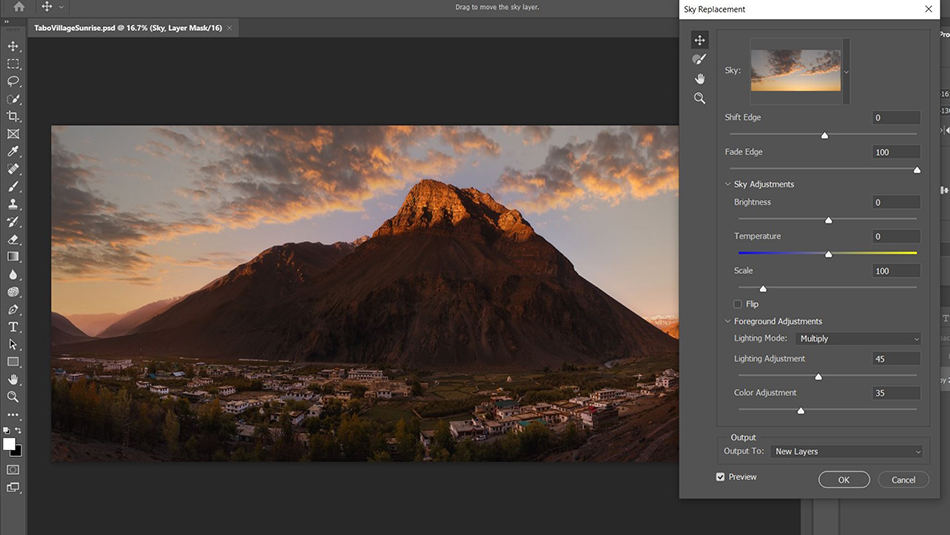
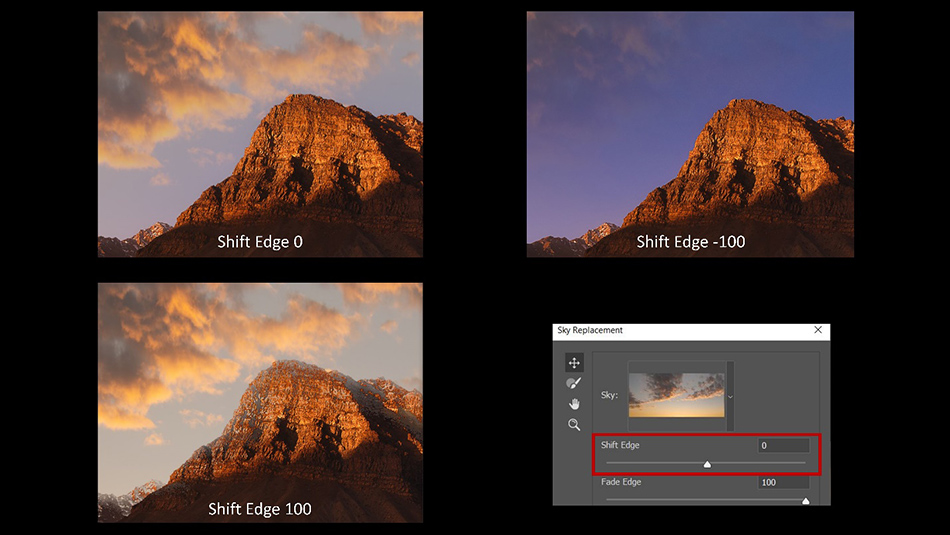
Let’s take a look at those available settings. We will start with Shift Edge and Fade Edge. You can adjust these two sliders for a more seamless look.
The Shift Edge slider allows you to move the edge of the sky. Usually, I would prefer to leave it at default 0 value, as I think Photoshop is doing quite well in blending the sky. However, to give you a better understanding, here’s how the result looked like after adjusting the Shift Edge slider.
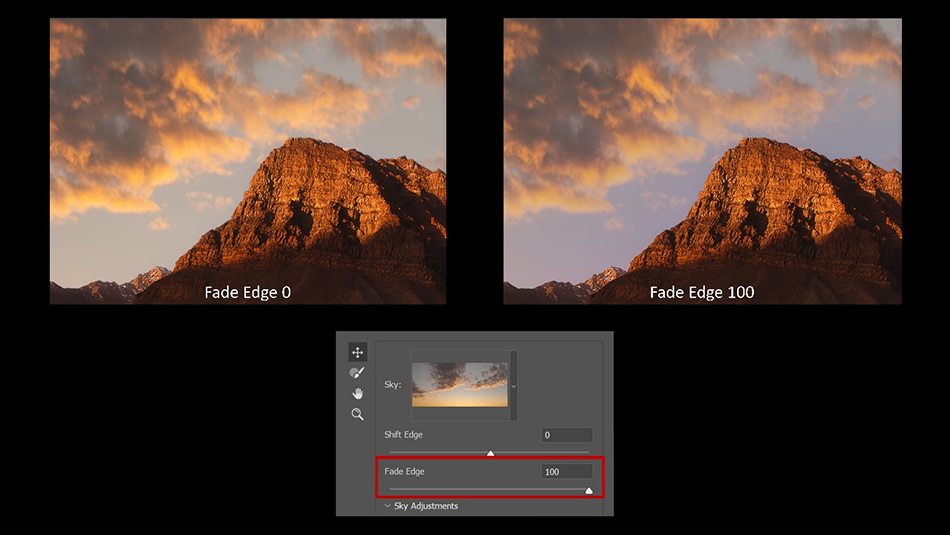
Another slider that will affect the blending result is the Fade Edge slider. Fade Edge is actually Feathering, which you can soften the edge of the sky to have a smoother blending result.
However, if the sky is darker than the foreground, applying too much Fade Edge may also produce a soft halo around the edge. To solve that, you can reduce the Fade Edge’s value or the contrast between the sky and the foreground by adjusting the brightness value for the sky.
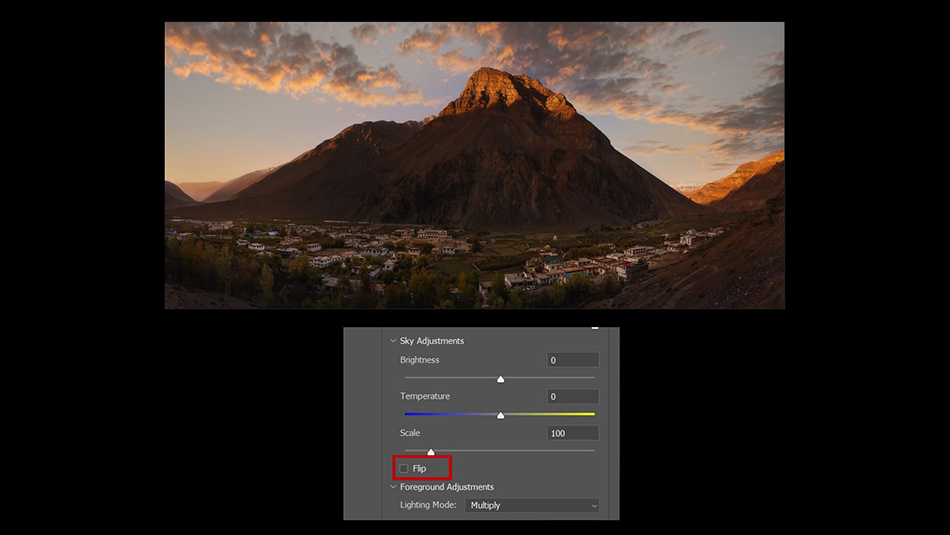
Next, under the Sky Adjustments section.
Both Brightness and Temperature sliders are pretty self-explained. For the Scale slider, you can enlarge or reduce the size of the sky. I think this is very helpful, as sometimes you need only a part of the sky.
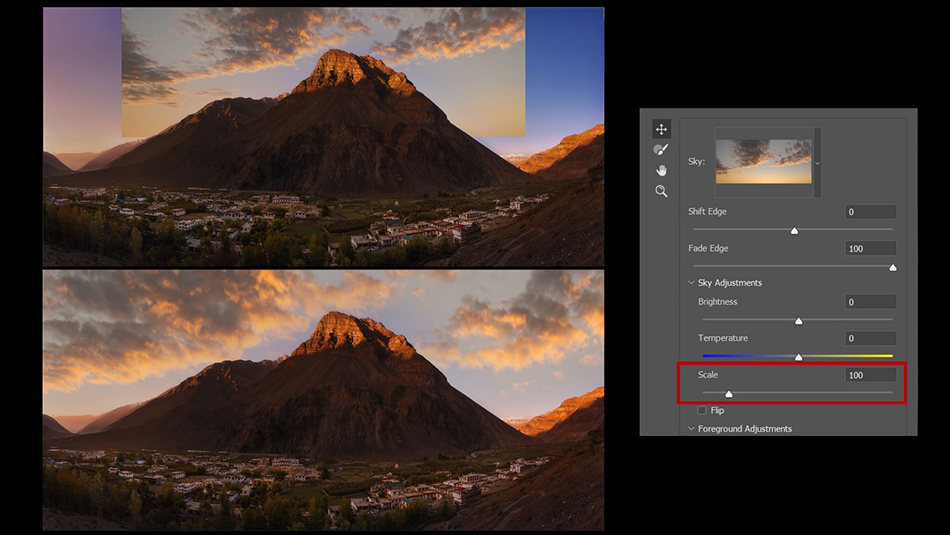
Furthermore, you can use the Sky Move tool to adjust the position of the sky.
One last setting for the Sky Adjustment is the Flip checkbox. By enable that, the sky will get flipped horizontally. This helps you to match the sky based on the sunlight direction, which gives a more natural look.
I have tested a few photos with the Sky Replacement, and I would say most of the time, Photoshop did very well in replacing the sky seamlessly. However, there are cases that you will need a bit of modification to the blending result.
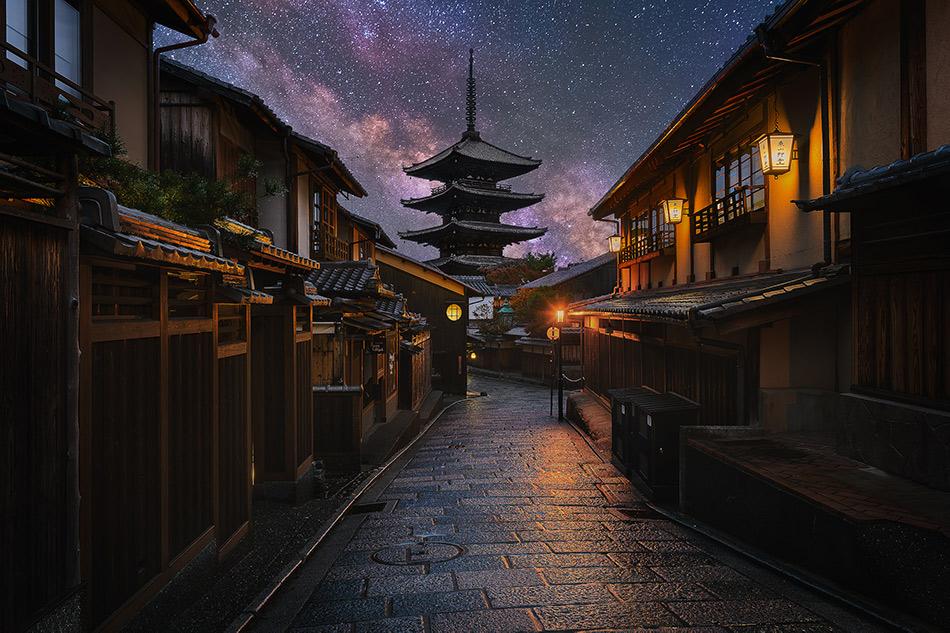
Here’s a photo of the famous Osaka Castle in Japan. I think it can be quite interesting to put a starry sky above the castle.
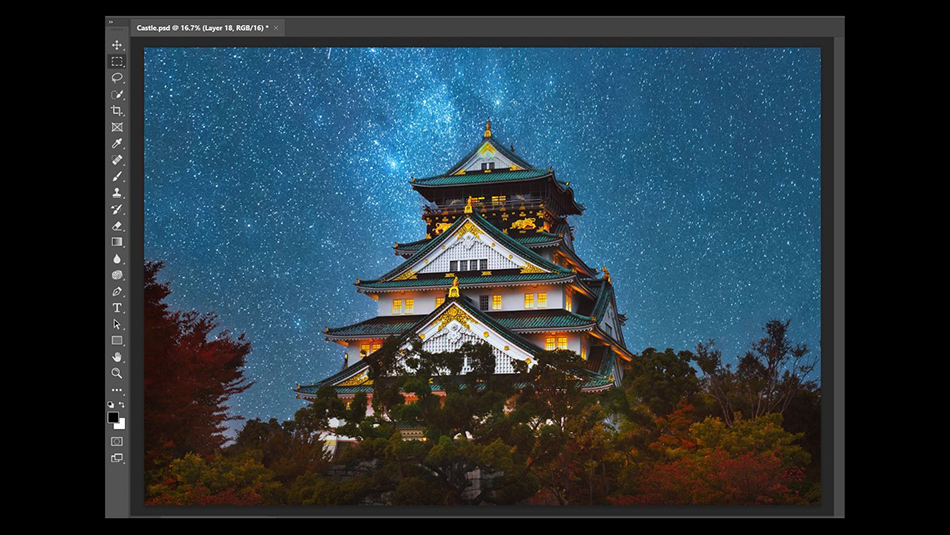
However, if you zoom in, you will notice that part of the sky overlapped on the castle. To fix that, you can use the Add/Remove Sky Area tool to remove the overlapped area on the castle

Next, there’s Foreground Adjustment section. Under the Lighting Mode, there are two options, Screen and Multiply. If you choose Screen, you can brighten up the areas around the edge of the foreground using the Lighting Adjustment slider.
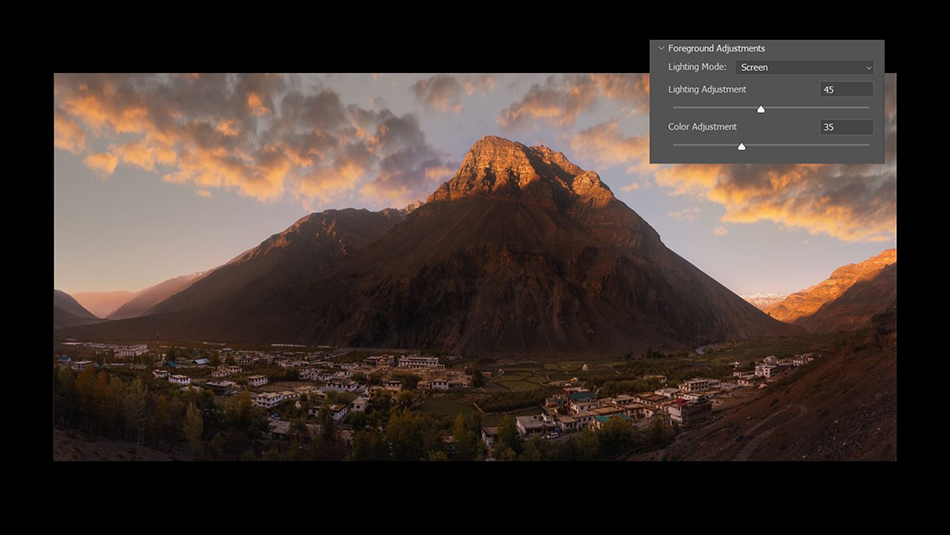
If you choose Multiply, it will darken the areas.
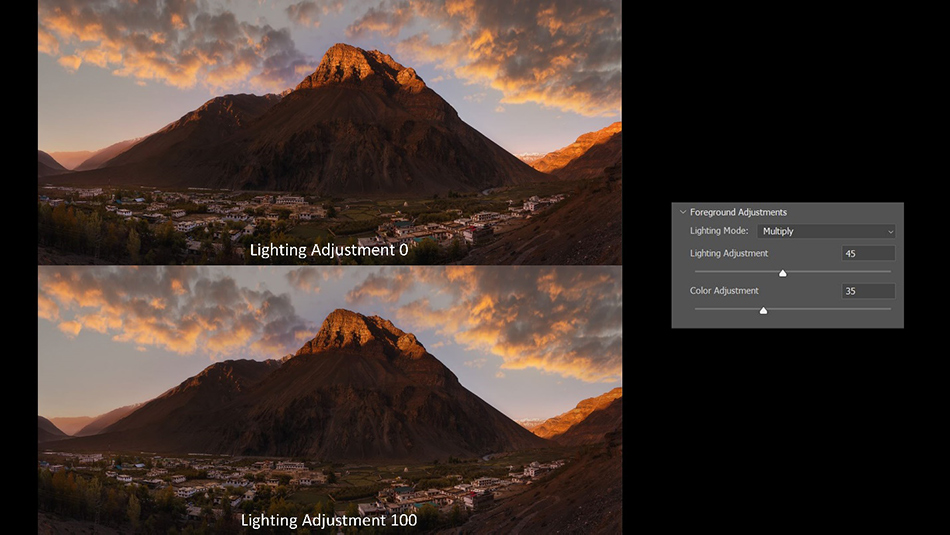
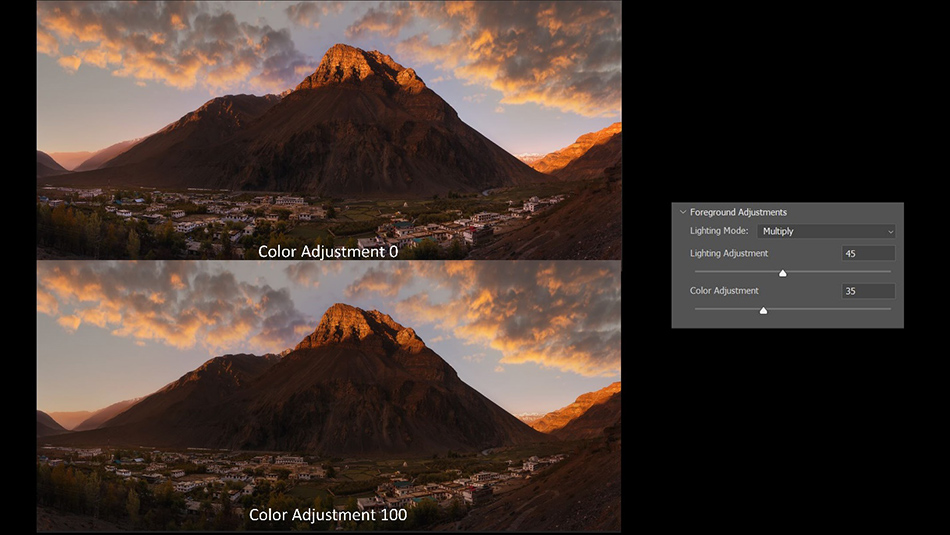
You can also adjust the colour of the foreground using the Colour Adjustment Slider, but I personally felt that the result is subtle and I could do better myself by further adjusting the colour on Photoshop.
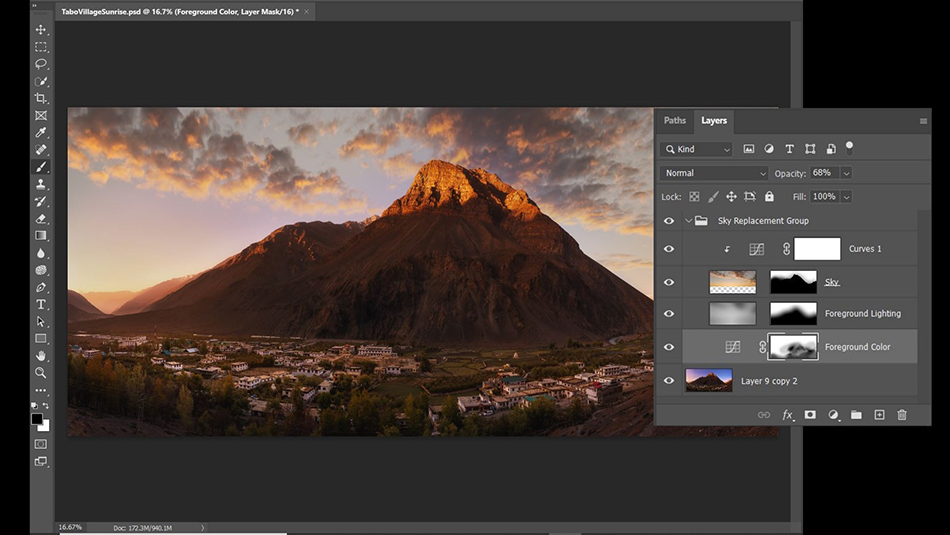
After you have everything set, you can choose to output the result to New Layers or Duplicate Layer. If you choose Duplicate Layer, Photoshop will create a new Image Layer with all the adjustments applied to it. For New Layers option, Photoshop will put the sky image and all the adjustments into different layers.

I prefer the New Layers option, as I have the option of further finetuning the result. I can add another adjustment layer as a clipping mask to boost the contrast of the sky or make any modification to the layer mask. I can also open up the Foreground Colour adjustment layer to increase the brightness and add a warmer tone to the foreground.
Import your skies
If you want to import a sky, you can open up the sky catalogue by clicking on the Sky option on Sky Replacement panel, and then click on the + icon to choose your sky and import it. For better organization purpose, you can create a new folder and then categories skies into different folders such as blue skies, dramatic skies, milky way, etc.

Photoshop seemed able to accept all kind of file formats, and so far, I have tested PNG, JPEG and PSD files.
Both PNG and JPEG files work fine, but I’m having an issue with PSD file. It only works on my first few attempt, and then Photoshop is having problem to import the file properly. I not sure whether is this a bug or is there a specific requirement for PSD file.
Anyway, I’m good with using only the PNG or JPEG file format.
Luminar 4 VS Photoshop 2021
I have tested the same file on both software, and here’s the result from Luminar 4.
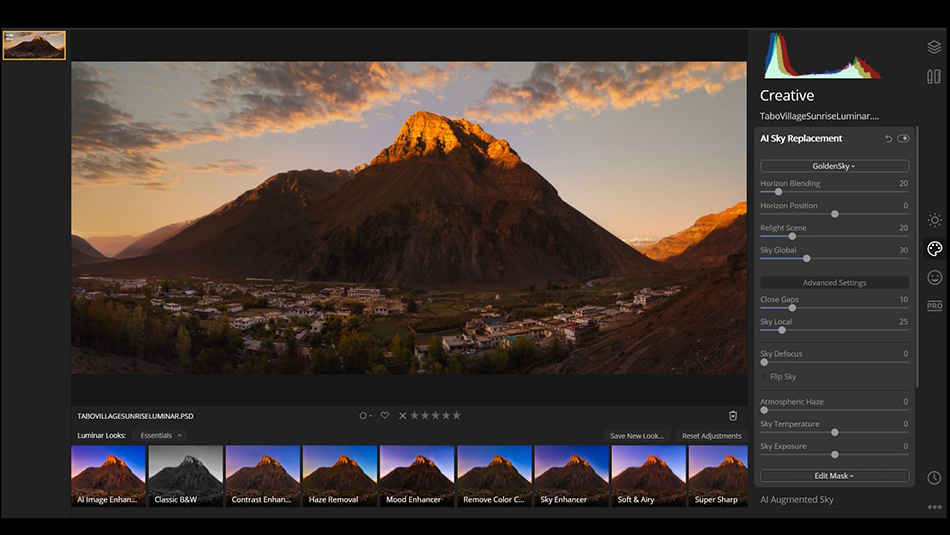
Here’s a detailed comparison of the blending result using another photo. Noticed that both Luminar 4 and Photoshop 2021 can handle the complex details and edges nicely and produce a seamless blending result.
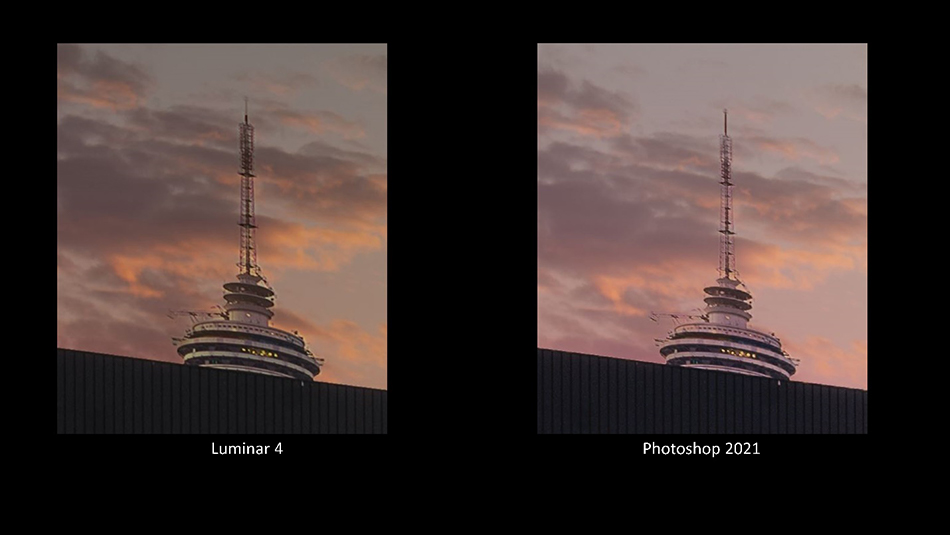
I think Luminar 4 produces a better result in term of matching the colour of the foreground and sky. I also like the Horizon Blending option, which targets to smoothens the transition between the sky and the horizon. However, I prefer Photoshop as it provides the flexibility to scale and move the sky. On top of that, I can make any further adjustment as Photoshop can output the result into layers. Again, that’s my preference.
What do you think about the Sky Replacement? Which software would you prefer? Luminar 4 or Photoshop?
We receive a small commission for each sale, but this article is unbiased and was written by a guest writer.
Thank you for reading this article Advanced Sky Replacement on Photoshop 2021, You might also be interested in the articles below. Be sure to sign up for our newsletter for more tutorials and great offers.
Enter your email below and join our community of more than 100,000 photographers who have also
Subscribed to our newsletter.
Downloaded our FREE Photoshop Course.
Got our FREE Easy Panel for Photoshop.
And, have our FREE Essential Guide To Luminosity Masks E-Book.
Other Sky Replacement Articles
The Photoshop world seems to be rejoicing with the new Sky Replacement feature with videos and tutorials popping up everywhere. And that’s no surprise when you see how easy it is now compared to how it was before. To see what I mean have a look at this youtube video.
Alternatively, we can use the Blend If feature to help replace the sky. But, if we are using Blend If, for best results, we need to be replacing a flat sky with little colour change and not a lot going on. This article is a good example on HOW TO REPLACE THE SKY IN A PHOTO IN PHOTOSHOP