Avoid Find And Fix Oversaturation in Photoshop
We can all get carried away with colour saturation when we’re editing. We have a fantastic and simple technique that you can do at the end of every edit that will help you with over saturation. Of course, this is if you don’t want bright and vibrant colours in your image. If what you set out to do is create in your workflow was a balance and natural image, then this saturation correction technique is a must have. It’s really simple as well, we’ve covered it in a short 2 minute photoshop tutorial on how to Avoid Find And Fix Oversaturation in Photoshop.
If you wish to experiment with this, I would really appreciate it if you included my name (Duke McIntyre) and www.shutterevolve.com when you publish your image. If you post your published image on our Facebook page I’d be happy to check it out.
Finding Oversaturation in Photoshop
A huge thank you to Terrance Reiners for supplying the image. Terry posted the image on our Facebook page, I messaged Terry as I liked the image and thought it would be great for a tutorial that I had in mind. He agreed to let me use the image to show this saturation correction technique. Below we have terry before, during and after images.

Before 
Finding Oversaturation 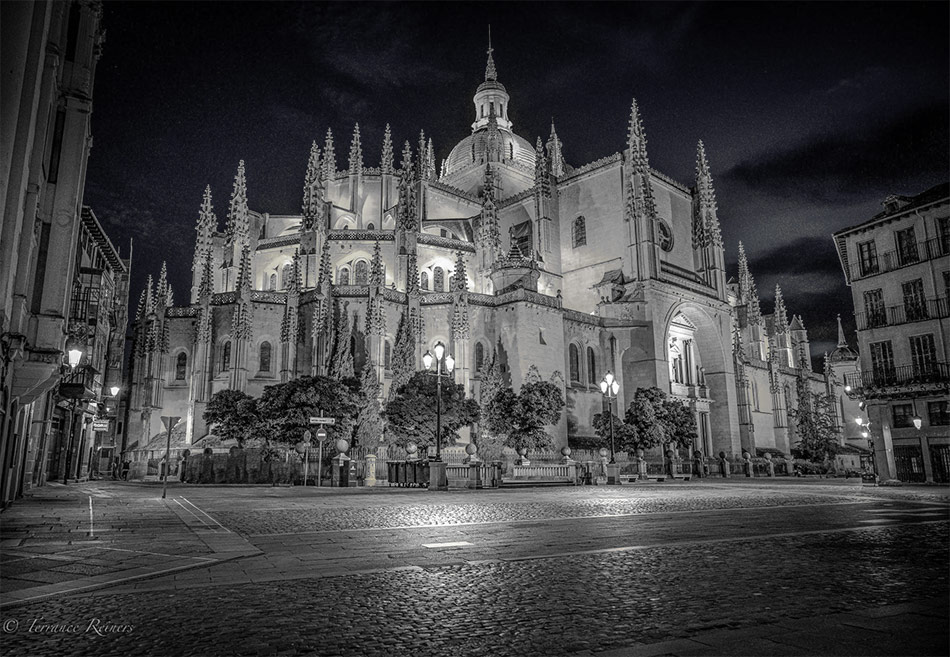
Fixing Oversaturation 
After
To find the oversaturated areas we use Invert Adjustment Layer. This inverts the image, so luminosity levels are reversed, so what was dark is now bright and vice versa. The Invert layer also reverses colours, so red becomes cyan, blue becomes yellow, and green becomes magenta and vice versa. This happens for all colours, they invert to the colour on the opposite axis of the colour wheel. To isolate the colours and the oversaturation we then change the blending mode of the Invert Adjustment Layer to Colour. Now the layer no longer affects the luminosity of the image. To hone in on the oversaturated colour tones we set the layer opacity to 50%. Any colour tones that are visible are the colours that are oversaturated.
-Tutorial Continued Below-
How to Find And Fix Oversaturation in Photoshop
1. Click on the Add a New Adjustment Layer icon.

2. The Adjustment Layer that we’re going to use if Invert.
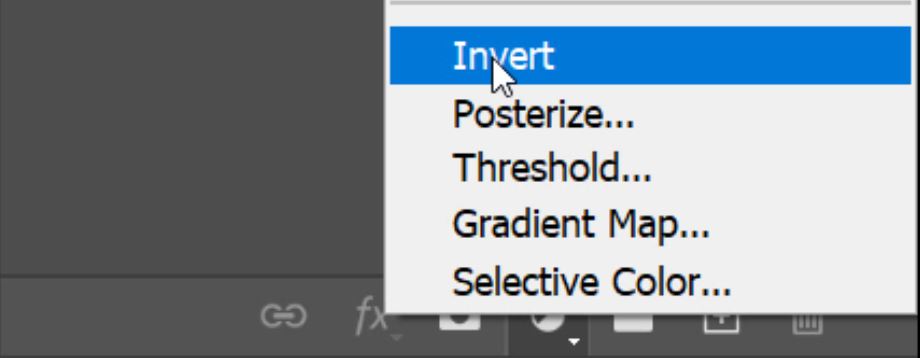
3. Change the Blending Mode of the Invert Adjustment Layer.
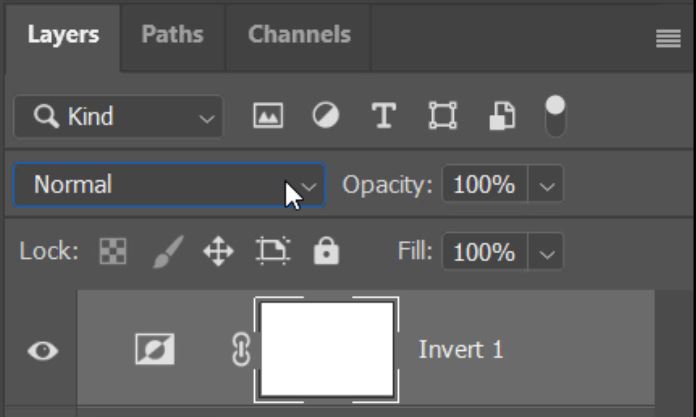
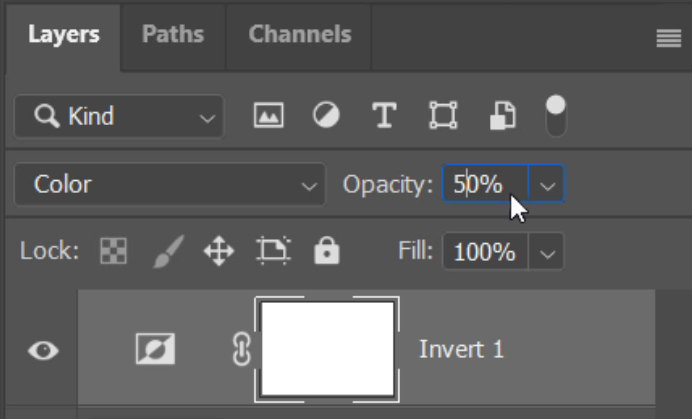
4. The Blend Mode that we use to find oversaturation is Color.

5. Set the Invert Layer Opacity level to 50%.
6. Now add another Adjustment Layer, this time we need a Hue/Saturation Layer.
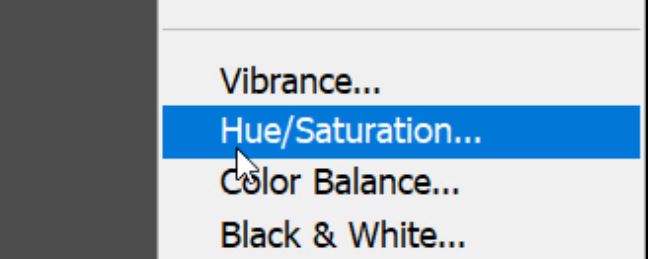
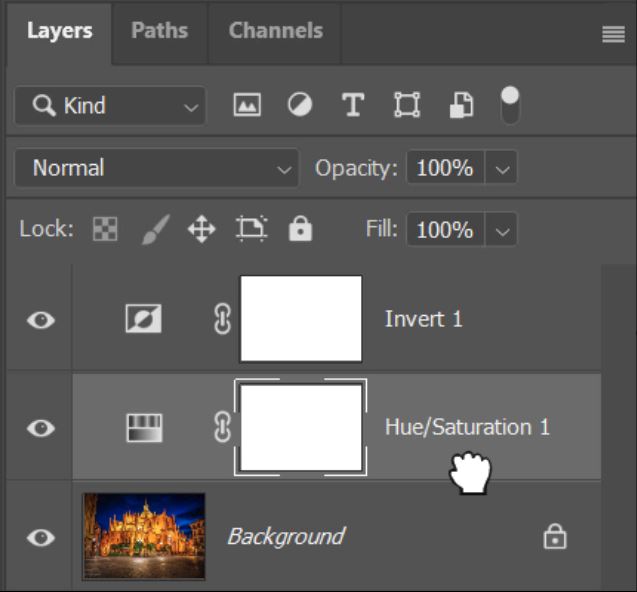
7. Drag the new Hue/Saturation layer below the Invert layer.
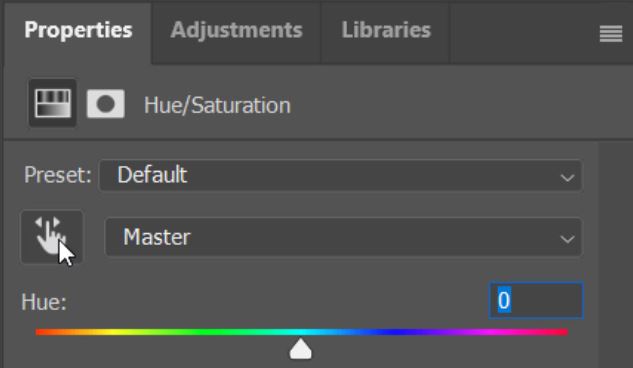
8. Click on the Master Color Select tool.
9. Now if you can see any obvious colour (like this red), left-click on it to select the visible color range.
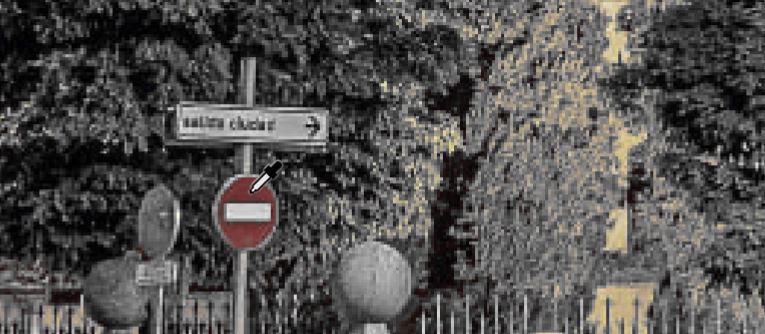
10. Lower the Saturation to remove all of the colour and turn that previously colourful area to greysacale.
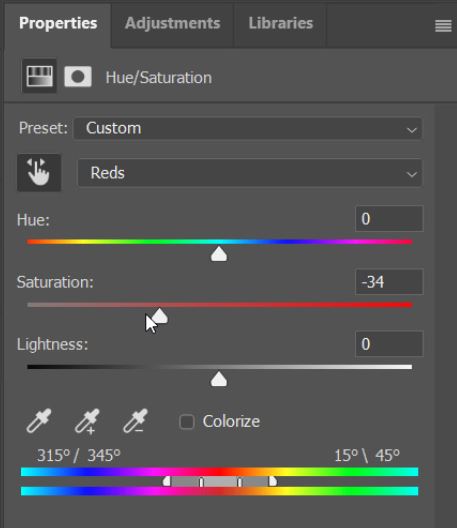
11. This is how you correct oversaturation in Photoshop.
12. Click on the Master Color Select tool and click on any other colours that you see, and repeat the lowereing saturation levels to control colour oversaturation.
Take a look at the before and after images.


Photo by Terrence Reiners

