How To Fix An Overexposed Foreground in Photoshop
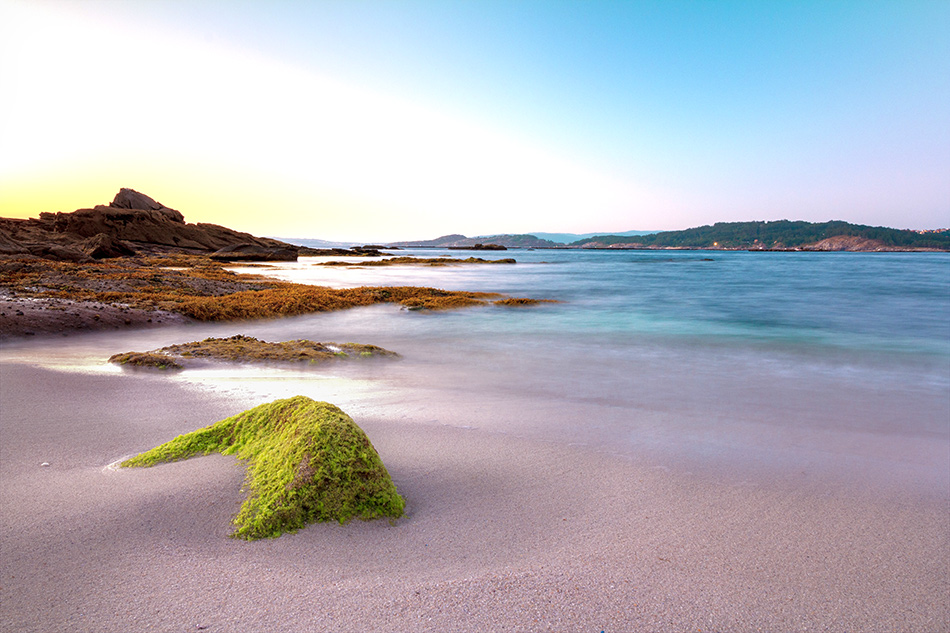
To capture information or details in darker areas of a scene, we sometimes need to crank up the exposure. If we aren’t exposure blending bracketed images then unavoidably, brighter areas will be over-exposed. In this example, the foreground is particularly blown out, the sky is also very bright, but it works well for the image. We’ll show you How To Fix An Overexposed Foreground in Photoshop and not affect the rest of the image. We’ll also show you how to add a bit more depth by adding contrast to highlights against shadows.

How to Fix Overexposed Foregrounds in Photoshop
1. To start we add a New Adjustment Layer by clicking on the following icon at the bottom of the Layers panel.

2. The Adjustment Layer type that we need to select is Black & White

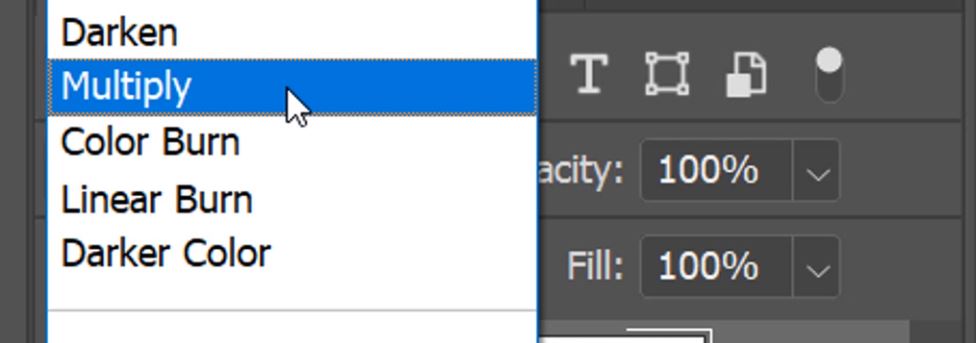
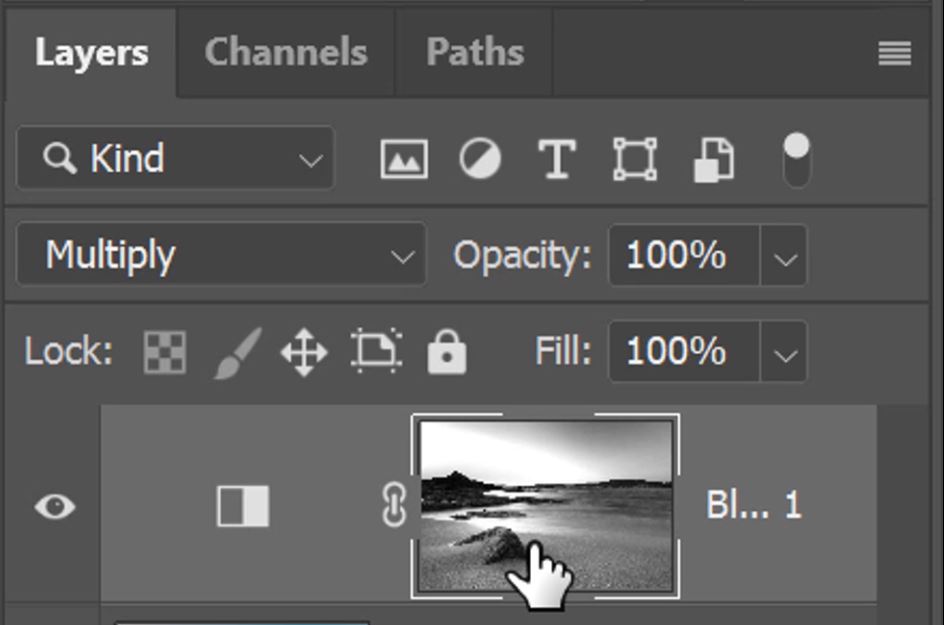
3. Click here to change the blending mode of the newly added Black and White Adjustment Layer.

4. Change the blend mode to Multiply.
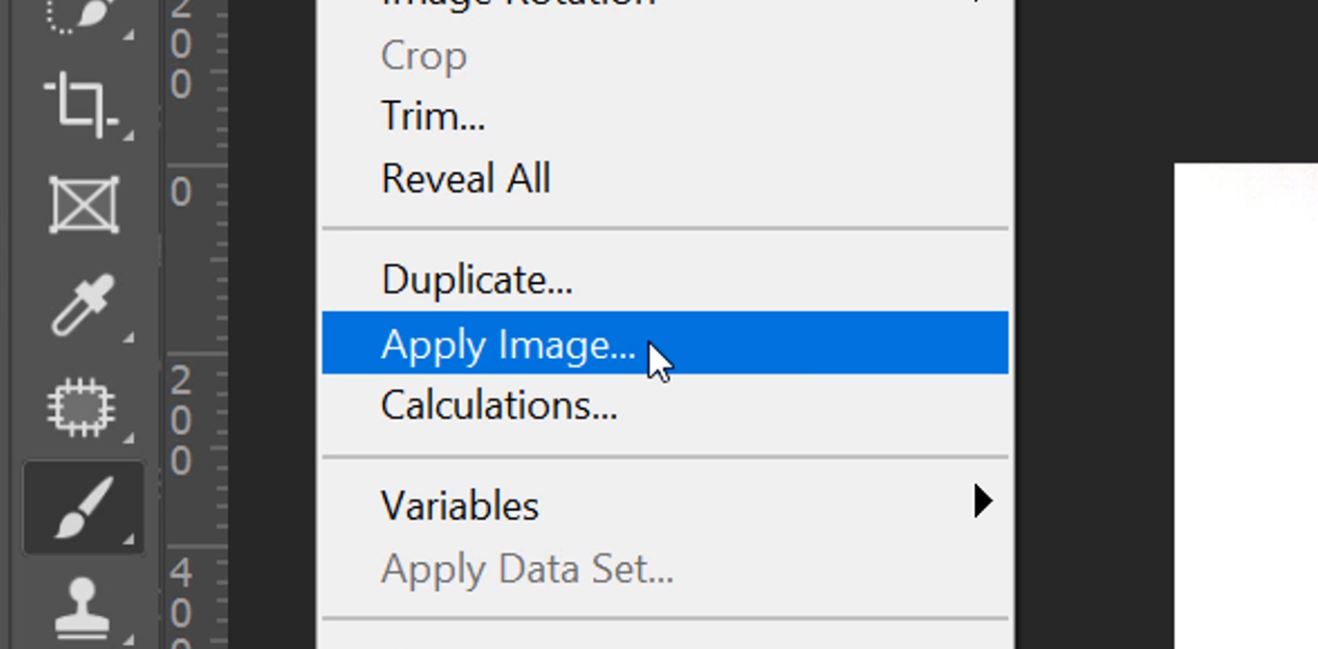
5. Now we need to go to the Image menu.
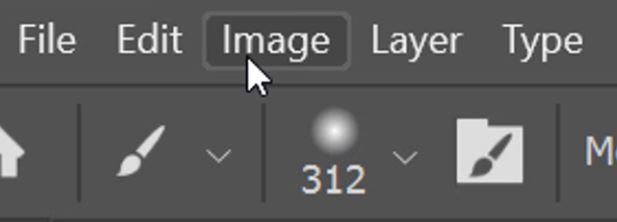
6. From the various choices in the Image menu, select Apply Image.
– Tutorial continued below –
Enter your email below and join our community of more than 100,000 photographers who receive regular tutorials and have also

Subscribed to our newsletter,
Downloaded our FREE Photoshop Course
Got our FREE Easy Panel for Photoshop
And have our FREE Essential Guide To Luminosity Masks E-Book
Fixing Overexposure in Photoshop
7. Make sure your settings are the same as ours and click on OK.
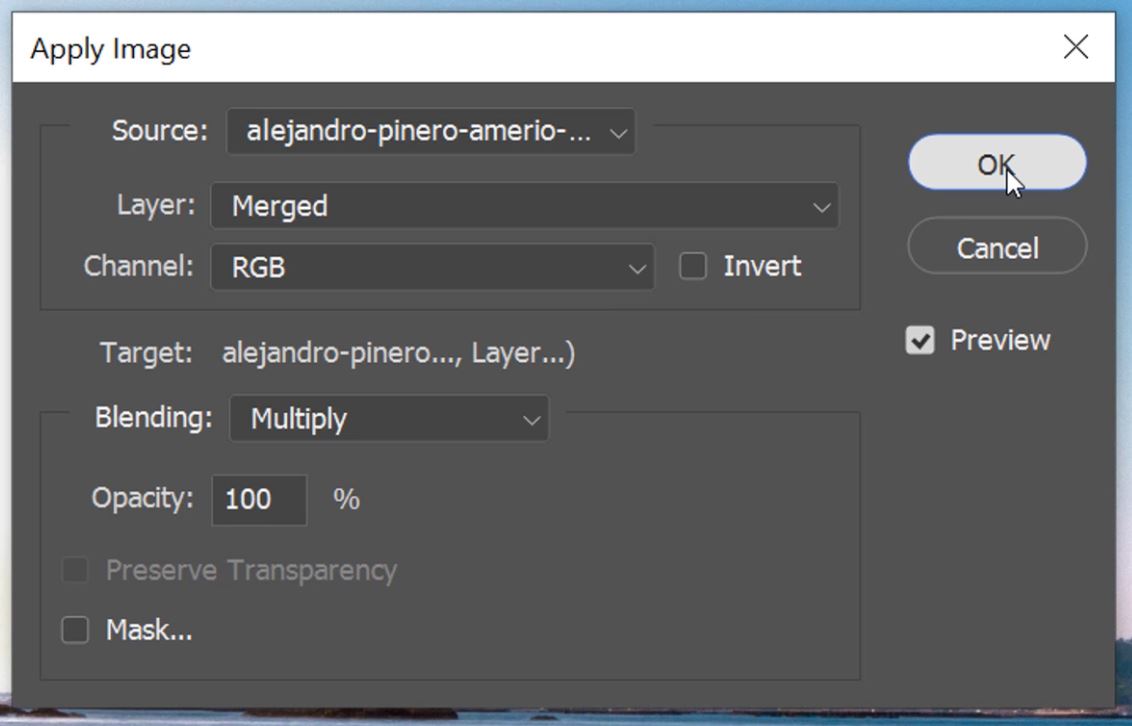
8. This applies a luminosity mask, this will ensure the brightest areas of the mask are the only areas that will be affected.
9. Because in this example we don’t want to affect the sky, we need to paint out part of the mask. So we select the Brush Tool.

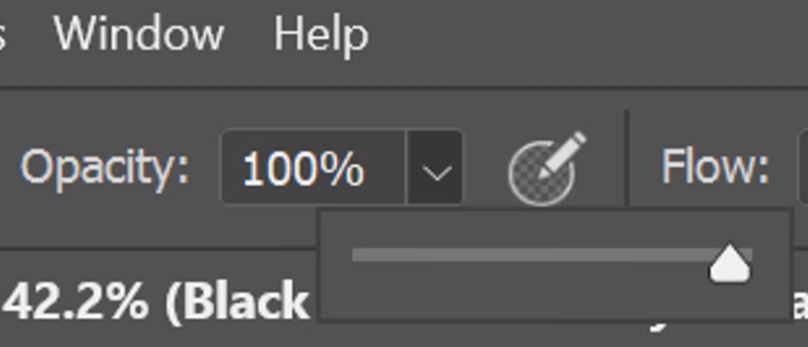
10. Make sure you have a black foreground.

11. Check the Brush Opacity, if it’s not at 100, click the little down-arrow.
12. When the slider appears, click and drag the slider right to set the Opacity to 100.
13. Now paint over the area that you don’t want to affect by the adjustment. In this case, we paint out the sky.
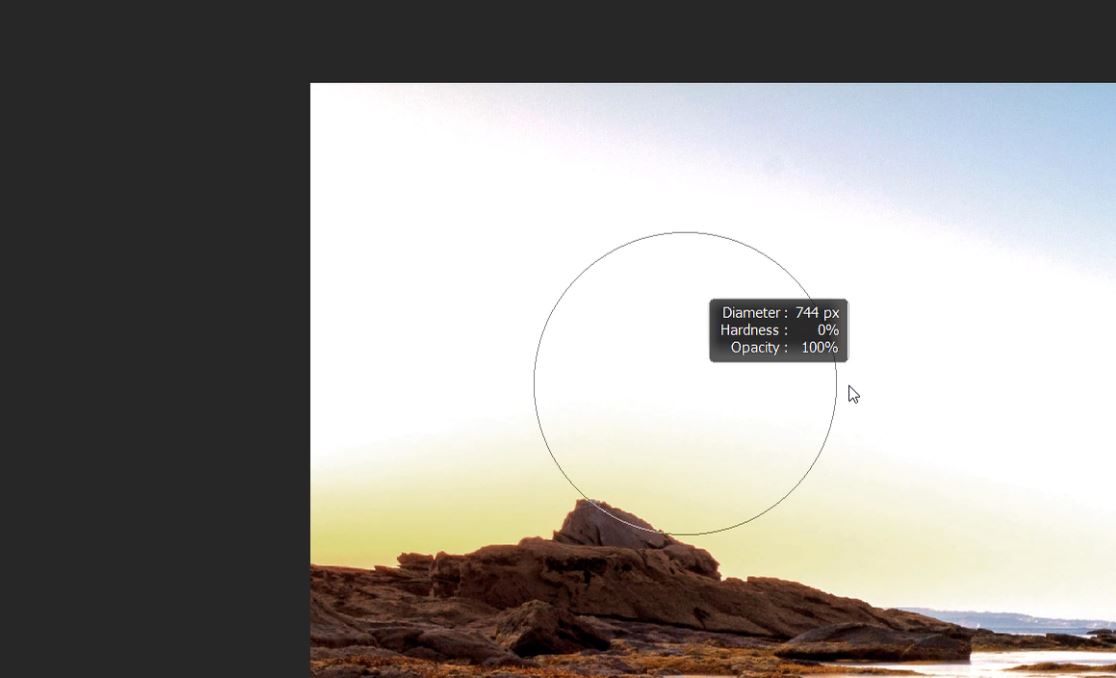
14. The luminosity mask now shows the sky as black. Now only the foreground will be affected. The sand is grey so it will be less harshly affected compared to the water which is white in the mask.

15. Now that we have tailored our luminosity mask we can begin to make our adjustments. Under the properties panel, move the sliders left to darken or right lighten. I know that Red is a fairly dominant colour in our foreground, so I’ll move that slider first.
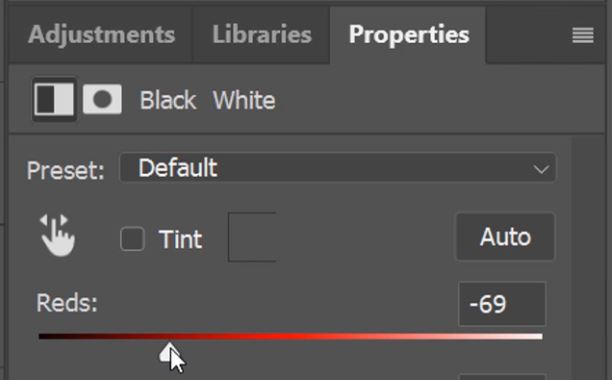
16. The next most dominant colour in the foreground of this image is Magenta, so that is the next colour that I’ll target. I left-click and drag the slider left to darken the magentas.

17. move all of the sliders and gauge the changes that they make to your image to help balance the tones.

How To Add a Bit More Depth By Adding Contrast To Highlights Against Shadows
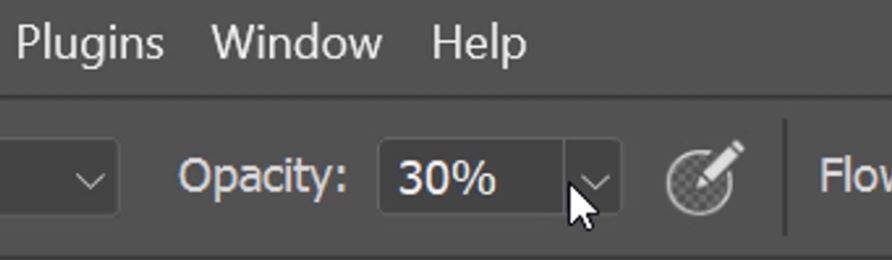
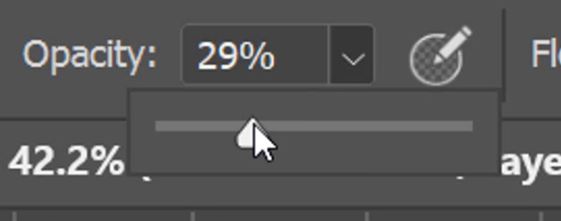
18. Reduce the Brush Opacity to around 30%.
19. Brush over the areas that you want to highlight, so areas where the light might have hit naturally, ensuring you don’t paint into the shadow areas.

20. Now if you look at our luminosity mask you will notice the darker halo surrounding the rock in the foreground. Because these areas are darker, the exposure compensation adjustment affects the darker area less. Thus, these painted areas are brightened.

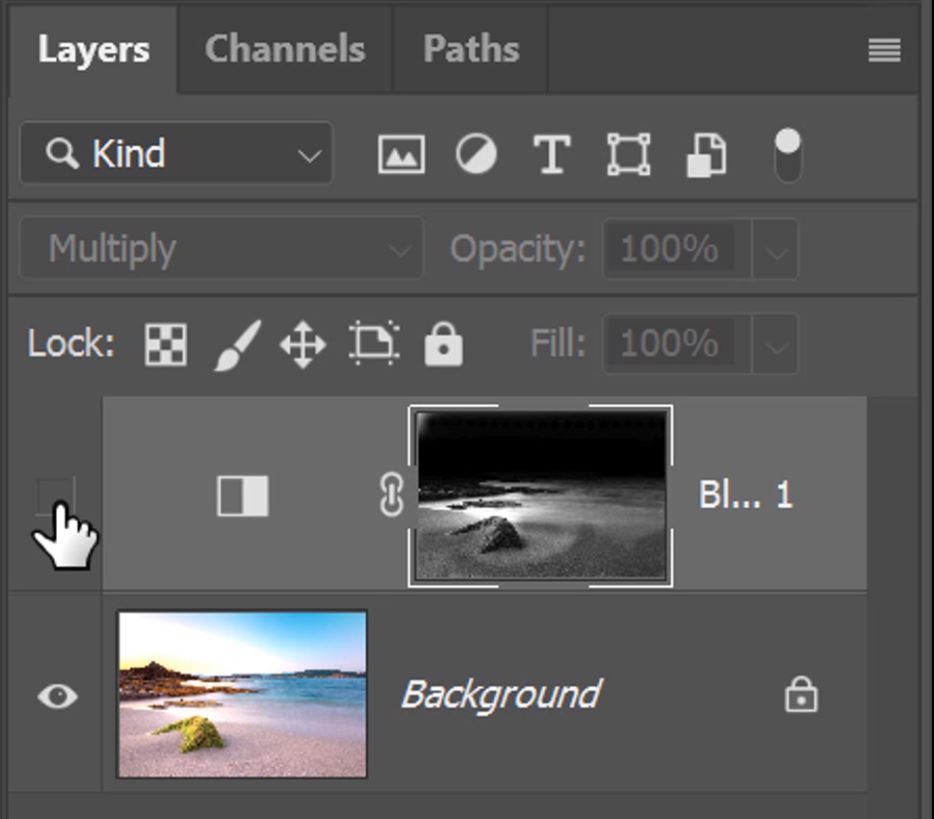
21. Toggle the Adjustment Layer visibility on and off often to see the changes that you’re making with the brush tool as you go.
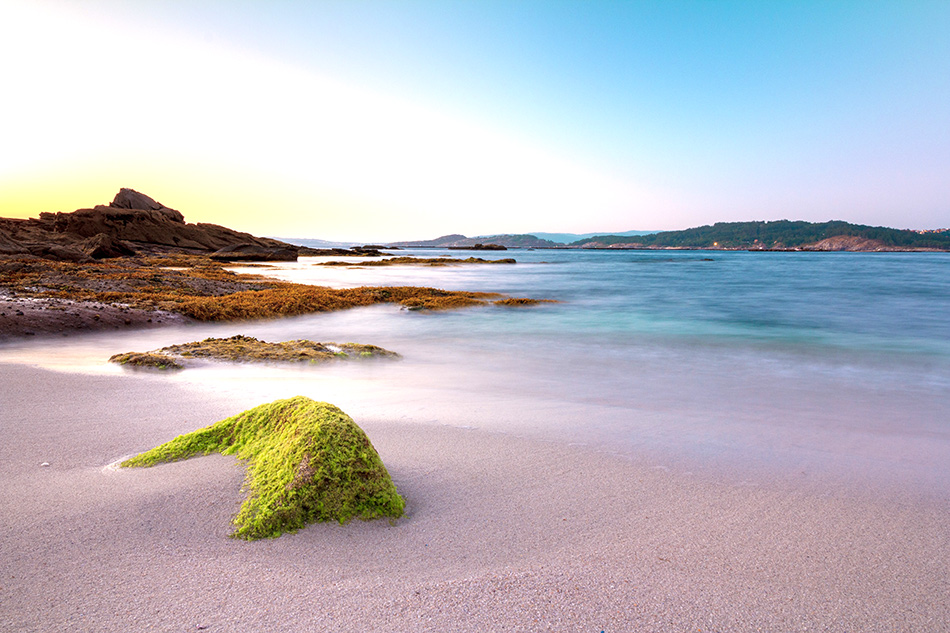
Now the overexposed foreground has been brought under control, and the highlights have added some lovely depth in the foreground.
[compare]
[/compare]
Photo by Alejandro Piñero Amerio on Unsplash
More articles on Fix An Overexposed Foreground in Photoshop
How to Fix Blown-Out Whites in Photoshop
5 Easy Ways To Save An Overexposed Image In Photoshop
3 Useful Photoshop Techniques for Making Images Exposure Corrections
Thank you for reading this article on How To Fix An Overexposed Foreground in Photoshop, be sure to sign up for our newsletter for more tutorials and great offers.
Hurry Up!

Enter your email below and join our community of more than 100,000 photographers who have also
Subscribed to our newsletter.
Downloaded our FREE Photoshop Course.
Got our FREE Easy Panel for Photoshop.
And, have our FREE Essential Guide To Luminosity Masks E-Book.
FREE Photoshop Course

The Art Of Photography

Raya Pro for Photoshop

How To Fix An Overexposed Foreground in Photoshop