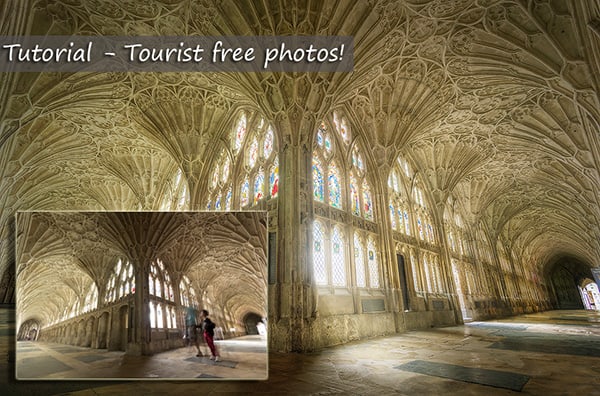
Tutorial – How to Remove Tourists From Your Photos
Sometimes photographers are a strange group of people. We take pictures of amazing places and whenever a tourist walks into the shot we grumble to ourselves ‘stupid tourist!’ There are certain techniques that photographers employ to remove tourists or people from their photos. I’ll show you a less commonly known tutorial, although very straightforward, on how to remove tourists from your photos.
P.s. you can go straight to the video below if you prefer visual tutorials…
What you need
– A touch of patience
– Photoshop
How to set it up
It’s preferable to use a tripod to minimise movement between frames.
Basically, set your tripod up and take note of where tourists are in your frame. Let’s say hypothetically you’re shooting the scene above in Gloucester Cathedral. 2 tourists are walking towards you from the left, and 2 more from the right. Take a shot (feel free to use auto-bracketing). Wait for them to walk a couple of metres further and Take another shot. Now you have 2 images, each one with tourists but they’re in a different spot each time.
In Photoshop
Take your images and place them on top of each other in Photosohp. On the Layers panel at the bottom you’ll see a square with a circle in it. Make sure the top image is selected. Click on that icon while holding down Alt (Option on a Mac). A black square will appear to the right of the top layer which is now invisible.
Select the Paint brush on the left tool bar, set the foreground colour to white and make sure the opacity is set to 100%. Choose an appropriately sized brush. Now, with the black mask on the top layer selected, move your cursor over the tourists and began painting onto them. You’ll see them disappear, leaving a perfectly tourist-free space behind them! Simple, right?!
How to remove tourists from photos – Alternative tutorials on the Web


