How To Take Better Cityscape Photos
How To Take Better Cityscape Photos article is by Grey Chow, If you would like to write for us, please read here.
It’s a struggle when we can’t travel anyway for some natural sceneries. Have you considered cityscape photography? To most people, it is more accessible, and it is also easier to start.
To ease you in photographing the city, here are some tips and tricks on how to take better cityscape photos. Let’s start with the camera setting.
1. Shoot in Manual Mode for Cityscape
By shooting in Manual mode, you have full control of your camera settings, which allows you to get the best out of your camera.
Although shooting in Manual mode may sound a bit complicated, don’t worry, I will keep things simple by using the below process flow to help you decide your camera settings.
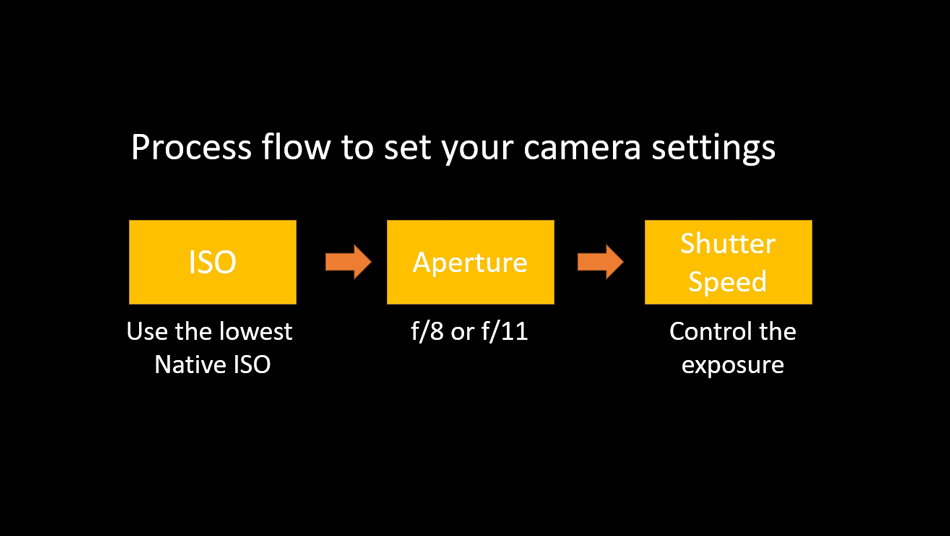
We all know that ISO, Aperture and Shutter Speed are the Exposure Triangle used to control the exposure of a photo. Let’s start with the ISO setting.
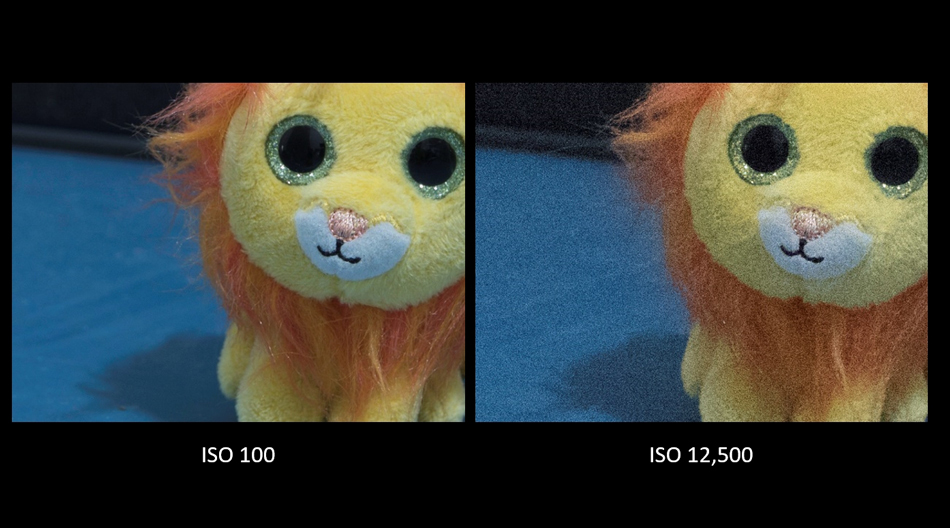
When deciding the ISO setting, I always suggest using the lowest native ISO of your camera.
Depending on your camera, it can be either ISO 100, 50 or lower. The reason for using the lowest native ISO is to capture photos with better image quality. The camera’s sensor produces more noise at a higher ISO setting and reduces the photo’s dynamic range.
Next, Aperture setting, you can go for either f/8 or f/11, depending on how close the distance between your foreground subject and your camera. Usually, both f/8 and f/11 Apertures are considered the “sweet spot” of an Ultra Wide Angle lens, which gives you a good sharpness and a wide enough depth-of-field to ensure everything in your frame is in focused.
Now, you have both the ISO and Aperture setting set, the last setting you can use to control your exposure is Shutter Speed. You choose a Shutter Speed based on the exposure meter on your camera’s live view. Then you take a test shot and review the result. If the photo is underexposed, change to a slower Shutter Speed; if it is overexposed, use a faster Shutter Speed. Pretty straightforward, right?
– Tutorial continued below –
Enter your email below and join our community of more than 100,000 photographers who receive regular tutorials and have also

Subscribed to our newsletter,
Downloaded our FREE Photoshop Course
Got our FREE Easy Panel for Photoshop
And have our FREE Essential Guide To Luminosity Masks E-Book
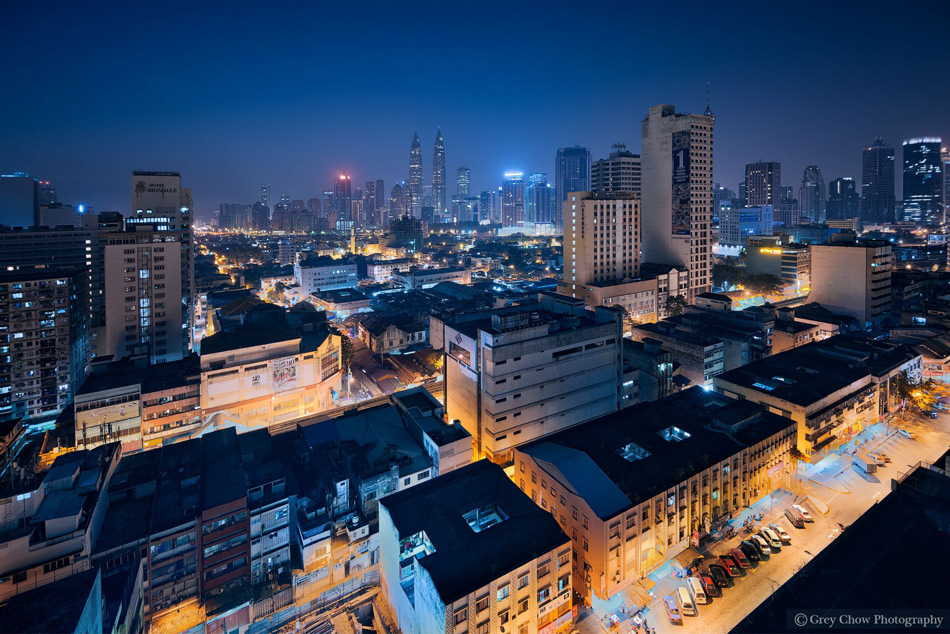
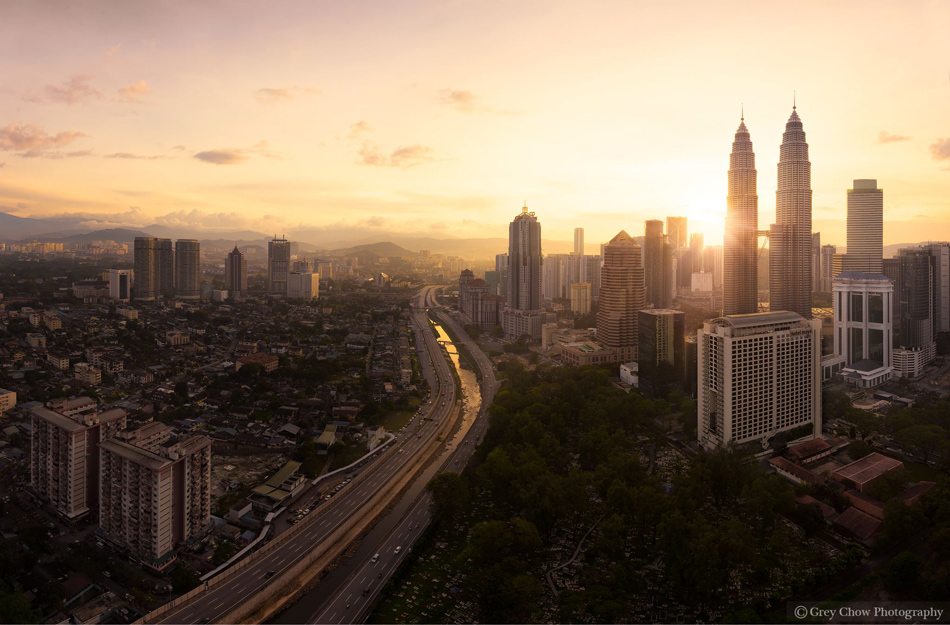
2. Aim for the Cityscape Blue Hour
Of course, if the weather is great, we would love to capture dramatic weather during the golden hour. However, taking photos during the blue hour can be pretty nice too for cityscape, and it is easier to capture.
On top of that, having a blue sky and yellow artificial lights produces a complementary colour harmony. Complementary colour harmony is about using two colours on opposite sides of the colour wheel. It creates an interesting contrast between the blue and yellow colours.

Usually, the blue hour during the evening is better than the morning. There are more lights on the buildings in the evening and more traffics for better light trails, which is good for your foreground.
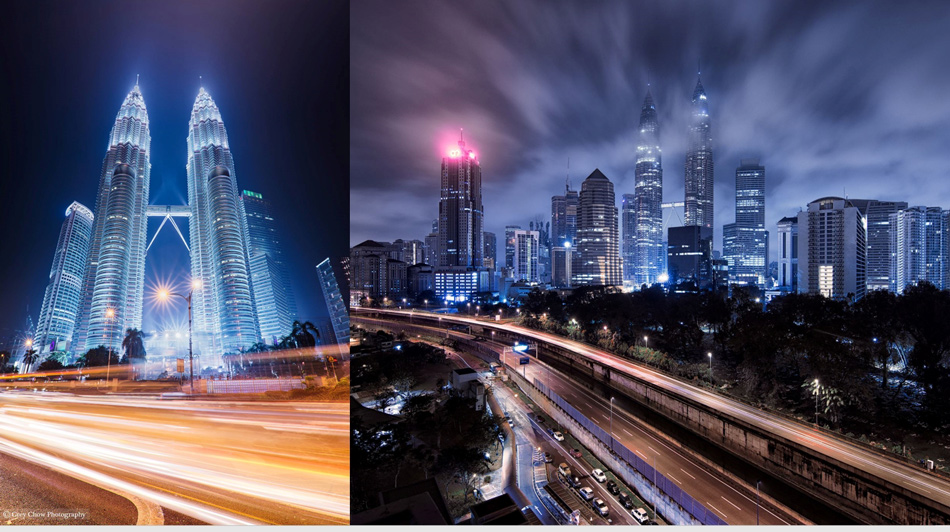
Here’s the comparison of the two photos that are taken in the morning and evening. Petronas Twin Towers is the main subject on both photos but with its lights turned on in the evening, the towers are more interesting and stand out more on the frame.
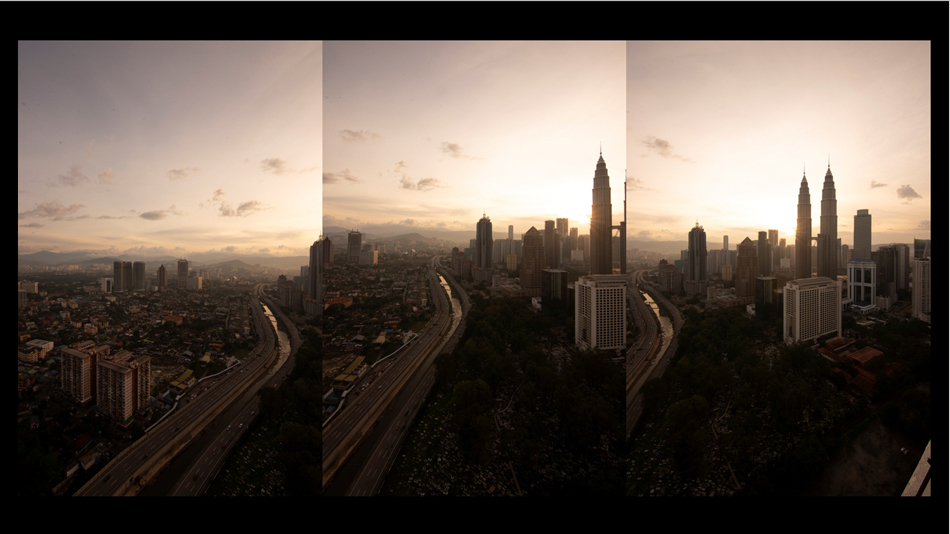
3. Bracketed Shots for cityscapes
Following the transition from day to night, the sky will get darker and darker, and the highlights from the city lights will get brighter and brighter, which will produce a strong contrast between the brightest and darkest areas of the scene. If you take a photo during this time, your photo may contain some heavily under/overexposed areas.
To solve that, you can take multiple exposures of the scene, which is known as bracketing. By having multiple exposures, you’re able to capture all the details in the highlight and shadow areas. You can use the Auto Exposure Bracketing function to take the photos, which I believe most of the cameras should have then exposure blend the images using Raya Pro.
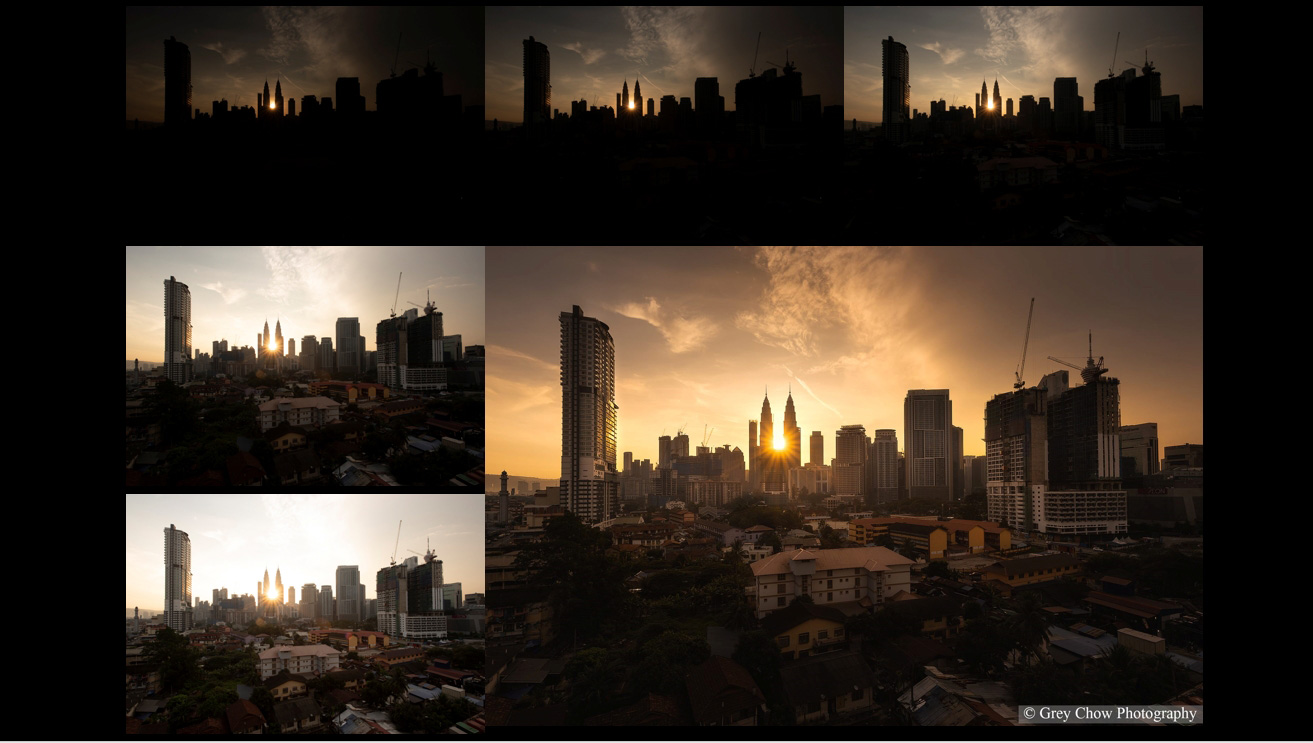
For the above example, I took five different exposures of a scene containing -2, -1, 0, +1 and +2 stops exposures. During the post-processing, I picked only two photos; one for the foreground and another for recovering the overexposed highlight in the sky.
Alternatively, you can consider taking an underexposed photo and try to recover the shadow’s details via post-processing. After years of improvement, the camera’s dynamic range is getting better and better, and you can now recover a three or four stops underexposed photo easily. (Depending on your camera)

However, note that this may come with a consequence of capturing more noises on the photo. The left photo is originally underexposed and brightened up in post-processing.
4. Cityscape long exposure
Here’s the fun part. Using a slow Shutter Speed like 15 or 30 seconds, you can create a motion blur effect on any moving object, which is something that you can’t see with your naked eyes.
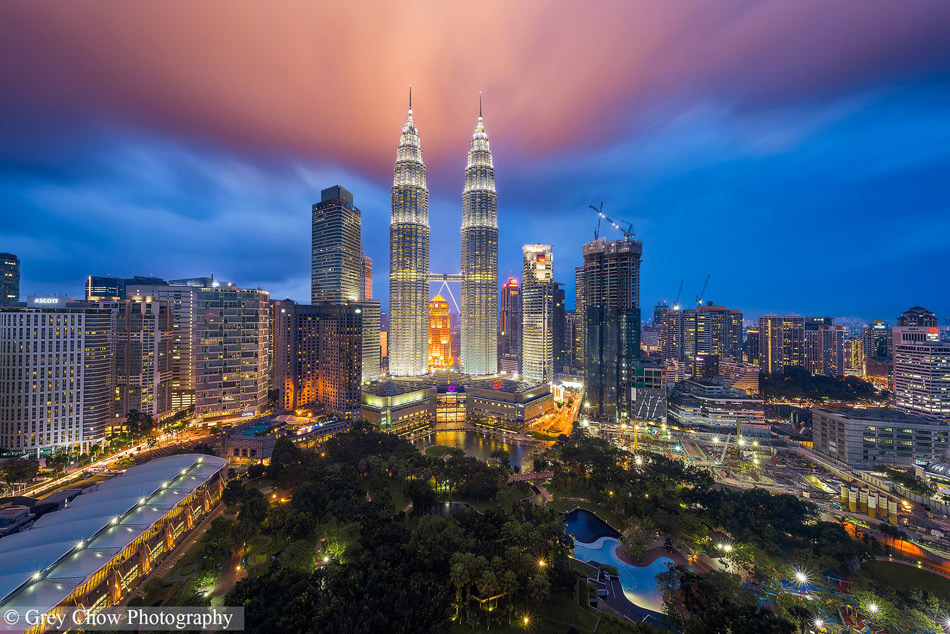
For example, the “fast-moving clouds” effect on the below photo was captured using 30 seconds Shutter Speed.
Light trails is also an interesting subject in cityscape photography. Noticed that in the below photo, different Shutter Speed produce a different result. Usually, I recommend using at least 15 seconds Shutter Speed for a longer and better light trails.

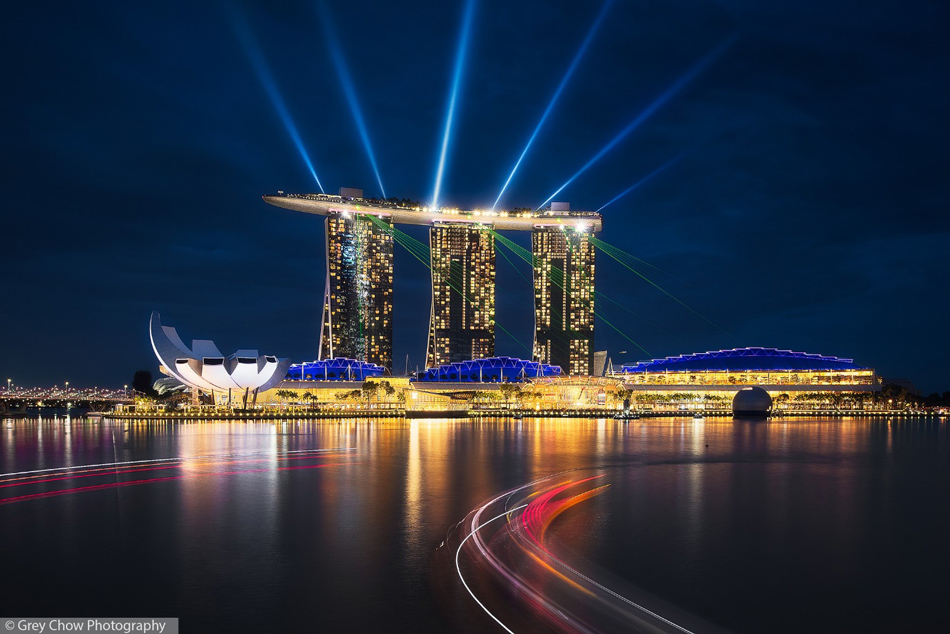
Here’s another photo that contains light trails. Under long exposure, I was also able to smooth out the water, create a cleaner composition.
5. Cityscape Panorama for a wider perspective
A panoramic photo is a combination of multiple photos to create a wider view of a scene. Because of that, the photo can also produce a unique perspective that you can’t get with a single shot, even at the widest focal length of your lens.
To capture a simple panoramic photo, you set your camera in portrait orientation, then start taking multiple frames from left to right by rotating your tripod ball head.
For the above photo, I took three photos and then merged them into a single photo using Adobe Photoshop. Most editing software on the market has the same photo merging feature.
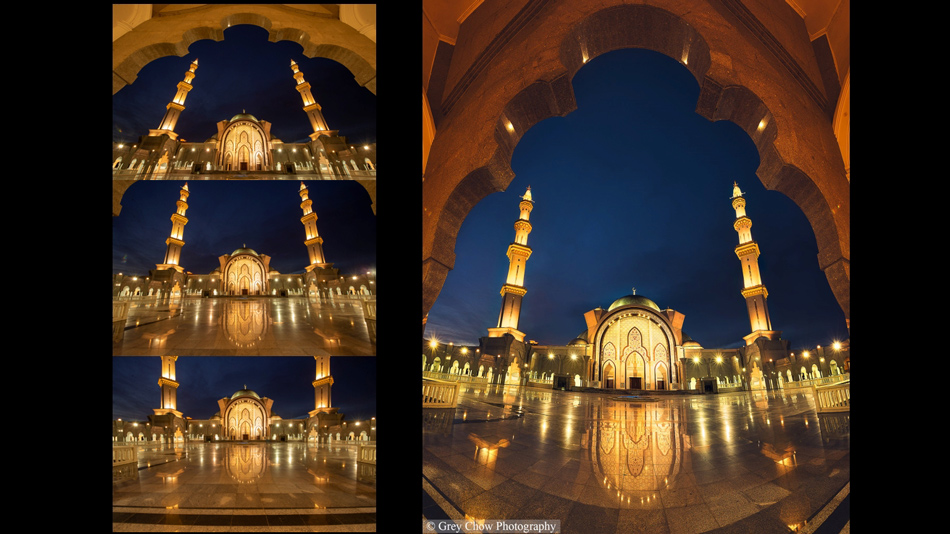
Alternatively, you can also try out the vertical version of a panoramic photo known as vertorama. Same as panorama, but instead of taking from left to right, you take the photos from bottom to top in landscape orientation.
For better merging results, you can consider investing in panoramic equipment, which also helps resolve the parallax problem.
Summary from Grey Chow Photography
So, that’s all for this article. I hope my article on how to shoot better cityscape photos. Happy Shooting! 😊
Grey is an award-winning travel photographer based in Kuala Lumpur, Malaysia. Passionate in Nature Landscape and Astronomy photography. Be sure to check out his website and Facebook page.
Happy shooting!
Thank you for reading this article on How To Take Better Cityscape Photos, be sure to sign up for our newsletter for more tutorials and great offers.

Enter your email below and join our community of more than 100,000 photographers who have also
Subscribed to our newsletter.
Downloaded our FREE Photoshop Course.
Got our FREE Easy Panel for Photoshop.
And, have our FREE Essential Guide To Luminosity Masks E-Book.
FREE Photoshop Course

The Art Of Photography

Raya Pro for Photoshop
