Increase The Tonal Range Of Your Images
We are going to look at how you can use Photoshop to increase the tonal range of your images. Sometimes we want a soft image, an image with a slight haze of subdued whites and soft grey shadows. Other times we might want the full tonal range in one image. We’re always cautious not to clip our images when capturing them with our cameras. Clipping occurs when we take an over-exposed image and areas a far too bright. Adversely if we take an underexposed image which is far too dark. We can use under-exposed and over-exposed images to great effect when blending images. In this tutorial, we’ll explain why it is important. And we’ll show you how to make sure that one image has the entire tonal range in it.

Why Is It Important To Have The Full Tonal Range In Our Images?
In short, it is for completeness. A lot of the great images we see posted on the internet on an almost daily basis have a full tonal value. It is something that some world-leading photographers always ensure their images have where possible. I say where possible because sometimes it’s not possible, or preferable. There aren’t many scenarios though, only in environments bathed or starved of light where either black or white don’t exist. In a lot of what we do in post-processing such as Luminosity masking, Exposure blending and HDR we always strive for a tonal equilibrium. Whether we’re using 1 exposure or multiple exposures.
In this tutorial, we show you how to make sure one single exposure have a full tonal range from 0 (black) all the way to 255 (white). These steps can also be taken at the end of your workflow. If you’ve combined several exposures and done all your fancy tricks to get the image exactly how you want it, I challenge you to give this a go and see what a difference it has on your images. We kept the whites and blacks down to a minimum in the below example, but you don’t have to, you can still have excessive black or white in your images. By carrying out this little adjustment at the end of your edit you will ensure your images have a complete and full tonal range in them.
How To Test The Tonal Range In Images
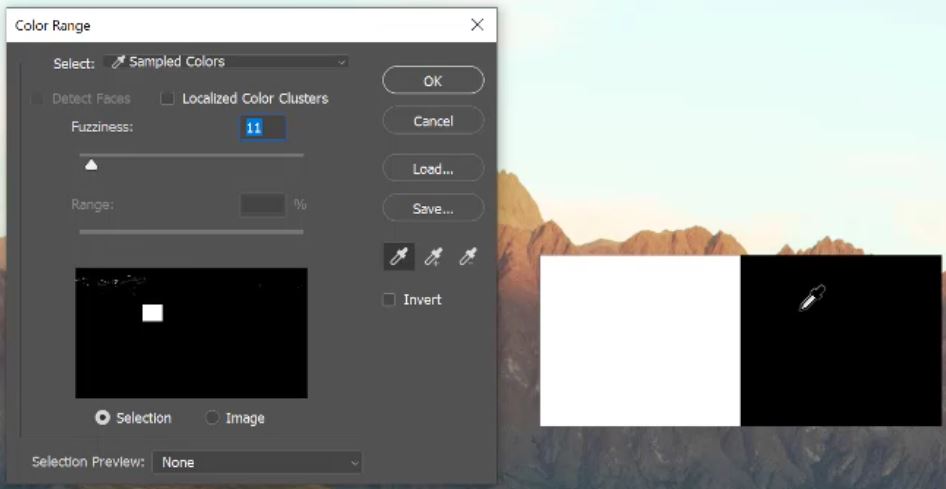
1. To test your images tonal range, you’ll to make two samples first. One black, and the other one white. alternatively, just right click on the image below and save it to use.

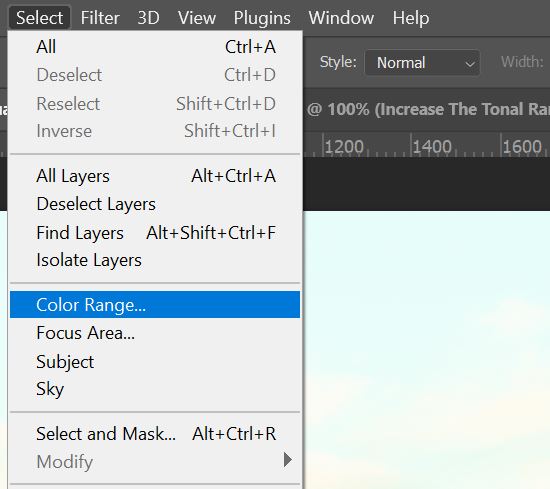
2. With the black and white samples visible on top of your image go to the Select menu in Photoshop and choose Colour Range.
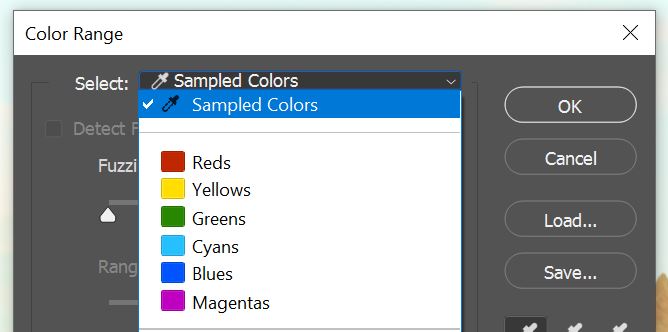
3. When the Color Range box appears, makes sure you select “Sample Colors” for your selection method.
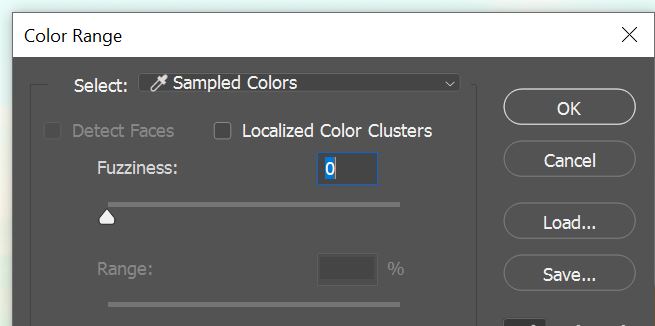
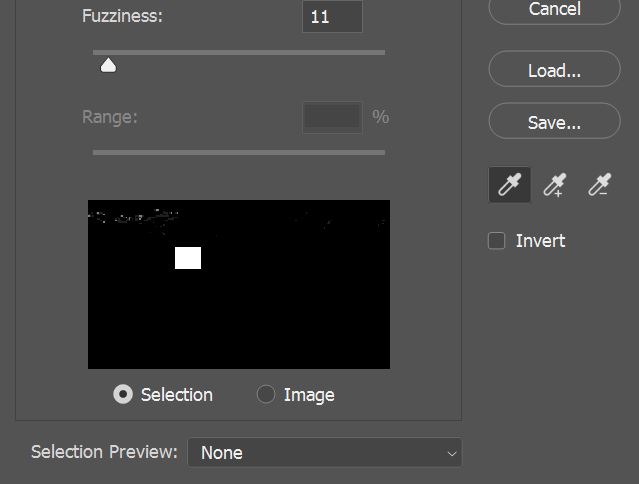
4. Set the Fuzziness slider down to 0 (zero).
5. Now click on the white square. This will show you all of the WHITE pixels in your image. As you can see below mine are all in the white square, so I have none in the image.
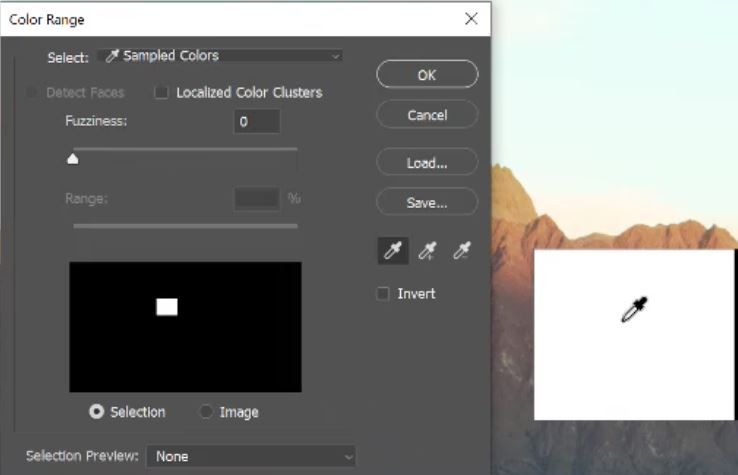
6. Slide the Fuzziness slider right until some white pixels are revealed. This gives us a clear indication that there is no white present and roughly where our tonal range is in relation to white (255).
7. Now click on the black box with the sampler tool.
8. Then slide the Fuzziness slider again until you reveal black pixels in your image. This gives us a clear indication that there is no black present and roughly where our tonal range is in relation to black (0).
Enter your email below and join our community of more than 100,000 photographers who receive regular tutorials and have also

Subscribed to our newsletter,
Downloaded our FREE Photoshop Course
Got our FREE Easy Panel for Photoshop
And have our FREE Essential Guide To Luminosity Masks E-Book
How To Increase The Tonal Range Of Your Images
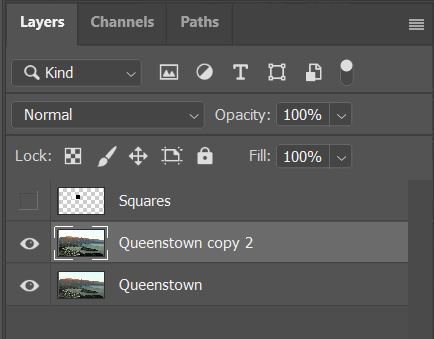
1. To make sure that we’re not working on the original or complete image I first make a copy and select it to work on.
2. Next I go up to the Filters menu and choose the Camera Raw Filter.

3. Hold down the Alt key on a PC or the Opt key on a Mac and slide the Whites slider to create your white point.
4. Slide the Whites slider until some actual white appears in your image.

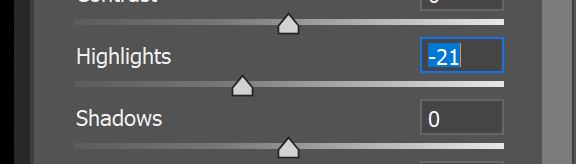
5. To reduce the selection slightly, hold down the Alt/Opt key and move the Highlights slider.
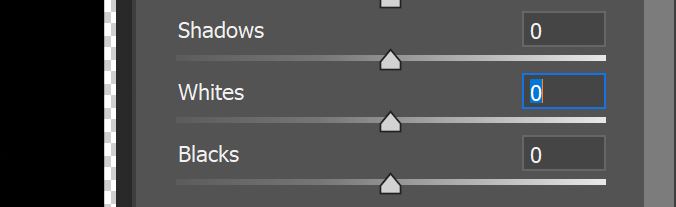
6. Now do the same with the Blacks slider. Move the slider left to create a black point.

7. While holding down the Alt/Opt key slide the Blacks slider until some actual black appears in your image.
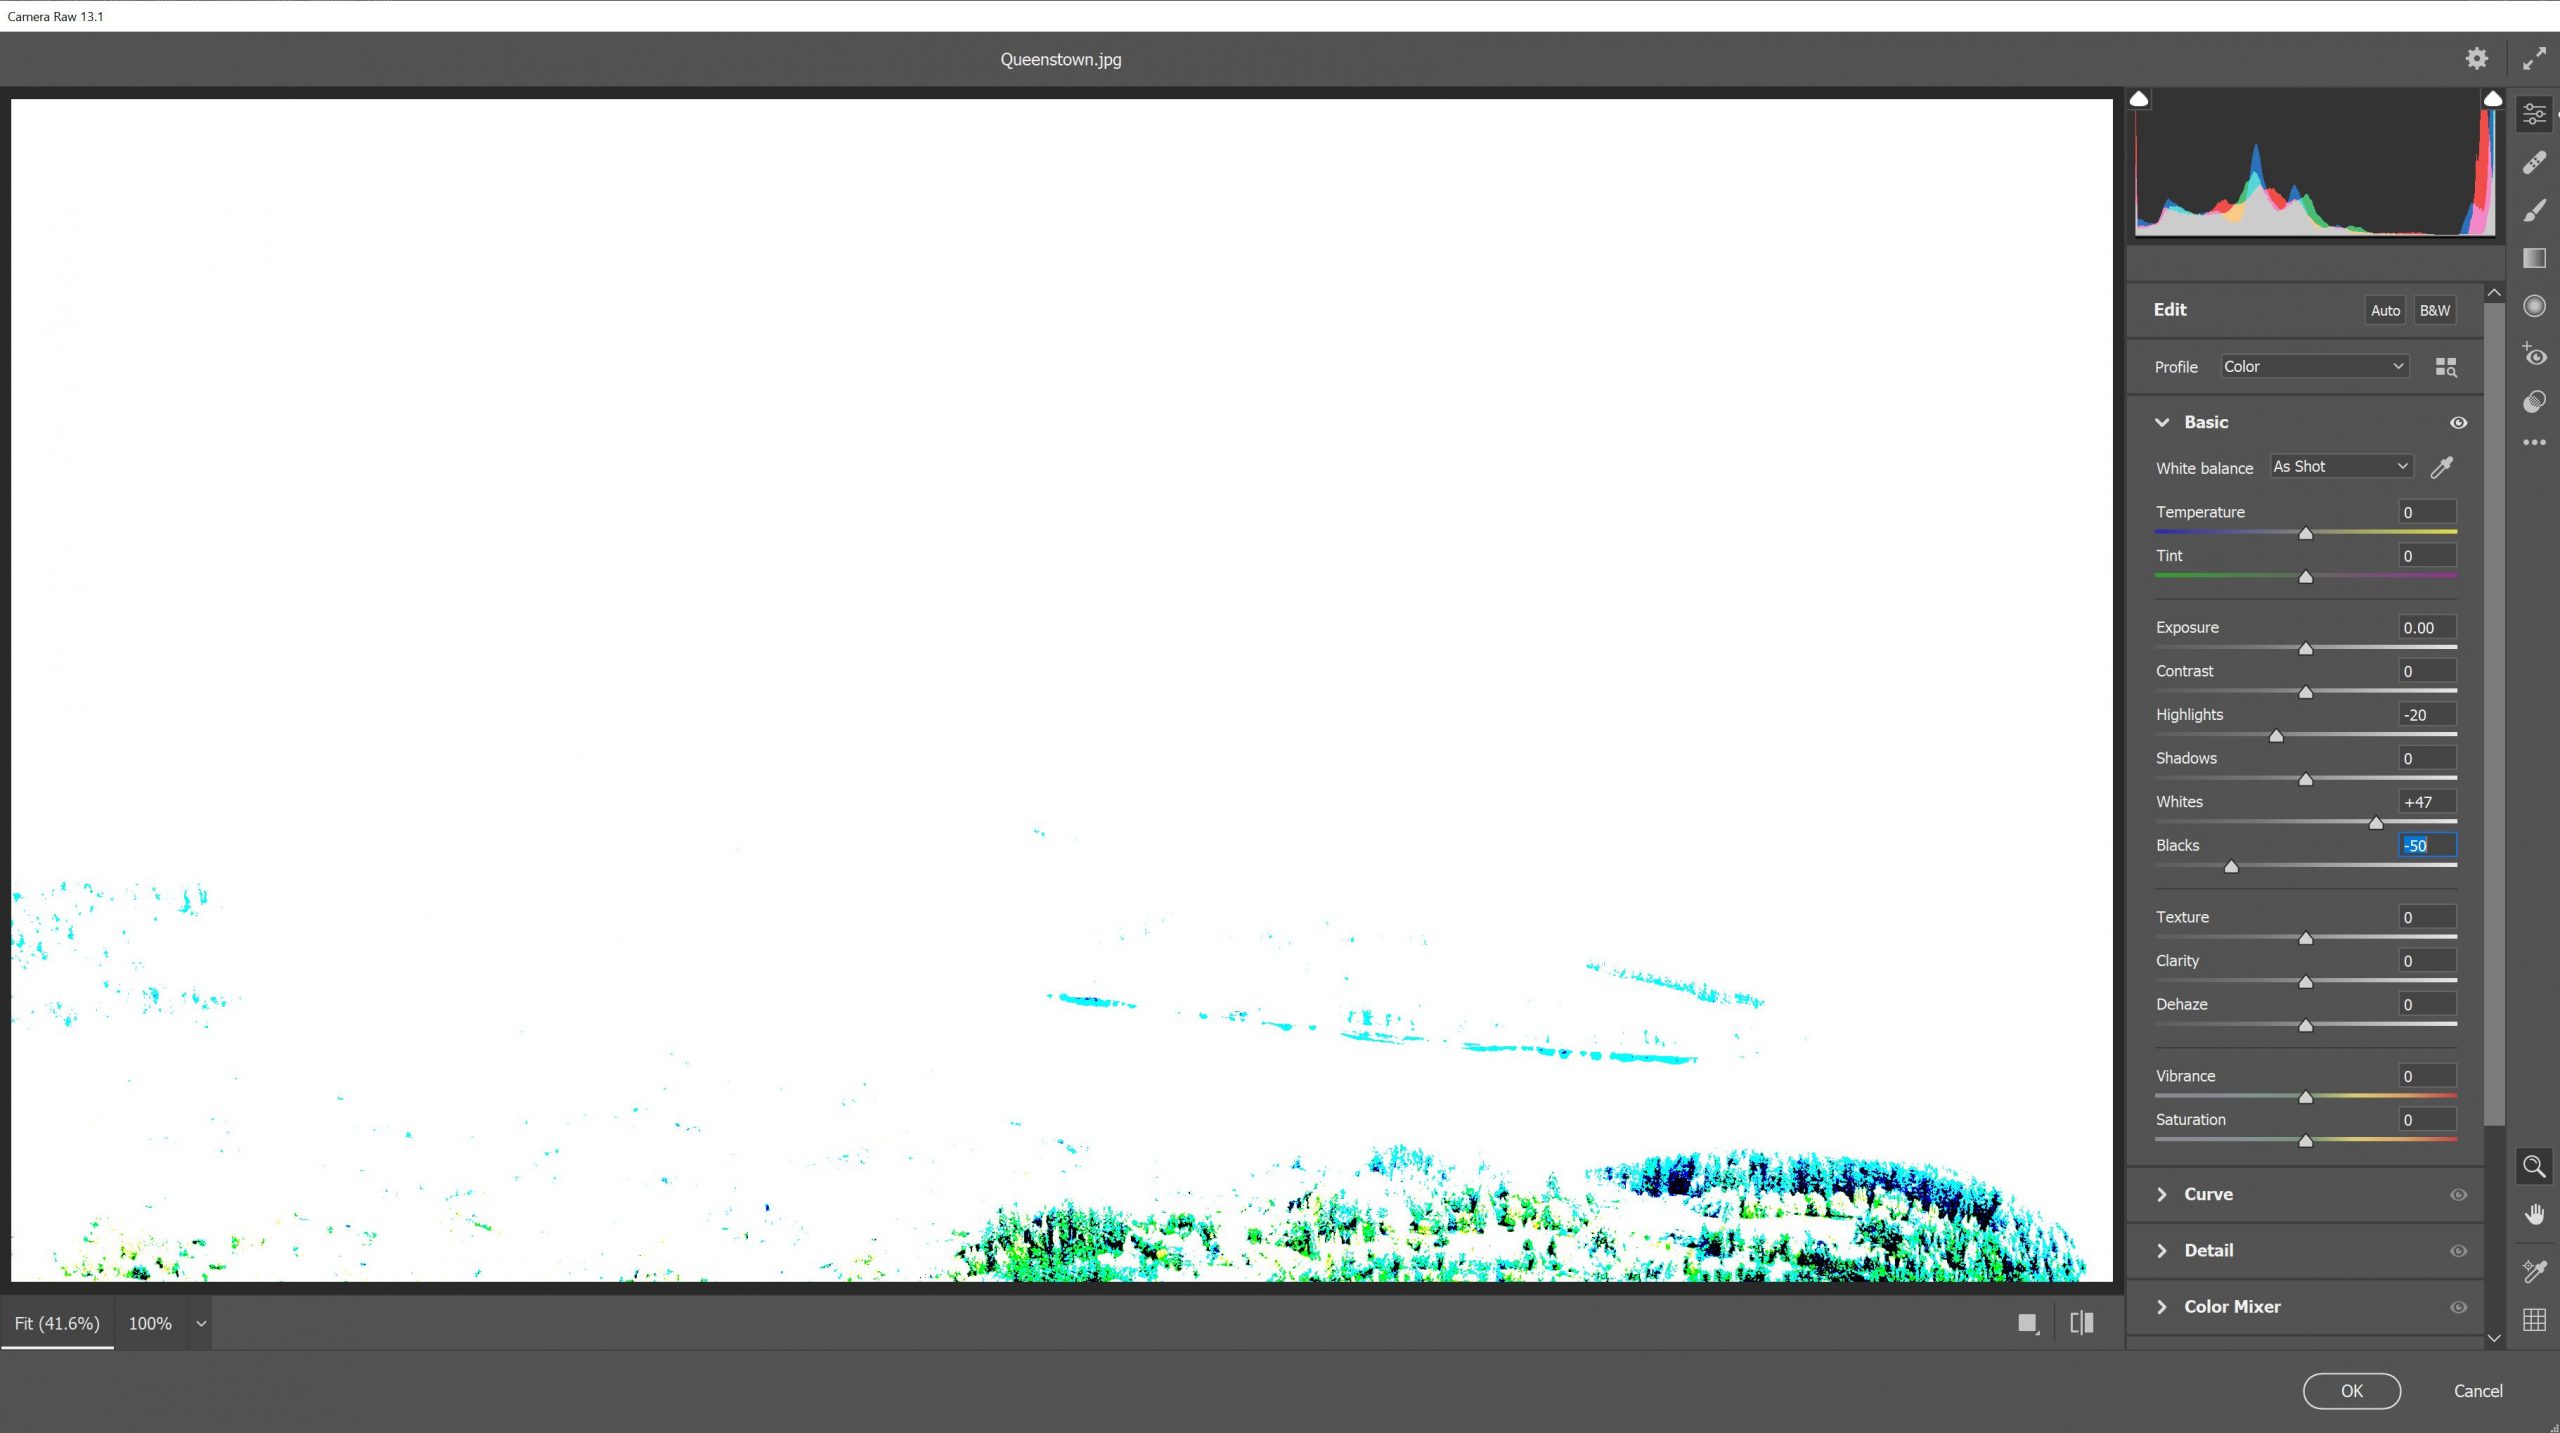
8. Now slide the Shadows slider to further restrict the blacks in your image.

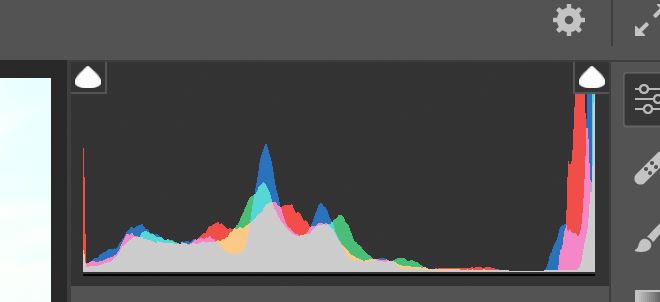
9. A great indication that you now have black and white in your image is by watching the Histogram. As soon as black is present the raindrop type icon on the top left of the Histogram turns white. When white is present the raindrop in the top right turns white.
10. When you’re done in Camera Raw click ok to accept the changes and return to Photoshop.
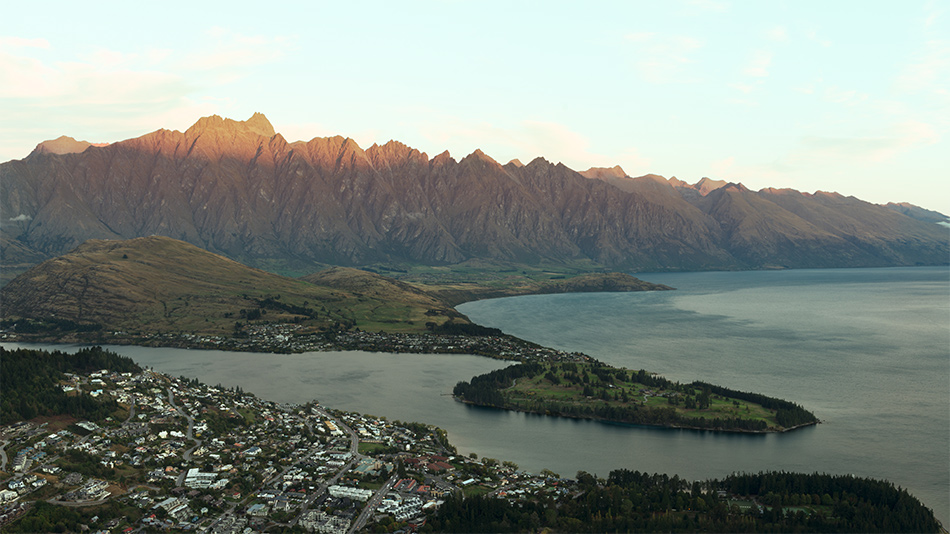
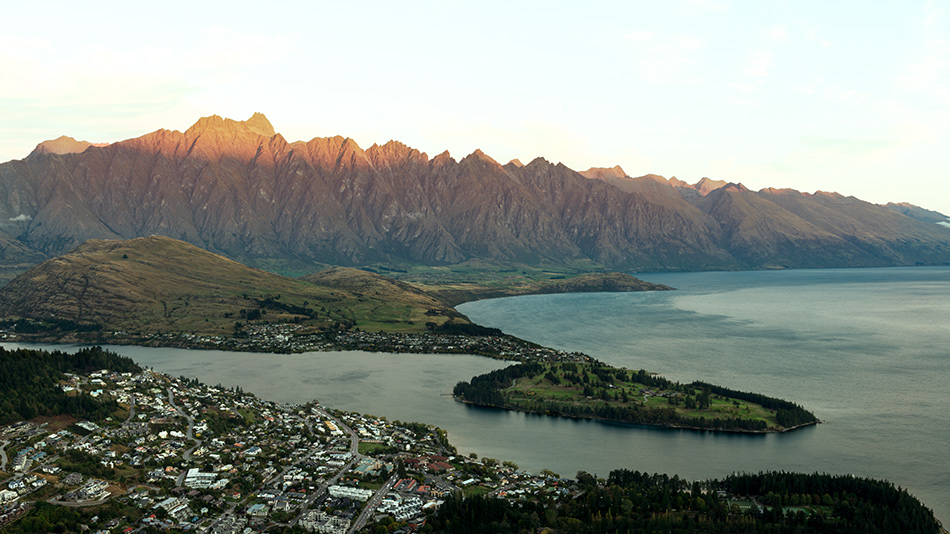
This is an interesting experiment. In the example image that I used, I was really happy with the foreground at the end. But I felt the sky was too bright. The sky was bright in the image anyway which is why we never used the image. I chose this image because despite its bright and boring sky the image appeared to have a full tonal range to start with. It was only under scrutiny that we revealed that even a well-balanced image doesn’t contain the full tonal range.
I would definitely work on the sky before using this image further. This Image could now certainly be used as a really good base image to be blended with darker and lighter exposures. This would help add contrast to the sky and bring more detail to the shadows. What I do love is the greater level of detail in the image all round especially in the mountains and town.
[compare]
[/compare]
Thank you for reading this article on How to Increase The Tonal Range Of Your Images, be sure to sign up for our newsletter for more tutorials and great offers.

Enter your email below and join our community of more than 100,000 photographers who have also
Subscribed to our newsletter.
Downloaded our FREE Photoshop Course.
Got our FREE Easy Panel for Photoshop.
And, have our FREE Essential Guide To Luminosity Masks E-Book.
FREE Photoshop Course

The Art Of Photography

Raya Pro for Photoshop

Other Articles That Might Interest You
What Is Dynamic and Tonal Range?
5 Ways to Maximize Your Tonal Values in Photoshop
Histograms and Tonal Range
Understanding Tonal Contrast for Better Photos