What Is Masking In Photoshop? – Photography Tutorial
At the heart of almost every strong workflow in Photoshop is Masking. However, the process of Masking can be, at first, a tricky idea to get your head around.
What Is Masking?
At its most basic level, Masking is a way of making parts of a layer invisible. But the beauty of masking is that it is non-destructive – meaning, we can make something invisible but still be able to make it visible again at any time.
Let’s look at an example.
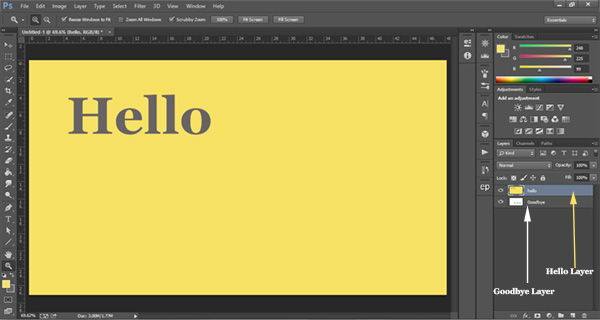
We will be working with two images. One that says Hello and one that says Goodbye.
We layer these in Photoshop. This just means that we put one image on top of the other, just like the layers of a cake. Here, Hello image is placed on top of the Goodbye image.
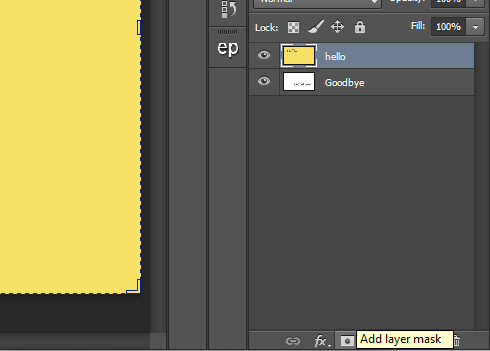
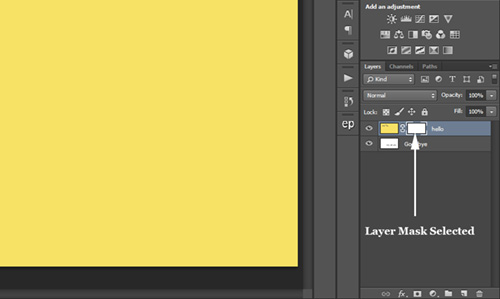
Now we create a Layer Mask. This is very easy. We just make sure to have the image we want to mask selected, in this case Hello, and press the square button underneath your layers that has a circle in it.
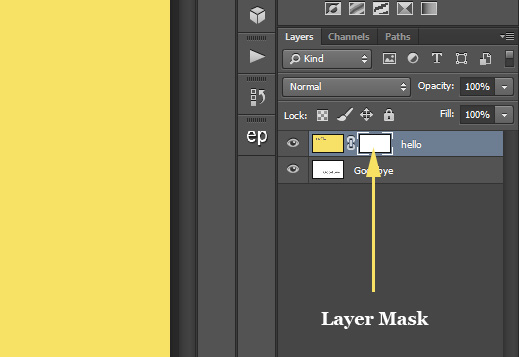
Once you’ve done that, you will see a white square appear next to the Hello layer. This is your Layer Mask.
-Tutorial Continued Below-
Everything is now ready to begin masking.
Before we go any further, it would be wise to look at a simple analogy for Masking.
In Photoshop we have an eraser tool. This does exactly what it sounds like – it erases things. The problem with erasing something is that it is difficult, and often impossible, to get back what you’ve erased further down the line. If you make a mistake, there’s no going back.
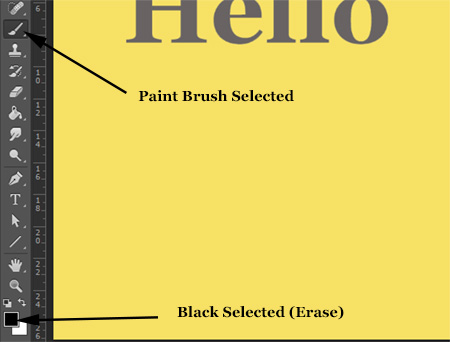
Photoshop came up with Masking to fix this solution. With Masking we erase something (make it invisible) but can very quickly bring that erased area back at any time (make it visible again). We do this by using the Paint Brush, and the colours Black and White.
This is where things can get confusing. There’s no logical reason why the colours Black and White should be associated with erasing and un-erasing. So we have to suspend our logic for a moment.
The rules of Masking are: White = Visible, Black = Invisible. In other words, if you want to erase something, make sure your foreground colour is set to black. Conversely, if you want to un-erase something, you need to have white as your foreground colour.
Let’s look at masking in action. Firstly, whenever we mask, we must have the Layer Mask selected and not the layer thumbnail selected.
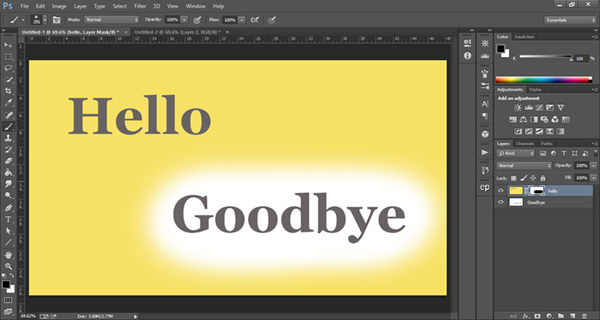
You’ll see that the default colour of the Layer Mask is White. As we already know, white means visible so this layer is completely visible. What would happen if we painted over areas of the image with our Paint Brush and had the foreground selected as black? We’d start erasing the top layer. As in the example below.
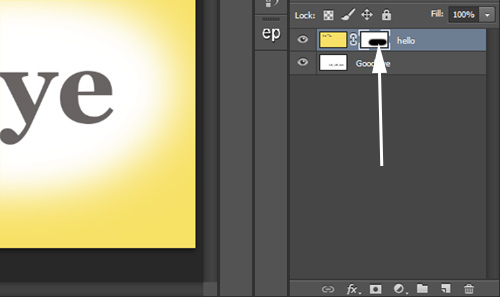
Here we simply run the Paint Brush over the Hello layer to reveal the Goodbye layer below. It seems like we paint on the image itself, but we have the Layer Mask selected, so that is what we’re effecting.
By looking at the Layer Mask thumbnail, we can see a black part which indicates where we’ve just masked.
But if we feel we’ve made a mistake, we can simply change our foreground colour to White, and paint over the area we just erased. This will bring back that area. As you can see below, we’ve brought back some of the Hello layer.
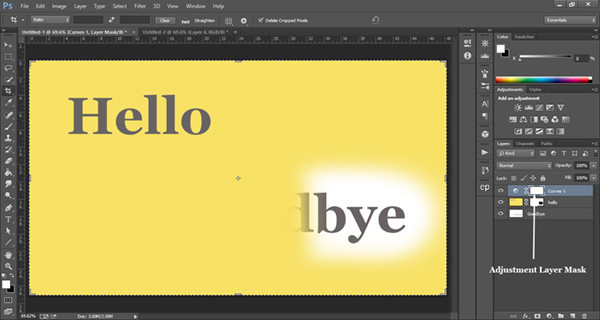
That’s it! The great thing about Layer Masks is that all adjustment layers, like Curves Adjustments, or Levels, all come automatically with a mask, ready for you to make more accurate and specific changes.
Some more Classic Articles on Shutter…Evolve
Photoshop Shortcuts For A Non-Destructive Workflow
Luminosity Masks Tutorial – Specific Contrast Adjustments
Other Articles on Masking
Fast masking in Photoshop: 5 pro tips
Thank you for reading this article, be sure to sign up for our newsletter for more tutorials and great offers.
