Quick Photoshop Secrets 1: A Fast And Easy Method To Correct Colour
This is the first in a series of quick and easy tutorials, showing you some of the lesser-known useful techniques in Photoshop. In today’s tutorial, we’ll learn at what colour cast is and why it appears. Then, we look at an extremely powerful, but very easy method for quickly correcting colour/removing colour cast in Photoshop.
What Is Colour Cast And Why Does It Appear?
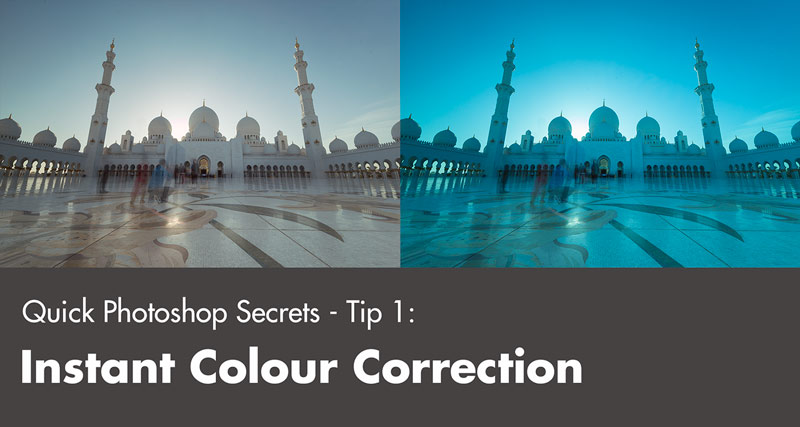
Colour cast is what we call the presence of an unwanted colour in your image which affects the overall tone. It usually appears as a result of light reflection or white balance adjustment. For example, a green tint can be caused by shooting in fluorescent lighting. Sometimes we will create colour cast on purpose by using filters. These can be used to either give our images deeper tones or when you need to increase the contrast in certain areas of our images.
In this example, we used a formatt hi-tech filter to capture more details from the building. Near the end of the video you will see an image taken without a filter. Note, how flat the unfiltered image is in comparison to the filtered version.
How To Colour Correct The Fast And Easy Way
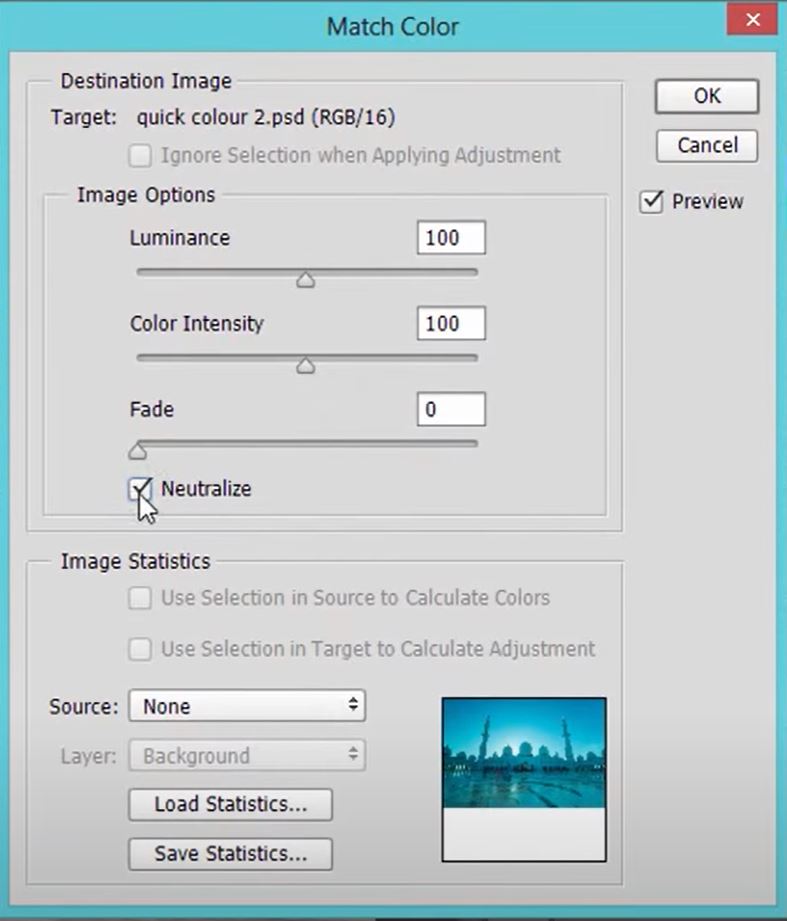
All you need to do, while in Photoshop, is go to Image>Adjustments>Match Color. Then, a dialogue will appear. Around the centre of the dialogue, you will see ‘Neutralize’. Check this and hey presto! you’re done.
Learn How To Colour Correct With Images
1. First, With your image selected, go to Image on the top menu bar.
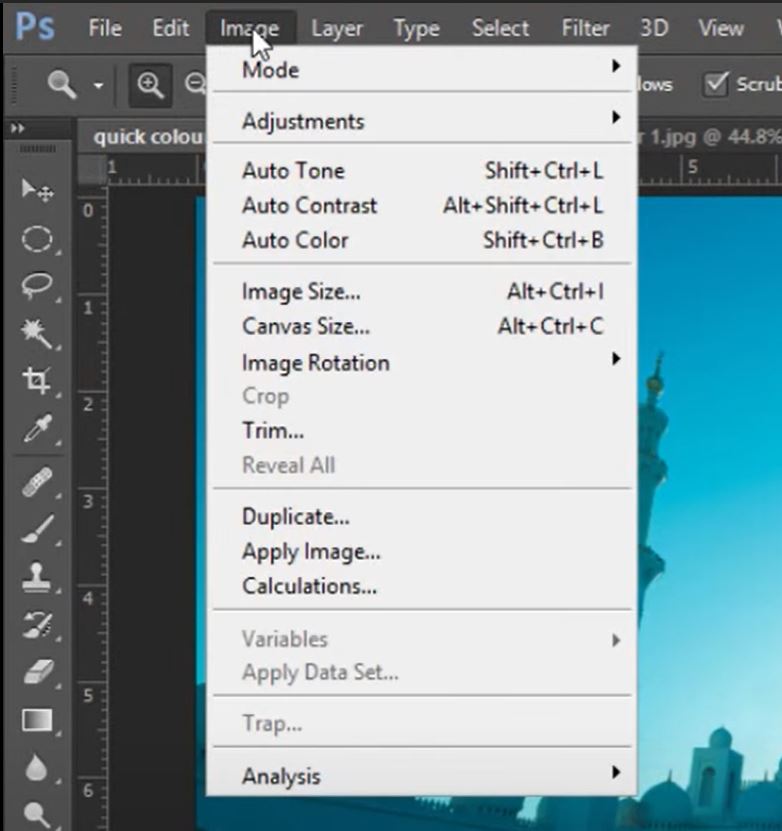
2. Near the top of the Image dropdown list, you will find Adjustments.
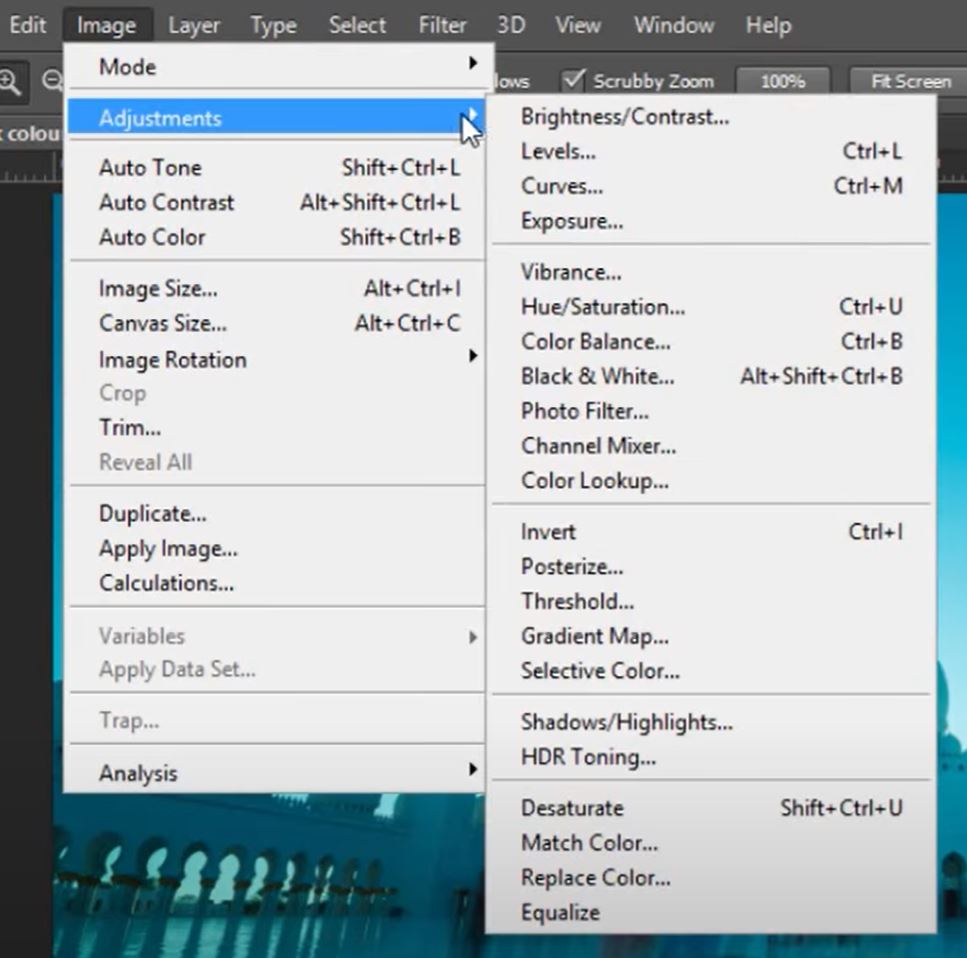
3. When the Adjustments sub-menu appears, look near the very bottom to find Match Colour and click on it.
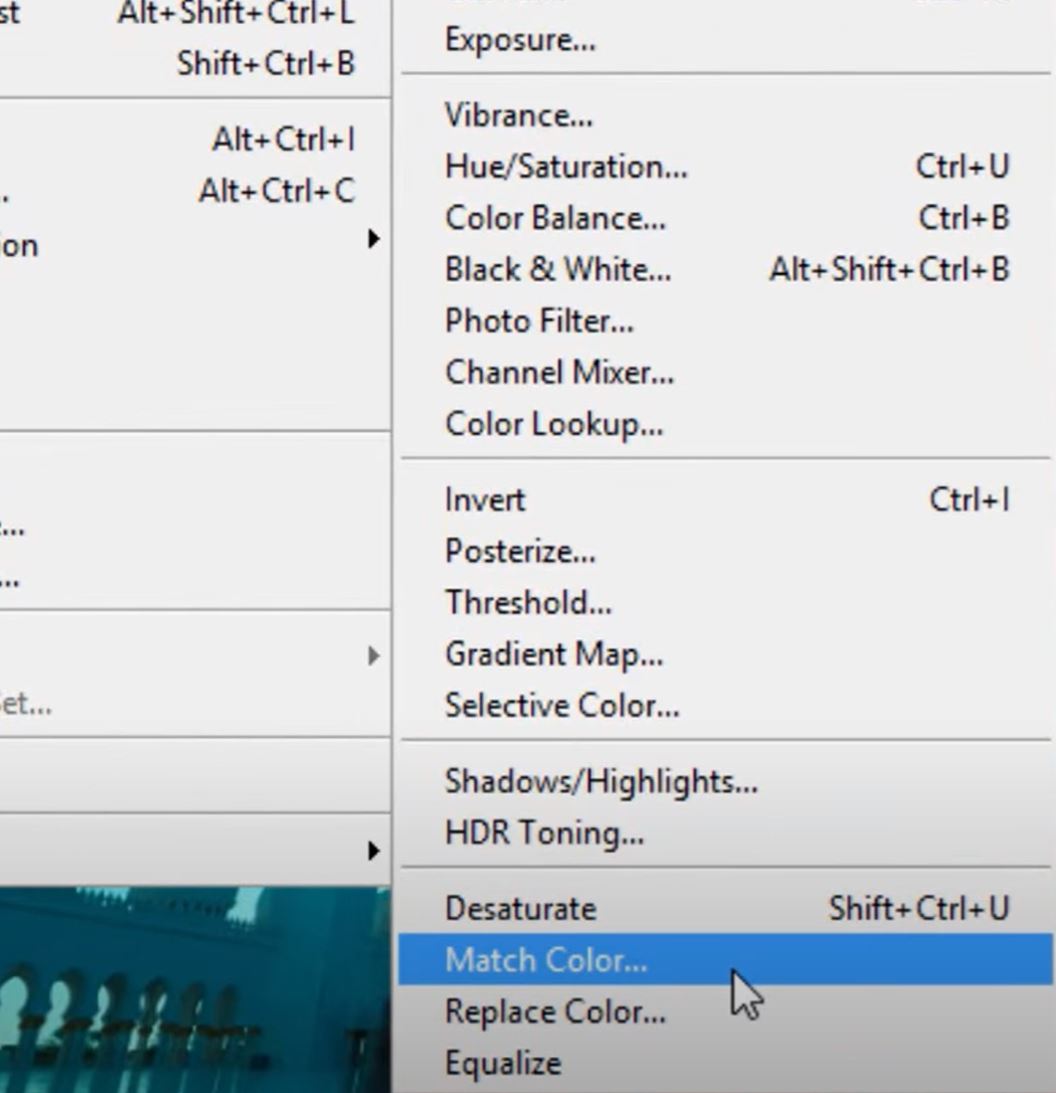
4. This is the important part. Finally, select Neutralise in the Image Options section. Making sure that a tick is displayed in the box, then press ok.
