
Quick Photoshop Secrets 15: Paint a Beautiful Sunset/Sunrise
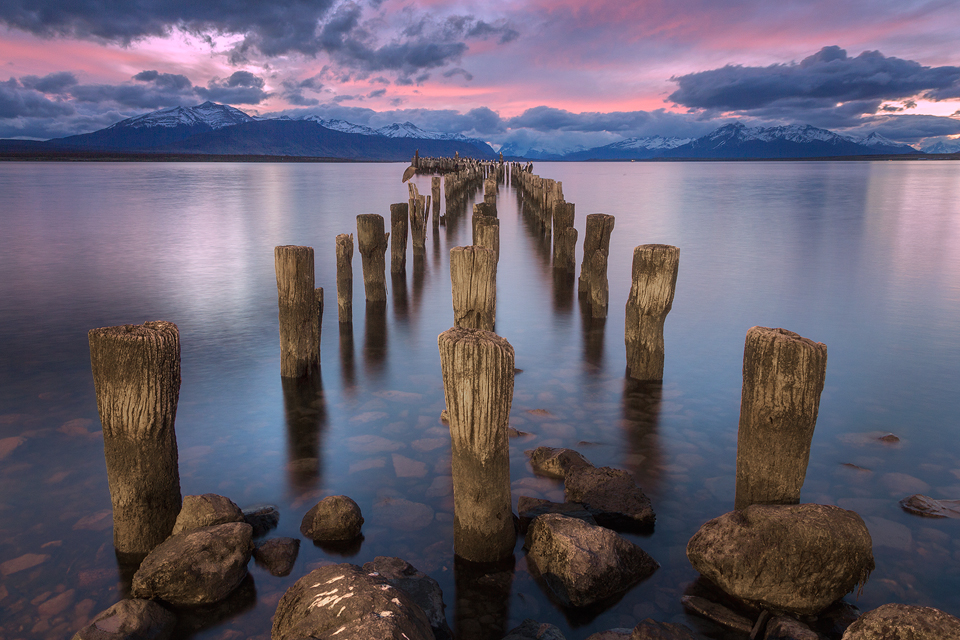
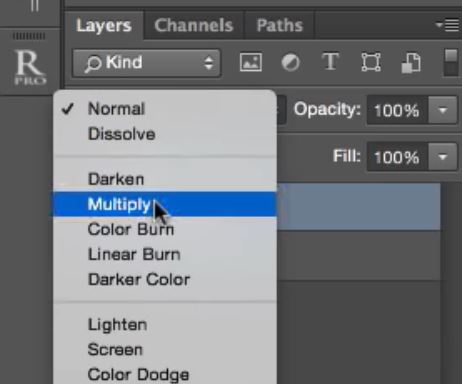
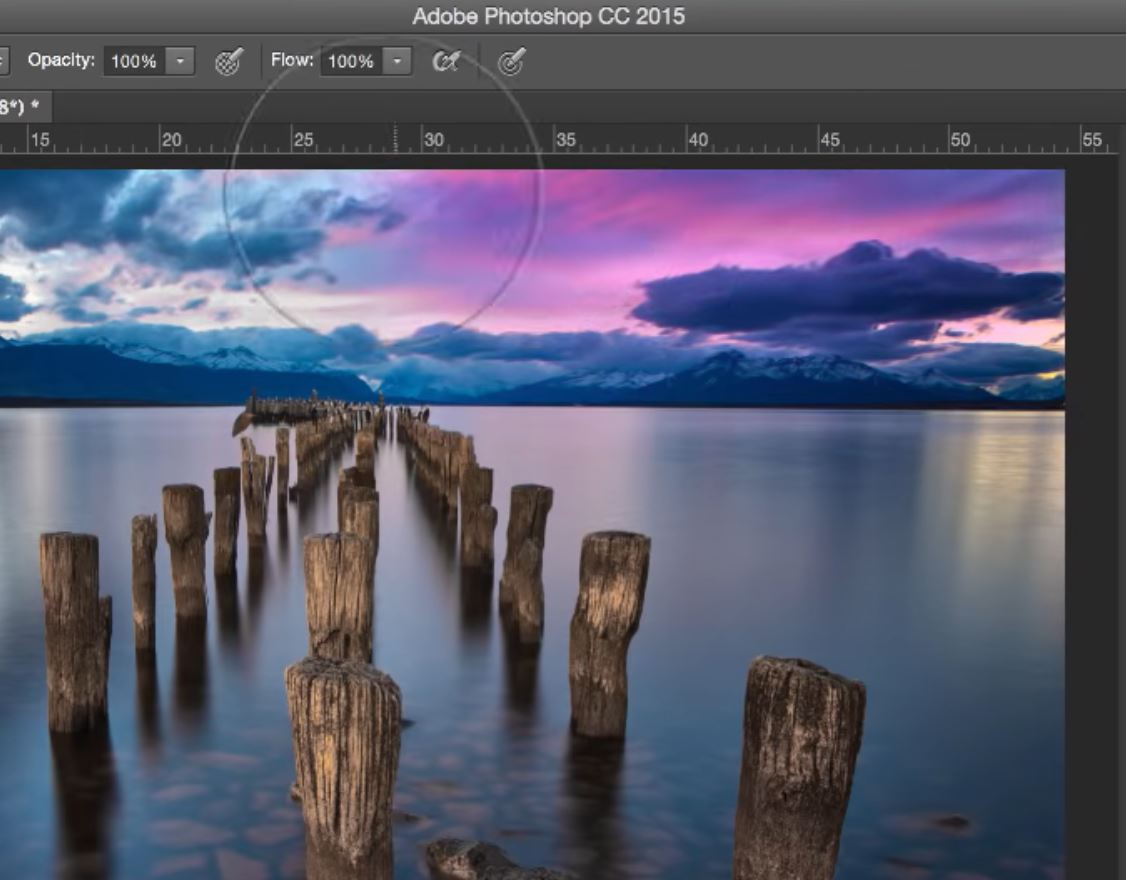
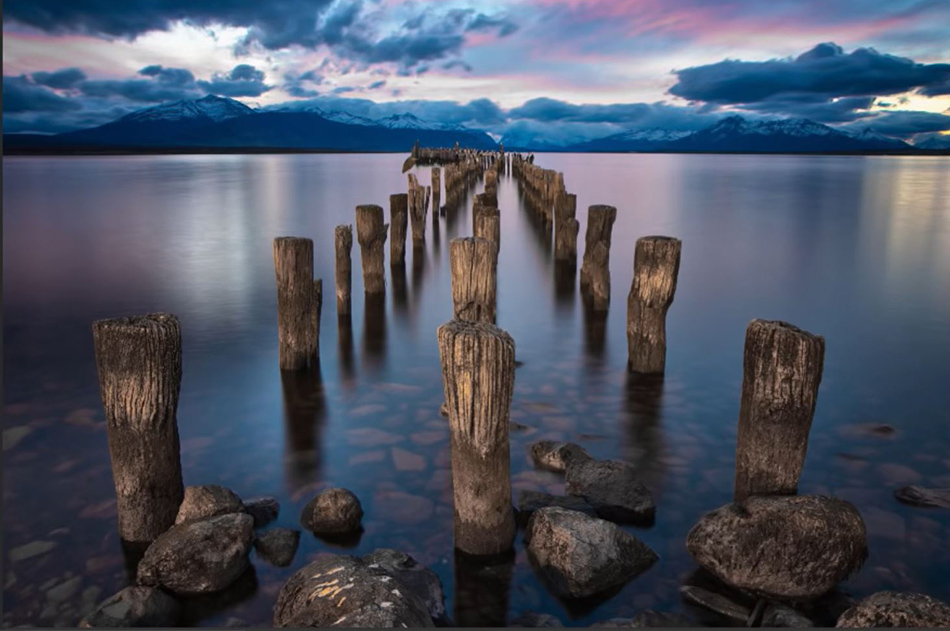
Carrying from our last tutorial on Light Bleeding, we look at another technique that will help paint a beautiful sunset/sunrise crating a more impactful image in Photoshop. We are literally painting colours into the sky. We do this on a new layer, with its Blend Mode set to Multiply and then paint a colour that roughly matches the existing golden hour colour.
This technique works best when there already is some colour in the sky, and some cloud textures to work with.
Paint a Beautiful Sunset/Sunrise Step by Step Guide
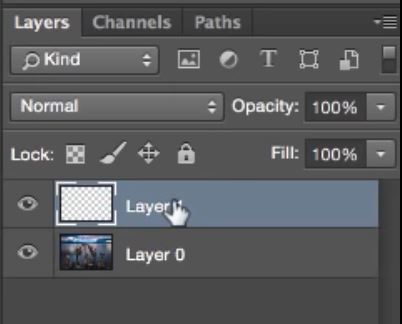
1. Add a new layer.
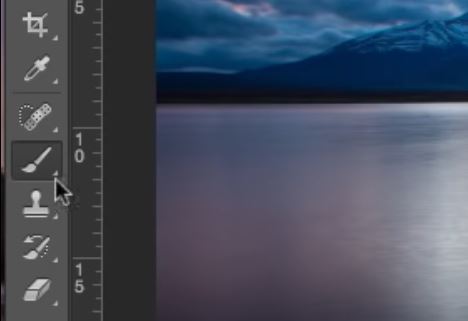
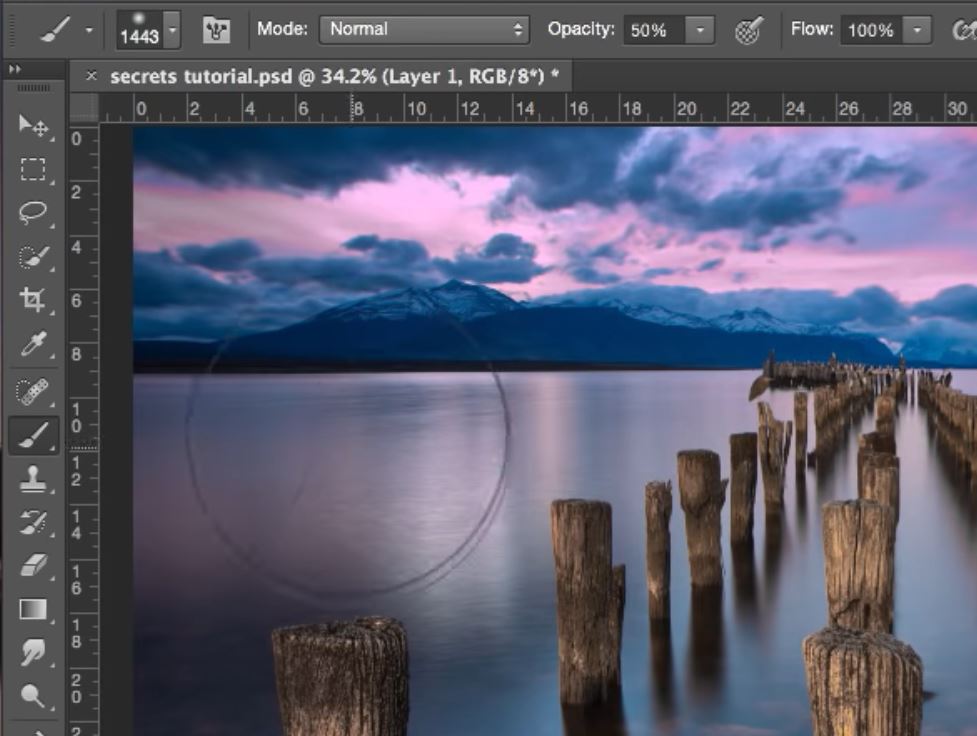
2. Select the Paint Brush tool.
3. Set the brush opacity to 100%.
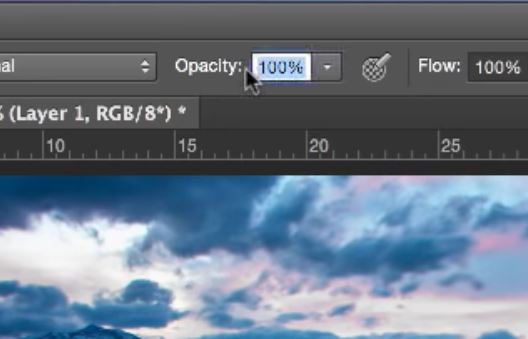
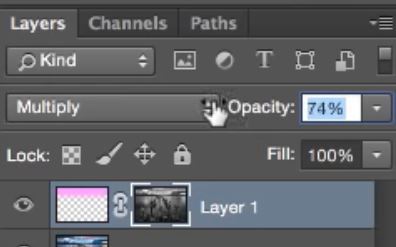
4. Change the Blend Mode to Multiply.
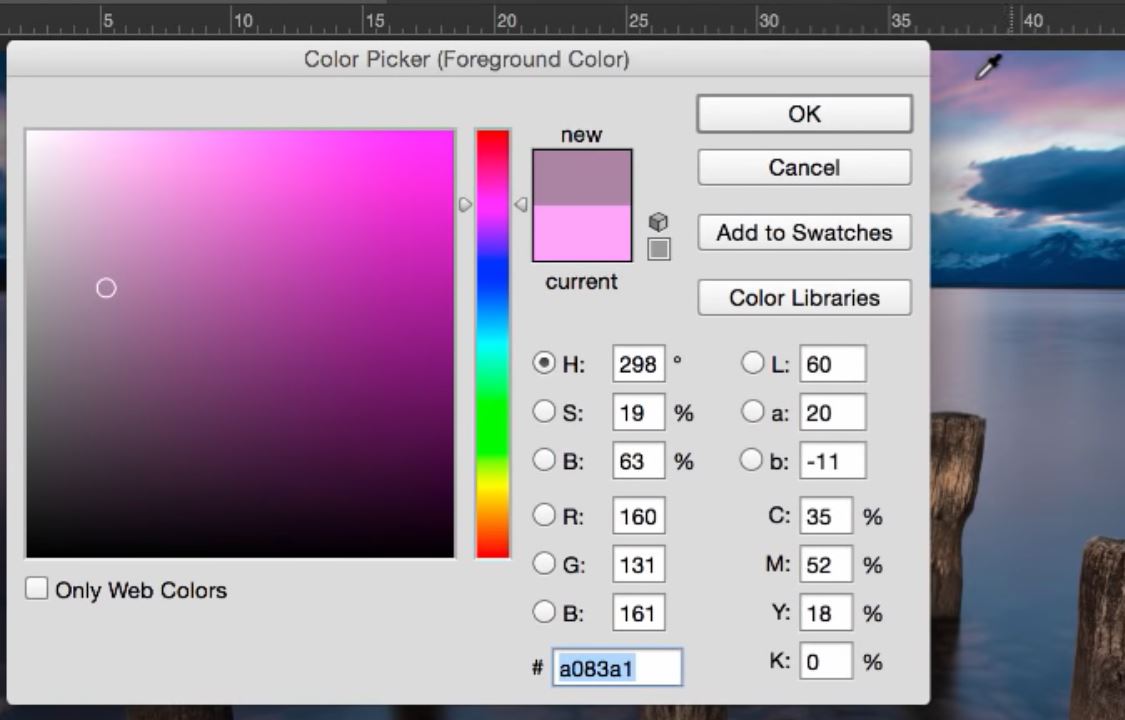
5. Select the foreground colour using the dropper tool.
6. Paint in the desired colour.
7. Add a layer Mask.
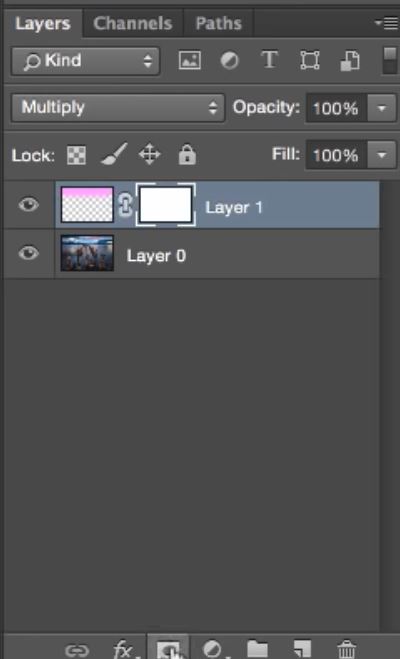
8. Disable the visibility of the top layer.
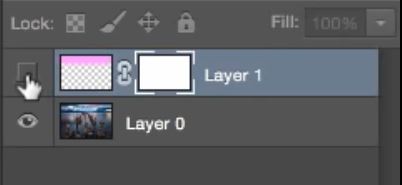
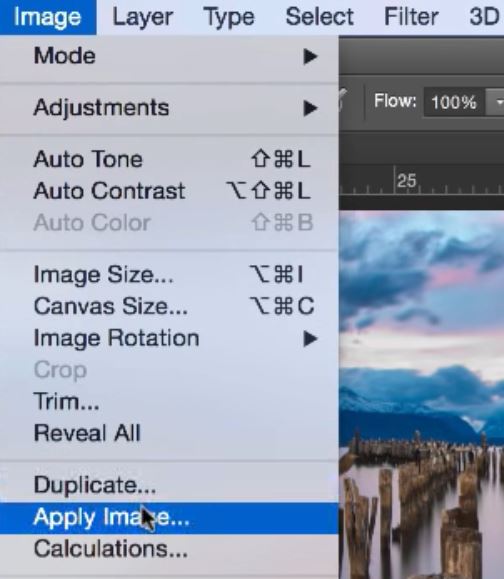
9. With the top layer selected, go to Image>Apply Image.
10. Ensure your settings are the same as ours and click OK.
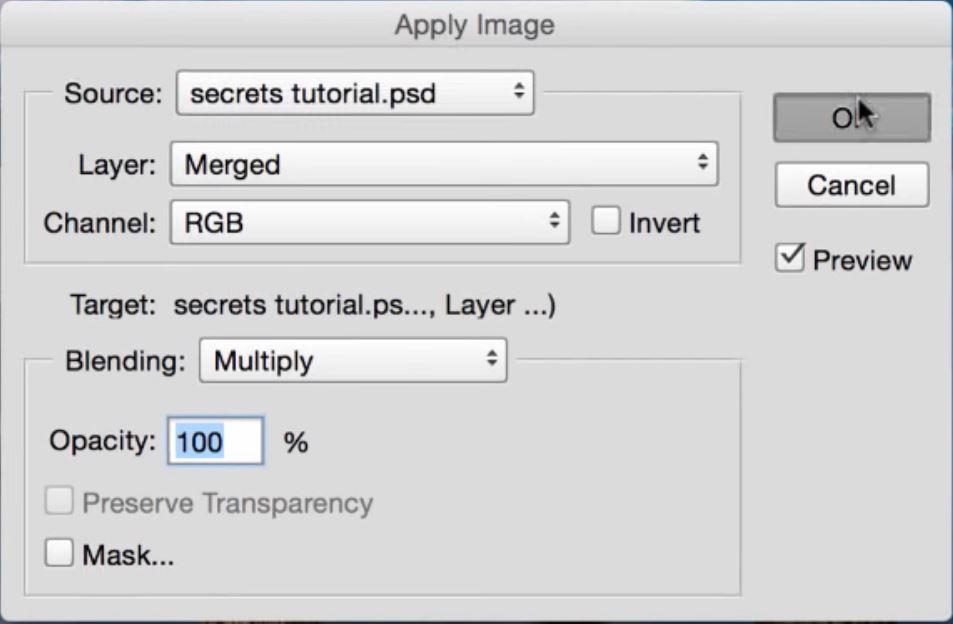
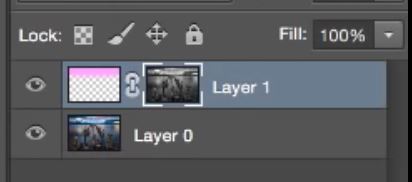
11. The image will be applied to the mask. Enable the layer visibility.
12. Reduce the layer opacity to give a more natural tone.
13. Reduce the brush opacity to 50% and paint in highlighted areas to bring balance. In our case the reflection of the sky.
14. If the colour is not quite right, open a new Hue/Saturation layer.
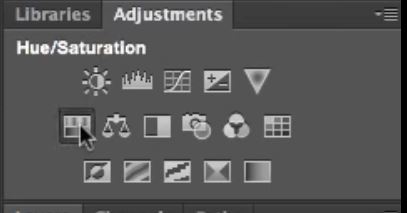
15. Create a clipping mask so the Hue/Saturation layer only affects the layer directly below.

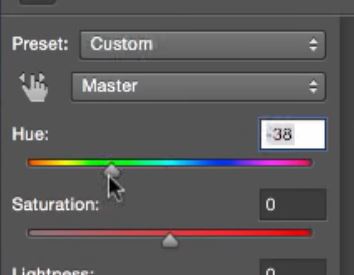
16. Slide the Hue slider to change the colour tone to where you feel is best for your composition.

Feel free to join the almost 85k other photographers and subscribe directly to my youtube channel for more useful tutorials: Jimmy McIntyre YouTube Channel
Follow our Photoshop Secrets series of tutorials.
There are of course various ways to add colour to skies. Here is an alternative method: https://www.youtube.com/watch?v=3LONKqAgWUs
Enter your email below and join our community of more than 100,000 photographers who have also
Subscribed to our newsletter.
Downloaded our FREE Photoshop Course.
Got our FREE Easy Panel for Photoshop.
And, have our FREE Essential Guide To Luminosity Masks E-Book.
To go directly to any of our products, simply click on the image below.


