
21 Superb Tips That Will Transform Your Cityscape Photos
I’ve been shooting cityscapes for a few years now. Every time you leave the door of your house or hotel, you have no idea what adventure lies ahead and what new locations you might uncover.
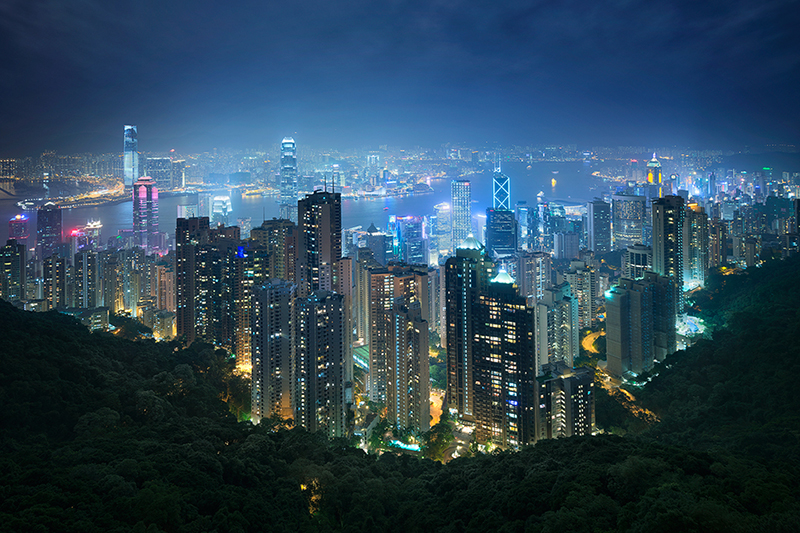
From New York to Dubai, and Paris to Hong Kong, every experience has been incredibly different. I learn more and more about the art of searching out and capturing cityscape photos with each new trip.
I feel that a point now where, dependent on the weather, I’m confident of coming out with an image I like with just about every outing. This seemed almost impossible when I first started out. In this article, you’ll see some of the most important tips, grouped into 3 categories, that I’ve learned in my quest for cityscape perfection.
Important Point: As a useful bonus, you can click on most of the images in this article and see the workflow that was used to create them, and the images before/after processing.
How To Prepare For Cityscape Photography
1. Scout before arriving. As with landscape photography, it will save you an immense amount of time and stress if you search sites like 500px, flickr and even just Google for great images of the city you’re in. When I’m in a new city, I always have a list of must-shoot locations, but I also put a few days aside to explore and look for some unique shots, too.
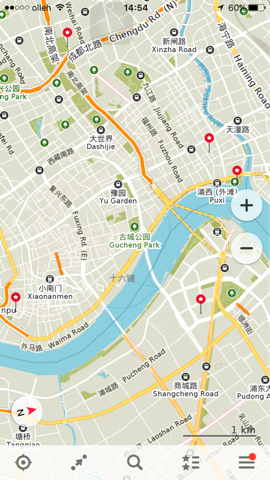
2. Mark all of your locations on a map beforehand. I use Maps.Me for my iPhone, because it is an offline map. Google has recently announced that it will make its Google Maps completely offline too, in the coming months.
There are three main benefits of marking these locations on a map beforehand. Firstly, you’ll know where to go. It’s very challenging being lost, with heavy camera gear on your back in 35c temperature and 100% humidity. Secondly, you arrive on time, with plenty of time to capture that lovely light. And finally, you are less likely to wonder into a less than welcoming area.
The locations marked on my Shanghai map (in red)
3. Coincide your trip when it is low-smog season. At certain times of the year smog is worse than at other times. Visibility, especially in some Asian cities, can be reduced to just a few metres. No matter how good the view is, it isn’t worth shooting in conditions like that.
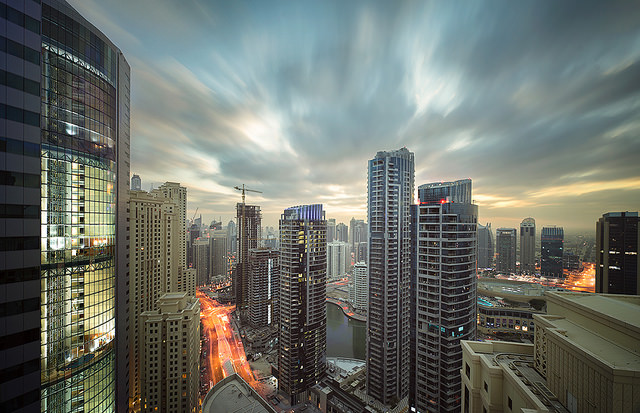
4. Choose a great hotel location. This is more than just how central you are, or how close you are to public transport. If you research well, you may be able to find a great apartment with a killer view. Imagine shooting a beautiful sunrise from the comfort of your own bedroom. In Dubai we rented an apartment based solely on its view (although it was well located too). On our first sunrise we were greeted with a very rare sight in Dubai – clouds. It was so convenient to roll out of bed, take some nice photos, and then eat breakfast and have a coffee.
5. Look into bar/hotel views. This isn’t something I do often, but many cities have Sky Bars, or Sky Lounges where you can go for a drink and enjoy one of the best views in the city at the same time. It is worth calling these places up and asking for permission to shoot when you’re there. Thanks to local photographers, I was able to get permission to shoot from one such place in Dubai.
Learn How I Created This Cityscape With Raya Pro

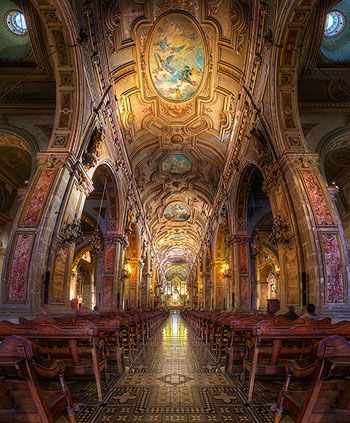
6. Look for interior locations. While most cityscape photographers are competing for roof space, I highly recommend you find some great interior locations for daytime shooting, or if it’s raining.
7. Always have camera strap. Or a clip of some kind will do fine. Some photographers choose to ditch their camera straps because they flap around in the wind. My camera strap, however, gives me serious peace of mind. Whenever I’m hanging off the tops of buildings, I wrap the strap firmly around my forearm so there’s no way it can fall. Or if it’s attached to my tripod, I can strap it to some railings or other fittings. You’d be surprised how many photographers have lost their cameras and tripods over the sides of skyscrapers. Fortunately, I’ve never heard of anyone getting hit by one on the ground.
8. Arrive very early. I’ll admit it now – I’m obsessed with time. I arrive early for pretty much everything. In photography this has been a huge blessing. I can’t count how many times I’ve turned up to a shoot and had my pick of spots. The next hour or two photographers are fighting for the few positions remaining.
9. Search for interesting bridges. Some bridges are justifiably famous, like the Golden Gate bridge. When you’re visiting a new city, be sure to Google interesting bridges in the area. You never know what you might find and they’re a welcome change for the usual epic cityscapes we usually go for.
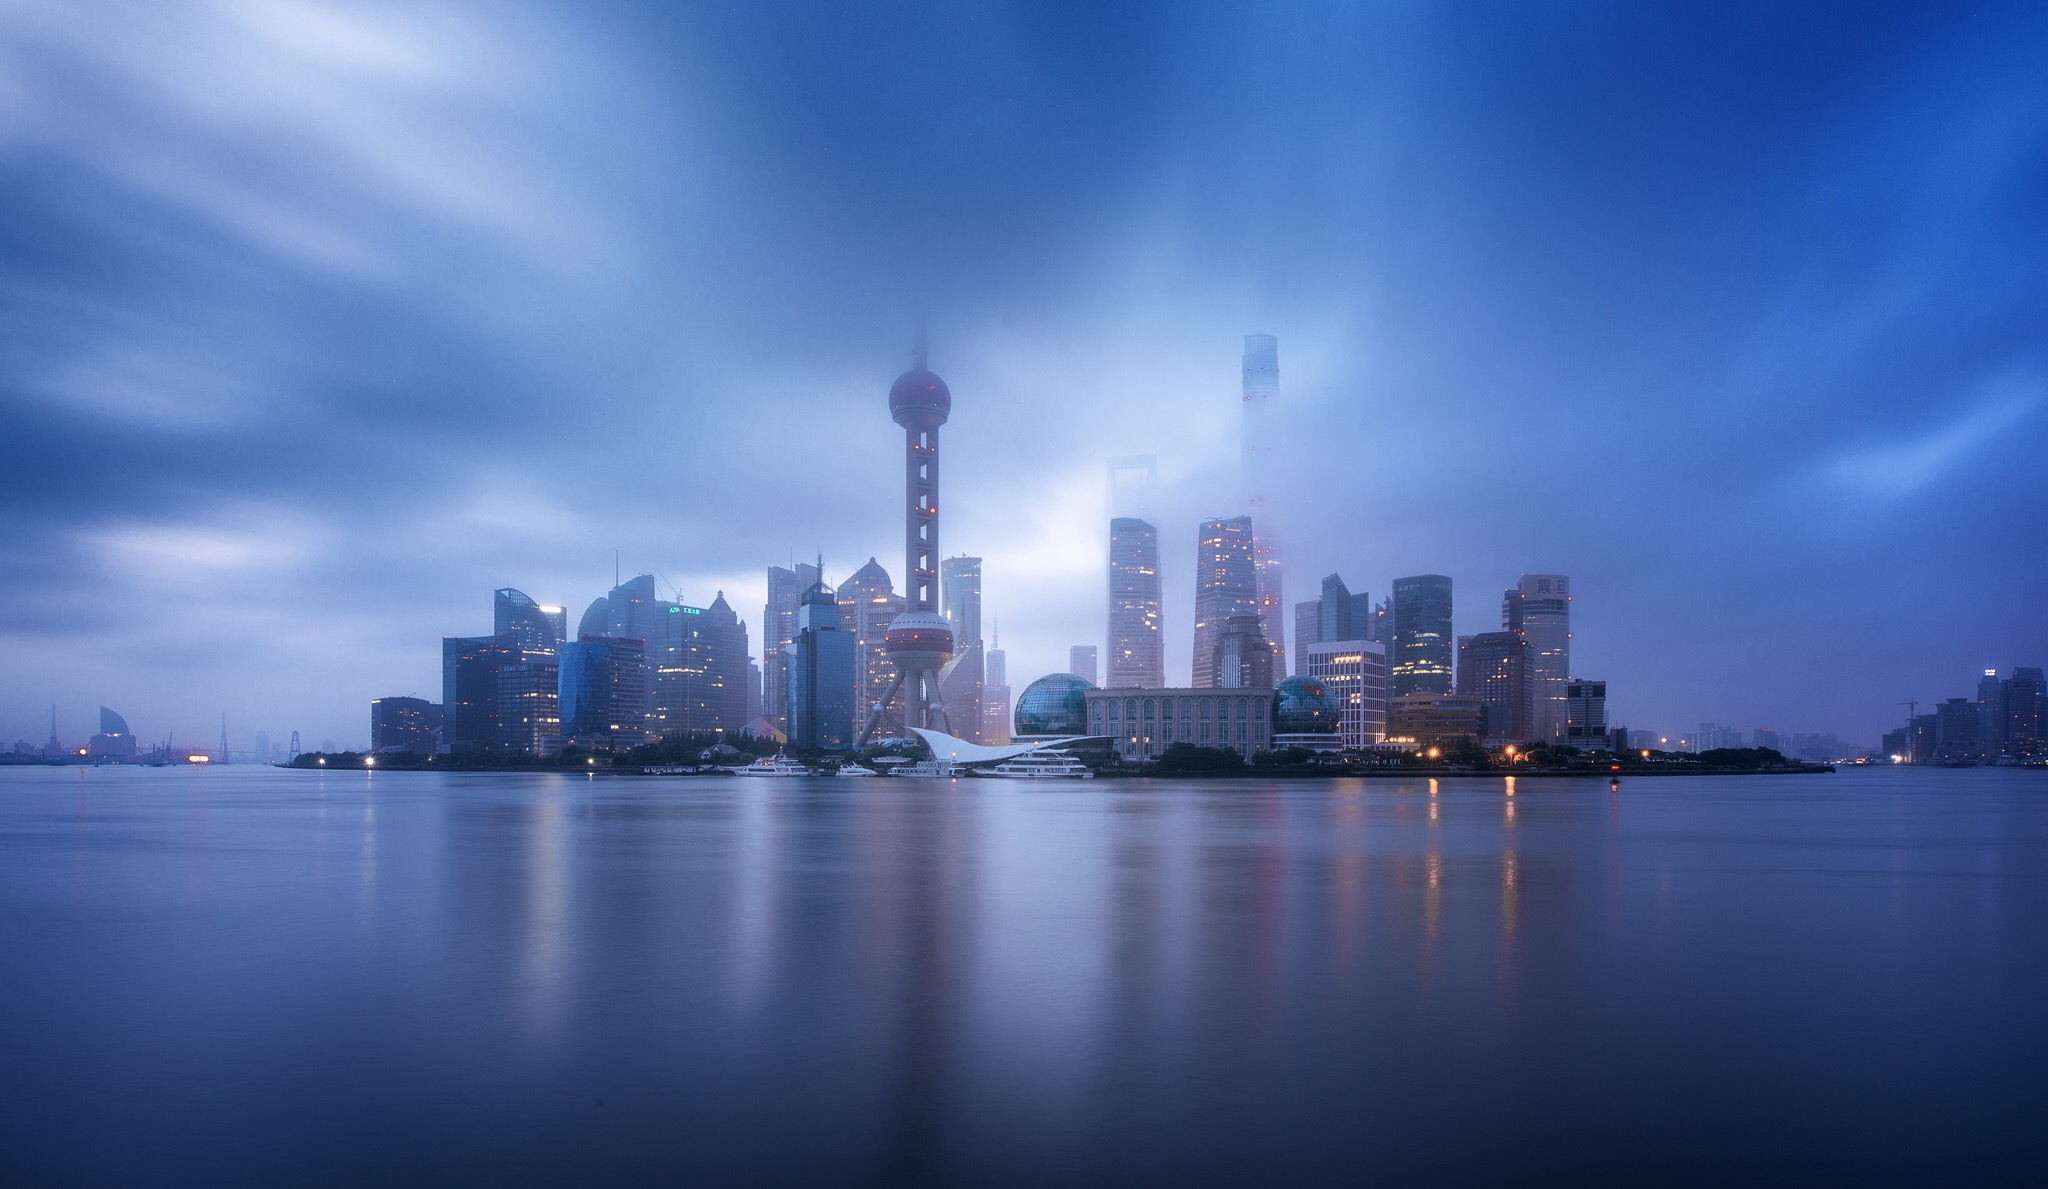
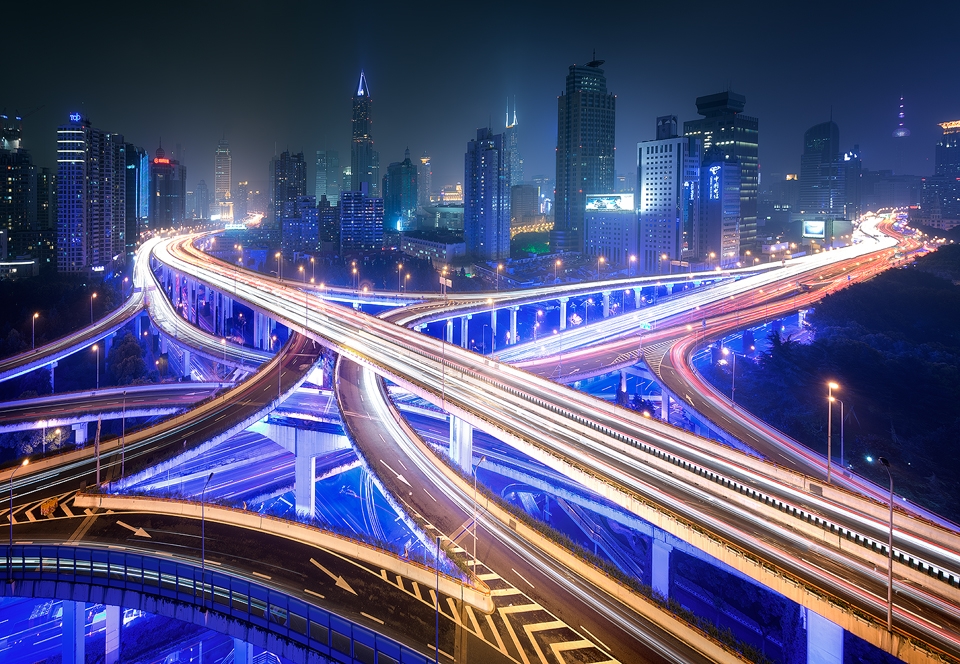
10. Search for quirks. Some cities have unique quirks that only happen at certain times. Google special events to see what’s happening in your chosen city. For example, every weekend the underside of Shanghai’s Tron-link intersection is illuminated blue for a few hours. If you went there during the week, you would miss it.
Equipment For Cityscapes
11. Clamp, or mini tripod. I have both a clamp and mini tripod. The clamp, although I’ve only used it once, is need where tripods aren’t allowed. The mini tripod is great for the rooftopping. Rather than trying to push and pull my large tripod to get over a ledge, I can just plonk my little tripod on the ledge and shoot comfortable.
12. Tripod with an extending column. My Manfrotto 055 tripod has an extending central column. This can be fantastic for pushing out further over ledges, or if there is a line of cameras all on tripods which are just in your frame you peak out your camera that little bit more with an extending central column. You can see other photography gear I like in this post: My Favourite Photography Gear For Travelling
13. Mirrorless might be better. I’ve been stopped three times from shooting interiors by security saying I either look like I’m a professional, or my camera looks expensive so I must be a professional. I’m just guessing here, but you may get stopped less if you’re shooting with a smaller camera.
14. A Small notebook and pen. If you’re travelling in cities where you don’t speak the lingo and you’re negotiating over the price of a bribe to get on the roof, just being able to write the price down instead of communicating non-verbally is much easier. In Shanhai I wrote a price and gave it to the guard. He wrote a different price. We repeated this until we came to a deal. Much easier than talking two different languages.
15. Black tee-shirt. Whenever we’re shooting through glass, which is more often than we’d like, a black tee-shirt will work wonders in reducing flare and reflections from behind you if you place it against the window, and around your lens. Or you could buy those cool suction cups specifically for this situation.
Shooting & Processing
16. Be persistent. It took me half a dozen attempts to get on a Zenith tower rooftop in Busan. If at first you don’t succeed, keep coming back until you do.
17. Spotless lens & Kleenex. I always have a few packets of mini Kleenex tissues with me. When shooting night cityscapes even the tiniest bit of dirt on your lens can flare up dramatically when a little bit of light from a street lamp touches it. A quick wipe with a Kleenex and you’re good to go.
18. Go out even if it’s raining. The image below was shot during a monsoon. It was bucketing down with rain, so I sat in a bar and waited for it to calm down. When it did I ran out and captured this image. Never use rain as an excuse for staying in.
19. Blue and yellow is a nice combination. Blue and yellow are complimentary colours. And, by coincidence, that is the same dominant combination of colours we have at blue hour, when the street lights are shining brightly. I like to gently desaturate other colours so that these two are most compelling.
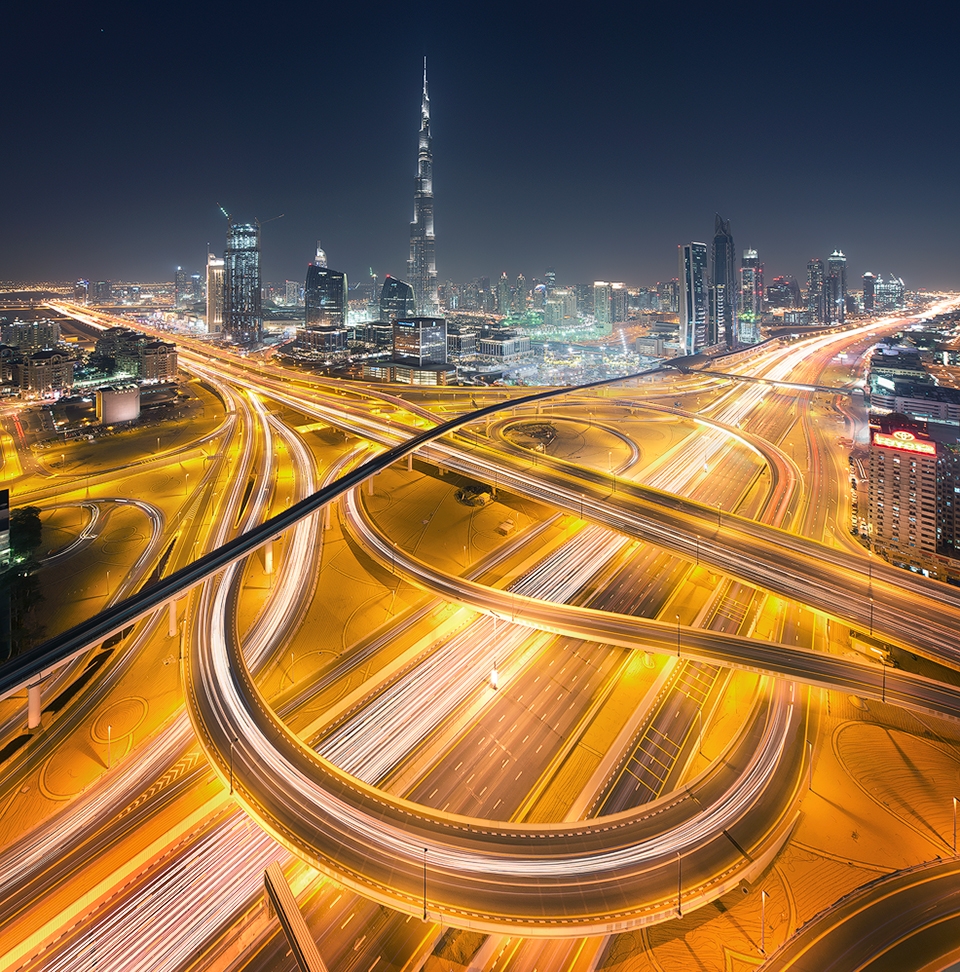
20. Light trails add dynamism. As you can see in the image above, light trails can be hugely impacting. Try to stretch out your exposures by using a narrow aperture or lower ISO so that you can capture long sweeping light trails.
21. Exposure for street lights. When bracketing make sure the street lights are nicely controlled in your darkest exposures. Strongly over exposed streets can be far too distracting. If you don’t exposure for them in your darker exposures, they are almost impossible to recover in brighter exposures, regardless of the quality of your sensor.
Bonus tip:
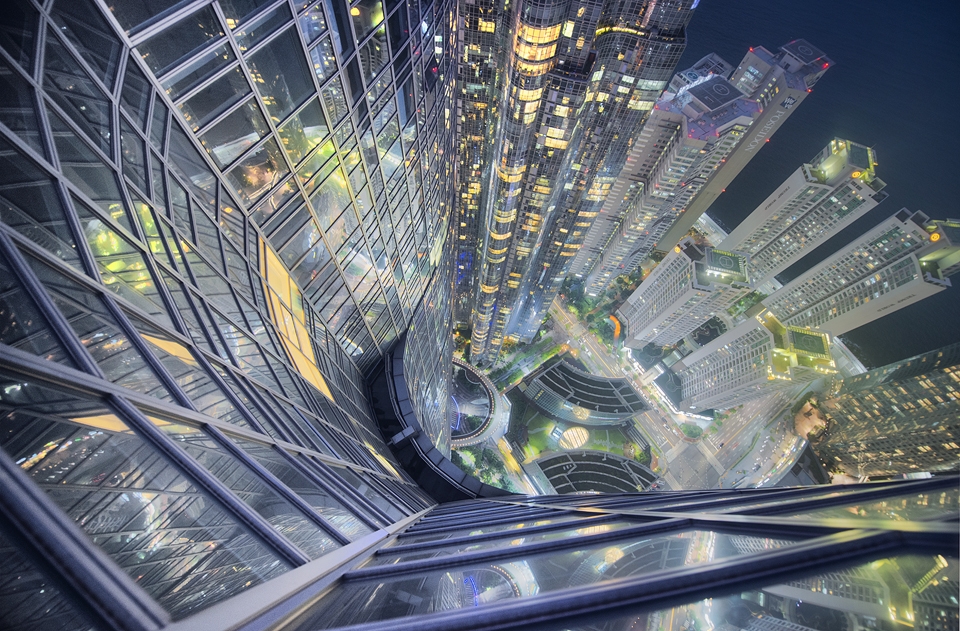
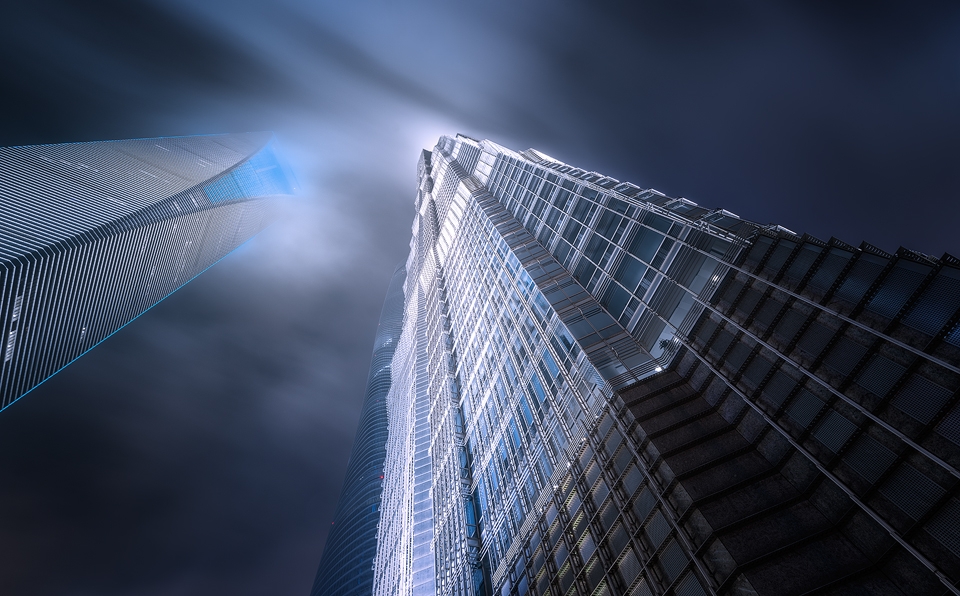
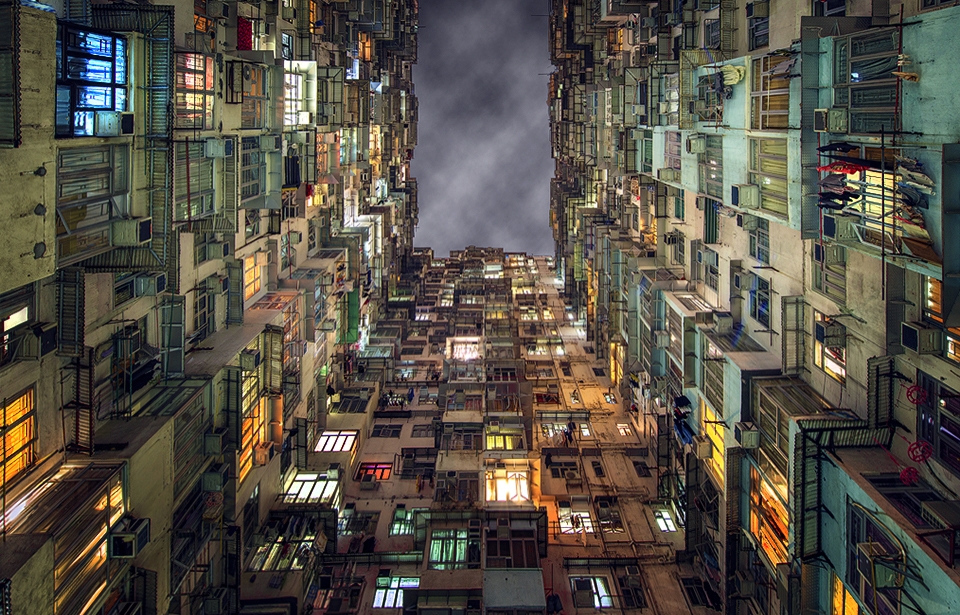
22. Look up. We, as cityscape photographers, love to hop from rooftop to rooftop. But often the view from below, looking up, is even more impressive. Spend some time during the day just looking up for interesting subjects to shoot later on. If this is something you haven’t done before, a whole new world of shooting will open up to you.
I hope you’ve found this article useful. Feel free to show us your awesome cityscapes in the comments box below.
Enter your email below and join our community of more than 100,000 photographers who have also
Subscribed to our newsletter.
Downloaded our FREE Photoshop Course.
Got our FREE Easy Panel for Photoshop.
And, have our FREE Essential Guide To Luminosity Masks E-Book.
To go directly to any of our products, simply click on the image below.


