A Hidden Way To Add Precision Contrast To Your Photos
Article by Brian Knott. If you would like to write for us, please read here.
There are numerous ways to add precision contrast to an image and they vary in many ways. There’s everything from the built-in contrast slider in Photoshop or ACR to the more popular option of a curves layer. One might argue that contrast methods are more subjective tools than most. I’d like to offer an alternative method of adding contrast to an image that can be much more effective in making your image “pop” without degrading quality.
Combining Apply Image and LAB Overlay for Precise Contrast Changes
Using the Apply Image command with a LAB overlay layer is what I prefer to try first. It works based off of medium grey values, affecting the tones that are darker or lighter than the neutral tones. The B channel in a LAB layer is the blue-yellow color range. In other words, the yellow tones are lighter than medium grey and they get brightened while the blue tones are darker than medium grey and get darkened.
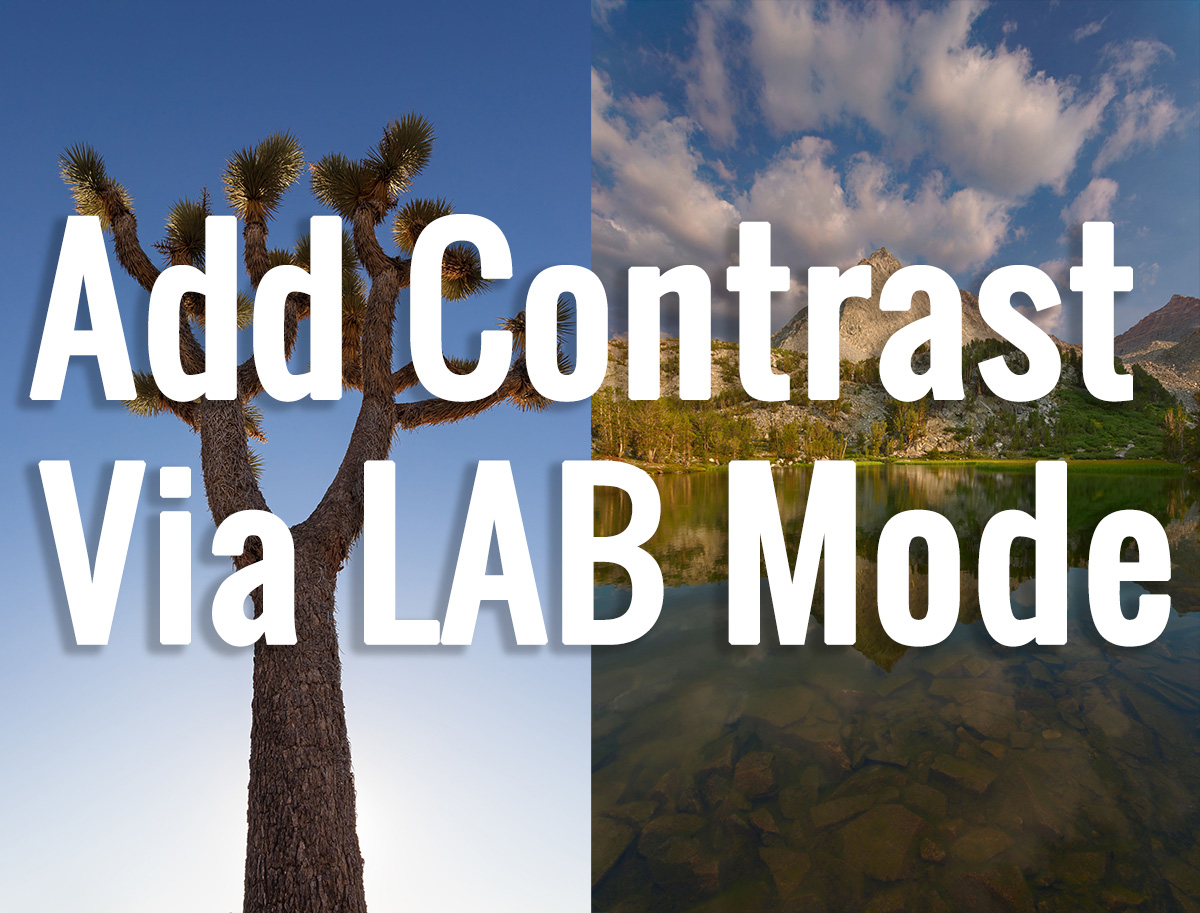
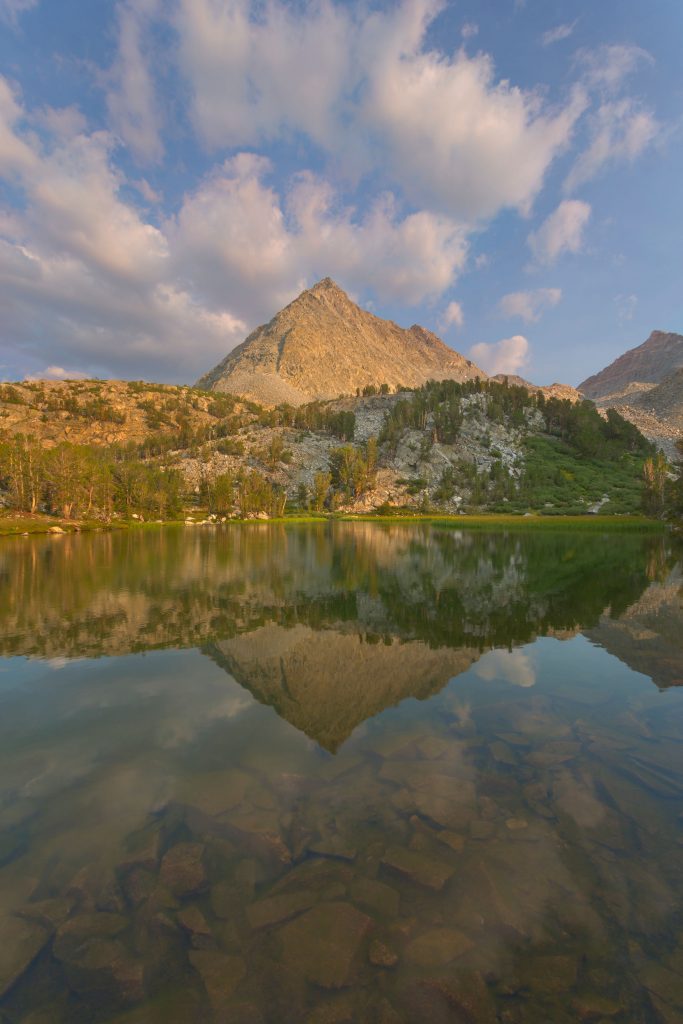
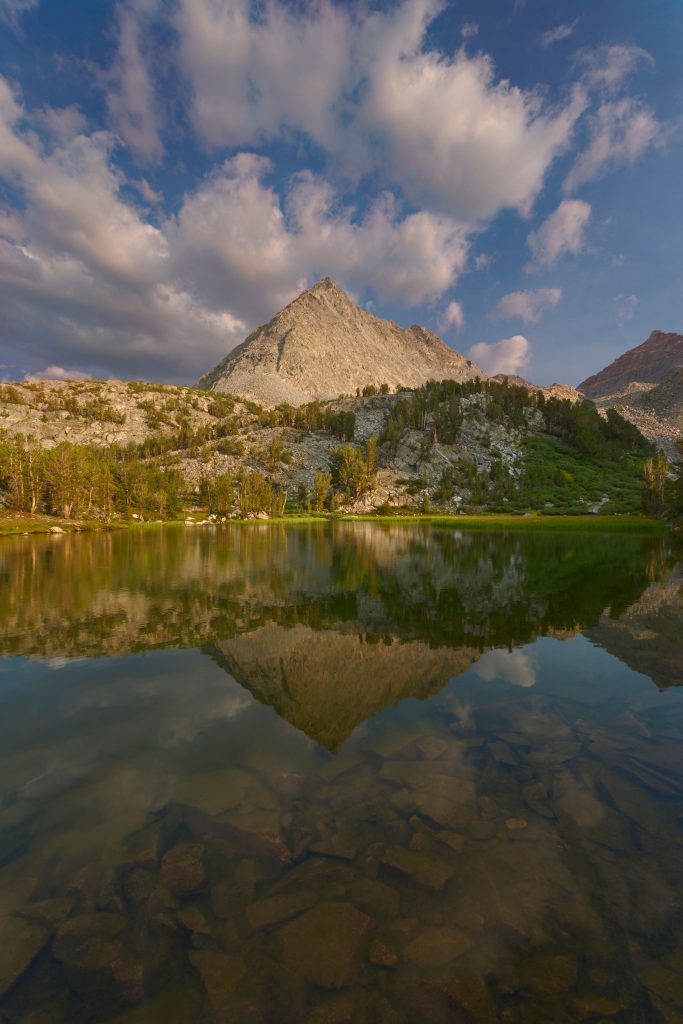
The below image on the left has no contrast applied. The right image has LAB precision contrast applied.
Enter your email below and join our community of more than 100,000 photographers who receive regular tutorials and have also

Subscribed to our newsletter,
Downloaded our FREE Photoshop Course
Got our FREE Easy Panel for Photoshop
And have our FREE Essential Guide To Luminosity Masks E-Book
How To Apply LAB Contrast Adjustments In Photoshop
It can get a little complicated so the best way to explain it is to show you. (I typically make the LAB contrast method the very first edit to my images – after removing dust. Although you can put this contrast layer anywhere in your workflow without changing the effect.)
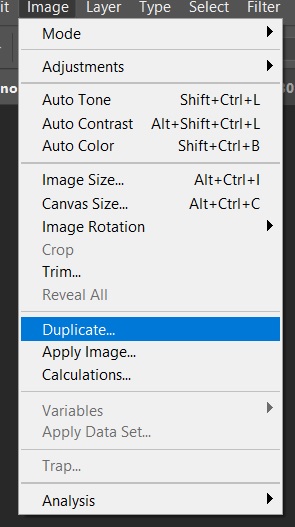
1. Duplicate your image via the top menu by selecting Image>Duplicate. In the pop-up window, check Duplicate Merged Layers Only and click OK. This will merge any layers if you had multiple already and then it will automatically assign a name for the new file by adding “copy” at the end of the original file name (change it if you wish).
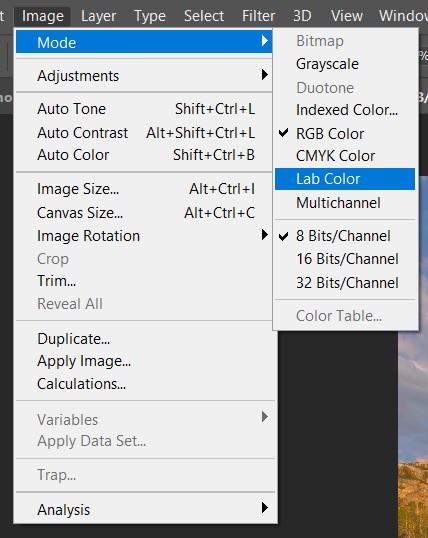
2. On the duplicate file select Image>Mode>LAB Color.
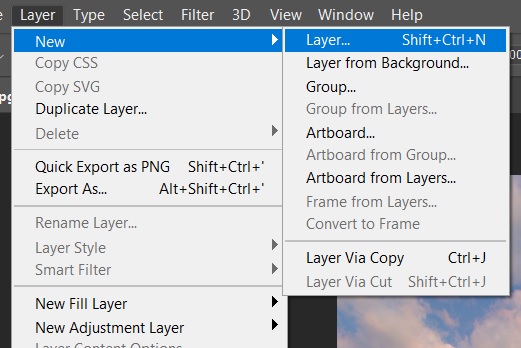
3. Now go back to your original file and create a new blank layer by clicking on the icon at the bottom of your layers panel that looks like a plus inside a box. Alternatively, you can use the top menu: Layer>New>Layer, name it and click OK.
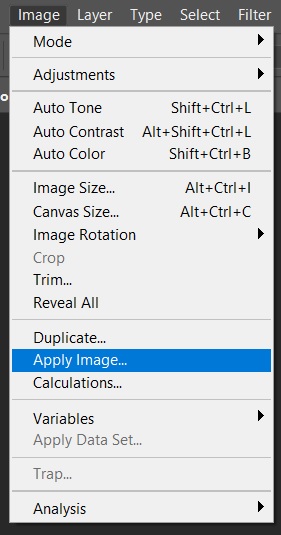
4. We need to apply the image now by selecting Image>Apply Image. In the dialogue box make sure to select the “copy” image as the Source and Channel “b” from the drop-down menus. Layer should be “Background”, and Blending should be Multiply at 100%. Click OK. It’s going to look weird, don’t panic.
5. In the drop-down menu at the top of the layers panel change the blending mode of the new layer to Overlay. Now you should see the contrast effect.
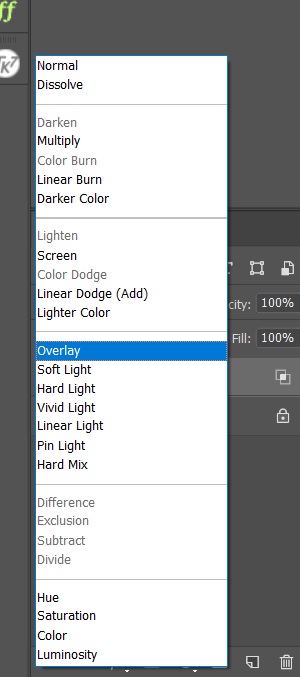
6. Normally you would be done here but, if the effect is too stark for your taste you can either adjust the opacity or change the blending mode to Soft Light to reduce the effect. You can now close and discard the duplicated file. You’re all done!
Sometimes this method can brighten the yellows too much thus desaturating these tones. This is when I will paint out these areas using a mask but let the contrast layer still affect the rest of the image.
I usually add some very subtle additional contrast via a curves layer after the LAB contrast layer to increase a bit of global contrast. Now I’m ready to continue with any other edits my image may need.
I find that this contrast method works particularly well when you want to darken a blue sky but leave the clouds untouched or to darken the sky and brighten the foreground to make the subject stand out more. It often works well with brightening up green foliage in the foreground too.
Here is another example of how powerful this method can be.
On the left is the image with the LAB contrast effect applied. The Joshua Tree itself has brightened up nicely and the sky has darkened, again leaving a nice 3D effect without shadows or the highlights being overpowering. On the right is a standard curves layer without LAB.
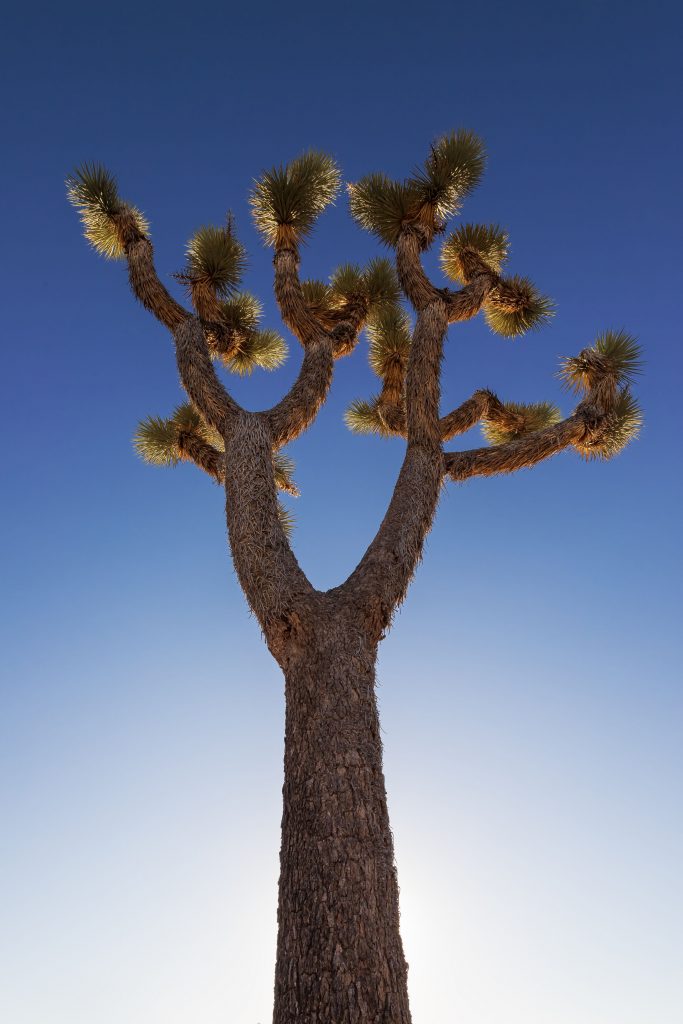
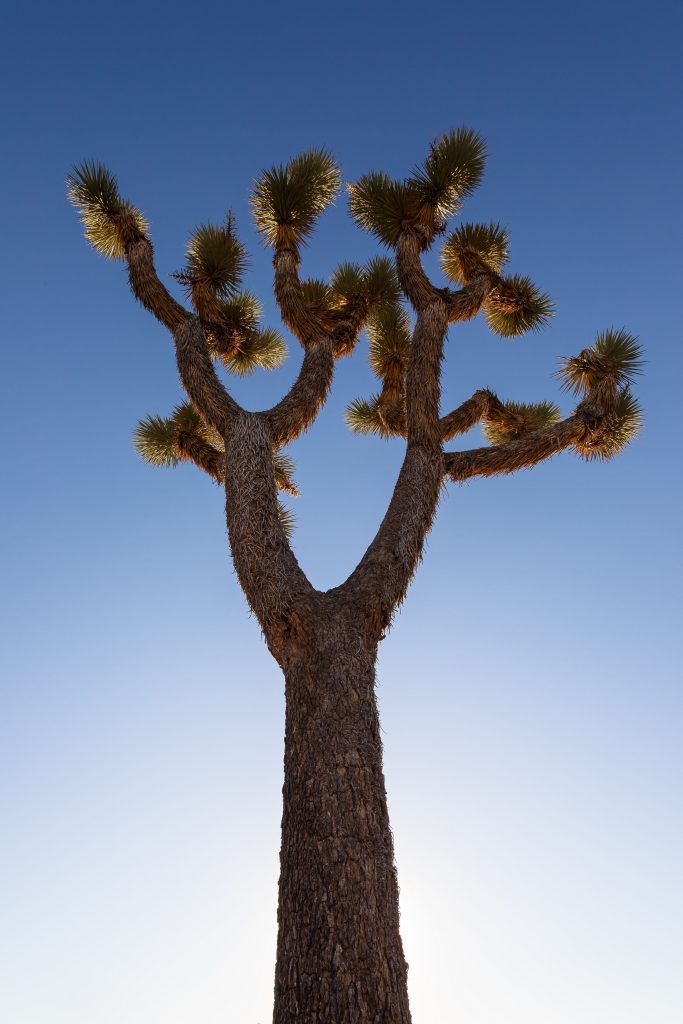
Using a curves layer here is undesirable to me. It has darkened the tree and added too many highlights in the sky desaturating the whole image. This image is not very flattering now.
It’s important to remember that this method doesn’t work well with every image but if it does, it is worth it. Play with it and see if it works with your particular image.
This tutorial was written by Brian Knott. Website | Facebook
Alternative Resources Online
How to Use LAB Color in Photoshop to Add Punch to Your Images
How to Master Editing Colors using LAB Mode in Photoshop
Use LAB Color Space in Photoshop to Take Your Editing to the Next Level