Levels In Photoshop For Beginners
Levels adjustments are almost always being applied to create more beautiful and contrasting images. In this tutorial, we will introduce you to Levels Adjustments in Photoshop. We’ll explain, what Levels adjustments do, and how the effects can be brilliant for your images. Also, you’ll learn how to make your own changes to an image to get the right tonal balance by following our beginners tutorial.
What Level Adjustments Do And How They Affect Your Image
Levels adjustments give you a fantastic level of control over the shadows and highlights in your images. By adjusting sliders, you can change the whole tone of your image to give more character to your photos. The Levels Adjustment panel is a simple one to navigate, and its adjustment can be seen immediately so, it is a very enjoyable panel to play with.
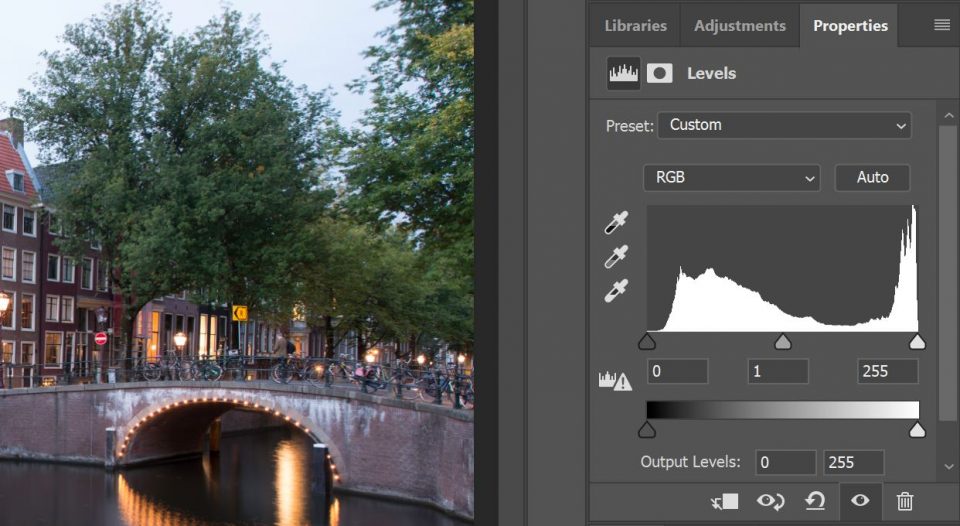
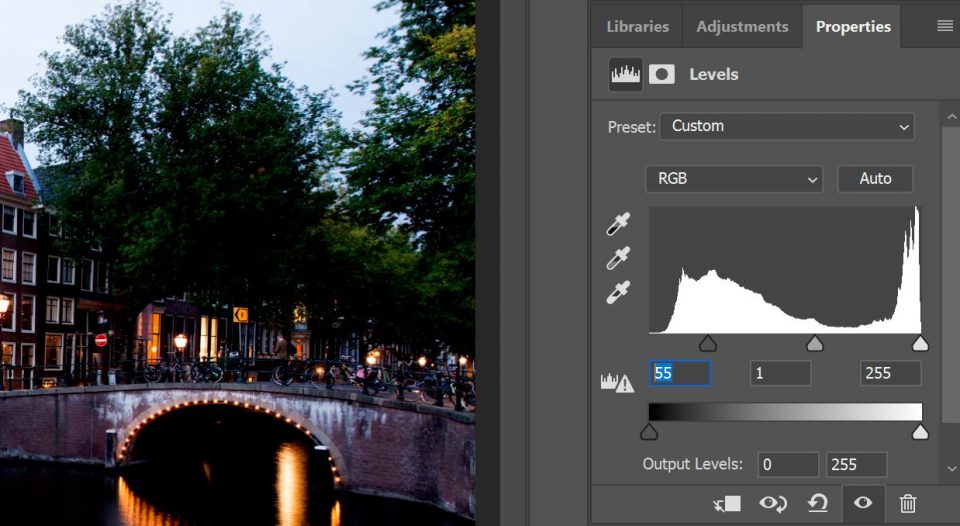
The Levels panel has two main areas, the Input, and Output. We are going to concentrate on the Input section. This is the main section and contains a large display with three simple controls underneath. These three controls are what give you the power to control your shadows and highlights individually. The middle control will raise or lower the overall tonality of your image, it can make your images extremely soft or hard, whichever you desire. The control on the left affects your shadows, sliding it right will makes your shadows even darker. While the control on the right controls your highlights and sliding left will increase the brightness of the image highlights. By being able to adjust the highlights and shadows independently, you have complete control to change the contrast between shadows and highlights.
NOTE:
There are two ways to add a Levels adjustment, destructively or non-destructively. The destructive method can be accessed quickly by pressing Ctrl+L on a PC or Cmd+L on a Mac. As a rule, we never use destructive processes, so our tutorial will show you the non-destructive method. Processing images non-destructively allows us to go back as often as we like to make slight adjustments, this is a much better way to work in Photoshop.
Beginners Tutorial to Levels Adjustments in Photoshop
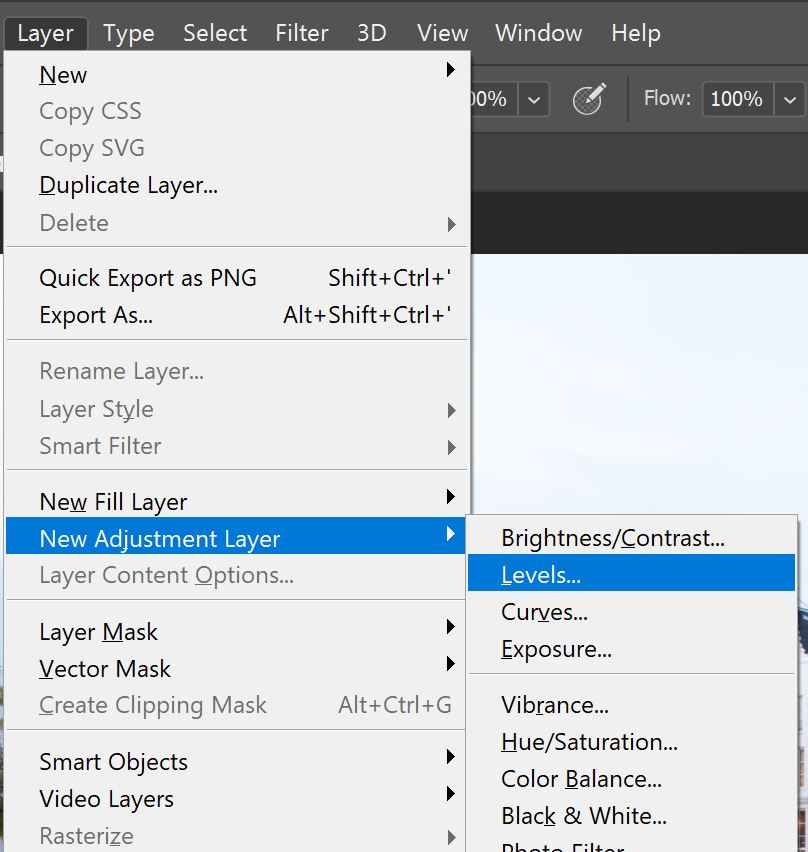
1. Create a non-destructive Levels Layer by going to Layers>New Adjustment Layer>Levels.
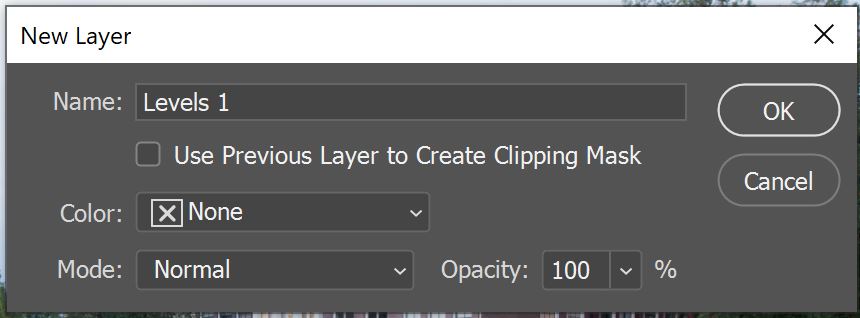
2. When the New Layer dialogue box appears, you can change the name of the layer if you like and click OK.
3. In the Properties panel, you will see the Levels Adjustments. The larger pane is where we will make our adjustments.
4. Slide the Shadows control on the left to the right to make your shadows darker.
5. Slide the Highlights slider on the right to the left to make your highlights brighter.
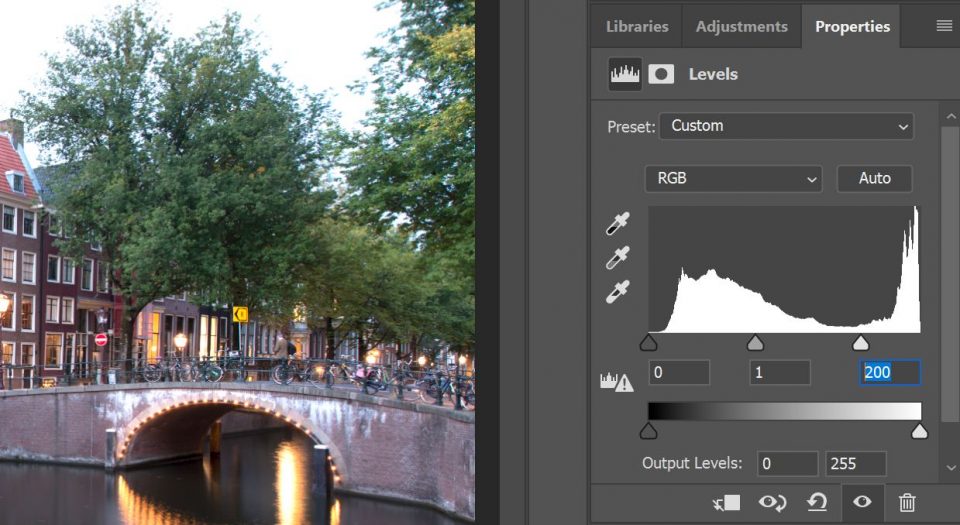
6. Sliding the center control to the left will bring softness to your image.
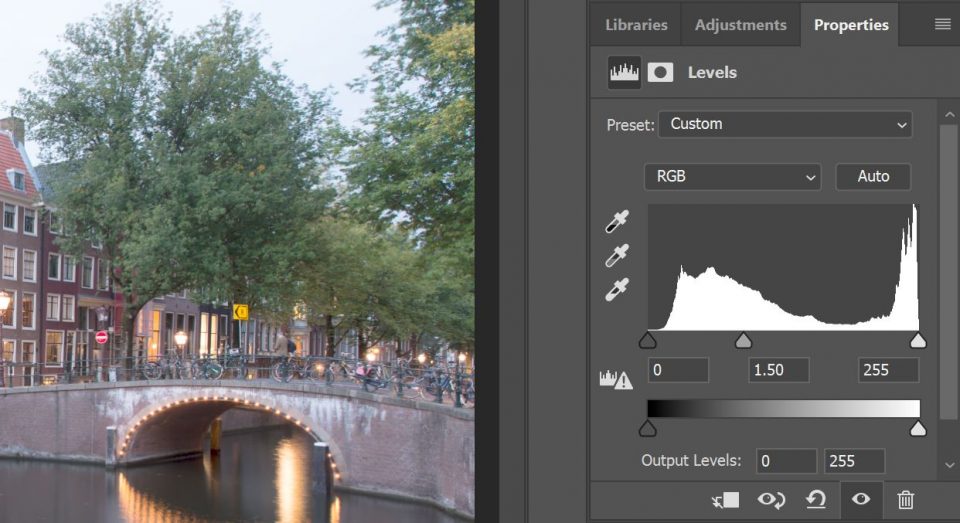
7. On the other hand, sliding the center control right will make the image harder or harsher.
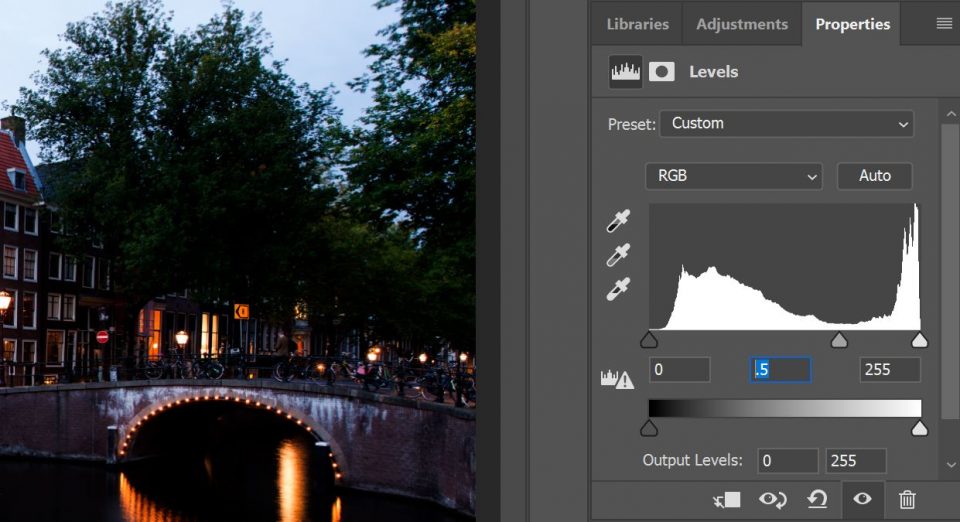
8. Remember, because this adjustment is non-destructive you can go back and tweak it whenever you like. Or until you are completely content with your before and after.
Thank you for reading this article on Levels in Photoshop for Beginners. If you liked this you might also like some of our related articles, such as:
Adding a Levels layer is not just for beginners. Almost every post-processing workflow will have a Levels Adjustment Layer. Read our article on 7 Ways To Instantly Improve Your Photos to see how we used Levels Layers.
Enter your email below and join our community of more than 100,000 photographers who have also
Subscribed to our newsletter.
Downloaded our FREE Photoshop Course.
Got our FREE Easy Panel for Photoshop.
And, have our FREE Essential Guide To Luminosity Masks E-Book.
Online Resources
If you want to learn more about Levels and How to Use Levels in Photoshop, we found a good article on PHLEARN.
You might also be interested in this article which will tell you Everything You Need to Know About Levels in Photoshop.
Thank you for reading this article, be sure to sign up to our newsletter for more tutorials and great offers.

