Straighten Buildings in Photoshop
When you take pictures of large objects and have to angle your camera to capture the full scene, the objects appear to lean. This is called Perspective distortion. For example, where an object seems wider at the bottom than at the top, even though we know they are not. There are a few ways to correct this. We are going to look at how to straighten buildings, using the Transform Perspective Function. First, let’s find out what the Perspective function does. Then we’ll show you a step by step guide on how to straighten buildings in Photoshop.

What Does The Transform Perspective Function Do?
This functions simply changes the perspective of an image. Much like how a short fence post would appear to an ant compared to how it would appear to us. Often when we take pictures with large buildings in them the buildings tend to lean. This is caused by your lens and is much more severe with Wide-angle lenses. We can use the Transform Perspective function to counter this lens distortion.
Top Tip
Transform Perspective only works on one X or Y axis at any one given time and gives you equal correction from the centre of the image. Use Perspective only when your images require symmetrical perspective correction. So where the centre is relatively perfect and the leaning inward or outward effect gets gradually stronger the further from the centre that you get.
-Tutorial Continued Below-
Enter your email below and join our community of more than 100,000 photographers who receive regular tutorials and have also

Subscribed to our newsletter,
Downloaded our FREE Photoshop Course
Got our FREE Easy Panel for Photoshop
And have our FREE Essential Guide To Luminosity Masks E-Book
Straightening Buildings in Photoshop Using The Transform Perspective Function
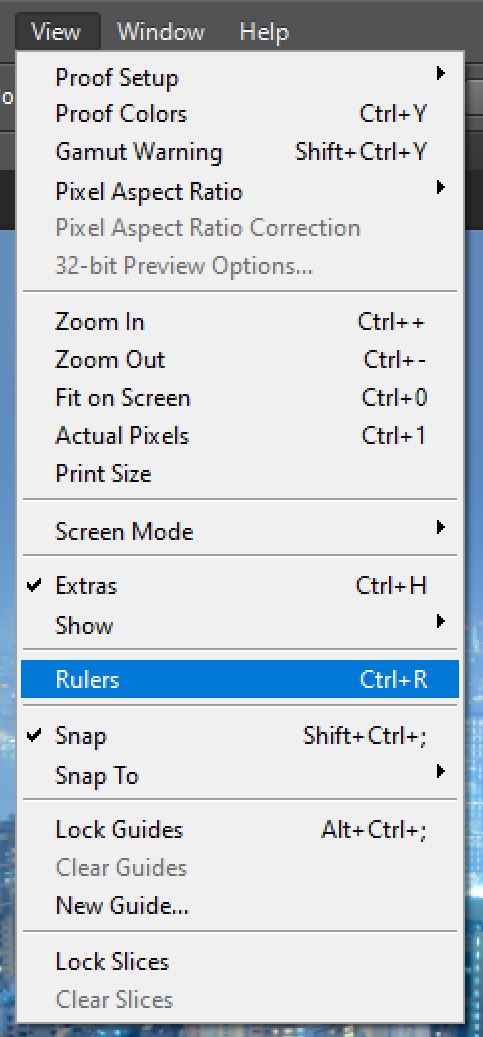
1. Find your perfect vertical. The best way to do this is to use your ruler. If you don’t have your rulers visible go to View>Rulers or press Crtl+R or Cmd+R.
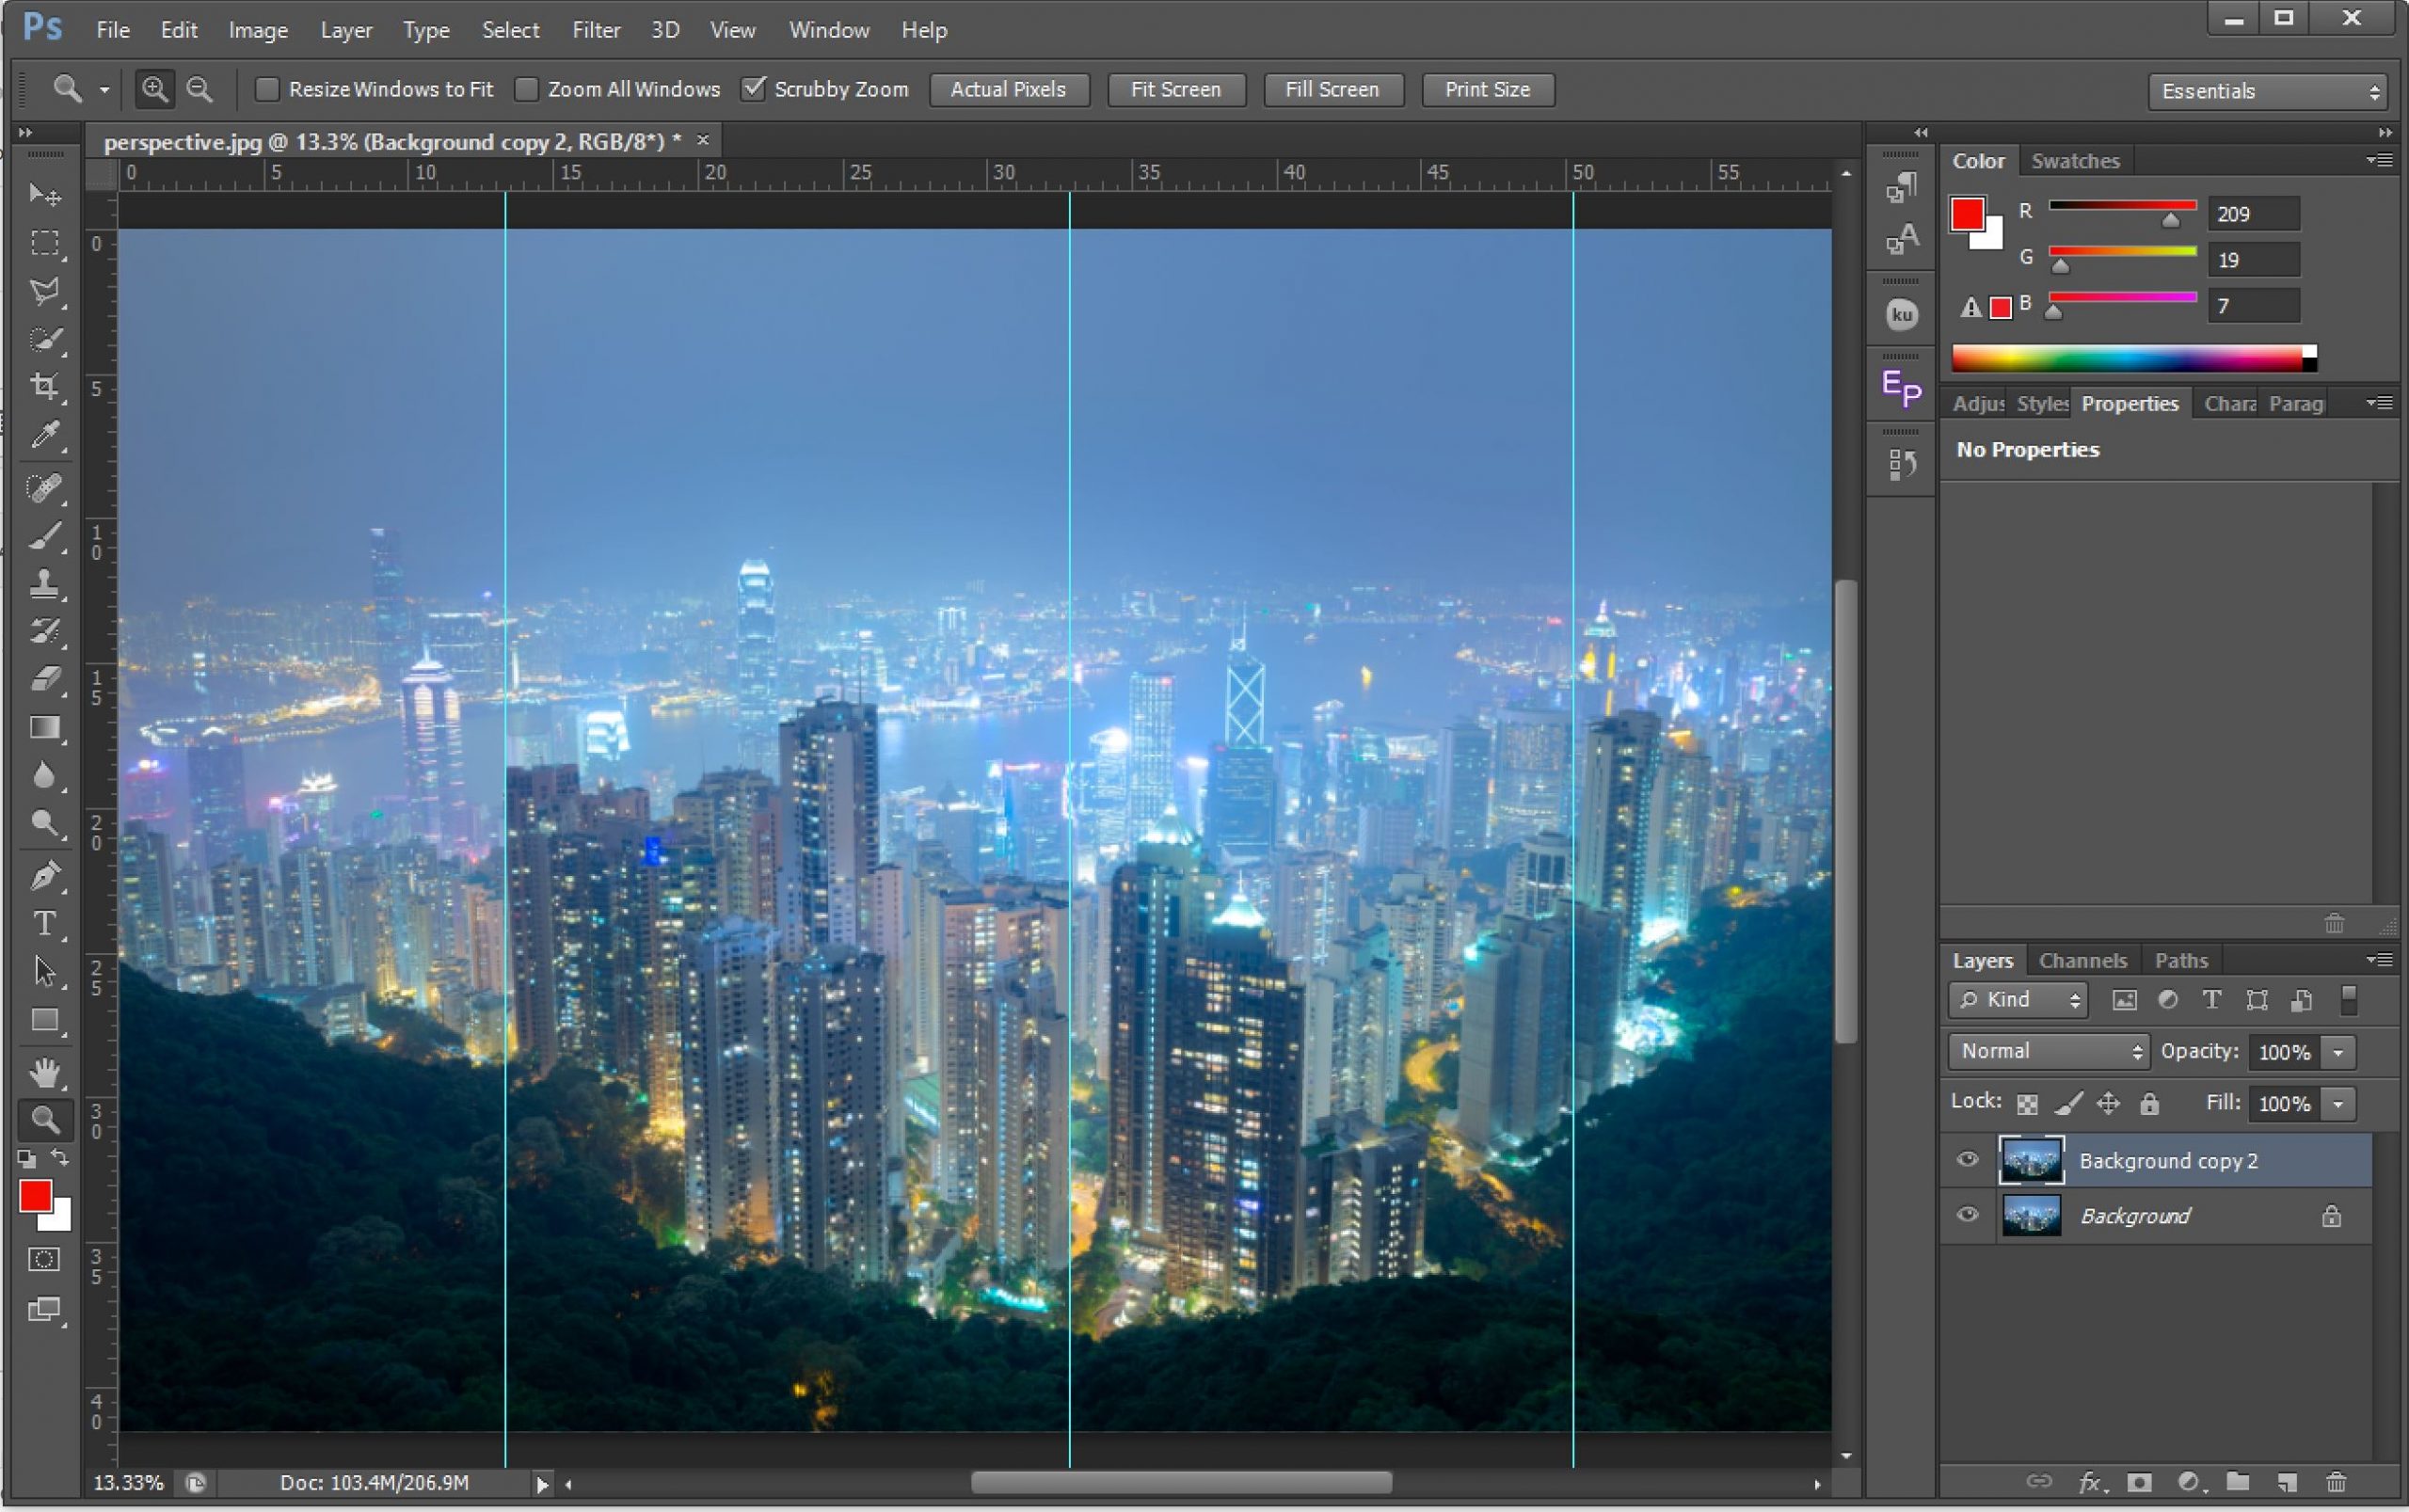
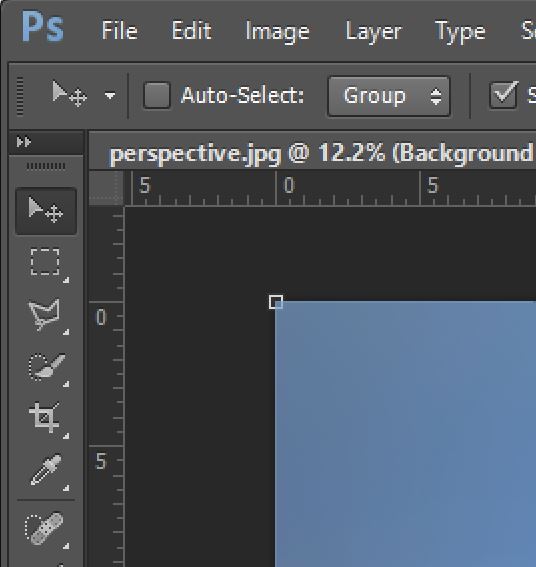
2. Create guides from the rulers.
On the vertical ruler on the left, click and hold your left mouse button to drag a vertical line from your ruler onto your image. Drag the line to the edge of your leaning building and release the mouse button. This will act as a datum or vertical reference point. If you place the line in the wrong place that’s fine, you can simply click on it and drag it to another location. You can have more than 1 vertical reference. You can also do this for horizontal reference points if you wanted, for this demonstration, we don’t need to do this.
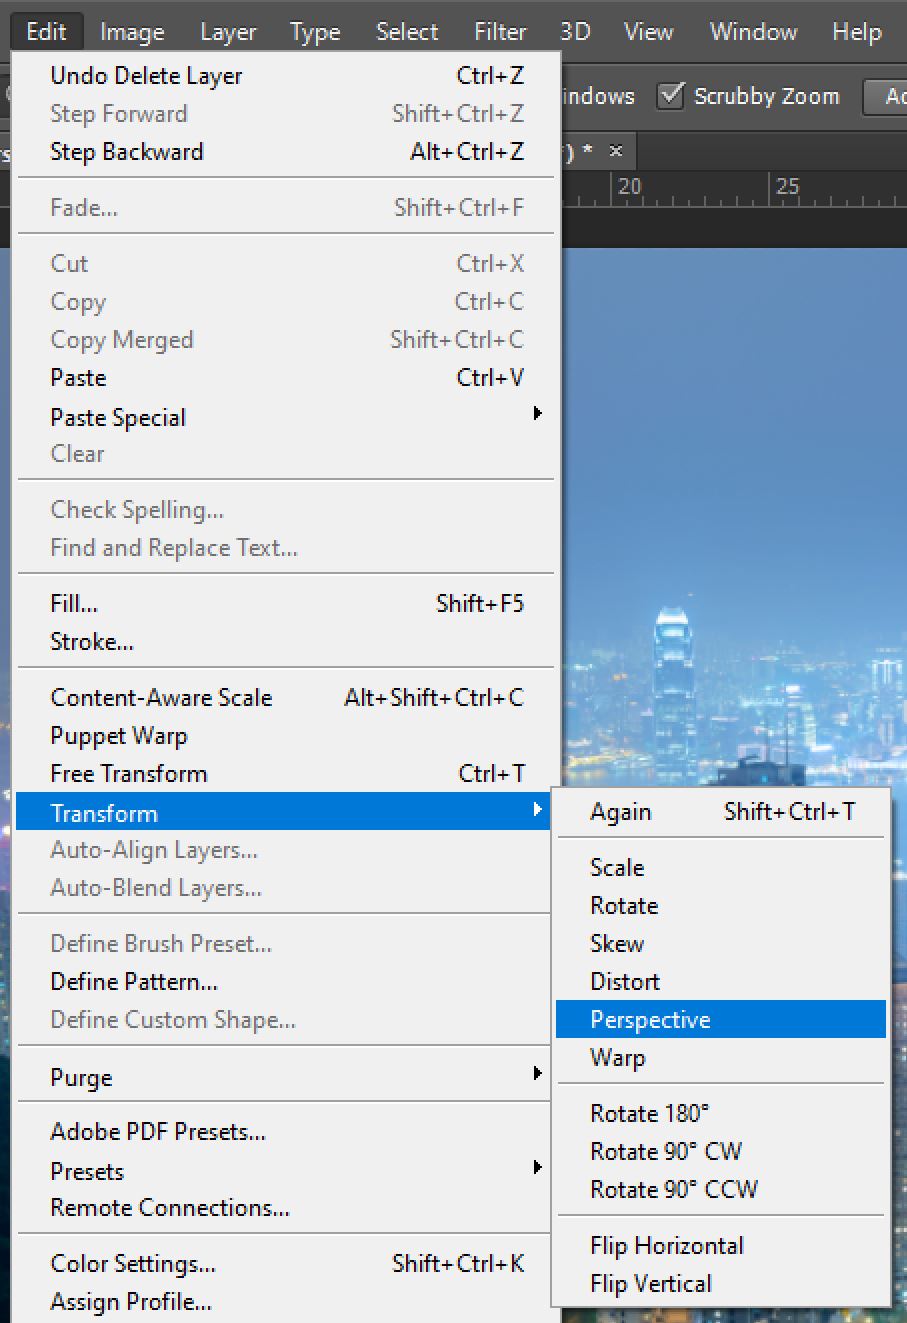
3. With a vertical reference line in place and your image selected. Go to Edit>Transform>Perspective. Or press Crtl+T or Cmd+T to select the Transform Function then right-click on your image and select Perspective.
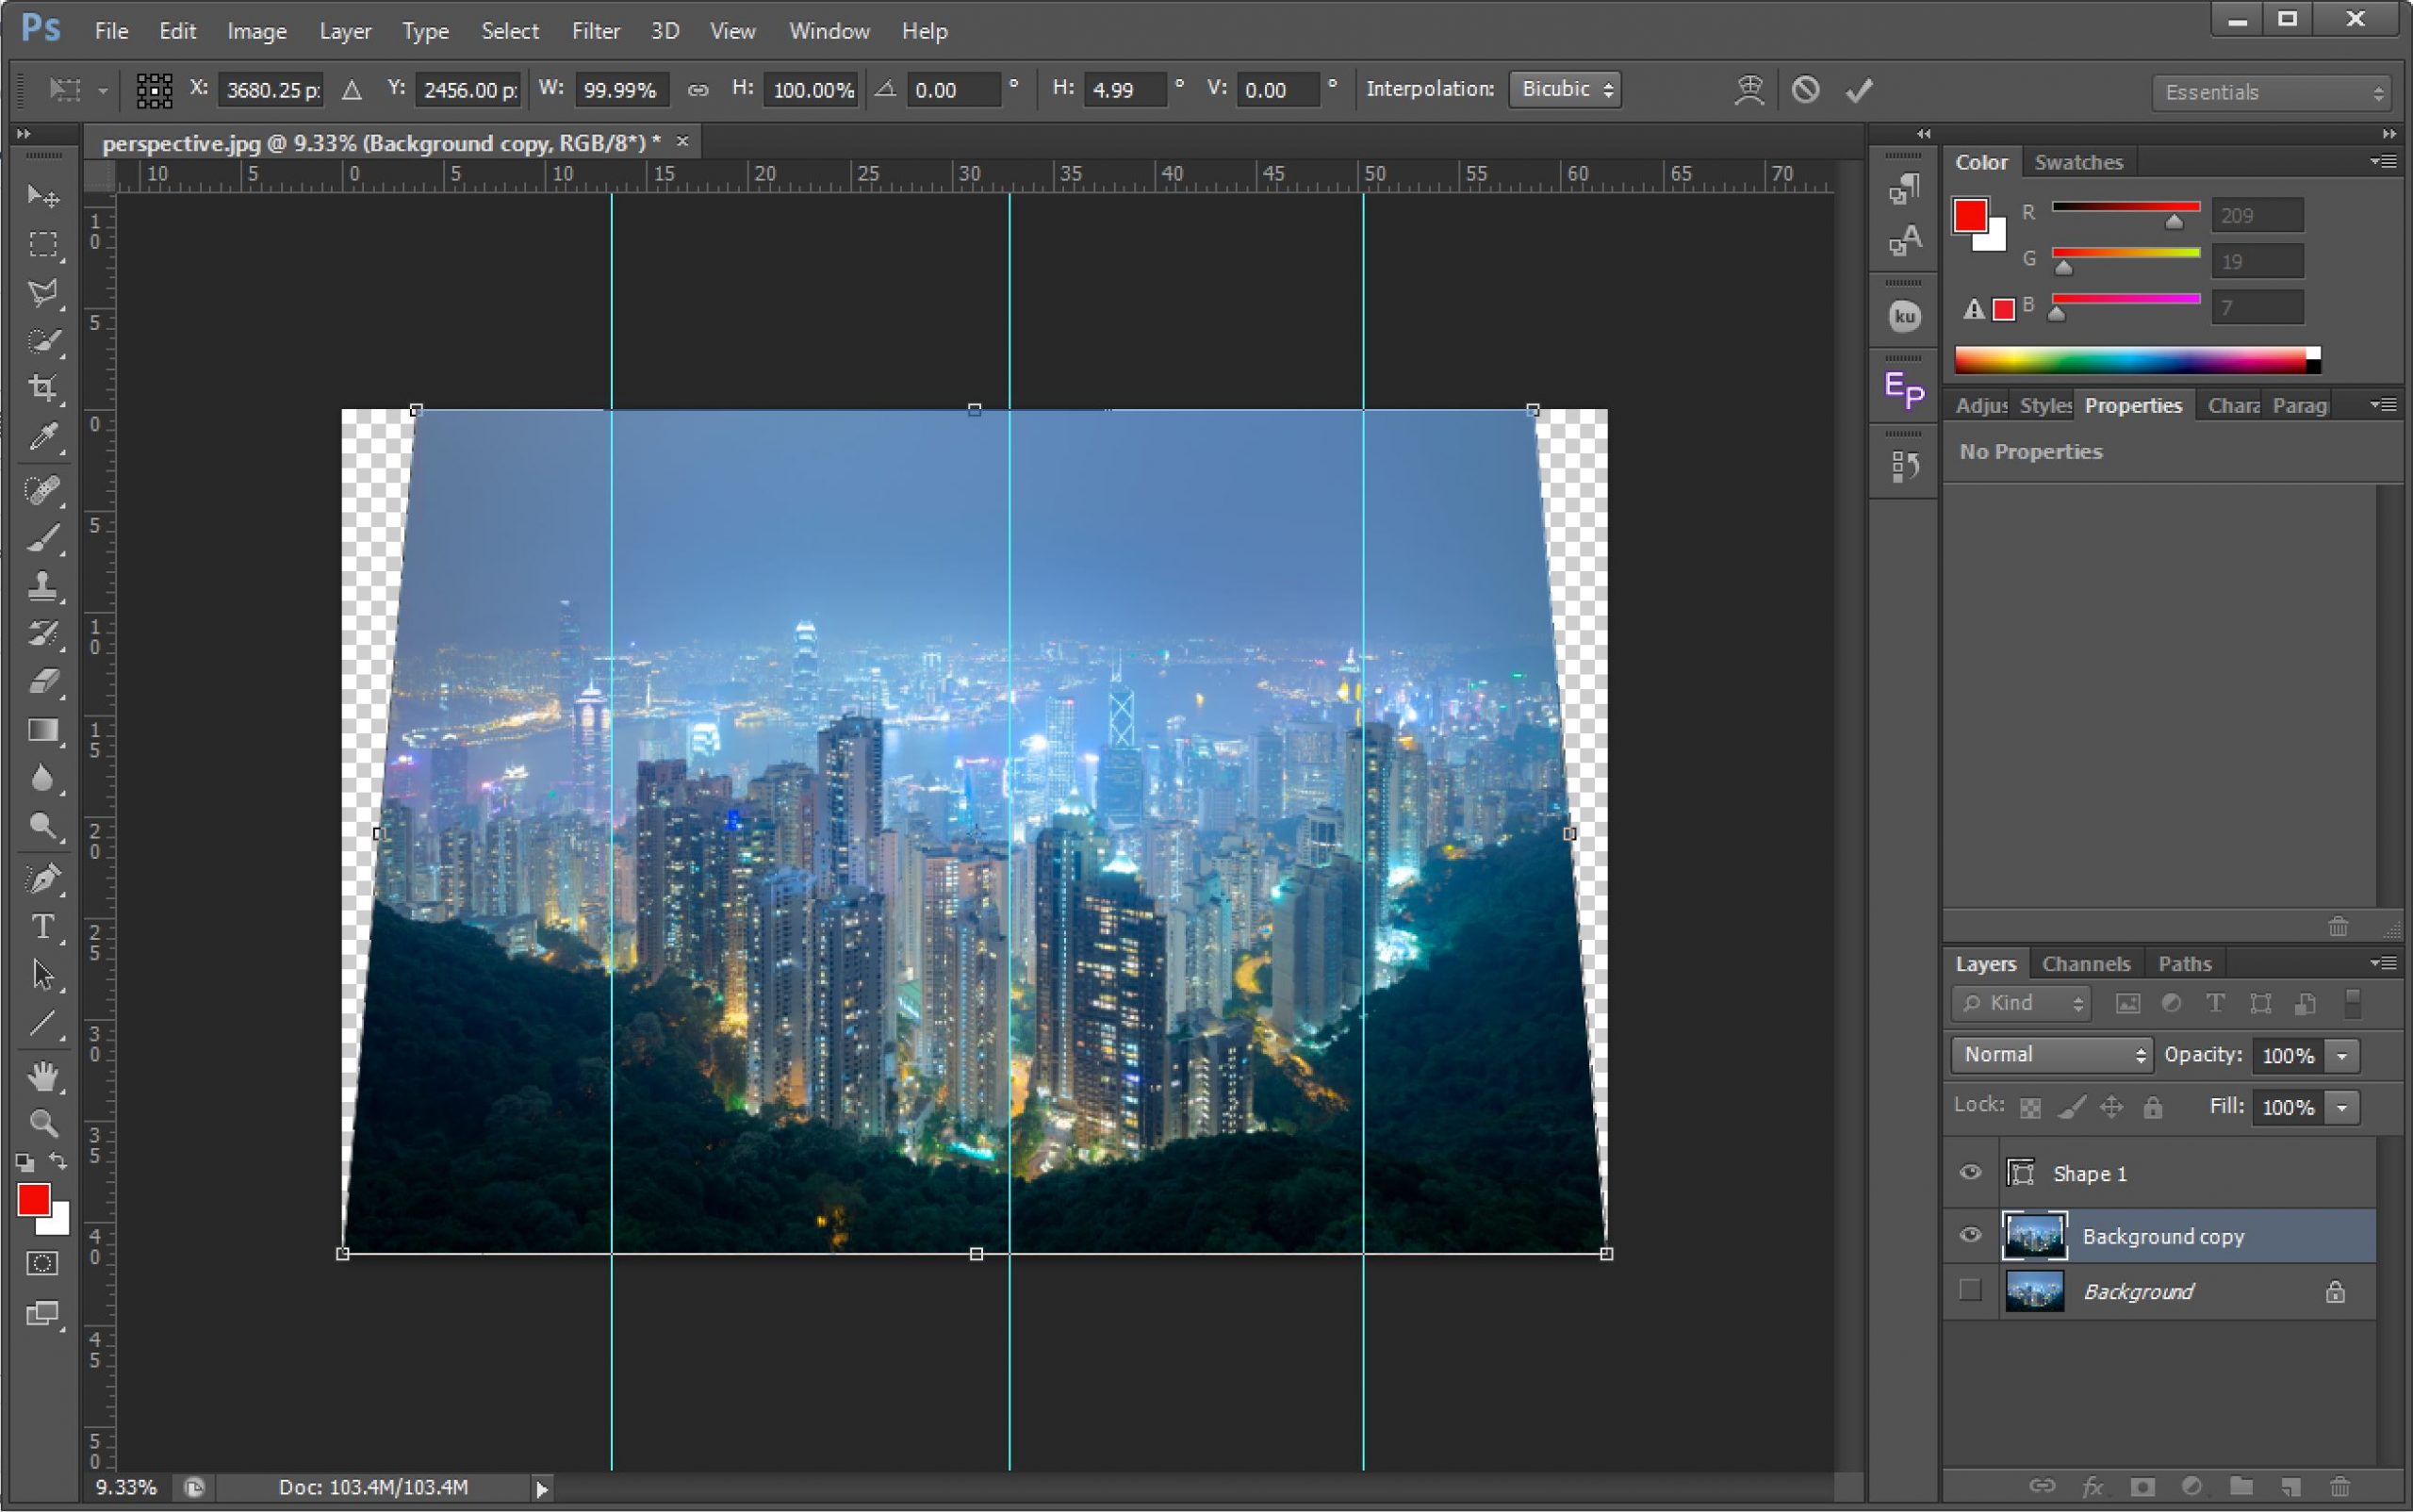
4. The Transform Controls will appear in each corner of your image and in the center of each edge.
5. Left-click and drag one of the corners and watch how the Transform Perspective function starts to change your image and straighten up those leaning buildings. Once you’re happy with the adjustment press enter to apply the transformation.
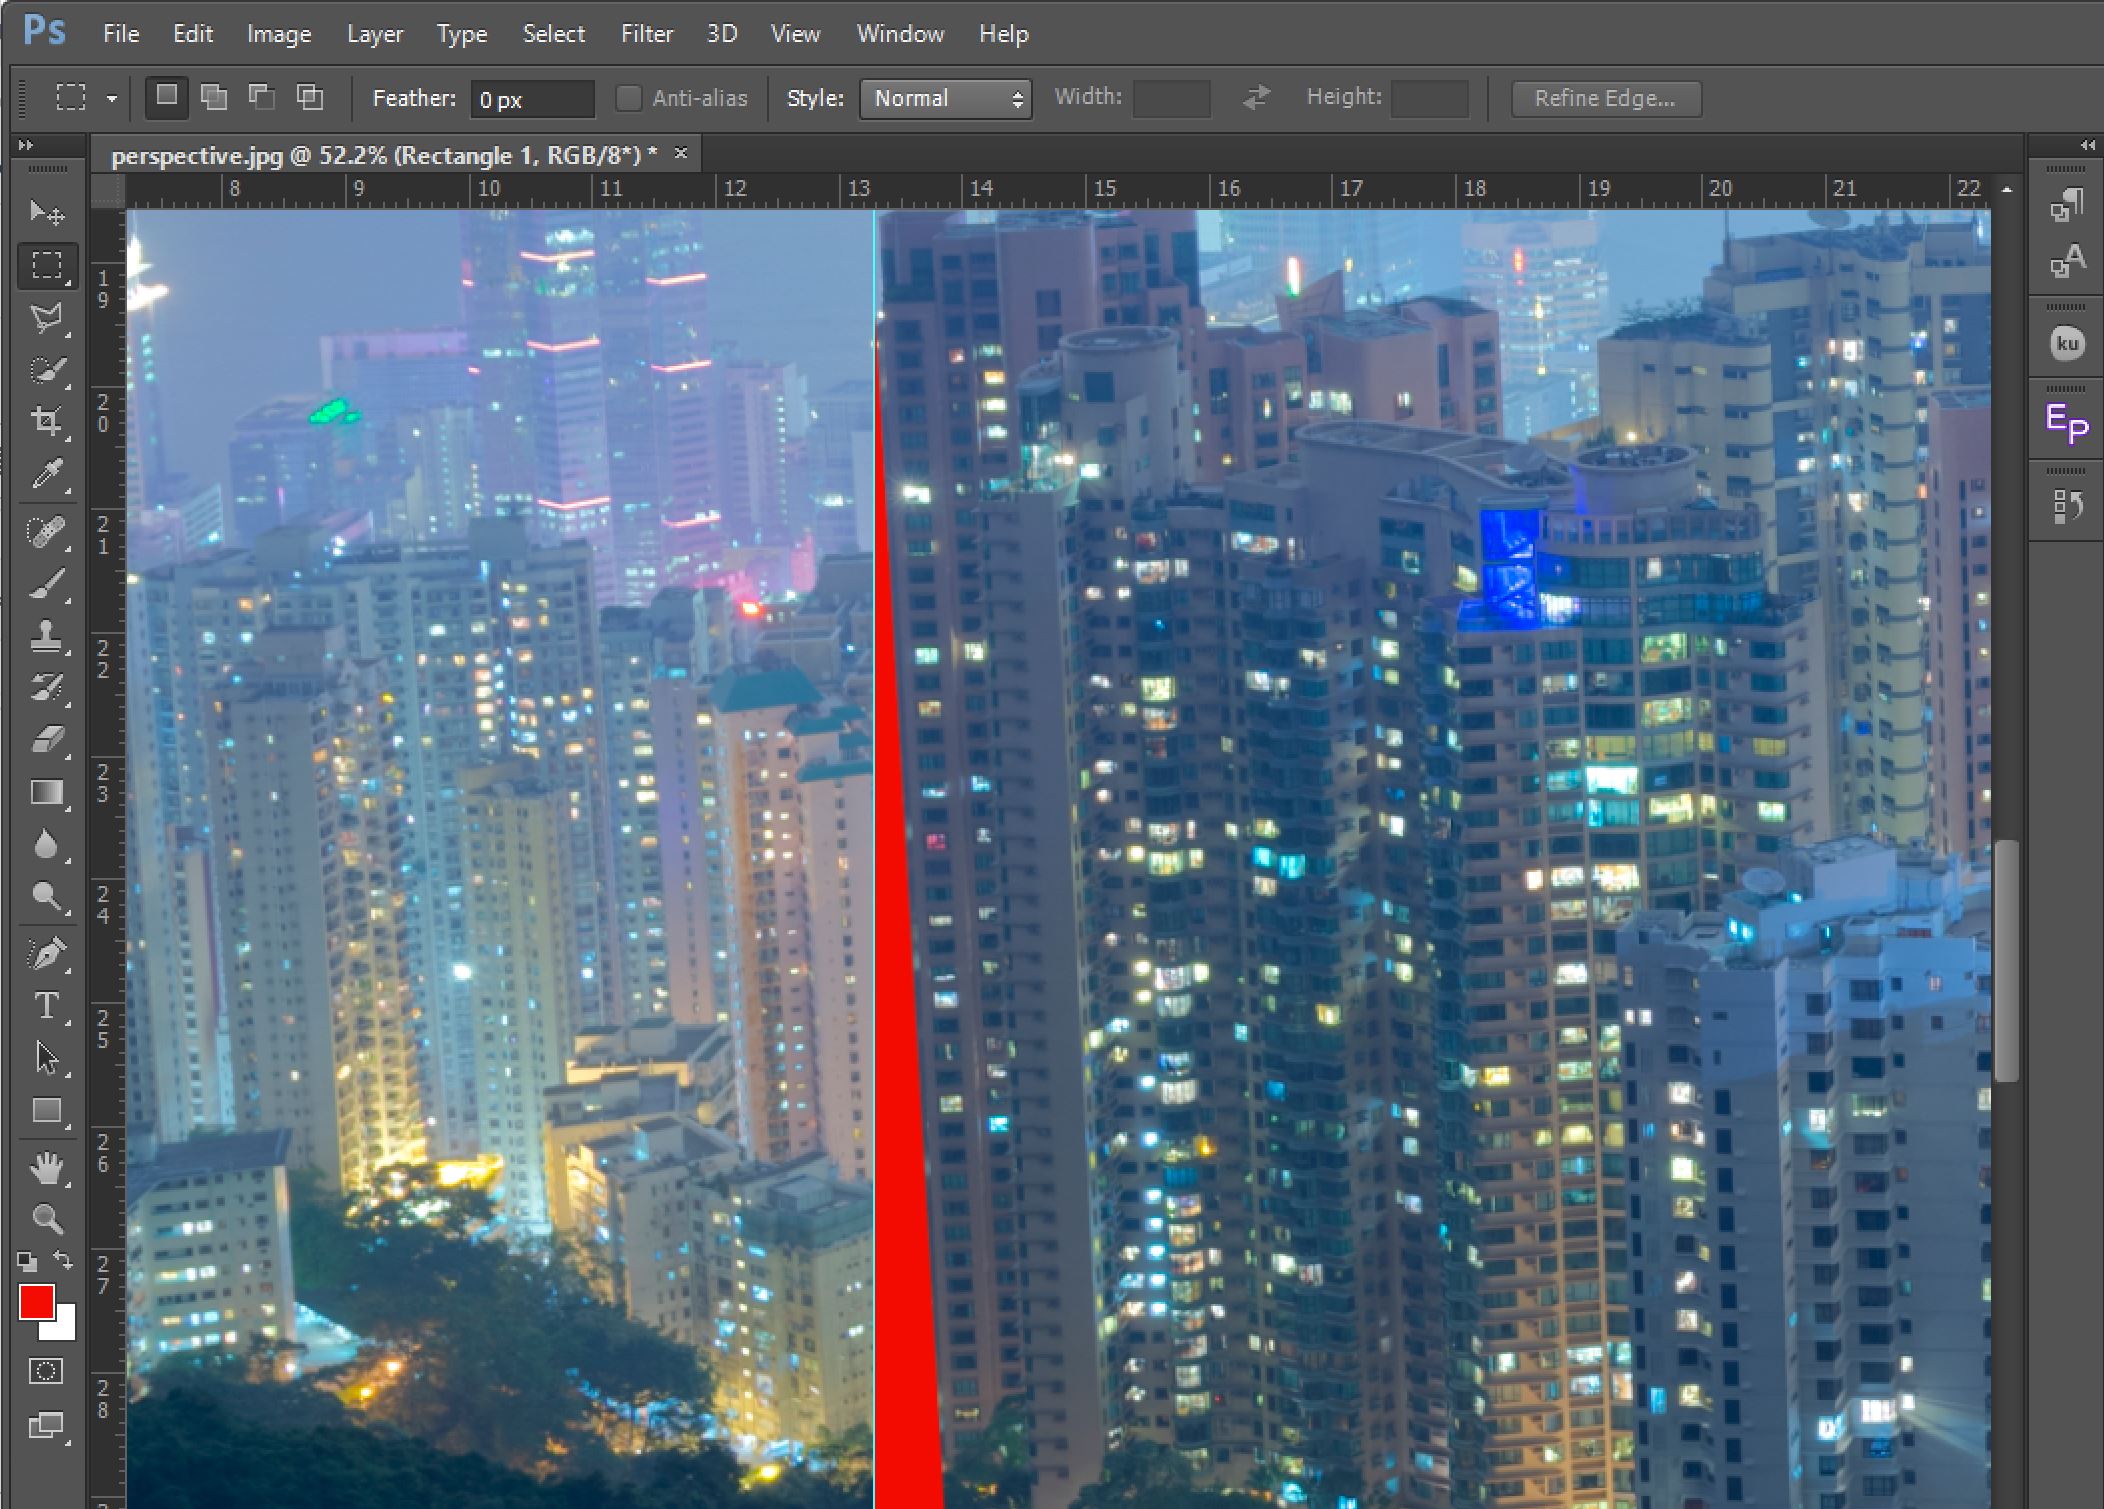
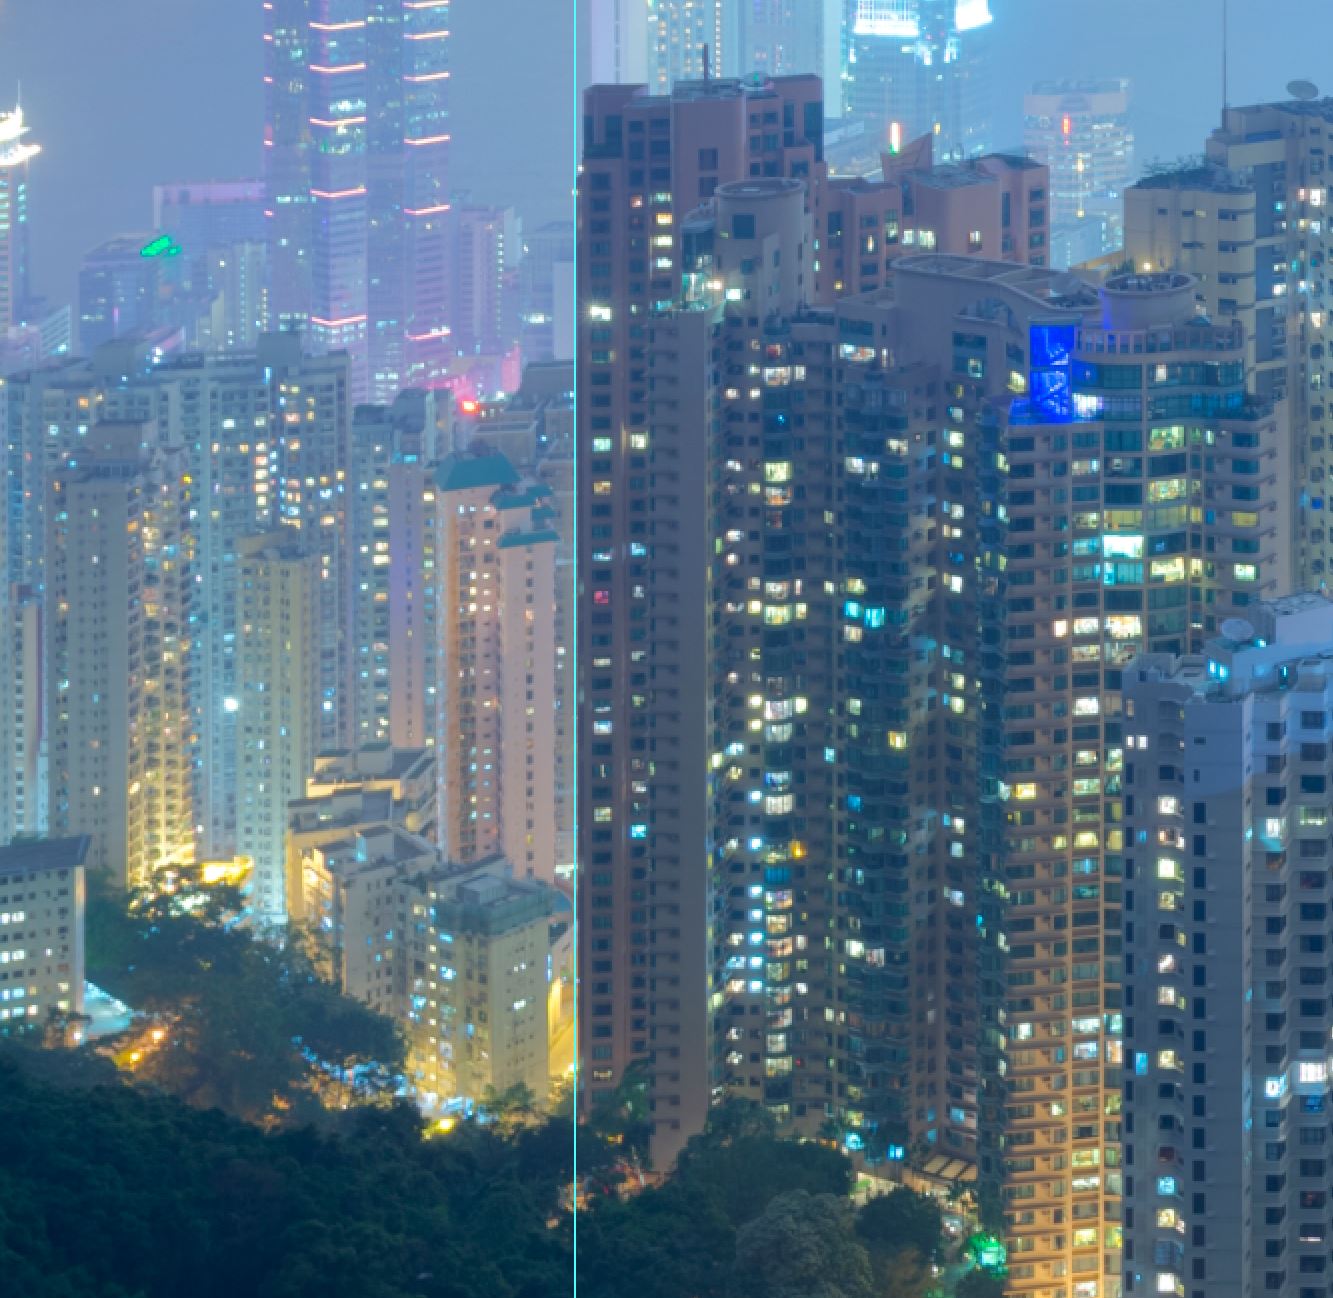
6. Zoom in to check if the buildings have straightened enough, you will have to move the vertical reference lines we set earlier, to re-align them to the same building.
7. If the buildings are not exactly where you want them, you can repeat steps 3 to 6 as often as you like until your buildings are perfect.
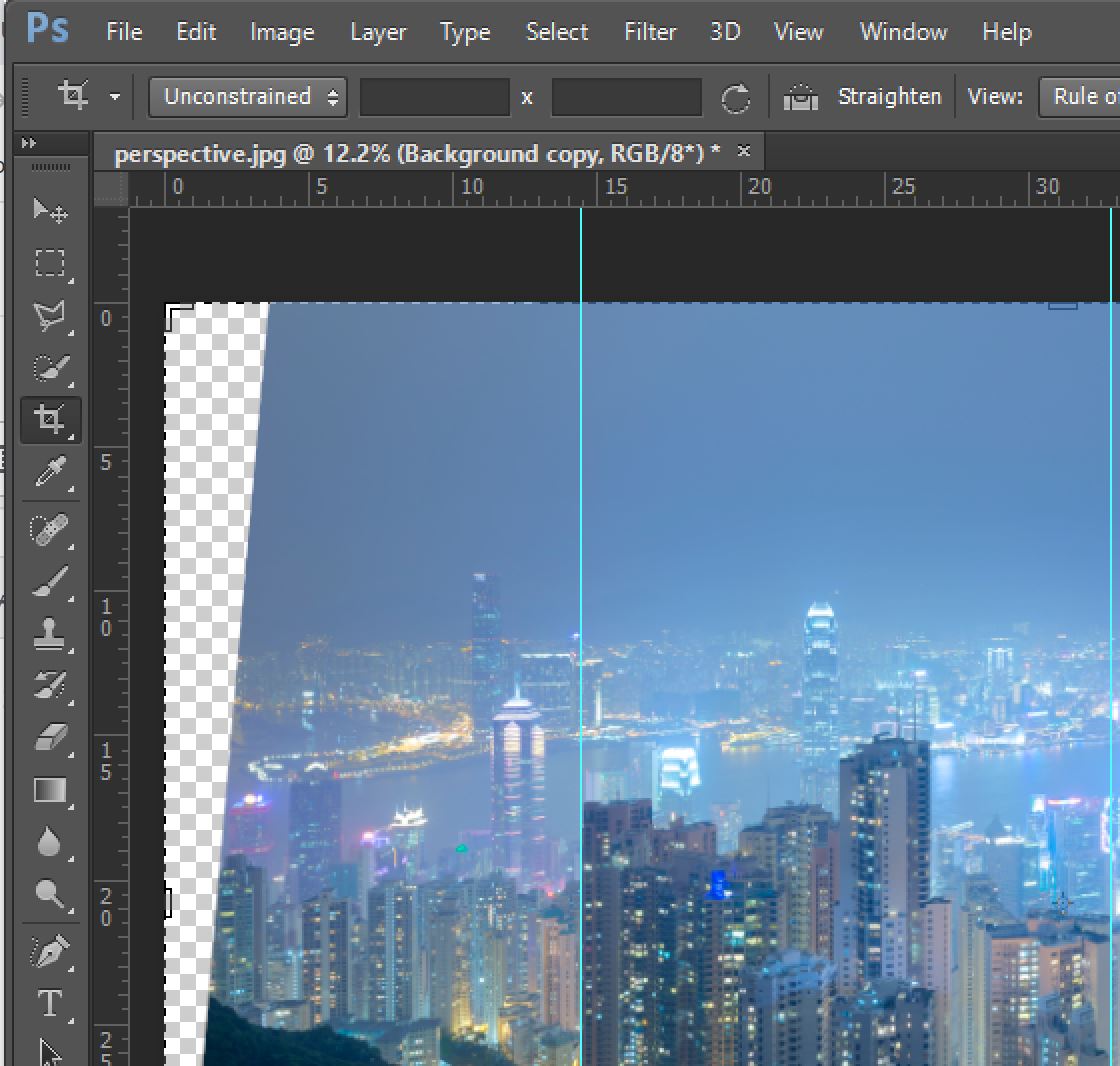
8. Once your buildings are straight, you will notice some blank space where you have tapered your image. Now, to finish off the image we need to crop it. Press the ‘C’ key or select the Crop tool by clicking on the Crop icon. Now Drag the edges inward to crop out the blank spaces.
9. Once you have finished cropping your image click enter. And you’re done.


Pro’s & Con’s to Using the Transform Perspective Function to Straighten Buildings
Pro’s
- Very easy to use
- Gives a well-balanced correction
- Doesn’t require graphics enhancers
Cons
- Is restrictive
- Can dramatically alter height dimensions
- Does not allow height adjustment to correct
Thank you for reading our article on How To Straighten Buildings in Photoshop. If you liked this you might also like some of our related articles, such as:
To see a more advanced method to fix perspective please read our Photoshop Secrets 20: Easily Remove Distortion (Perspective & Barrel) article.
We also have an article on How To Prepare Your Images in ACR Before Digital Blending in Photoshop using lens correction to reduce distortion.
Enter your email below and join our community of more than 100,000 photographers who have also
Subscribed to our newsletter.
Downloaded our FREE Photoshop Course.
Got our FREE Easy Panel for Photoshop.
And, have our FREE Essential Guide To Luminosity Masks E-Book.
Other online resources:
Here’s a nice basic youtube video showing a more advanced technique in Lens Correction but also the Transform Perspective function https://www.youtube.com/watch?v=0DlwGVUZ_dg
You can even follow Adobe’s instructions on Transforming Objects