How To use Blend If in Photoshop
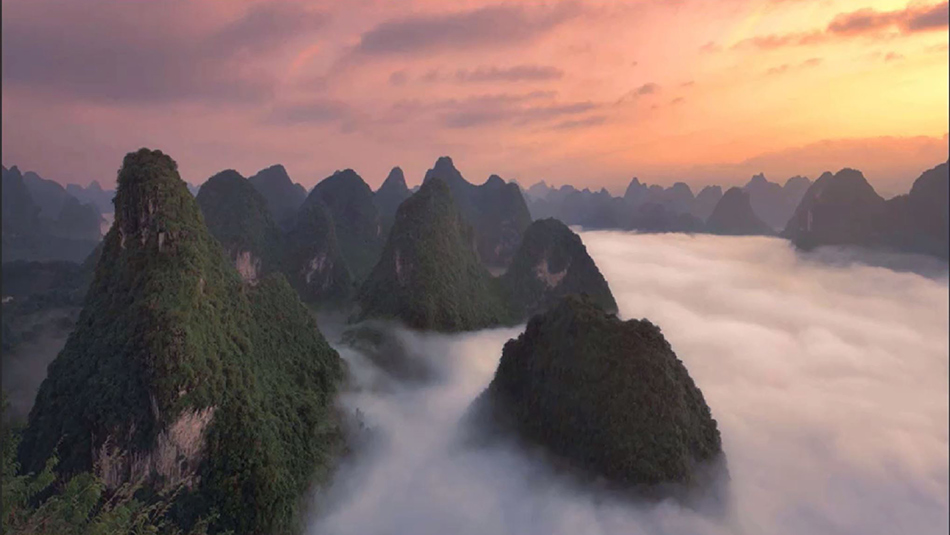
This feature in Photoshop can be very useful indeed. It can be used to seamlessly blend layers. Whether you’re blending textures or colours, having a play around can be very rewarding and fun. In this tutorial, we’re going to explain a bit more about this technique and the sliders that control it. In this example, we’ll use it to alter temperatures in targeted areas.

Blend If Explained
The way Blend If works is by using luminosity masking. Using the sliders, you can control the visibility of layer content by it’s grayscale value or luminosity. 255 being white and 0 being black. Where colours fit within that grayscale depends on their brightness and saturation. In our example, we’re going to play with the temperature. Playing with the Blend If function we’ll separately target lighter tones then darker tones. Giving us control over where the temperate changes are applied.
Additional Resources
Raya Pro 5.0 has the Blend If feature already incorporated in it which is preset to give smoothly feathered blends. Find out more about What’s New In Raya Pro.
Editor’s Choice plugin on Adobe marketplace

Raya Pro, the most rated plugin on Adobe Marketplace.
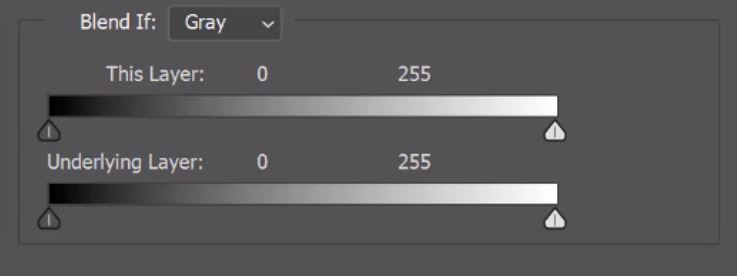
Blend If Sliders
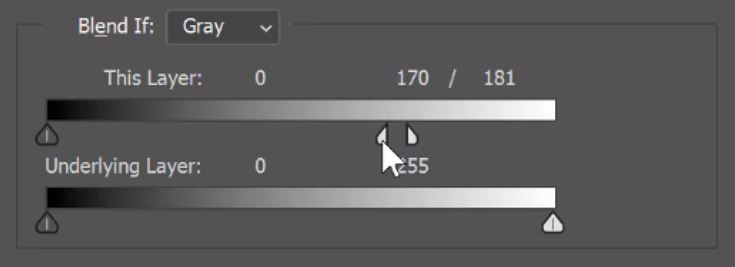
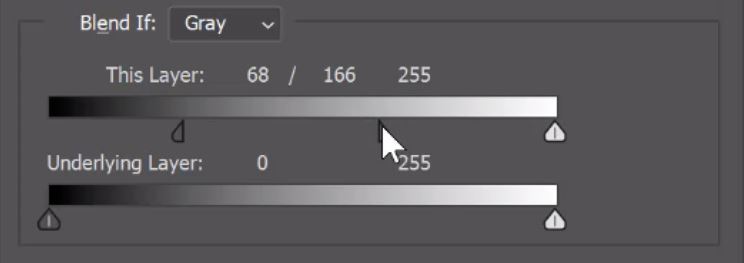
The Blend If sliders are different from most sliders. There’s two sets of sliders, one controls ‘This Layer’ (A) the other controls the ‘Underlying Layer'(B). As the names suggest by sliding the sliders on ‘This Layer’ you directly affect what happens to the layer you currently have selected. When you move the slider on the ‘Underlying Layer’ it forces change from the underlying layer through the top or current layer. The sliders control a luminosity range from Black (0) to White (255).
By sliding the sliders any part of the image in which tones are above the threshold of 201 will be blended out, but the blend will be harsh.

To soften the blend and make it smoother and more natural, we can split the sliders. Holding down the Alt key on a PC or Opt key on a Mac, left-click on the innermost section of the slider and drag it toward the center. You will see the slider will split in two. These two sliders will now form a rage where the blend is spread (170 / 181).

Watch the tutorial video so see the effects of the sliders.
Enter your email below and join our community of more than 100,000 photographers who receive regular tutorials and have also

Subscribed to our newsletter,
Downloaded our FREE Photoshop Course
Got our FREE Easy Panel for Photoshop
And have our FREE Essential Guide To Luminosity Masks E-Book
How To use Blend If in Photoshop
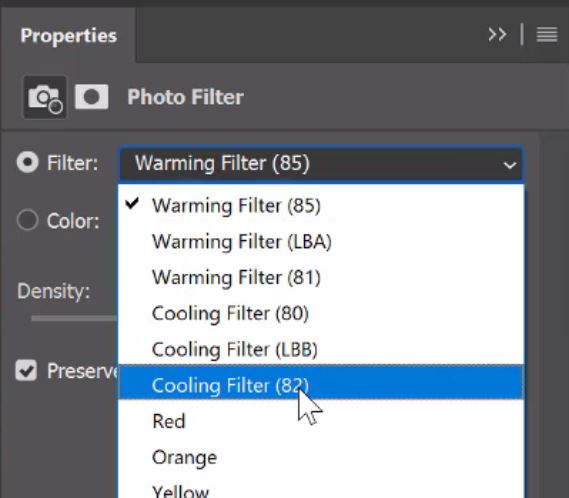
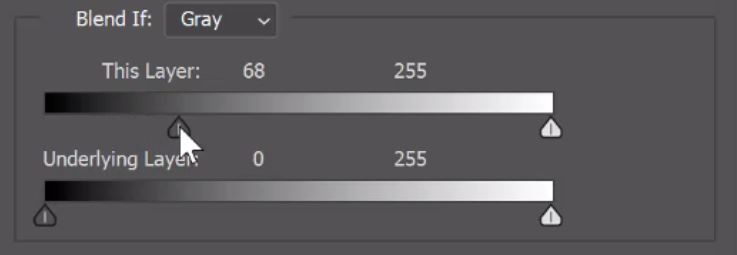
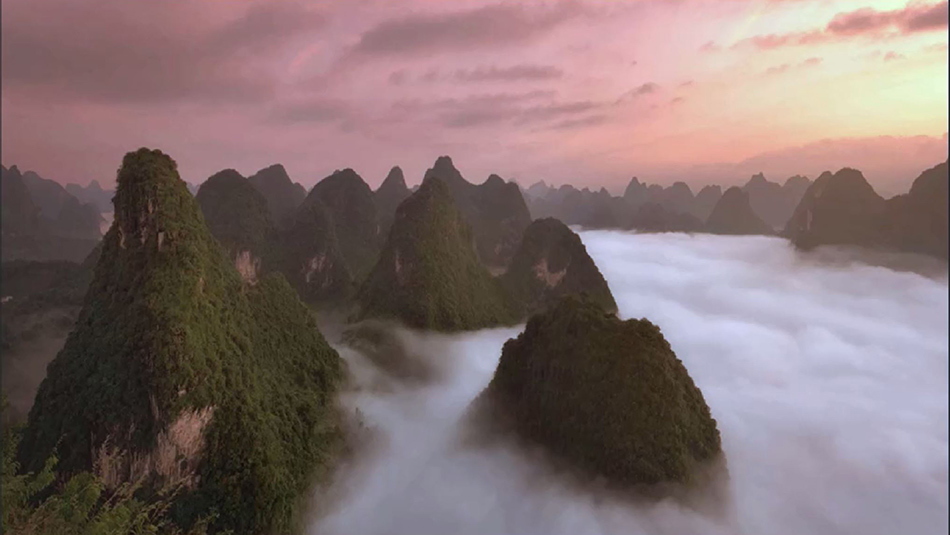
1. First, with your image open. Add a Cooling Photo Filter.
2. Select a cooling filter.
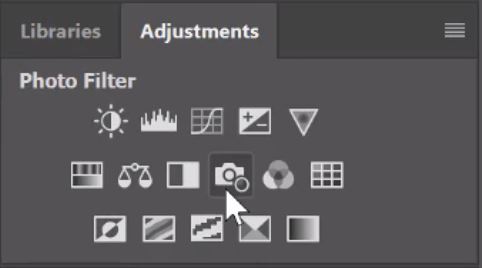
3. Double-click on the Filter layer.
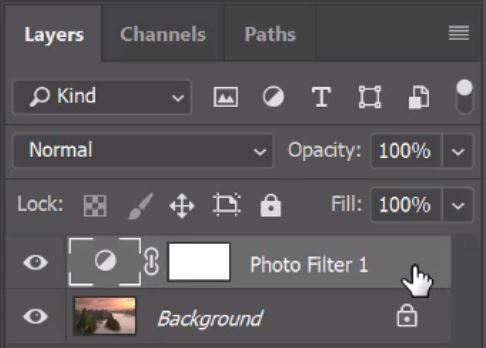
4. The Layer Style panel will open. This is where we will find the Blend If function.
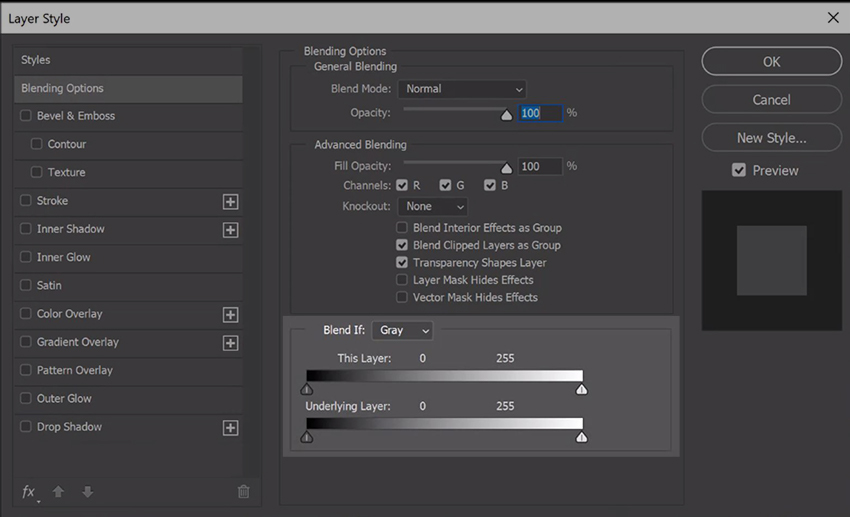
5. As we are trying to blend out the cooling filter effects on the clouds, we need to slide the brights slider. Left-click and drag the slider.
6. Eventually, you will see the effects of the slider. The filter will be blended out but it will be a harsh blend.

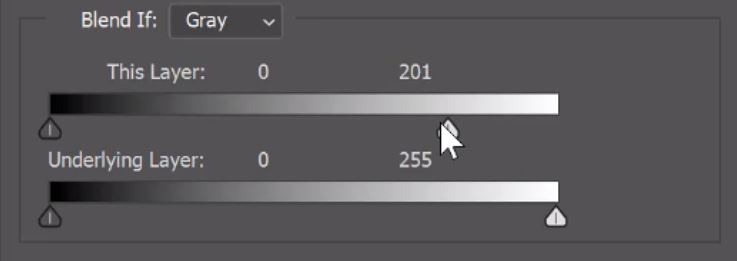
7. To soften the blend, hold down the Alt key on a PC or Opt key on a Mac. Now left-click on the innermost slider and slide it further.
8. The blend will soften and become smooth and natural.

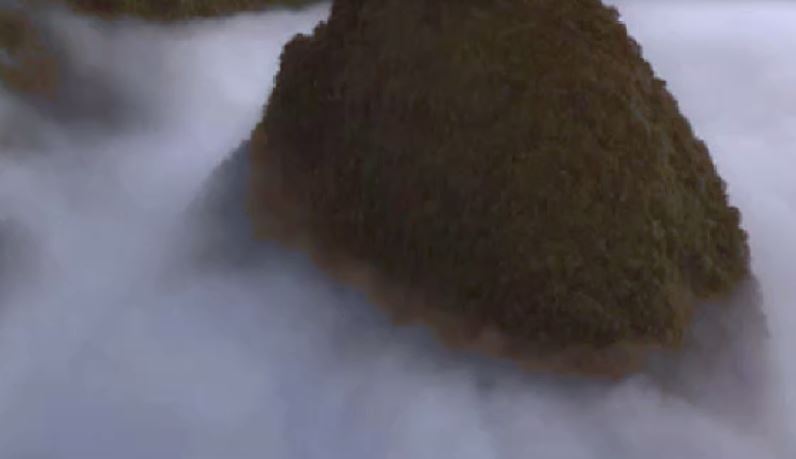
Now we have blended out the lighter tones in the cooling filter and brought back the warmth to the clouds but the mountains remain cool.

9. Let’s reverse this. Return the white slider back to its original position and slider the black slider toward the centre. This will target the darker tones in the image.
10. Again, by sliding both sliders the blend will be harsh
11. Hold down the Alt key for PC or Opt key for Mac and left-click on the inner black slider to create a blending range to smoothen the blend.
12. Notice how much smoother the blend now is.
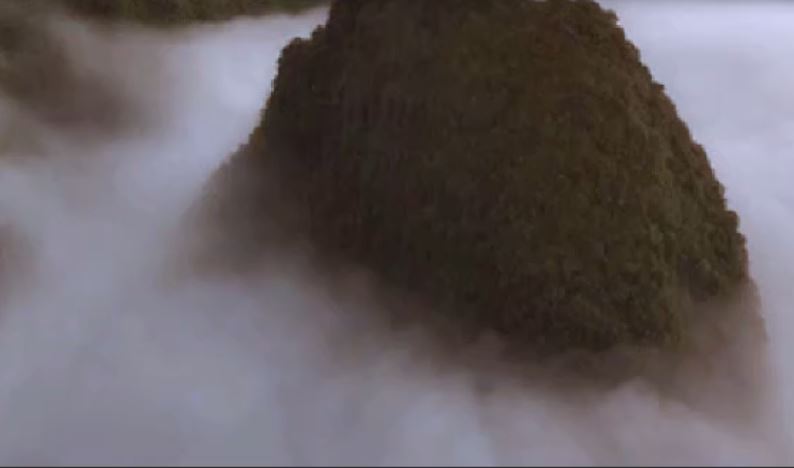
Now we have blended out the darker tones in the cooling filter and brought back warmth to the mountains while keeping the clouds cool.
Thank you for reading this article on How To use Blend If in Photoshop, You might also be interested in the articles below. Be sure to sign up for our newsletter for more tutorials and great offers.
Enter your email below and join our community of more than 100,000 photographers who have also
Subscribed to our newsletter.
Downloaded our FREE Photoshop Course.
Got our FREE Easy Panel for Photoshop.
And, have our FREE Essential Guide To Luminosity Masks E-Book.
Online Resources
You can also use Blend If in HDR. I found this in-depth article on How To Create Natural HDR Landscapes Using Blend-If Photoshop Layer Technique.
I also found a really handy video tutorial on How To Use “Blend If” In Photoshop Like a PRO: The Definitive 7-Minute Guide.
Or, a more comprehensive post on Photoshop Advanced Blending – The Blend If Sliders.
Thank you for reading this article, be sure to sign up to our newsletter for more tutorials and great offers.