Photography Tutorial On ETTR and Photoshop
Photography Tutorial On ETTR and Photoshop – Article by Bob Coates
While this is a tutorial on post-processing using Photoshop I want to start with choosing the file with which we work. When digital imaging first came about we had to make sure that absolutely no highlights were blown out in any of the color channels. If we did there was no real way to recover that information. That led to images being underexposed just to be safe. And, that was good. You need to work within the limitations of the tools
Moving forward sensors have more dynamic range and software has been improved to be able to extract and manipulate the data. With better tools and software come more options.
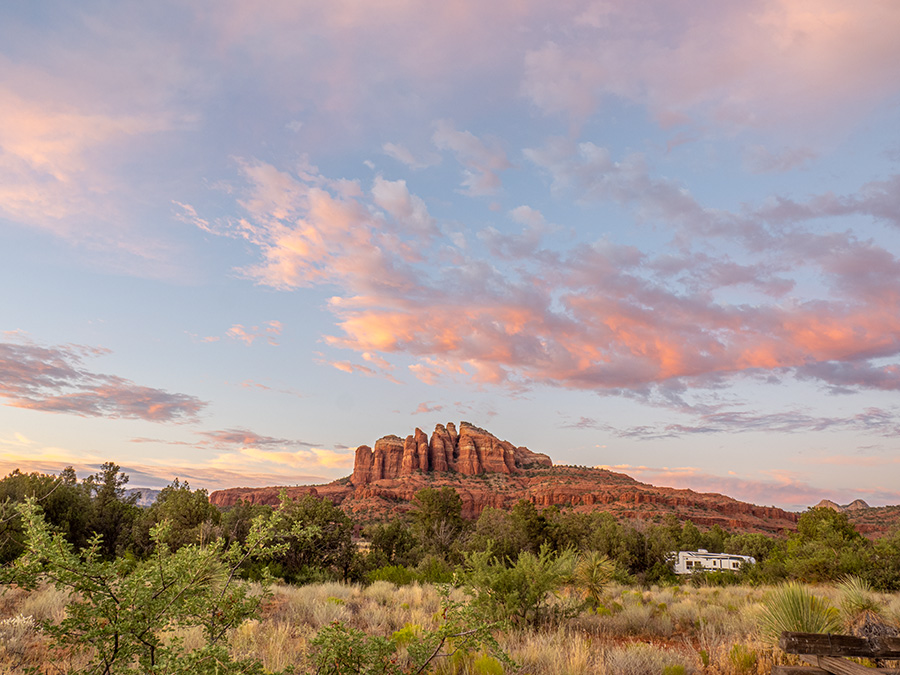
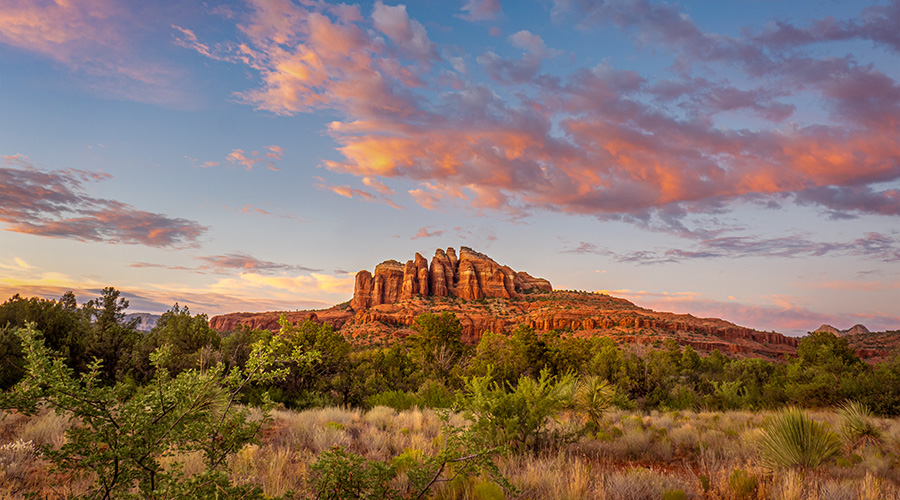
An example image from Sedona, AZ
I made this series of images to illustrate what I did in the past. I would bracket to get the most information from highlight and shadows. Sometimes blending the multiple exposures for processing with HDR software would lead to less than realistic images due to halos and extra noise. After experimentation, I started processing images in HDR software with a single image. I tried all numerous times processing each single exposure and the lightest one came out best each time as long as it wasn’t overexposing two channels.
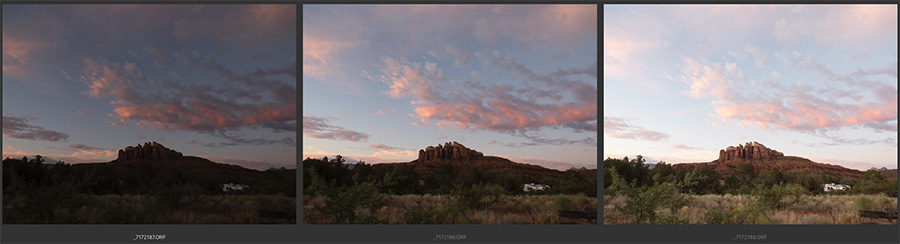
The middle image is the one showing ‘correct’ exposure. Image on the right is one and a third stops overexposed according to the meter.
This ETTR process sometimes allows me to skip the single image HDR step as I have done here
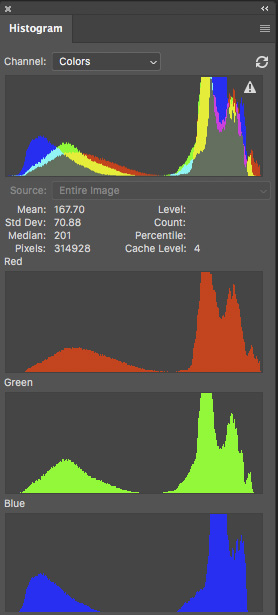
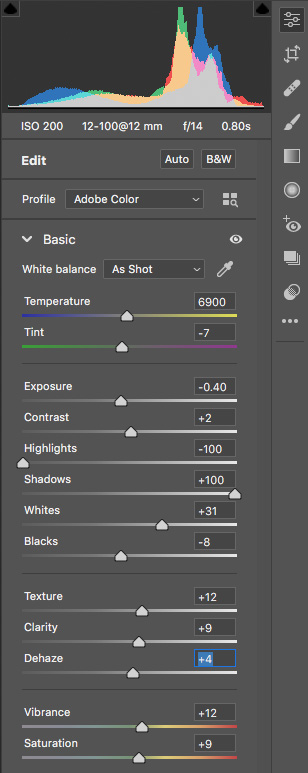
First step in processing this image was to get a good base. In ACR I recommend to process in this order. The actual settings will change dependent upon the density range of your file. Highlights Slider -100. Shadows Slider to taste. In this case it was +100. Set Exposure Slider according to histogram, -0.40. Contrast up a bit, +2. More contrast control using the Whites, +31 and Blacks, -8 Sliders. Add a little Texture, +12, Clarity, +9 and Dehaze, +4. Add a little Vibrance, +12 and Saturation, +9. Check the Exposure Slider once again before opening image.
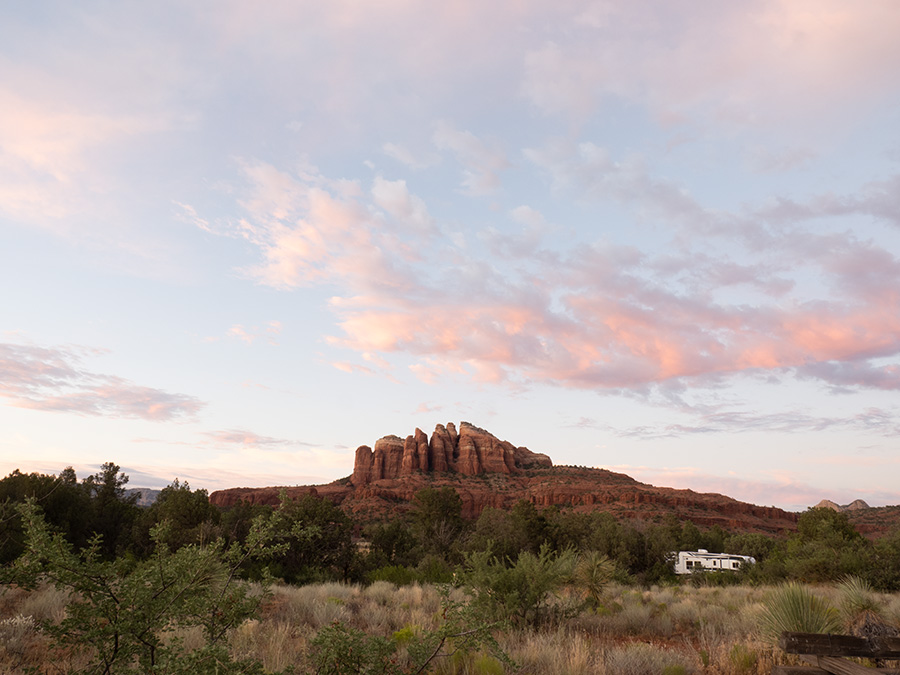
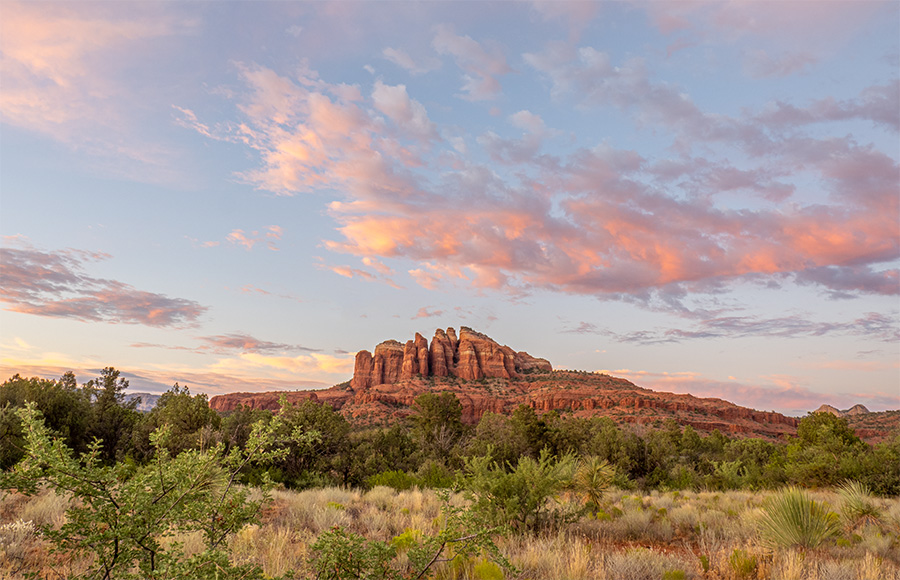
First process from ACR image – This is the initial Layer output after applying the settings above.
Working with Layers in Photoshop

Make a copy of the Layer. This Layer is for clean up using the Clone Stamp Tool and Spot Healing Brush. The trailer was removed along with the fence from the corner. Other small changes were made to remove dead leaves, encroaching branches around the edges of the image and other distractions. Be careful to make sure the information used to clone does not show repetition. No one needs to know you have idealized the scene. I say that as one who creates art, not editorial or historical imagery.
Add new Layer copy. CMD/Ctrl –J Convert Layer into a Smart Object. Shift CMD/Crtl A. Smart Objects allow access to any changes for tweaking filters without losing any quality just as an adjustment layer will do. Here two sets of adjustments were added in the Camera RAW Filter, Gradients and Radials. You can access the Camera RAW filter with the keyboard shortcut above or using the Filter menu. Filter>Camera RAW Filter.
Graduated Filter in ACR
Select the Graduated Filter option to the left in ACR (or up above in older versions of ACR).

Graduated filter Settings: top of the exposure slightly lowered -.10 Contrast +45 Dehaze +23 Saturation +23 Bottom Tint +30 Saturation +33
Radial Filter in ACR
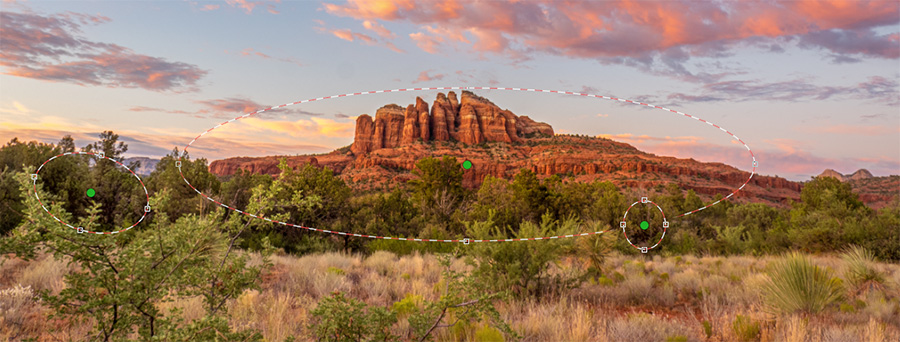
Radial filter Settings: Center pin Temperature +12 Exposure +15 Texture +18 Clarity +10 Saturation +56. Two other pins were set to open shadows. Shadows +48
Back in Photoshop
Once finished in ACR, we return to our layers in Photoshop. Now Painting with a low opacity soft-edged brush with black and white on a Soft Light (Blend Mode found at the top of the Layers Panel) Layer enhances depth and dimension by adding black to dark areas and white to lighter areas.

Next we selectively sharpen the image. In addition to composition and contrast, you can bring a bit of extra attention to certain subjects by selective sharpening. A High Pass Filter was masked out and certain areas were highlighted through painting on the mask with white.

Final tweaks to the image include a darkening Levels Layer with a mask to add a gentle vignette. All Layers were combined for a last trip to the Camera RAW Filter. The shortcut to combine all layers into one without losing the layers below is Shft/Opt/CMD E (mac) Shft/Alt/Ctrl E (pc).
Using the Radial Filter, another type of vignette was added. Overall exposure was lowered with the central red rock area held out which had the effect of making it look brighter.
At this point, I felt that the photo was a bit heavy on the sky. That called for the Rectangular Marquee tool to make a final crop selection. The selection was applied using the Image Menu – Image>Crop. This could also have been achieved using the Crop tool.
Photography Tutorial On ETTR and Photoshop Final thoughts
I make sure to save the base image with all working layers without the crop in case I find any errors. Sometimes when you go to print something that was not noticed jumps off the canvas. This saves having to go al the way back to work the file over again. Also, the final crop will depend upon how the image is going to be used. Those clouds that were cropped out could be important to someone who wants a specific aspect ratio.
I highly recommend that you don’t just believe everything you see and hear about processing images. I suggested that you should expose to the right (ETTR) and process that image for best quality. Always test it for yourself. Your mileage may vary. Your equipment is different. Your esthetic is different. Your final use or print substrate may be different. What I shared here is a good starting point but testing will ultimately give you the results you want for your work.
Yours in Creative Photography, Bob
Bob Coates is a Lens Based Artist and has had the honor and privilege to author books and articles on photography and has presented seminars and programs from Hawaii to the Caribbean. As a former Panasonic Lumix Ambassador, he has been able to stay up with the latest technology in the Micro Four Thirds cameras. Coates is a successful commercial and fine art photographer based in Sedona, Arizona with his wonderful wife who makes it possible for him to do all he does in the photography industry. Need a speaker? Get in touch.