How to Adjust Levels in Photoshop
Levels are almost always a necessary adjustment that needs to be made in post-processing. Playing with the levels of an image can change the whole dynamic and feel of the photos. Bring some drama and character to pictures very easily. Learn what the levels sliders do. We’ll show you 4 wayds to add levels adjustments in our quick 2-minute tutorial video.

What Levels Adjustment Sliders Do
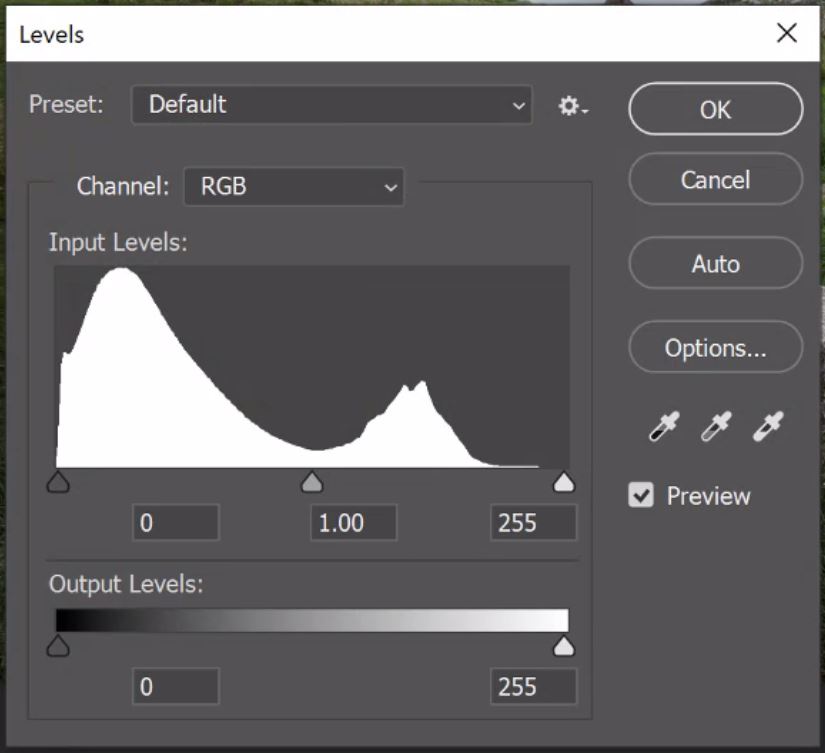
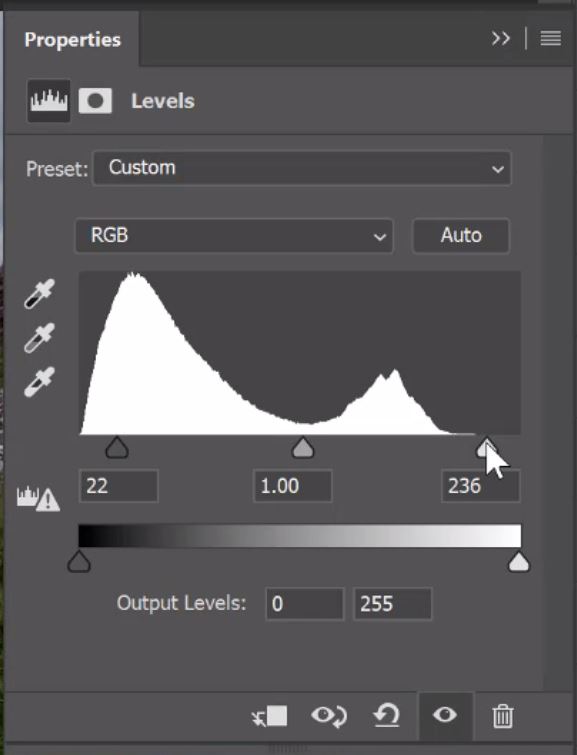
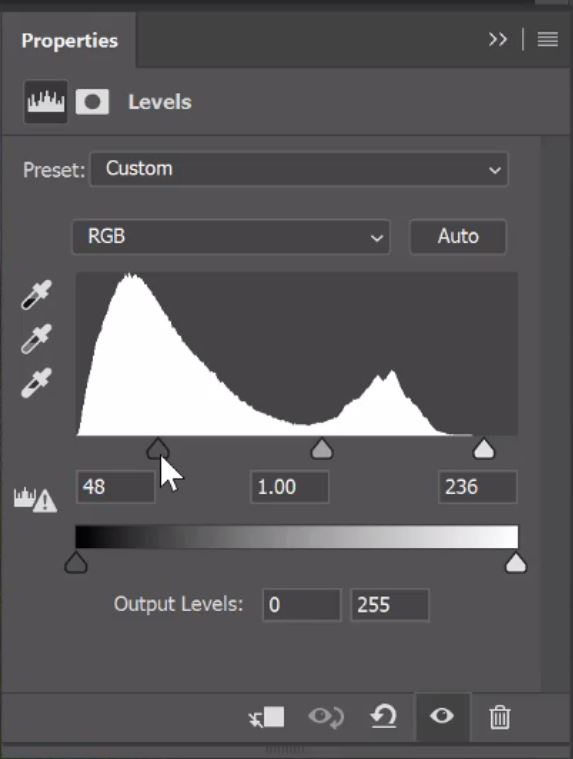
Levels Adjustments sliders are used to define what’s black and what’s white by their tonal value. By moving the sliders we can set what range we use to determine how pixel tones fit within a grayscale range. The scale from black to white is measured is from 0 to 255. Here is what each slider does:
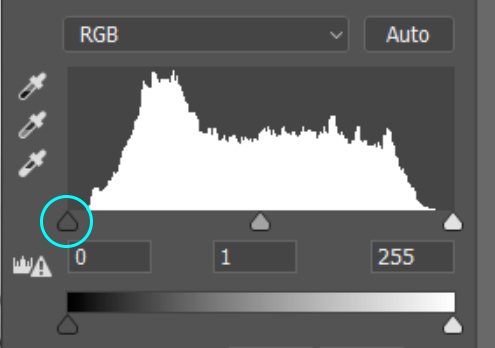
Highlighted is the black slider set to zero. If we slide it right to 35. Any pixels from dark gray 35 to black 0 will become black.
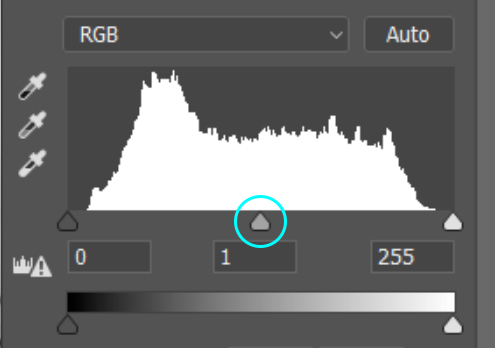
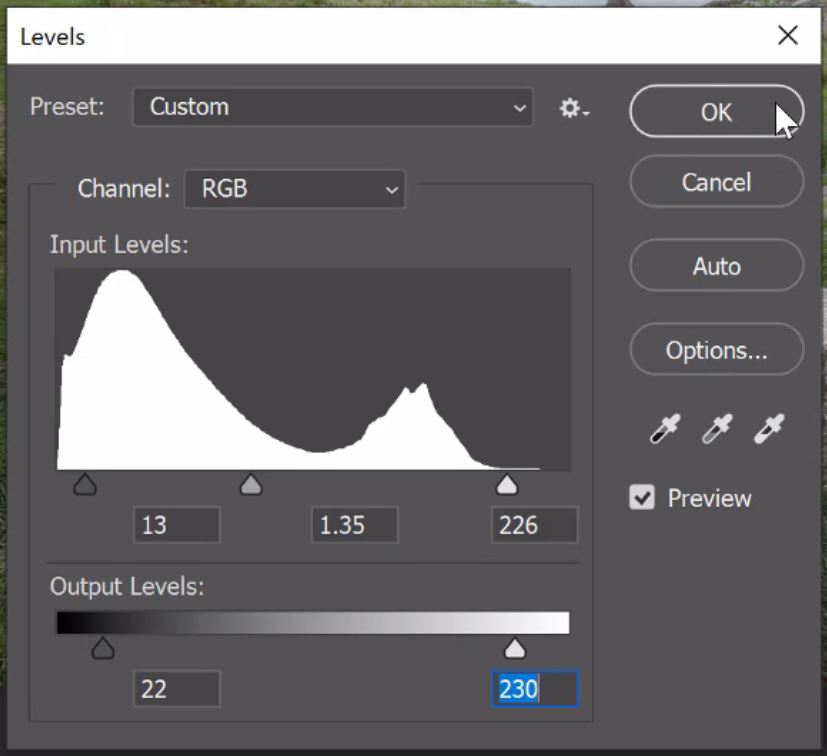
We have the mid-tone slider highlighted. This is set to 1 as default, sliding left toward black increase the range of white tones into mid-tones lightening the image. and vice versa, by sliding it right toward white, you increase the range of black tones into mid-tones darkening the image.
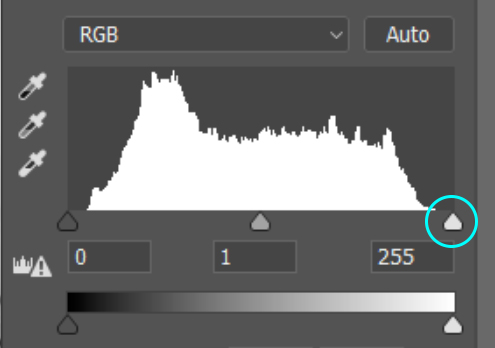
You’ve probably guessed by now. Highlighted above, the White slider controls what we determine as white. By sliding it left for example from 255 to 200 the upper mid-tones from 200 will now appear as white.
The Output sliders determine what tonal range exists in the image. We know 0 is black and 255 is white, what if we didn’t want any black in our image.
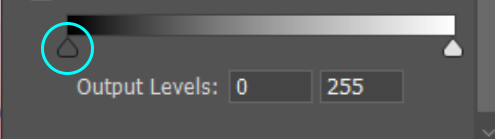
If we slide the black slider to, let’s say 50. Then Black will be replaced with the tones equal to 50. The image will brighten and soften as the full tonal range is set from 50 to 255.

Sliding the white slider will have the opposite effect. If we slid this to 200, the overall image will darken as white is removed and replaced with light grey with a tonal value of 200.
By having a good play around with these sliders and exploring what they do, you will quickly understand their purpose and figure out how they can work for you.
Enter your email below and join our community of more than 100,000 photographers who receive regular tutorials and have also

Subscribed to our newsletter,
Downloaded our FREE Photoshop Course
Got our FREE Easy Panel for Photoshop
And have our FREE Essential Guide To Luminosity Masks E-Book
4 Ways to Add Adjustment Levels in Photoshop
1 – Quick Keyboard Shortcuts.
2 – Adjustment Panel.
3 – Adjustment Layer Icon.
4 – Menu Navigation.
Method 1 – Quick Keyboard Shortcuts.
By far the quickest way to add a Levels adjustment.
1. Press Crtl+L on a PC or Cmd+L on a Mac.
2. Adjust the sliders as you see fit and click OK.
3. NOTE, there is no new adjustment layer. The level changes are immediately applied directly to your image. This is a destructive process.
4. To undo these adjustments you will need to press Crtl+Z on a PC or Cmd+Z on a Mac. Or go to Edit>Undo.
Method 2 – Adjustment Panel.
The remaining methods are preferred non-destructive methods.
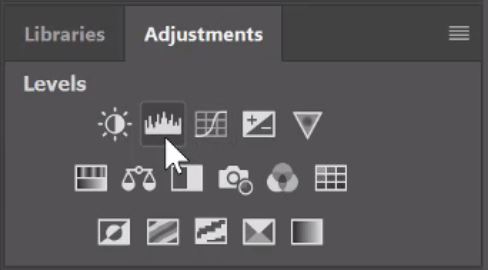
1. Go to the Adjustments panel and click on the Levels Icon.
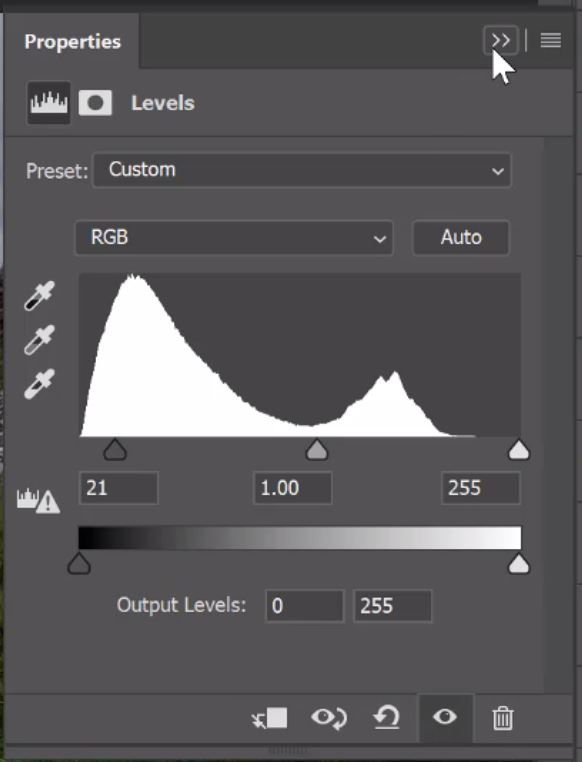
2. The levels pane will appear for you to play with.
3. When you’re finished making adjustments close the panel by clicking the icon it the top right corner that looks like two arrows >>.

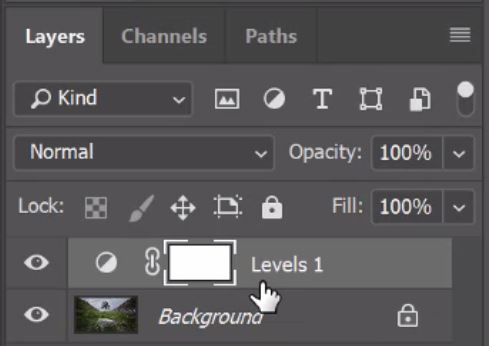
4. A new adjustment layer is made, showing that this is a non-destructive process.
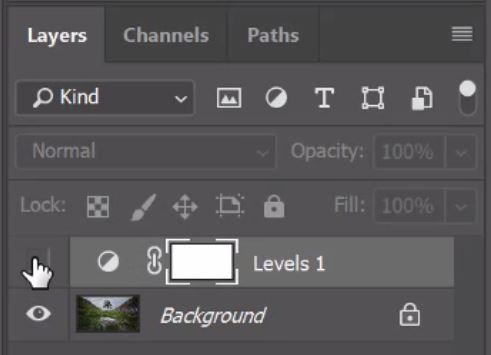
5. Because the levels adjustments are in their own layer you can toggle the visibility of the layer to see its effects before and after by clicking on the eye icon  .
.
6. If you need to make changes you can, by clicking on the circular icon  .
.

7. Adjust the levels layer to improve your image.
8. If the levels adjustment gives the right balance but it is too strong. You can reduce the levels layer opacity.

9. To delete the Levels Adjustment layer, you can simply drag and drop it to the bin icon.

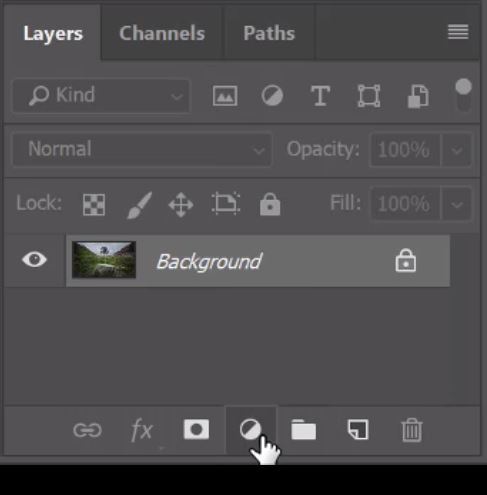
Method 3 – Adjustment Layer Icon.
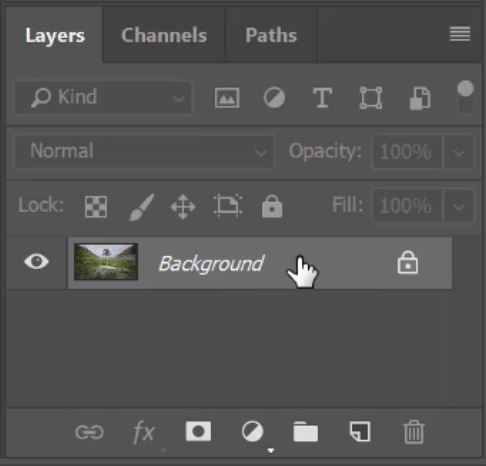
1. Click on the ‘create a new fill or adjustment layer’ icon at the bottom of the Layers panel.
2. Select Levels from the list that appears.
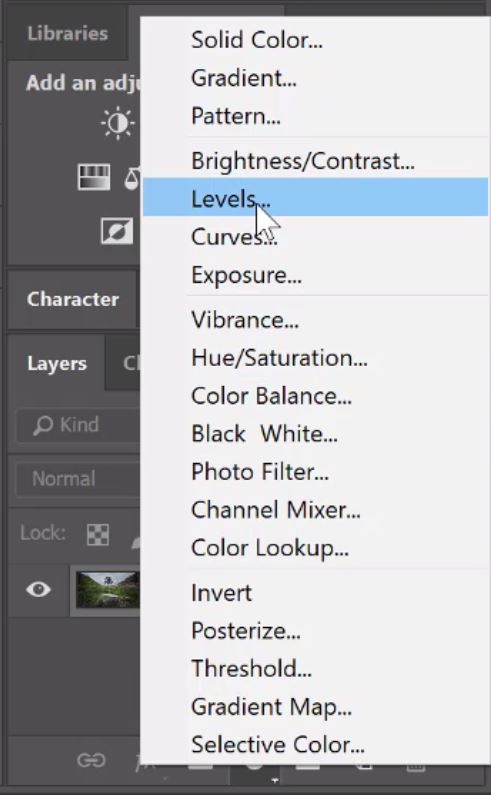
3. The Levels Adjustment panel will appear for you to adjust as described previously in Method 2 from point 2.
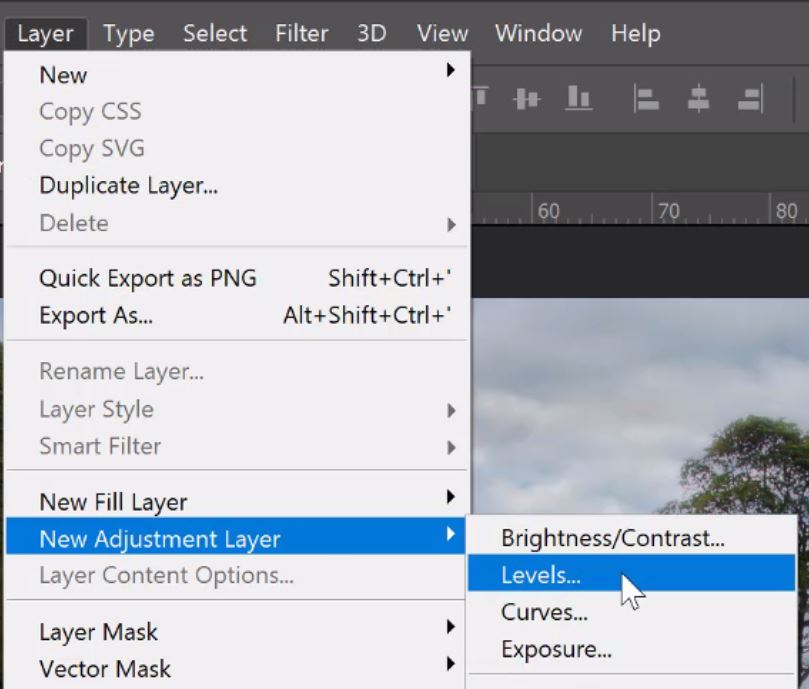
Method 4 – Menu Navigation.
1. Go to Layer>New Adjustment Layer and select Levels.
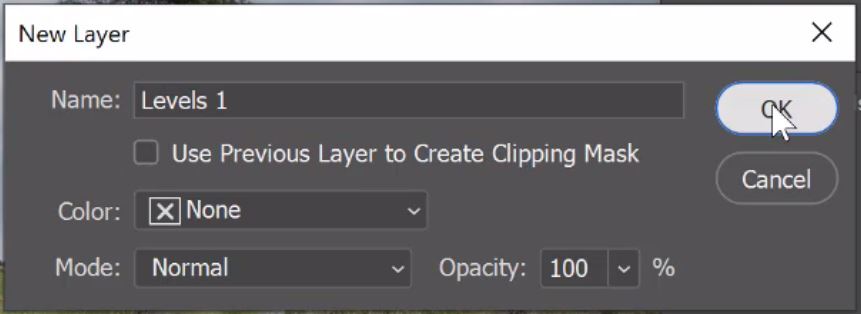
2. A box will appear where you can rename this layer and more. When you’ve finished with this box click OK.
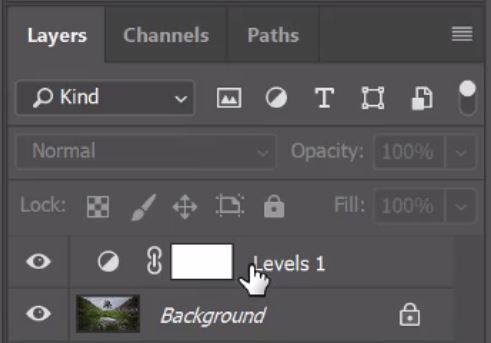
3. After clicking OK, the new Levels Adjustment will appear.
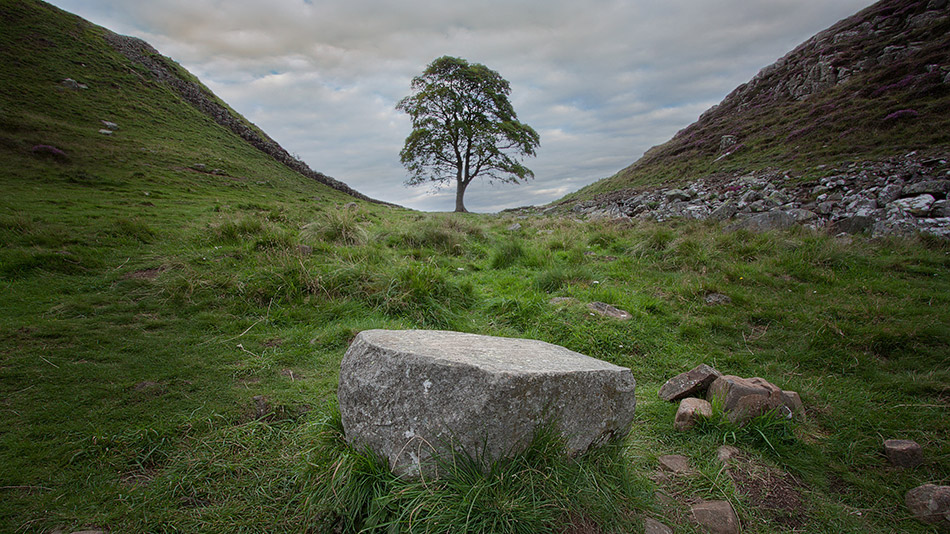
Here is an example image fo before and after we used this tutorial to adjust levels in photoshop.
Thank you for reading this article xxxxxxxxxx, You might also be interested in the articles below. Be sure to sign up for our newsletter for more tutorials and great offers.
If you liked this tutorial on how to adjust levels in photoshop, you might also like What Level Adjustments Do And How They Affect Your Image.
Enter your email below and join our community of more than 100,000 photographers who have also
Subscribed to our newsletter.
Downloaded our FREE Photoshop Course.
Got our FREE Easy Panel for Photoshop.
And, have our FREE Essential Guide To Luminosity Masks E-Book.
Online Resources
You can find out what Adobe has to say in their Levels Overview.
I also found a really good article on Picture Correct website on WHEN TO USE LEVELS OR CURVES IN PHOTOSHOP.
This is an interesting, comprehensive, and detailed tutorial on How to Use Levels in Photoshop Correct Color and Contrast.
Thank you for reading this article, be sure to sign up to our newsletter for more tutorials and great offers.