Change The Mood Of An Image With Split Toning in Photoshop
This Change The Mood Of An Image With Split Toning Article is by Nick Dautlich, If you would like to write for us, please read here.
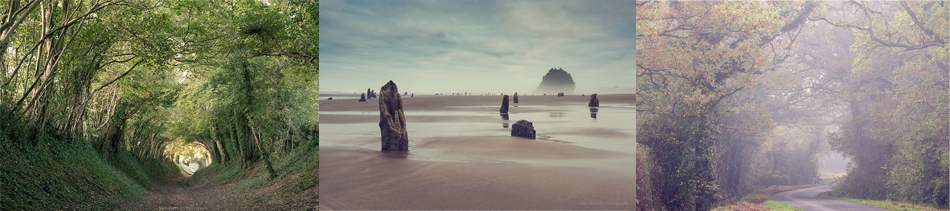
Photographers have a lot of tools available for changing the mood of an image in Photoshop. In this post, we explore how to make quick universal changes with split toning to create moody results from fairly bland starting points. Where we otherwise might colourise individual elements in an image, split toning applies one colour to all highlights and the opposite colour to the shadows. It’s a quick and easy technique, which like most things in Photoshop can be done in a number of different ways, with subtle or crazily overcooked results. Here we look at three different ways of split toning with three different images.
What is split toning?
I believe split toning started years ago when movies were colour graded, as it provided a quick method of changing the mood in a film scene, but let us know if you know otherwise! In Photoshop split toning is using one colour to tint highlights and the complementary (opposite) colour to tint shadows. If we need to know the values (like when doing this in Camera Raw), we simply add 180 to the colour value we picked to get the opposite or complementary value. The opposite colour is180 because a circle is 360º and colour is represented in a colour wheel.
Why split-tone images in Photoshop?
After playing around with split toning we start to see how some images have been colour graded in this way. A lot of popular Instagrammers and well known commercial photographers use this technique, combined with desaturation and other effects. The results can create a consistent unique style in their portfolio and it is a good way to make a number of images look cohesive.
What is the mood of an image?
As landscape photographers, we look for end results that enhance the mood that we want to convey. The mood might be how we feel when out in the landscape, what emotions we felt during the moment we captured an image and what we want the viewer to feel when they look at our work. Colours convey basic moods and split toning capitalises on them at a base level. For example, blues can cool down or deepen the mood and yellows can brighten a mood.
What images work best for split toning?
This needs some experimentation with your own images but I’ve found that monochrome and misty images work well, where toning is more noticeable while still being subtle. It also works well to colour grade images where there is a pretty clear difference in contrast between the highlights and shadows or to change colours in trees and foliage. Pick a few photographers whose style you like and see if you can work out what type of images they are using. Many portrait photographers also use this technique to deliver a particular style within a cohesive set of images.
Enter your email below and join our community of more than 100,000 photographers who receive regular tutorials and have also

Subscribed to our newsletter,
Downloaded our FREE Photoshop Course
Got our FREE Easy Panel for Photoshop
And have our FREE Essential Guide To Luminosity Masks E-Book
Using Photoshop Camera Raw to split tone
This first technique is easy but you have to pick the value of the complementary colour yourself, other methods below all pick that for you automatically.
Click the raw file you want to edit and choose open with Photoshop camera raw.

For this first image, I’m using a picture of a tree tunnel straight out of cameras aside from lens corrections. It’s contrasty but shows the process reasonably well and how far from the original you can get whilst still staying reasonably true to the original.
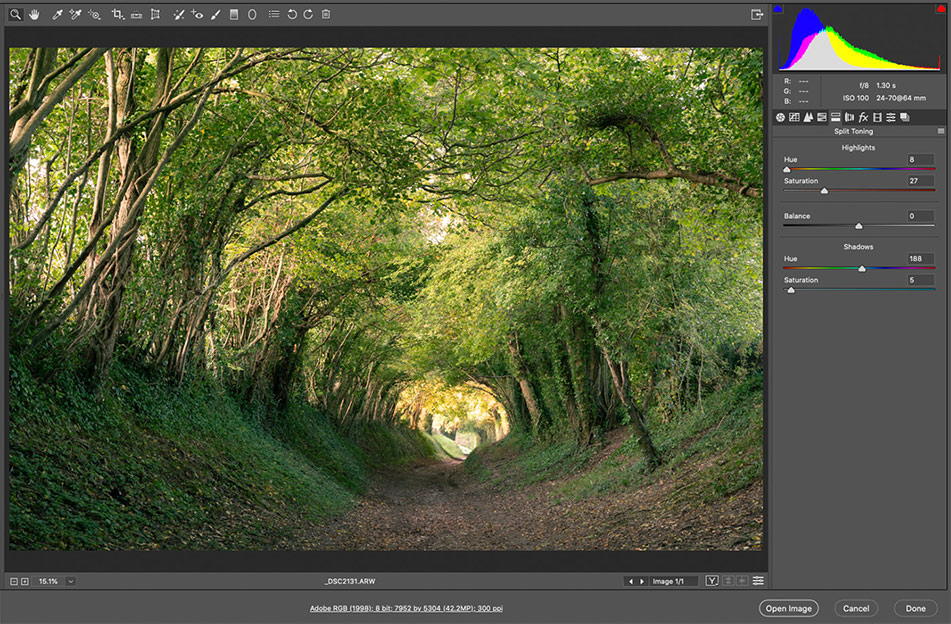
We have the starting point which is taken just as autumn started, with green to yellow leaves, quite similar hues and not much variation or interest. Adding red to the highlights and cyan (opposite) to the shadows with more saturation in the highlights provides some colour definition in the foliage and colder shadows. Picking the value of red (8) with 180 added gave me 188 for the shadow colour. You can adjust the saturation in Raw to see the effect it has. For the finished article I desaturated around 20% after lightning the image and added a light vignette. The mood in the picture has changed from brighter and cheery to darker and a lot more mysterious with a subtle blue undertone.

Split toning with a solid fill colour
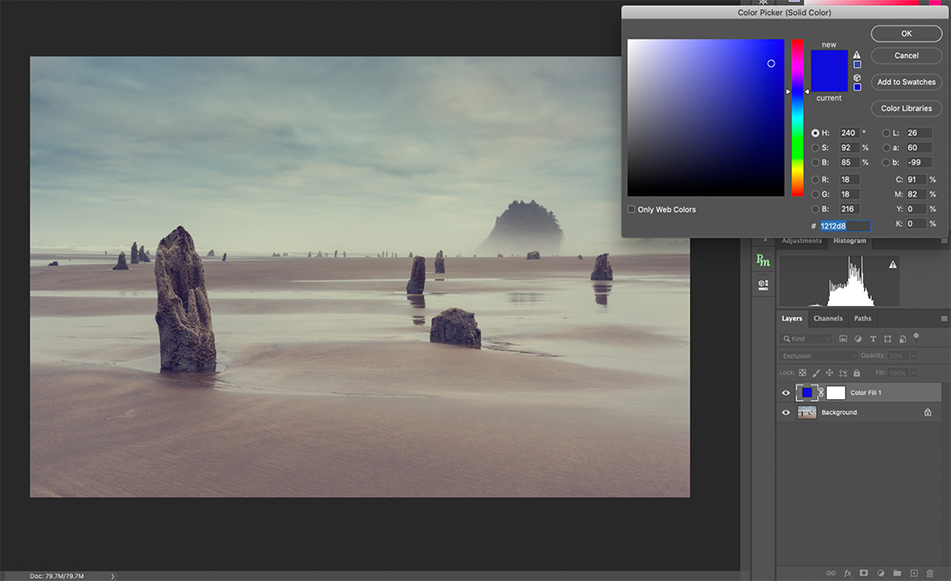
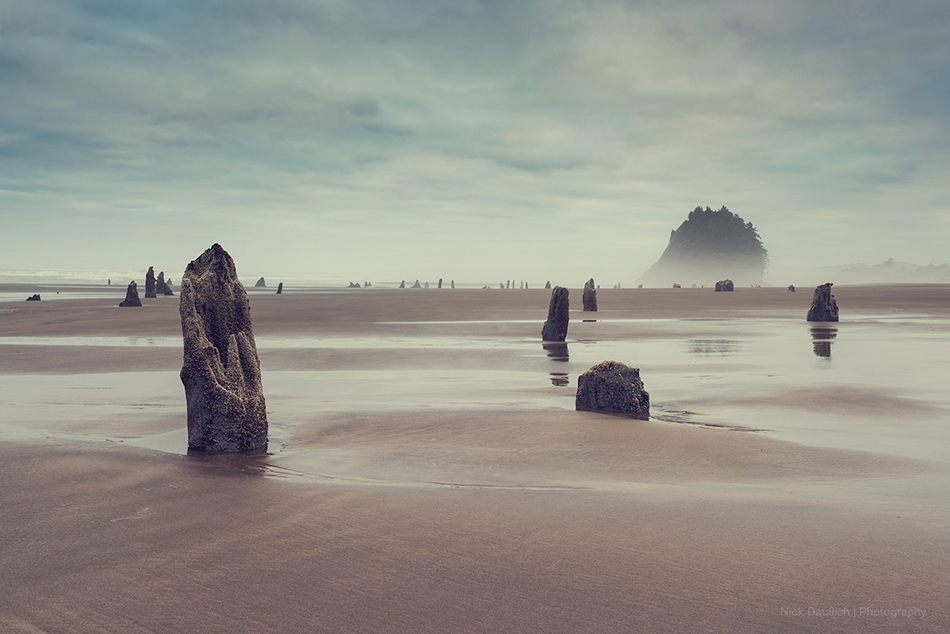
For the second technique, I’m using another straight out of camera beach scene. There are some light clouds and tree stumps on the beach which could look pretty alien, but instead looks fairly neutral and flat. I wanted to create a more sci-fi result whilst still staying within the bounds of possibility.

Adding a solid colour fill layer which is set to ‘exclusion’ blending mode is the second method. The immediate result is super weird.

If you drop the opacity right down (I used 20%) of the colour fill layer you can get some interesting results. Using a fill layer allows you to double click the colour and pick any new colour you like. Photoshop will automatically tone the shadows with the opposite colour for you.
Once again to finish I lowered the saturation and added a light vignette. Although this isn’t the sort of image I’d produce generally, it shows off the difference split toning can make, with the result looking otherworldly and surreal thanks to highlight and shadow toning.
Using curves to apply split toning
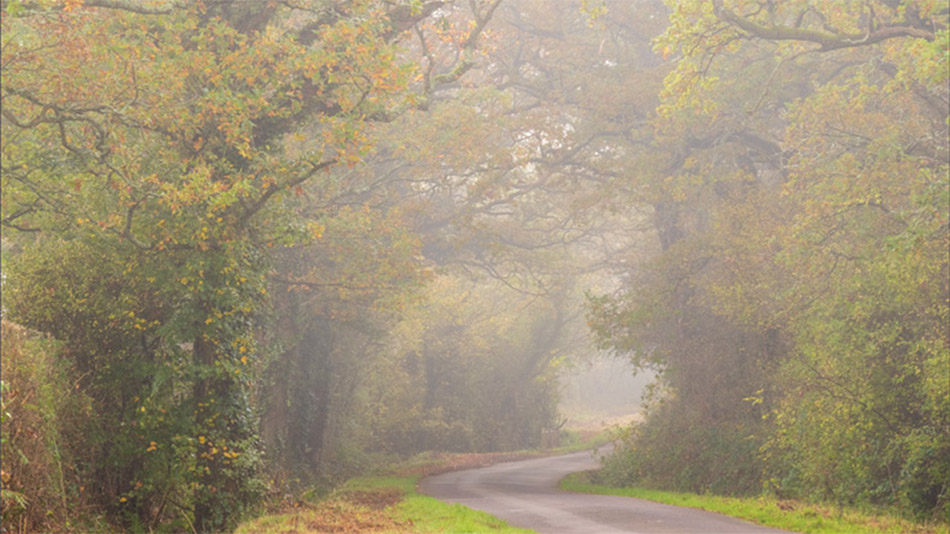
The 3rd example is taken on a misty lane in full autumn. Once again this is straight out of the camera and we can see the mist has picked up the yellow light coming through (mid morning) and autumn leaf colour so looks quite yellowish all over. I wanted a more spooky result so used a new curve layer to split tone this as well.
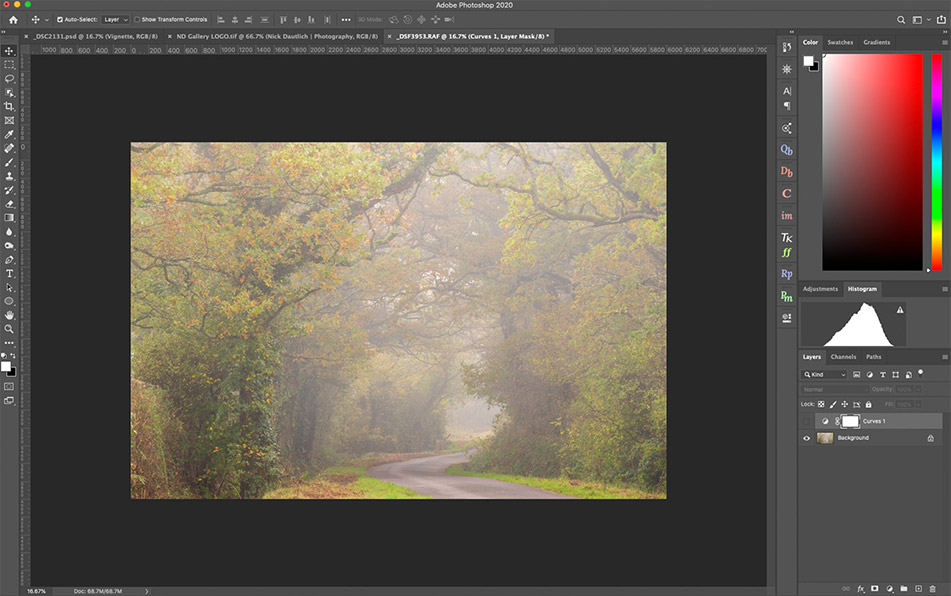
Rather than applying contrast in the RGB curve, for split toning, we choose an individual colour channel. I chose to add blue into the shadows to take away the yellow white balance. All histograms display shadow on the left and highlight on the right.So add a new curves layer, and click the RGB dropdown to select the colour channel you want to edit. By pulling the square corner curve marker on the left upwards we are increasing blues in the shadows and Photoshop automatically adds the opposite to the highlights.
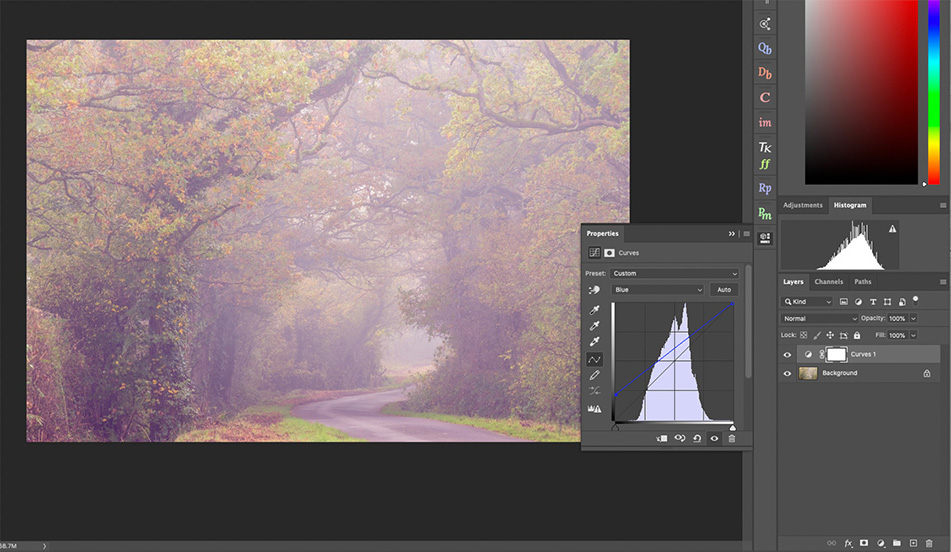
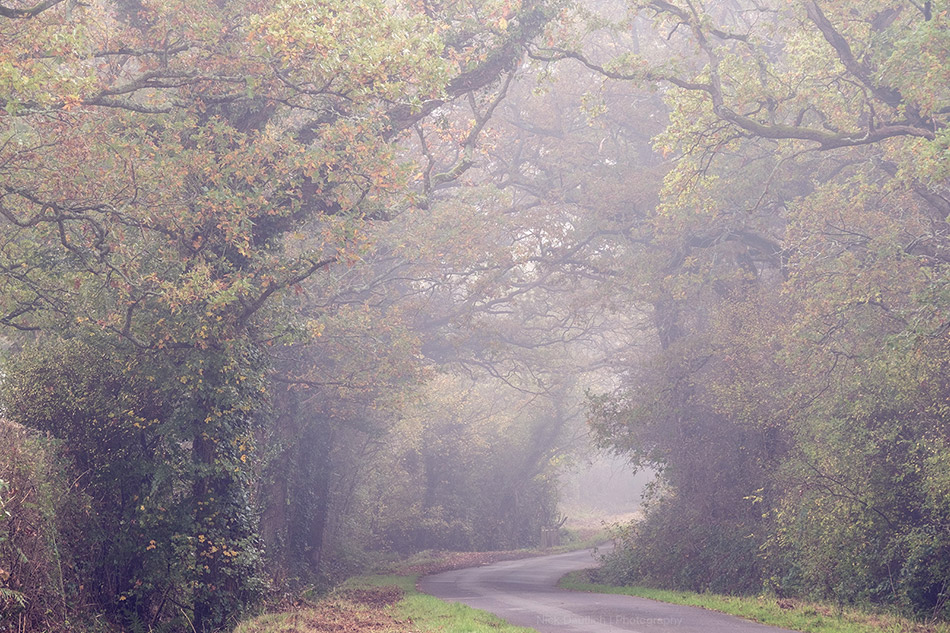
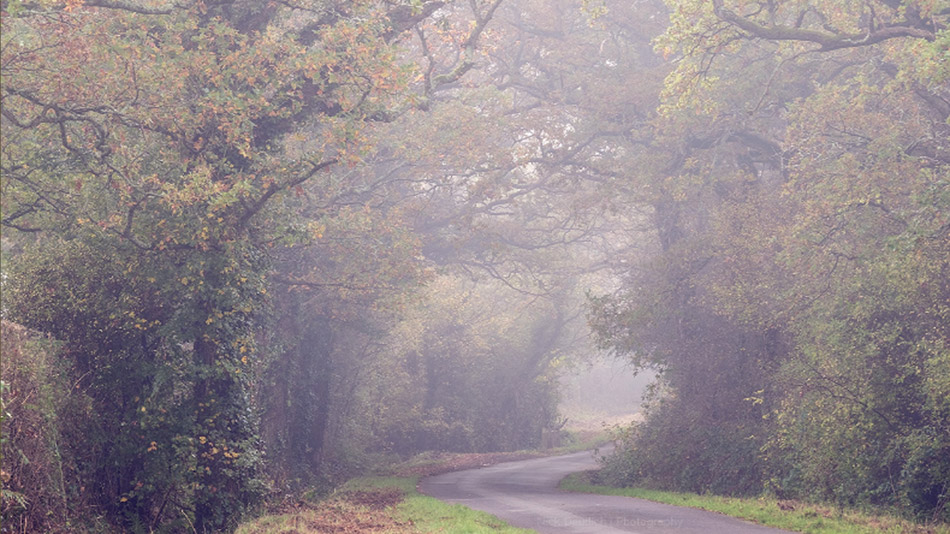
This creates a moodier shot which I desaturated to finish off. You can do this for any channel with either highlights or shadows.
Conclusion and examples from a skilled user
So with these three different methods, we can see how easy it is to change the mood of an image by using split toning in Photoshop. I have to admit it’s not my normal style of editing but interesting to see how images can be changed so easily. Many photographers achieve excellent split-toned images and I would say it’s a secret weapon in some famous photographers’ arsenals. Take a look at Ian Winstanley’s landscape gallery. He uses split toning consistently with other editing techniques, as he does in his commercial work which is highly successful.
Let us know what you think and whether it’s a technique you have tried, already use or something you might try now. Good luck, have fun, and happy shooting!
I hope you enjoyed this tutorial and that you are getting out into the landscape doing what you love. Please leave a comment below and if you want to see more of Nick’s photography visit https://ndgallery.com. Images in this article are ©Nick Dautlich.