CJ7: How To Edit A Foggy, Moody Landscape In Photoshop

CJ7: How To Edit A Foggy, Moody Landscape In Photoshop

How To Edit A Foggy, Moody Landscape In Photoshop

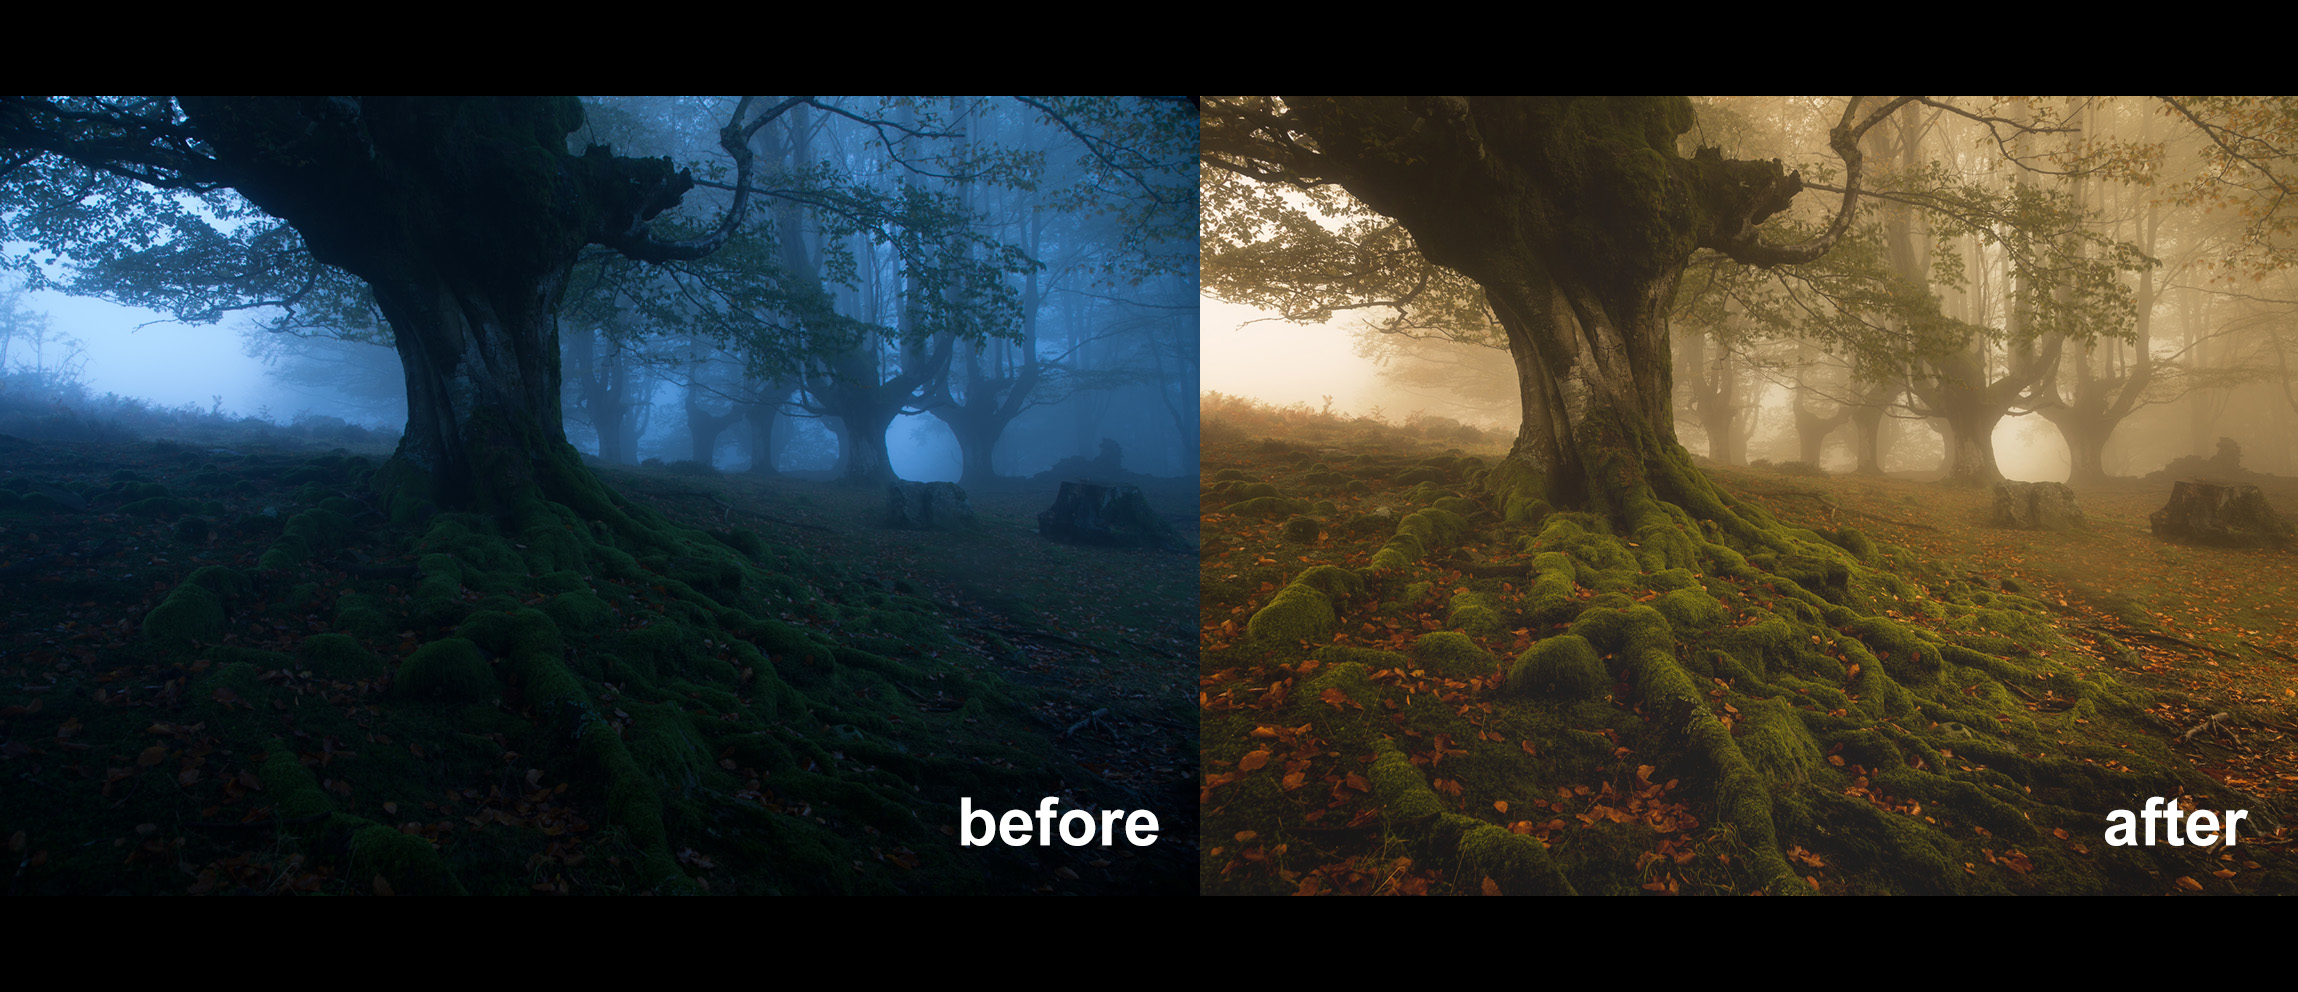
Foggy landscapes are often inherently moody scenes. It isn’t too difficult to edit these landscapes in Photoshop. In this case we started out with a beautifully composed image which was a little under exposed, with a strong blue colour cast. We finished with a softly-contrasting image, with deep autumn colouring.

In the tutorial we look at how to recover the image in Adobe Camera RAW, manually colour correct to reduce the blue cast, pull out the beautiful details in the tree and foreground, create a gentle but impacting Orton Effect, and selectively enhance certain colours that further deepened the mood in the scene.

Thank you to Leire Unzueta for sending in this week’s beautiful image for Challenge Jimmy.

To take part in Challenge Jimmy, please email me at challengejimmymc (at) gmail (dot) com. Include a paragraph detailing what you found difficult, and attach a full sized JPEG of your final version.
Enter your email below and join our community of more than 100,000 photographers who have also
Subscribed to our newsletter.
Downloaded our FREE Photoshop Course.
Got our FREE Easy Panel for Photoshop.
And, have our FREE Essential Guide To Luminosity Masks E-Book.

To go directly to any of our products, simply click on the image below.

Raya Pro
Lumi32
Gradiate
Gradiate
Art of Photography
Art of Digital Blending
Exposure Blend Like an Expert
Mastering Lumi32
Jimmy’s Big 5 Photos

Shutter Evolve Complete Product Range

CJ7: How To Edit A Foggy, Moody Landscape In Photoshop

6 thoughts on “CJ7: How To Edit A Foggy, Moody Landscape In Photoshop

  1. Jimmy, you are amazing. I love watching your tutorials to the point that when I see a notification for one in my inbox, I get excited! Thank you so much for always being so pleasant, respectful (even when working on other people’s submitted images), and succinct at describing not just your process, but offering alternative routes to achieve similar/same effects. I cannot thank you enough for the many tips and features you have offered over the years. You are incredibly gifted as a photographer and incredibly generous and kind as a person! –Theresa from TreeRose Photography

  2. Thank you for this feature, Jimmy. The images you select make for a wonderful collaboration with the original photographer. I would love to hear how Leire Unzueta feels about the direction you went with the post processing. I try to pop into your sites whenever I need a boost of inspiration for my work. Raya Pro makes my masks a snap, thanks. Have a great day, Rick.

  3. Another well put together post, thanks Jimmy! I have question though. After opening a raw file in PS as a smart object, any changes I make in camera raw ( after double clicking the smart object symbol in the PS layers palette ) are not written to the .xmp sidecar. They update the PS version of the file, but not the raw file.

    Any thoughts?

    I’m using rather old versions of all ( CS.51 ), but does that matter?

  4. Hey Jimmy

    A few months ago, I used your technique in this video to work on an
    image of my own and it came out great. I have since moved my work to
    using a software called darktable. As darktable has advanced masking
    (parametric masks) and the ability to do instances (kinda like layers), I
    wanted to try this technique in it. I am delighted to say that it
    worked and I was able to come up with an almost identical finish using
    darktable. This was class as with darktable everything is in raw and
    completely non-destructive. Great to see it works across different
    programs. I look forward to trying some of your other tutorials in dt.
    Thanks for the tutorial.

Comments are closed.

Scroll to top