Photoshop Secrets 21: Create a Fake HDR Effect
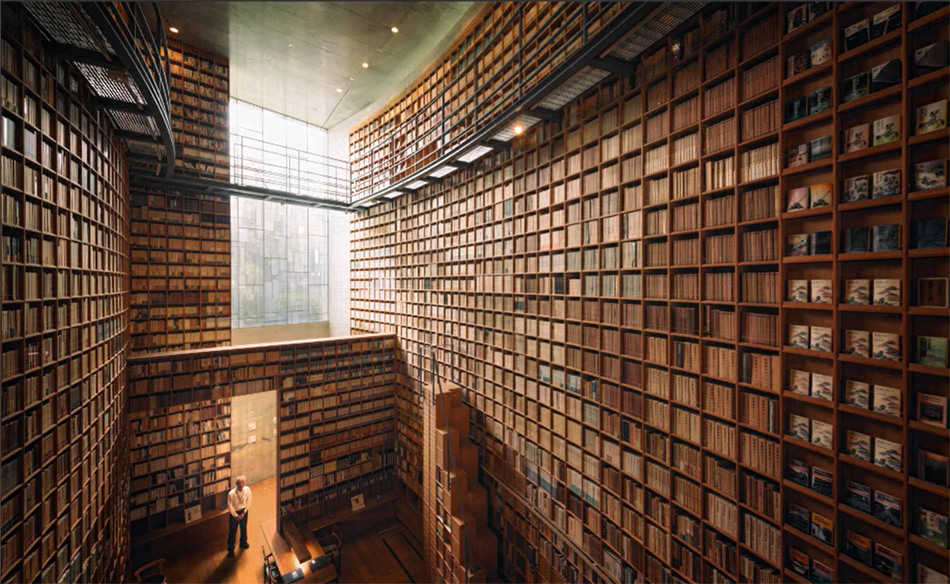
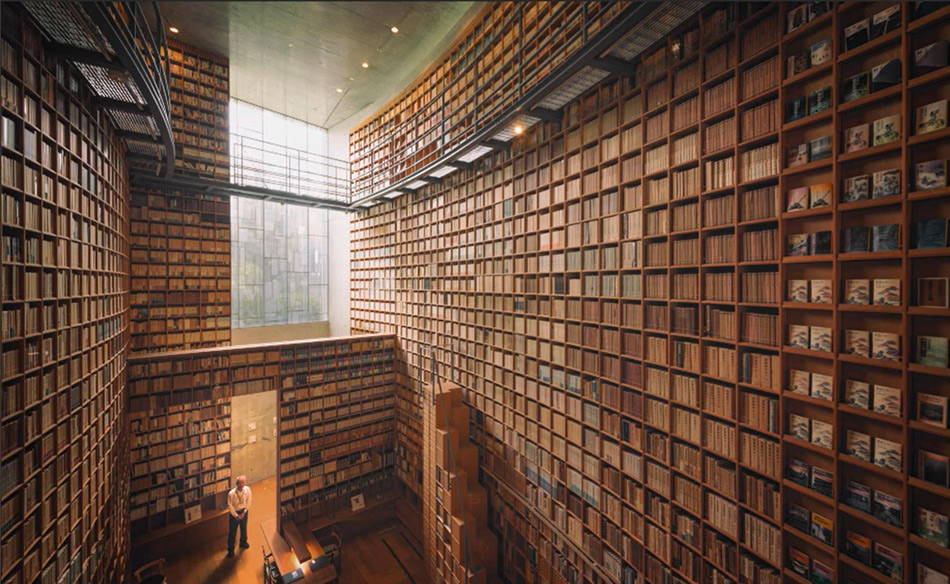
Today’s tutorial is designed to show you how to quickly soften your shadows and highlights. I’ve called it a Fake HDR effect. It seems slow at first, but if you record an action, the process will be fairly instant.
It’s a nice little tool to have in case you find your images are too contrasting. Sometimes, especially with landscapes, we can increase the mood of an image by softening the brightest and darkest tones in our scene. This action will do that for you.
Step-by-Step Tutorial
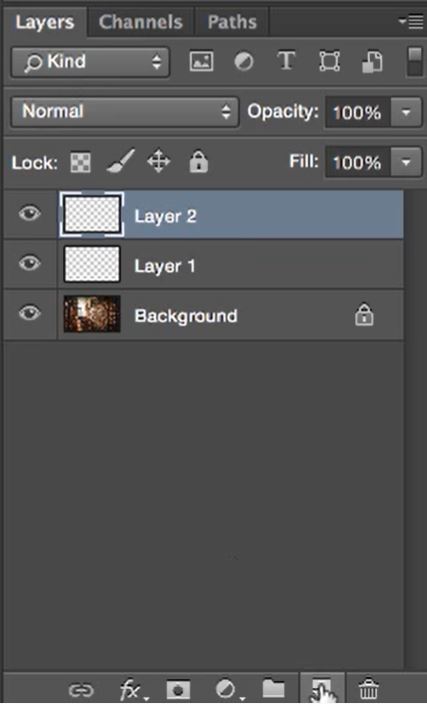
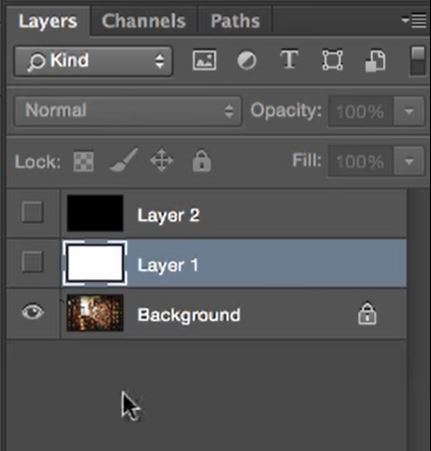
1. First, we need to add two new layers.
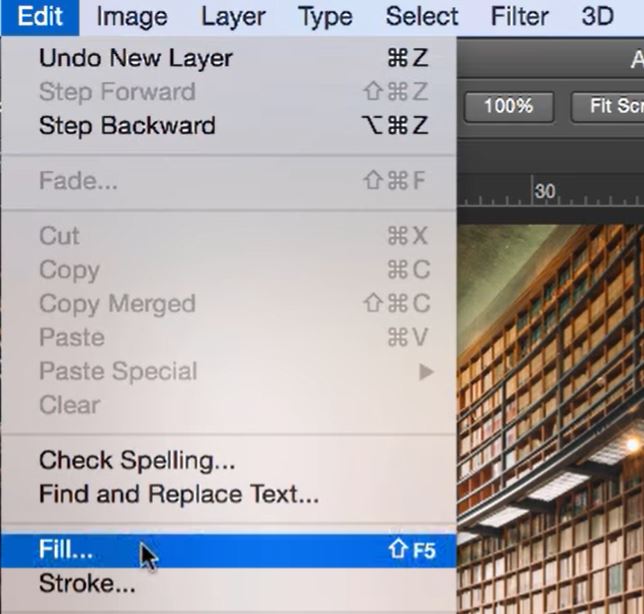
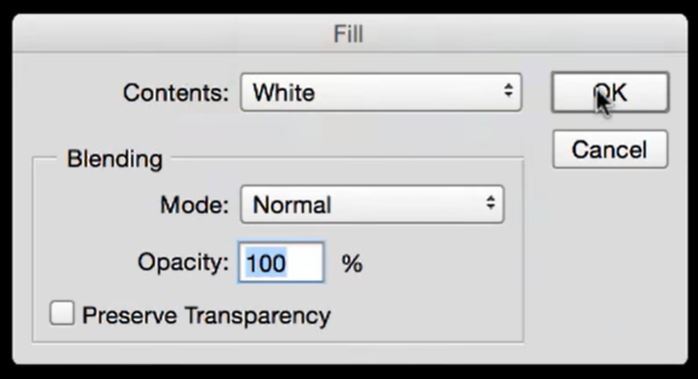
2. With the top layer selected go to Edit>Fill.
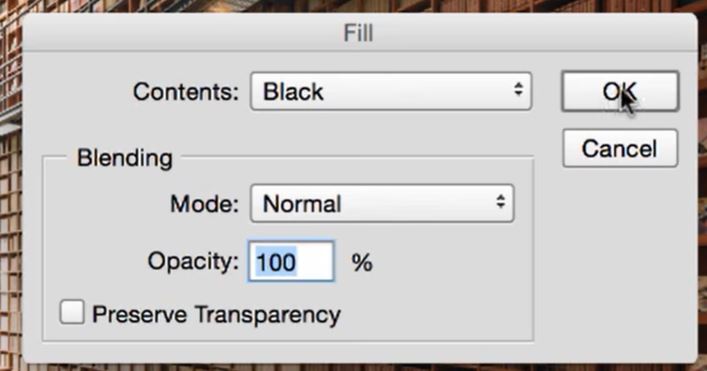
3. We’re going to fill the top layer with Black. So make sure your settings are the same as mine and click OK.
4. Now select the middle layer and do the same. Go to Edit>Fill. This time we will fill this with white.
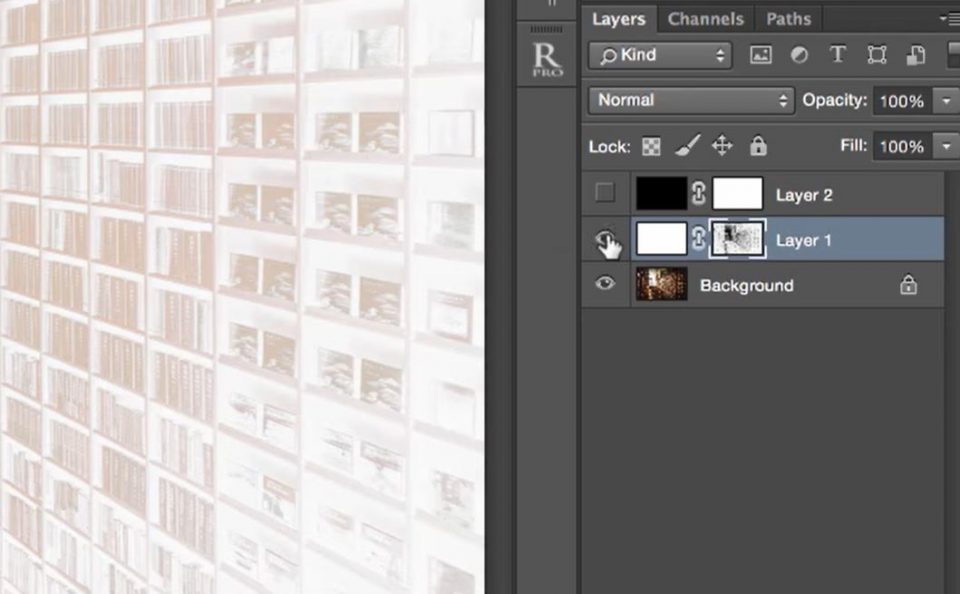
5. Hide both the top and middle layers.
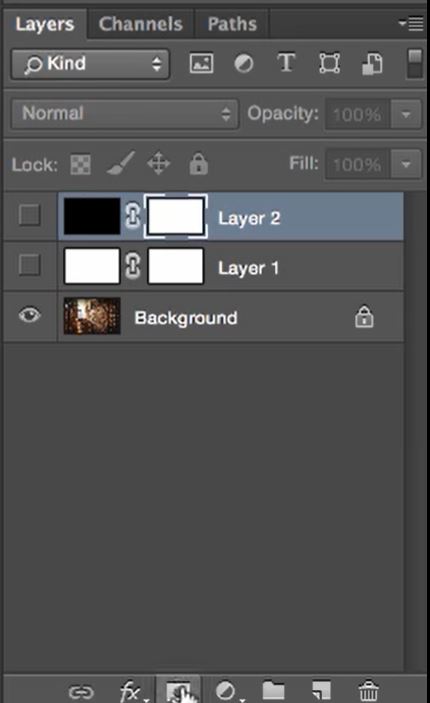
6. Add a layer mask to the top (black) & middle (white) layers.
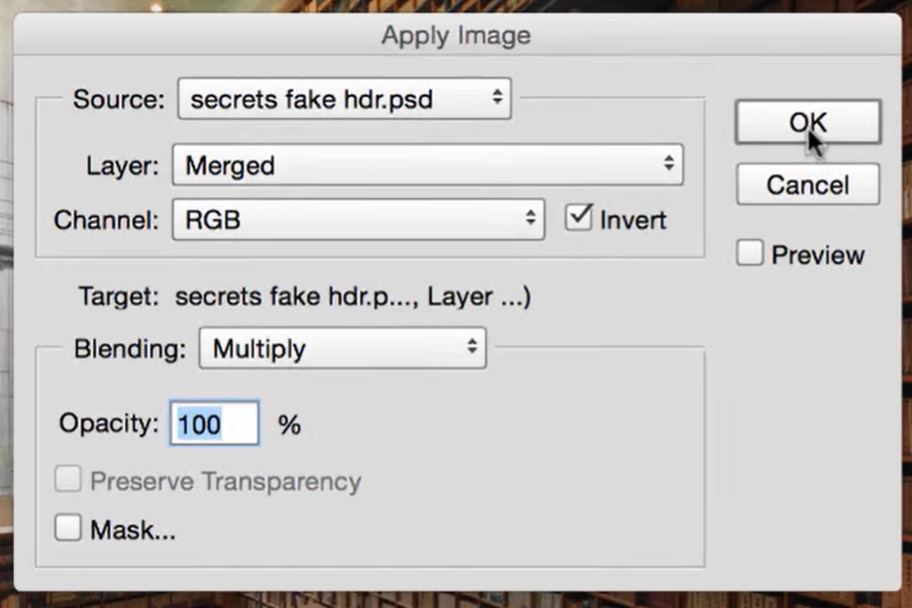
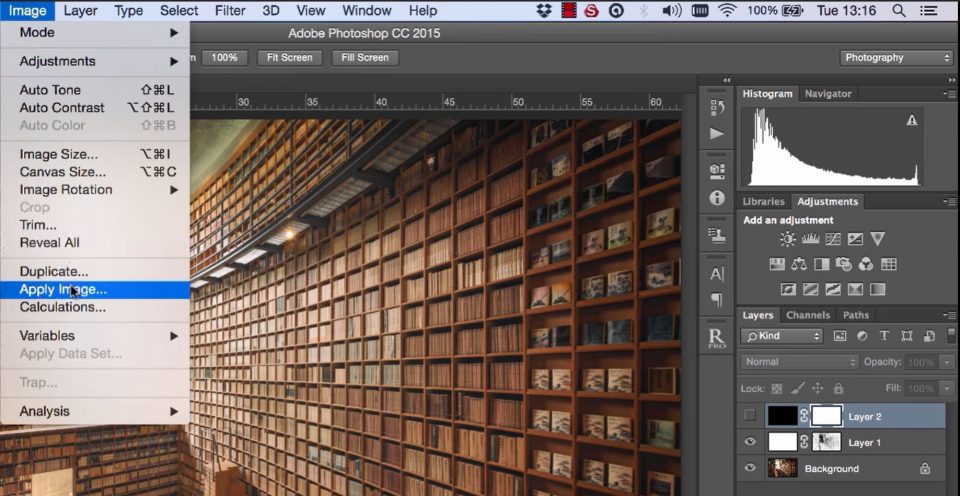
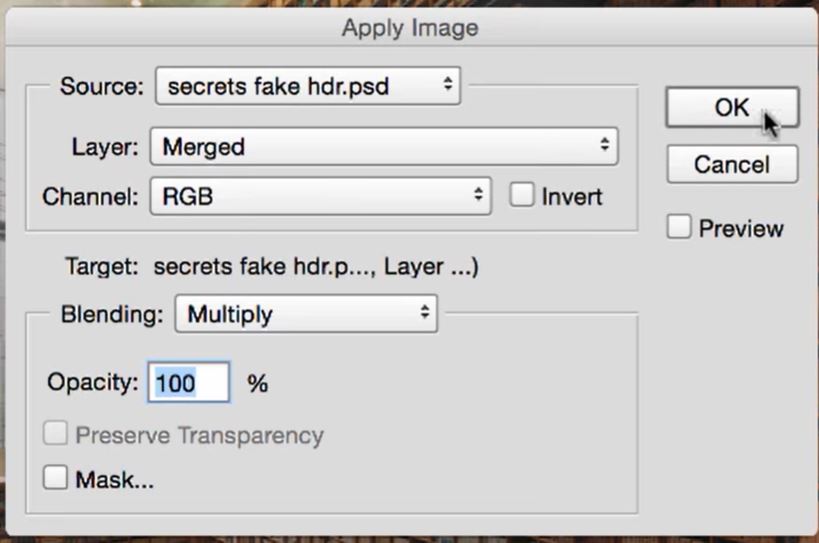
7. With the layer mask of the white layer selected go to Image>Apply image.
8. Ensure your setting are the same as mine and click OK.
9. Make the middle layer visible.
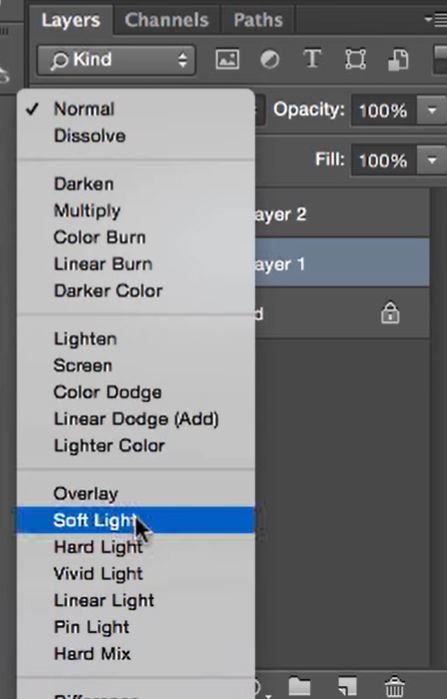
10. Change the Blend Mode of the layer to Soft Light.
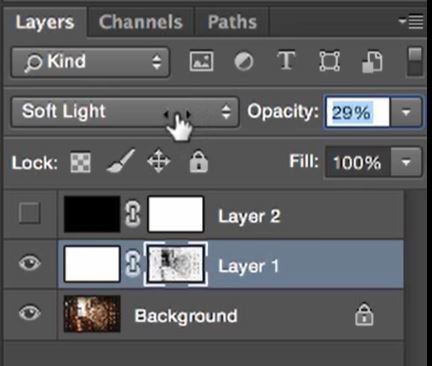
11. Lower the opacity of the layer to reduce the effect.
12. Now, select the mask of the top (black) layer and go to Image>Apply Image.
13. Before you click OK make sure your settings are the same as ours, then click OK.
Thank you for reading another article in our Photoshop Secrets Series. We don’t do much HDR processing these days here’s 7 Examples of How Exposure Blending is Superior to HDR.
Even though HDR is on a downward trajectory there is still a fanbase of HDR photography out there. Some HDR images can be absolutely breathtaking. Here you will find 10 HDR Photographers Worth Watching.
