
Colour Contrast With Selective Colour And Luminosity Blend Mode
Colour Contrast With Selective Colour And Luminosity Blend Mode article is by Nick Dautlich, If you would like to write for us, please read here.
In this simple tutorial, we’ll look at how to create tonal contrast with a colour adjustment layer set to luminosity blend mode. This is a quickfire technique to adjust the tones in a photo, whilst staying within the original colour range. We also use Raya Pro’s ‘Highlight Detail’ feature to bring up details in the highlights to draw the eye throughout the image.
Luminosity Blending Mode
Luminosity blend mode is useful quite often for making tonal or luminosity adjustments in an image while leaving colour information as it is. For example, when dodging and burning we could set each dodge and burn layer to luminosity mode, which protects colours and only adjusts tones, by lightening or darkening them. In combination with this, I really like using selective colour set to luminosity blend mode as a way of changing tonal contrast within a photograph, particularly on images where there isn’t a huge range of hues or colours available. On pictures with a limited palette we can shift colours almost without realising when editing, which can create distractions and complicate the final image unnecessarily. Conversely, if we have a layer with a blend-mode set to colour, adjustments will only apply to the colours without impacting tonality, but that’s for another time.
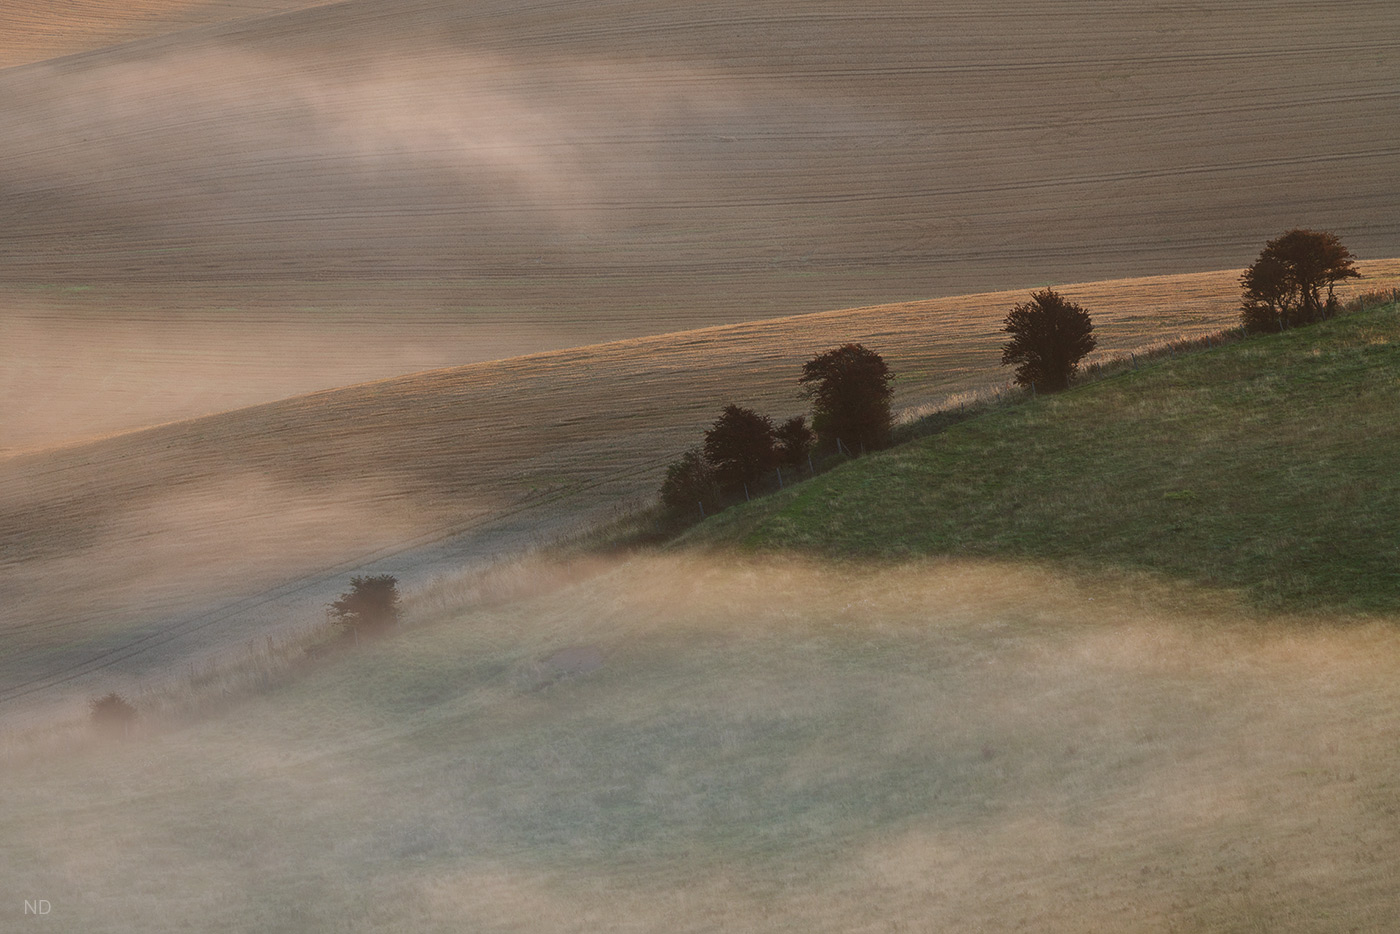
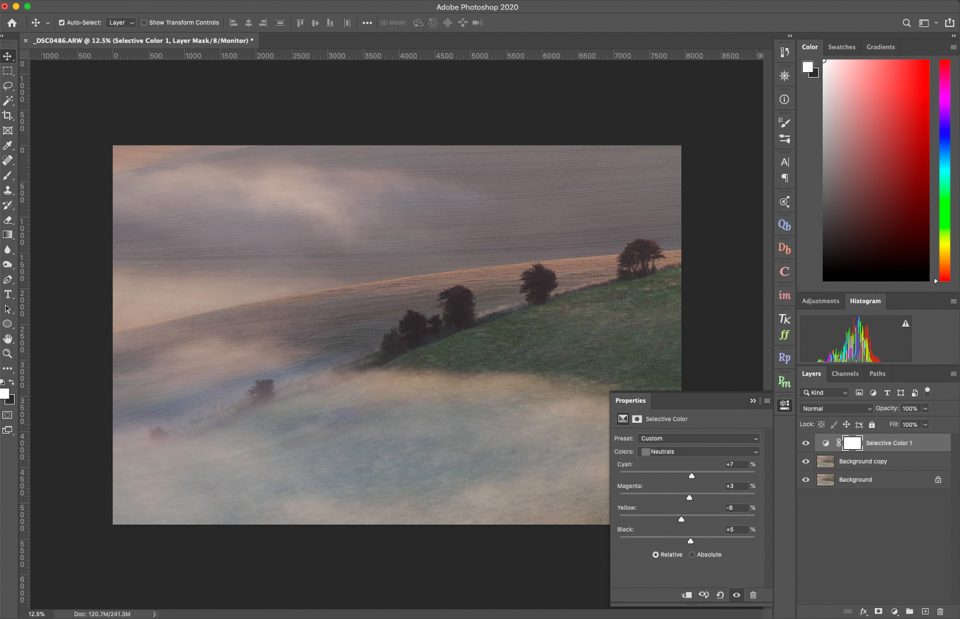
So for this tutorial, I’m using a misty image of grass and wheat fields shot on an otherwise clear sunrise. I really liked the way the mist was catching the light as it worked its way across two contrasting hills during spring. This is the kind of atmosphere I hope for and the kind of morning which makes me get out of bed at 3am to drive and hike to a location. I happened to visit this particular spot at least five or six times over a two year period before I got these conditions, so saying I was stoked is an understatement.
– Tutorial continued below –
Enter your email below and join our community of more than 100,000 photographers who receive regular tutorials and have also

Subscribed to our newsletter,
Downloaded our FREE Photoshop Course
Got our FREE Easy Panel for Photoshop
And have our FREE Essential Guide To Luminosity Masks E-Book
Colour Contrast With Selective Colour And Luminosity Blend Mode Workflow
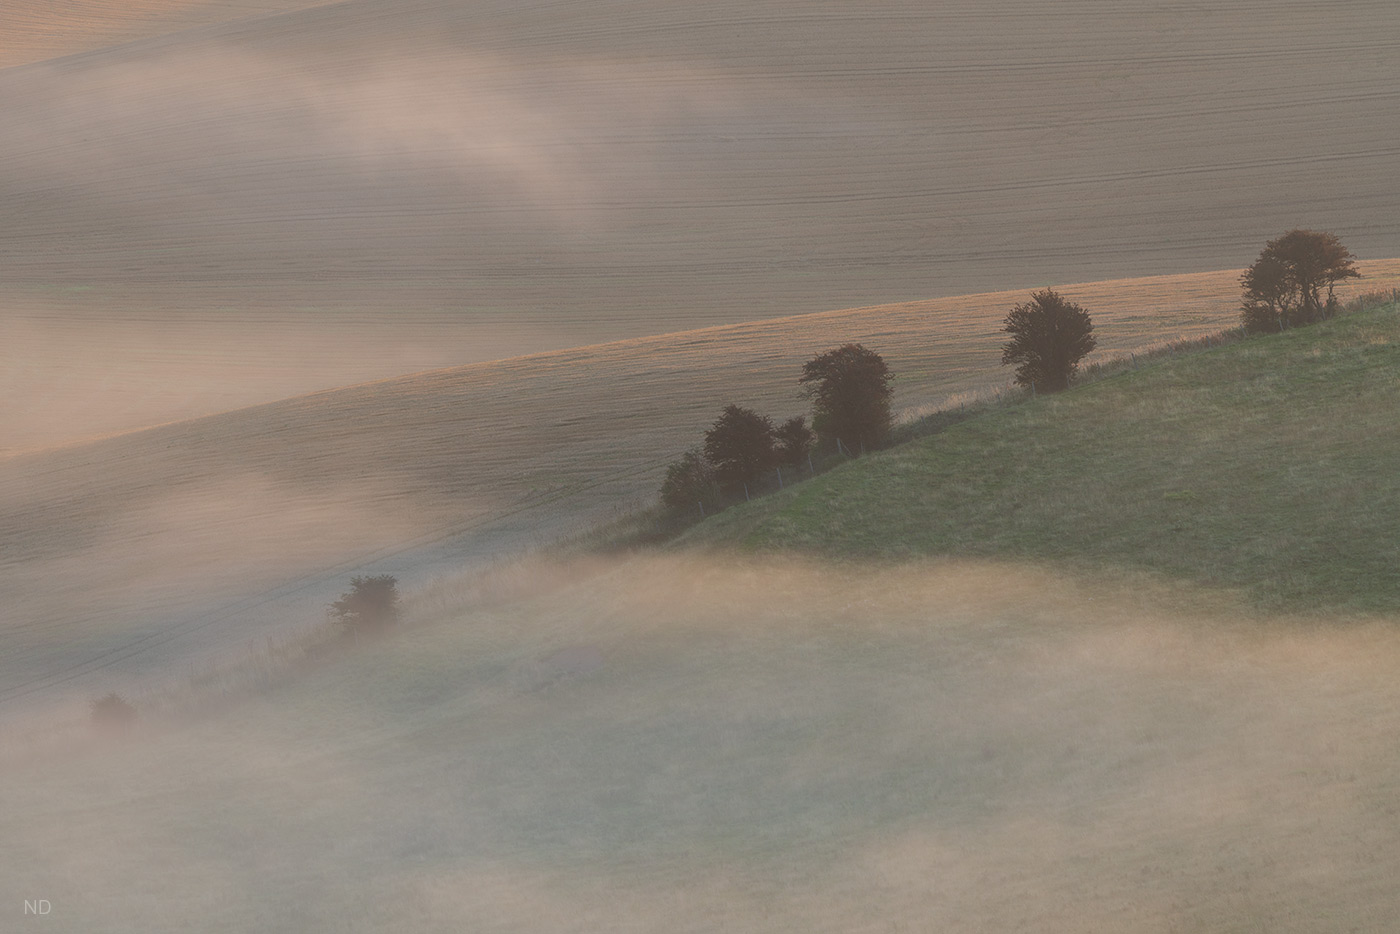
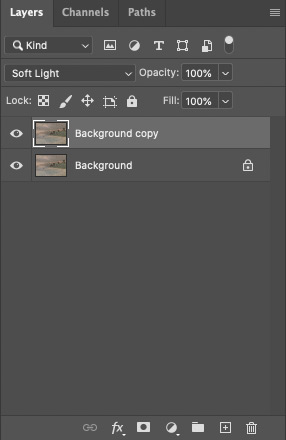
The shot is a little flat with low contrast straight out of camera, so the first thing I might try in this type of situation is to duplicate the background and set the new layer to soft light blend-mode. This is often my go-to starting point to process RAW landscape images which are flat, because it will instantly add a nice, natural contrast level to an image. I set this new soft light layer to 70% so the effect isn’t too strong, adding universal contrast across the entire image without overcooking it. Less is often more with Photoshop editing.
Next, I create a new layer set to ‘Selective colour’ which brings up a dialogue of four colours that can be edited, along with whites, neutrals and blacks. As this is a low contrast scene I will work on the neutrals to boost natural tonal contrast.
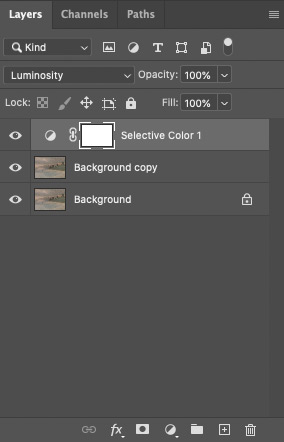
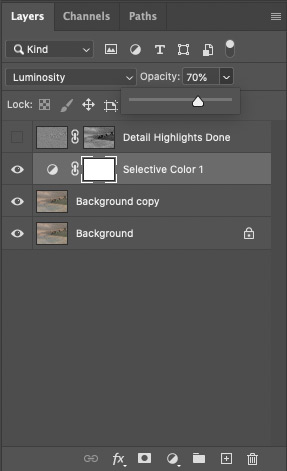
Leaving the radio button set to ‘Relative’ tells Photoshop to work within constraints of colours it finds in the image. In other words, it won’t go too crazy and let us adjust colours completely off the chart, which is generally my preference. I often get seduced by colour, pink sunrises, bright autumn colours and so on, so radio buttons like this help us stay within the realm of reality! For this image, I made small adjustments across the board on neutral tones, then set the layer to luminosity blend mode at 70% opacity. Before setting the luminosity blend we can see how Cyan, Yellow, Magenta (and Black) affect the colours. CYMK are also the colours used in print processes, which are the ones we edit in selective colour.

With luminosity blend set, we see the colours revert back to their original state straight away and Photoshop makes only luminosity changes within the tones it finds, rather than shifting colours. When the layer is set to luminosity we can continue adjusting the colour sliders to see how tones are affected in real-time, which is really useful to get the look we are after. I like to check my edit as I go to make sure I haven’t gone too far. Just in case you aren’t aware, you can do a simple ‘before / after’ view easily in Photoshop by ALT clicking on the lowest layer eyeball which is on the left of the layers panel (I left it as background in this case). Clicking the lowest eyeball with ALT turns off all layers above it, allowing us to see the original import. Simply ALT click it again to switch all of the layers above the background back on. This is a handy feature to check how we’re doing with our processing.
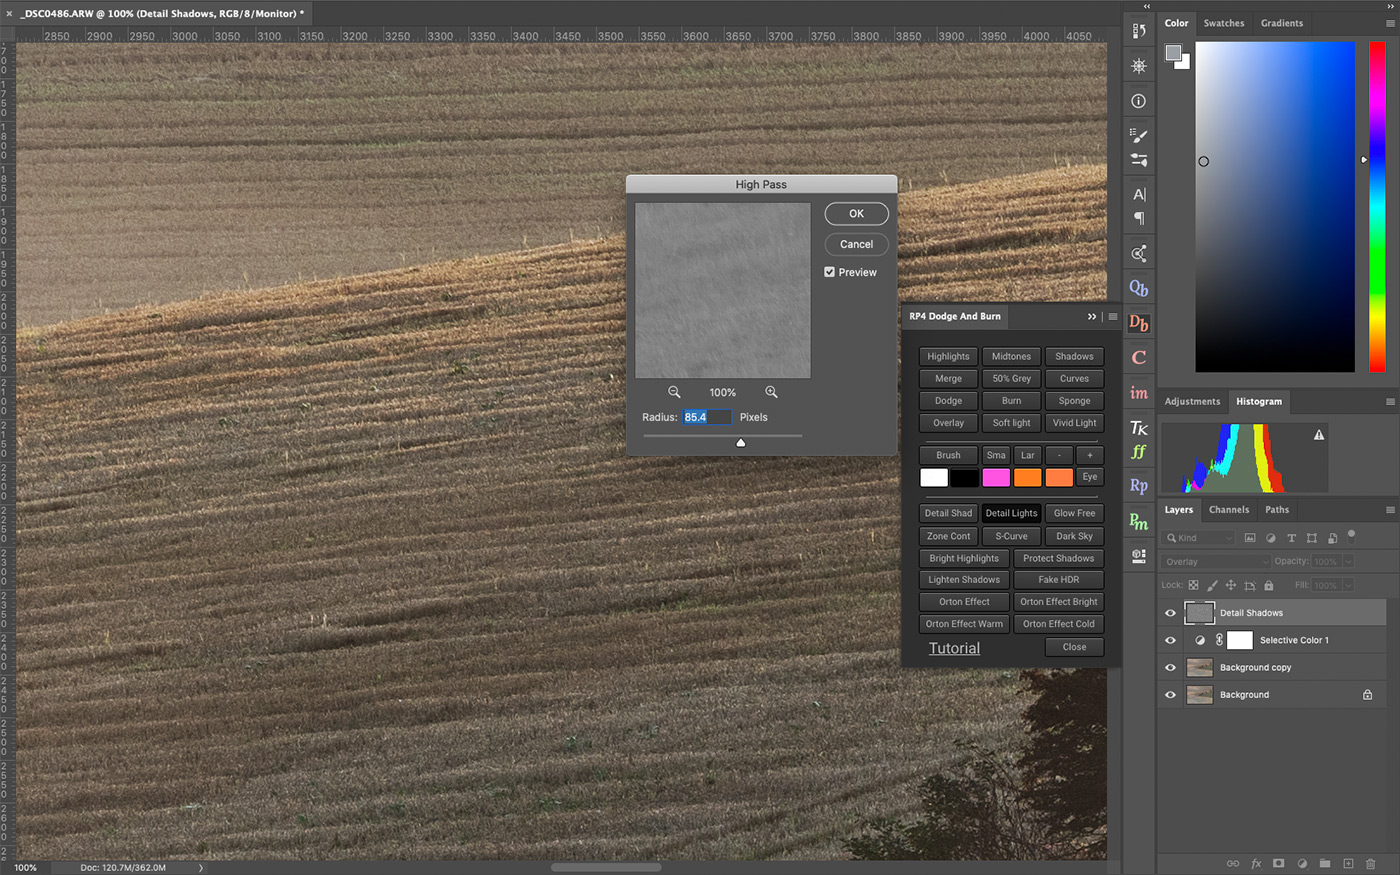
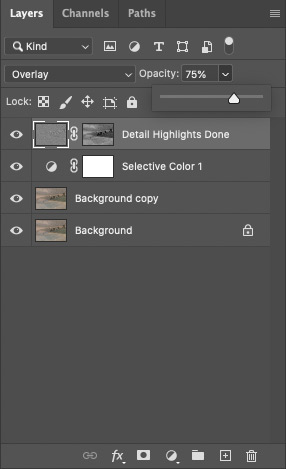
Now that I am happy with the overall neutral tonal contrast, I want to draw attention to highlights in this shot, where the low sun is hitting the mist between the hills. I often do this kind of process by using Raya Pro’s ‘Dodge and Burn’ panel where we find the very quick and easy to implement ‘Detail lights’ action. Clicking this will sharpen, enhance detail and increase the contrast just in highlights, which is a sure-fire way of drawing the eye towards any light in pictures.
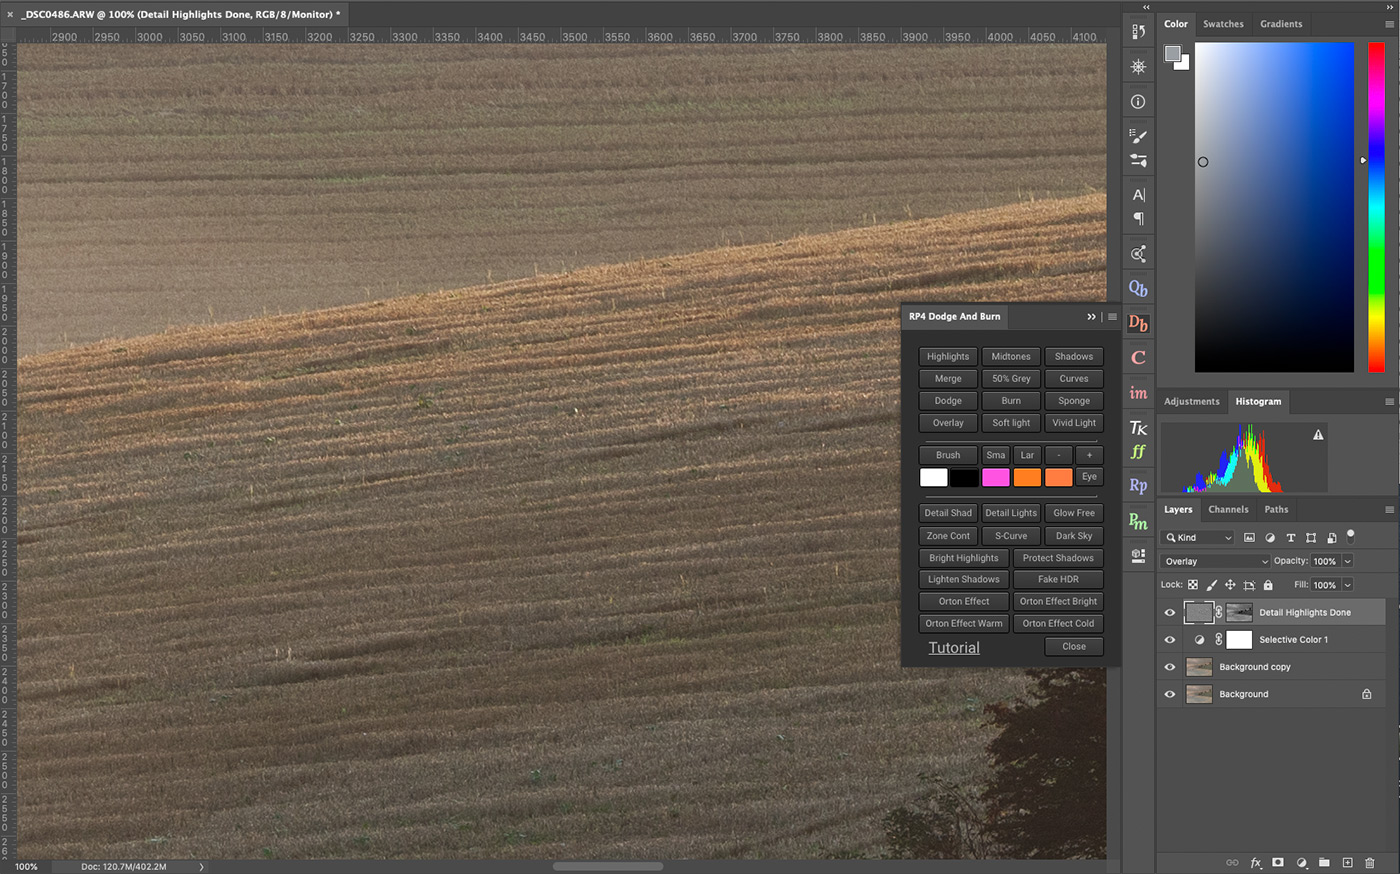
The first choice we are presented with is the amount of high pass filter to apply. The picture we are working on here has a lot of tiny details of the growing corn below the mist. With this in mind, I drop the default high pass opacity down just a little. The final option we are given affects the shadow contrast and I leave this at the default. I love the results from this action, with plenty of enhanced detail combined with brighter highlight areas.
I slide the opacity of this layer to see the overall effect and settle on 75%, once again making the end result slightly more subtle. We can see that the result has popped the mist and brightness on the brow of the cornfield nicely, giving us greater contrast and detail with more visual interest.
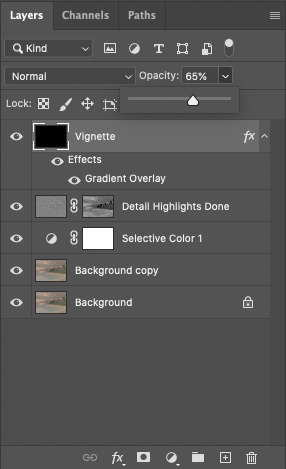
To finish off, as with many of the landscapes I work on, I’ll also use Raya Pro’s light vignette filter as a quick and easy vignette, which is similar to lens vignetting. Vignettes are definitely a personal preference and I like to have the choice in edit rather than using lenses which vignette too much in the field. It’s easy to correct or add afterwards, especially with Raya Pro. A vignette helps to draw the eye towards the middle of the frame as our eyes will naturally follow the light around a picture. Even a subtle darkening of the edges will help concentrate the viewer’s eye towards the centre. I set the layer opacity to 65% which is just right for our purposes here as it is quite a light image overall.
Summary from Nick Dautlich
I hope you found this Colour Contrast With Selective Colour And Luminosity Blend Mode article and this process useful and see how luminosity blend mode is a really powerful tool in our toolbox for adjusting luminance (light and dark) without affecting colour. Thanks for reading!
All images ©Nick Dautlich 2021. Follow along with Nick Dautlich on Instagram here.
Other Colour Contrast With Selective Colour And Luminosity Blend Mode
How to Add Contrast in Photoshop
How to Create a Selective Color Effect for Pictures
The Luminosity Blend Mode In Photoshop
Thank you for reading this article on Colour Contrast With Selective Colour And Luminosity Blend Mode, be sure to sign up for our newsletter for more tutorials and great offers.

Enter your email below and join our community of more than 100,000 photographers who have also
Subscribed to our newsletter.
Downloaded our FREE Photoshop Course.
Got our FREE Easy Panel for Photoshop.
And, have our FREE Essential Guide To Luminosity Masks E-Book.
FREE Photoshop Course

The Art Of Photography

Raya Pro for Photoshop
