Combining Blend Modes in Photoshop
Sometimes we can get carried away with editing in Photoshop. One of the most possibly underestimated ways to edit photos is by using Blend Modes. Blend modes are an incredibly powerful and useful tool when you’re looking to edit your images in Photoshop. Each blend mode has a different effect on the layer that it is applied to. We can use this to our advantage by combining blend modes in Photoshop to come up with some really quick edits with surprising results. In this article, we’ll use three different blend modes and look at what they do individually.

3 Blend Modes in Photoshop
Soft Light Blend Mode
This first Blend Mode that we’ll dissect is Soft Light. We use soft light blend mode often, for colouring and for its benefits to tonal values. Adobe officially describes Soft Light as:
Darkens or lightens the colors, depending on the blend color. The effect is similar to shining a diffused spotlight on the image. If the blend color (light source) is lighter than 50% gray, the image is lightened as if it were dodged. If the blend color is darker than 50% gray, the image is darkened as if it were burned in. Painting with pure black or white produces a distinctly darker or lighter area, but does not result in pure black or white.
Essentially the Soft Light Blending Mode is a sort of automatic Dodge & Burn blend mode. Brightening bright tones and darkening darker tones, creating greater contrast in our images. Below you can see the effect compared to the original image.
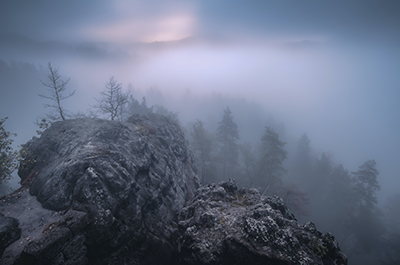
Original Image 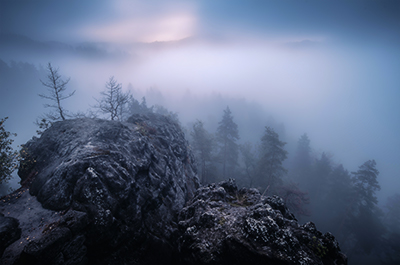
Soft Light Blend Mode Applied
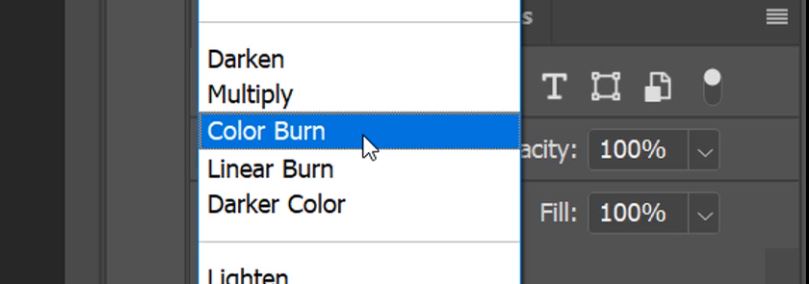
Color Burn Blending Mode
Color Burn blend mode can quite simply intensify the vibrance and contrast of the color palette of your images. Adobe tells us what the Color Burn blending mode does:
Looks at the color information in each channel and darkens the base color to reflect the blend color by increasing the contrast between the two. Blending with white produces no change.
Color burn can have a very overpowering effect so it is best to constrain by using a mask and or layer opacity levels. You can see the extreme effect the Colour Burn has on our images below.
Original Image 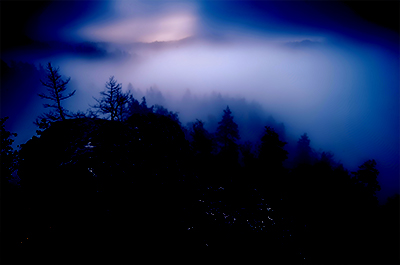
Color Burn Blending Mode Applied
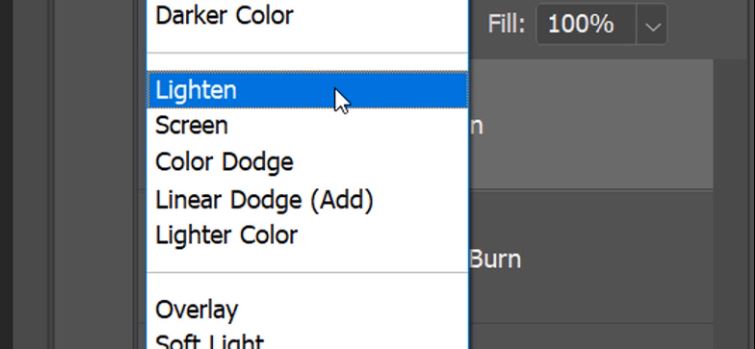
Lighten Blend Mode
Adobe tells us that the Lighten Blending mode:
Looks at the color information in each channel and selects the base or blend color—whichever is lighter—as the result color. Pixels darker than the blend color are replaced, and pixels lighter than the blend color do not change.
In this example, because the image originally has a soft colour palette, the Lighten blending mode has no effect on the original image on its own. However, once we used the Soft Light blending mode, which changed the contrast levels, the Lighten blend mode controlled the contrast to restore some softness.
Combining These 3 Blend Modes
Using these 3 particular blend modes might not have an amazing effect on all images. For example, if you have an image that already has strong contrast in its colours and tones, adding a Soft Light layer might excessively dodge & burn. What you should take from this article is that you can use multiple Blending Modes in Photoshop to edit an image very quickly. This particular combination seems to work very well on soft hazy images. It adds a subtle pop to the image. If you want to try this edit with just one click, you can download our pre-recorded action below.
– Tutorial continued below –
Enter your email below and join our community of more than 100,000 photographers who receive regular tutorials and have also

Subscribed to our newsletter,
Downloaded our FREE Photoshop Course
Got our FREE Easy Panel for Photoshop
And have our FREE Essential Guide To Luminosity Masks E-Book
Step-By-Step Guide
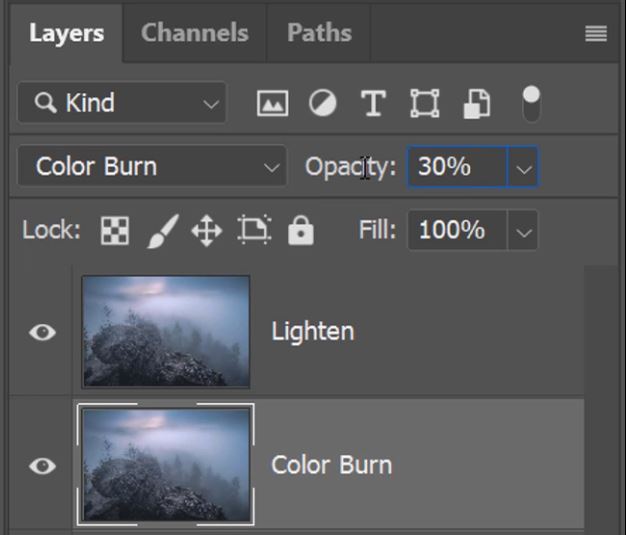
1. Right-click on the base image and select Duplicate Layer.
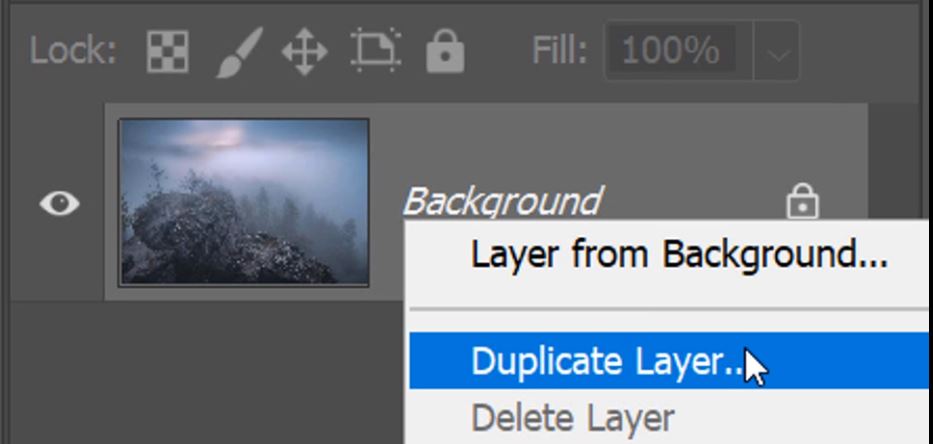
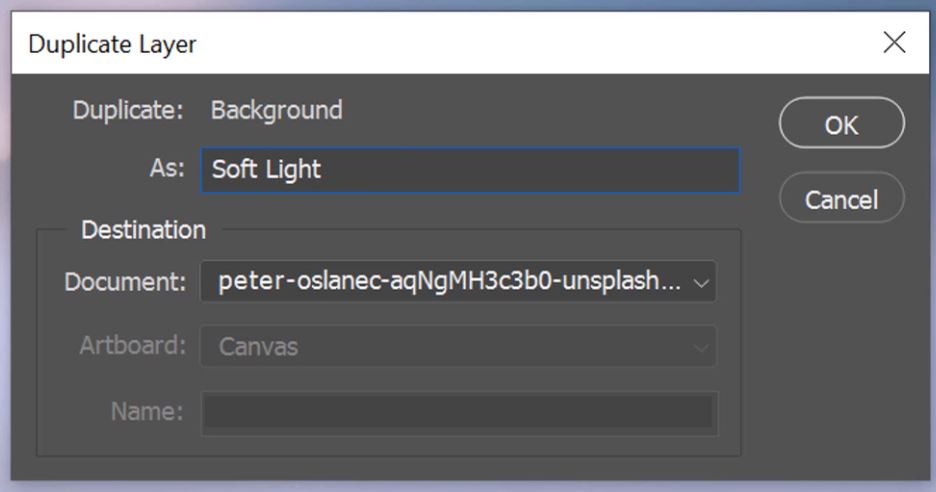
2. Name this duplicated layer Soft Light and press Enter or click OK.
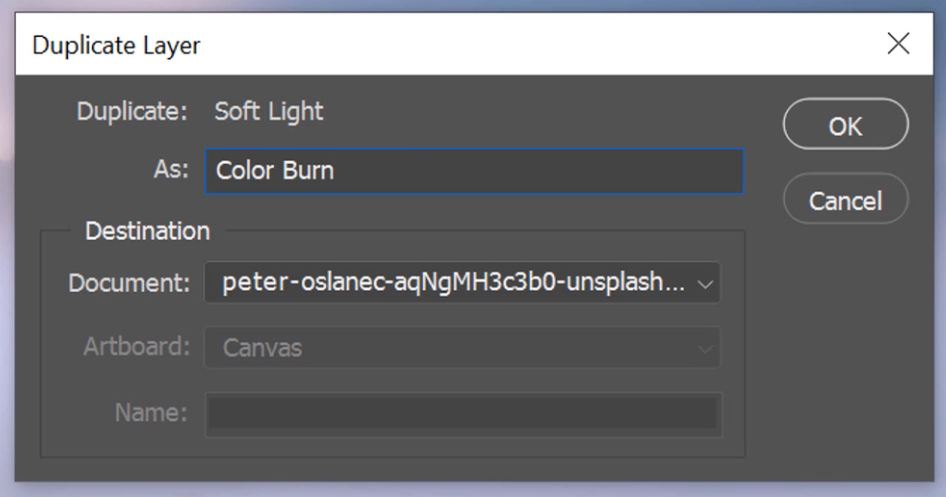
3. Like in step 1, right-click on the Soft Light layer and select Duplicate Layer.

4. Set the name of this duplicated layer Color Burn and press Enter or click OK.
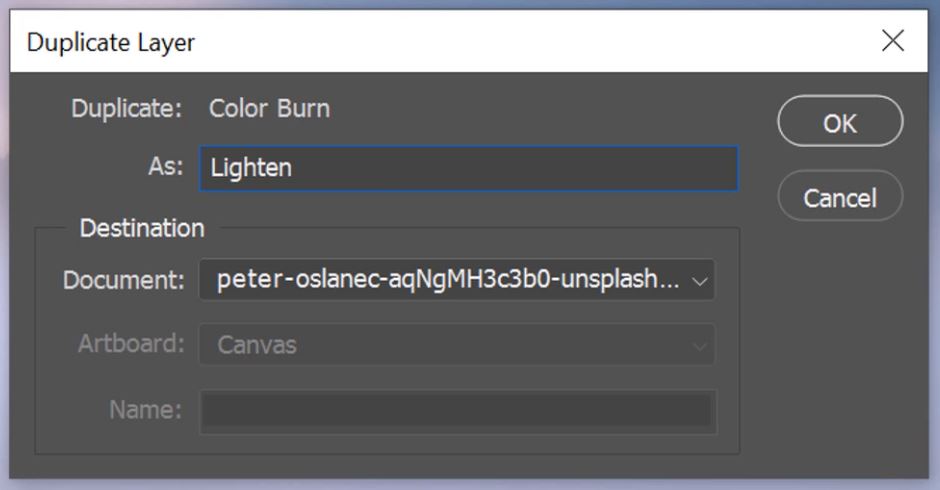
5. And again, right-click on the Color Burn layer and select Duplicate Layer.
6. We need to name the final duplicated layer to Lighten and press Enter or click OK.
7. Set the Blend Mode of the Lighten layer to Lighten.
8. Now change the Lighten layer Opacity to 30%, you might need to use a different setting for your edit.

9. Move down to the next layer which should be the Color Burn layer, and change the Blending mode to Color Burn.
10. For this edit setting to Opacity to 30% on the Color burn layer worked well.
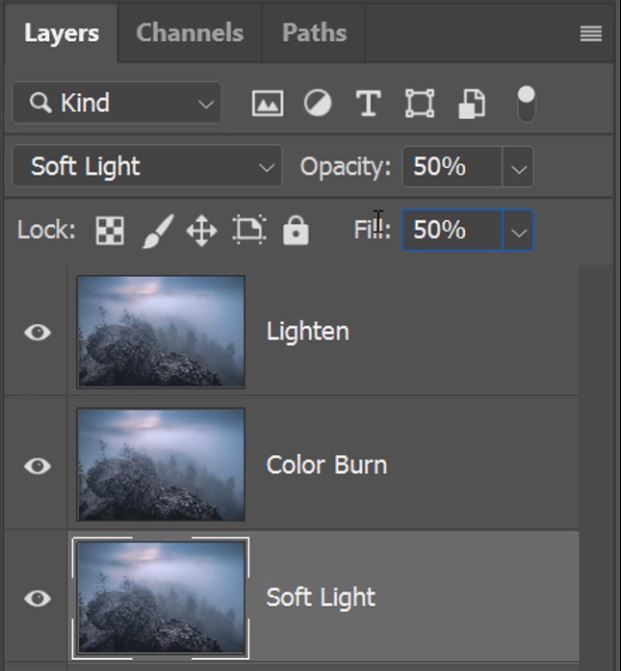
11. The last layer that we need to adjust is the Soft Light layer, change the Blending Mode to Soft Light.
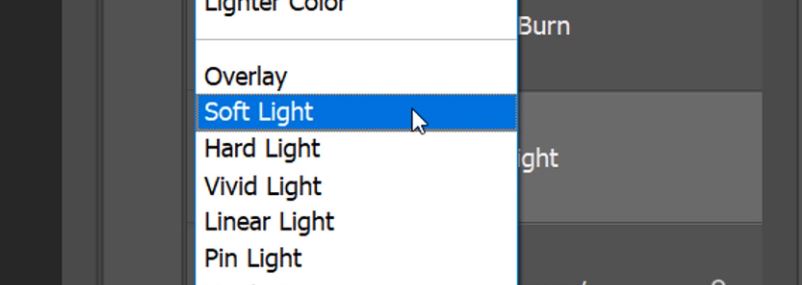
12. A bit different from the other two layers. Change the Opacity and Fill of the Soft Light layer to 50% for both.
This is one of our quickest ever edits. I have to reiterate this might not work as well for every scene. Give it a go anyway. Furthermore, don’t be afraid to try alternative blend modes. To understand more about Photoshop Blending Modes please see the link at the bottom of this article.


Photo by Peter Oslanec on Unsplash
TO DOWNLOAD THE FREE ACTION ENTER YOUR EMAIL BELOW TO JOIN OUR SUBSCRIBERS AND GET FREEE PRODUCTS TO HELP YOUR PHOTOGRAPHY.
Thank you for reading this article on How To Combine Blending Modes in Photoshop, be sure to sign up for our newsletter for more tutorials and great offers.
Enter your email below and join our community of more than 100,000 photographers who have also
Subscribed to our newsletter.
Downloaded our FREE Photoshop Course.
Got our FREE Easy Panel for Photoshop.
And, have our FREE Essential Guide To Luminosity Masks E-Book.
More about Blending Modes
Blending mode descriptions