Combining Luminosity Masking With Focus Stacking In Photoshop
Combining Luminosity Masking With Focus Stacking In Photoshop article is by Coen Janse, If you would like to write for us, please read here.
Having your photos sharp front to back can be tricky, especially with certain compositions. In addition to that, achieving a balanced exposure in your photos usually requires a graduated neutral-density filter. In this tutorial, I will explain how a correct exposure can be achieved without using a graduated neutral-density filter by using Luminosity masks and focus stacking to help you get sharp photos. Combining these two methods does require a bit more work, but once mastered it can be very rewarding. Note that this method is most efficient in compositions with a foreground relatively close to the camera.
Graduated Neutral-Density Filter vs Luminosity Masks & Focus Stacking
Using a graduated neutral-density filter can be very helpful in quickly getting the right exposure for your photos. It does, however, have its downsides. First of all, the various lenses available on the market require different sizes of filters and adapters. In the end, it can be costly to invest in an adapter ring, filter holder and the filter itself. Besides that, carrying this equipment around and fitting it in your camera bag can be challenging. Lastly, it is near impossible that your filter’s transition from light to dark perfectly lines up with the light and dark parts in your image. The basic principle of a graduated neutral-density filter is very simple and can be easily applied with just camera settings.
Learning to focus stack on the other hand, greatly improved the sharpness of my photos. A combination of luminosity masking and focus stacking can be used to both increase sharpness and improve exposure. While tricky to learn in the beginning, once mastered it can improve your photos in a natural way, without using any filters.
Enter your email below and join our community of more than 100,000 photographers who receive regular tutorials and have also

Subscribed to our newsletter,
Downloaded our FREE Photoshop Course
Got our FREE Easy Panel for Photoshop
And have our FREE Essential Guide To Luminosity Masks E-Book
How To Take The Correct Images For This Technique
As with every landscape photo, the process of getting a great final image starts in the field. In order to combine both methods, a set of photos -each with the exact same composition- need to be acquired. Therefore, using a sturdy tripod is crucial. In order to apply the technique of combining luminosity masking with focus stacking, you will need the following photos:
- A photo exposed for the foreground and focused on the foreground
- A photo exposed for the foreground but focused on the background
- A photo exposed for the background and focused on the background
The idea is that the first two photos will be combined into one image, resulting in a photo which is sharp front to back. After that, this merged image will be combined with the third image with the use of luminosity masking, resulting in a final photo with correct exposure and great sharpness.
Bracketing
Most cameras have a bracketing mode in which you can set the exposure difference between photos, also called the bracketing increment. On my Nikon D610, I usually choose 2.0 or 3.0, depending on the brightness of the sky (the brighter the sky, the higher the increment needs to be.) I will also select the option named –2F, which means the camera will first take one normal exposure and then one dark exposure (corresponding with your bracketing increment value which was selected earlier.)
After choosing the composition, it is time to take the first picture. While focusing on the foreground, take the picture. If your bracketing mode is already turned on, the next picture you take will be with a darker exposure. In the editing process, this picture can be discarded. The next two pictures will be used in the editing process. Focus on the background and take two pictures. When you are happy with the composition, focus and exposure of your images, you are ready to import them and start editing.
Focus Stacking The Lighter Exposures
After importing my photos, I label them with the corresponding exposure (dark or light) and focus (foreground or background):

The next step is to import both of the “Light” exposures by selecting them and dragging them into Photoshop. If you shoot in Raw format, Adobe Camera Raw will open, allowing you to make some adjustments to your images. Selecting both images will make sure all adjustments are applied to both images. In this step, I usually make the images a bit warmer, increase contrast and clarity and use the Color Mixer tab to adjust hue, saturation and luminance of individual colours. When you are done editing in Camera Raw, make sure you have all of the images selected and click on Open to move them into Photoshop.

When we get into Photoshop our images will all be in separate windows. We need to put them all into one window as stacked layers. We could use Ray Pro and simply click the Stack Button which will do this for us. Or we can do it manually by selecting the Move Tool (V) and while holding Shift (to ensure the images are lined up correctly), drag one image to the other. Holding down shift will ensure the edges of the image align not the content, so if the camera moved slightly we might have to align the content.
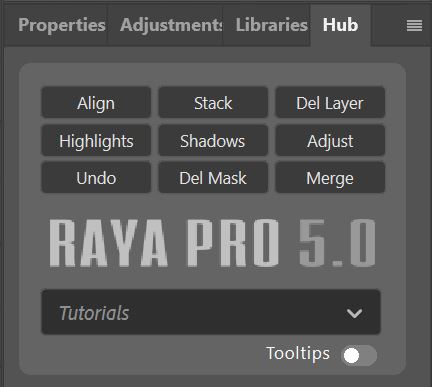
To align the content of the images you can click the Align button in the Ray Pro Hub. Or, to do this manually, select both of your layers and go to Edit > Auto-Align Layers and press OK. To check if the alignment is accurate set the blend mode of the above layer to Difference and move the image using the arrow keys until what you see as the image is as close to black as possible. Don’t forget to change the blend mode back to normal when you’re all aligned. Now that the images are lined up, select both layers again and go to Edit > Auto-Blend Layers. Make sure Stack Images is selected and press OK.
NOTE: MERGING LAYERS IS A DESTRUCTIVE PROCESS. AN ALTERNATIVE WOULD BE TO PRESS CRTL+ALT+SHIFT+E ON A PC OR CMD+OPT+SHIFT+E ON A MAC THEN GROUP YOUR ORIGINAL LAYERS AND HIDE THEM.
Now your combined picture should be sharp in all areas. If for some reason Photoshop did not accurately include the right areas, you can Alt (Opt) + Click on one of the masks and manually cover the areas with a white or black brush (B). Now the two layers need to be merged into one layer by selecting both layers and right-click > Merge Layers.

Using Luminosity Mask To Exposure Blend
It is now time to include the image with the dark exposure by opening it in Photoshop or Adobe Camera Raw. Again, if you shoot in Raw, Camera Raw will open and you can make adjustments to the image, taking into account that only the sky part of this image will be used in the final merged image. In this case, I usually make the colors in the sky warmer and add a bit more contrast. After making adjustments in the Camera Raw application click the Open button. Now we need to drag the darker image into the same window as our two brighter images. We do this by using the Move Tool (V) then, while holding down the SHIFT key, left-click and drag the darker exposure into the window containing the Lighter exposures. You layers panel should now look like this:

To make the luminosity mask you could use InstaMask in Ray Pro which does an excellent job of creating precise luminosity masks. If you don’t have Raya Pro I will show you how to make a basic Luminosity mask.
First I hide the darker layer so that I can see the Foreground_Light layer only. Then go to the Channels panel and while holding down the Ctrl (Cmd) you need to left-click on the thumbnail of the RGB channel.
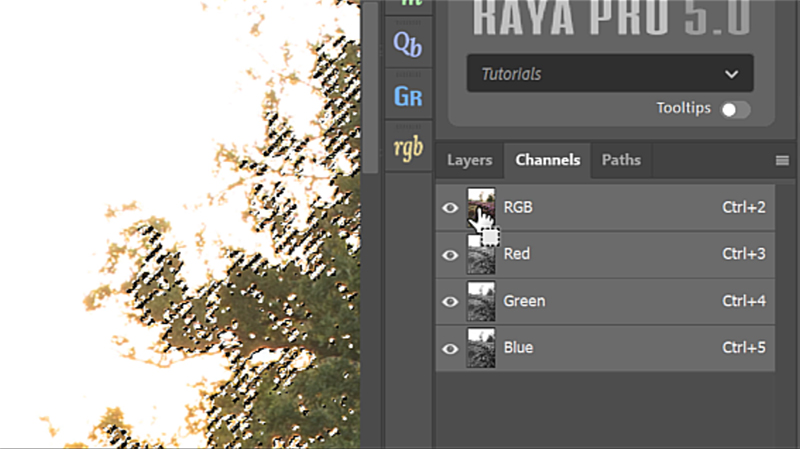
Now to create the Luminosity mask you need to click on the mask icon at the bottom of the channels panel to save the selection as a channel.

This will create a new channel called Alpha 1. Hold down the Crtl (Cmd) key and click on the Alpha 1 channel thumbnail to make a selection.
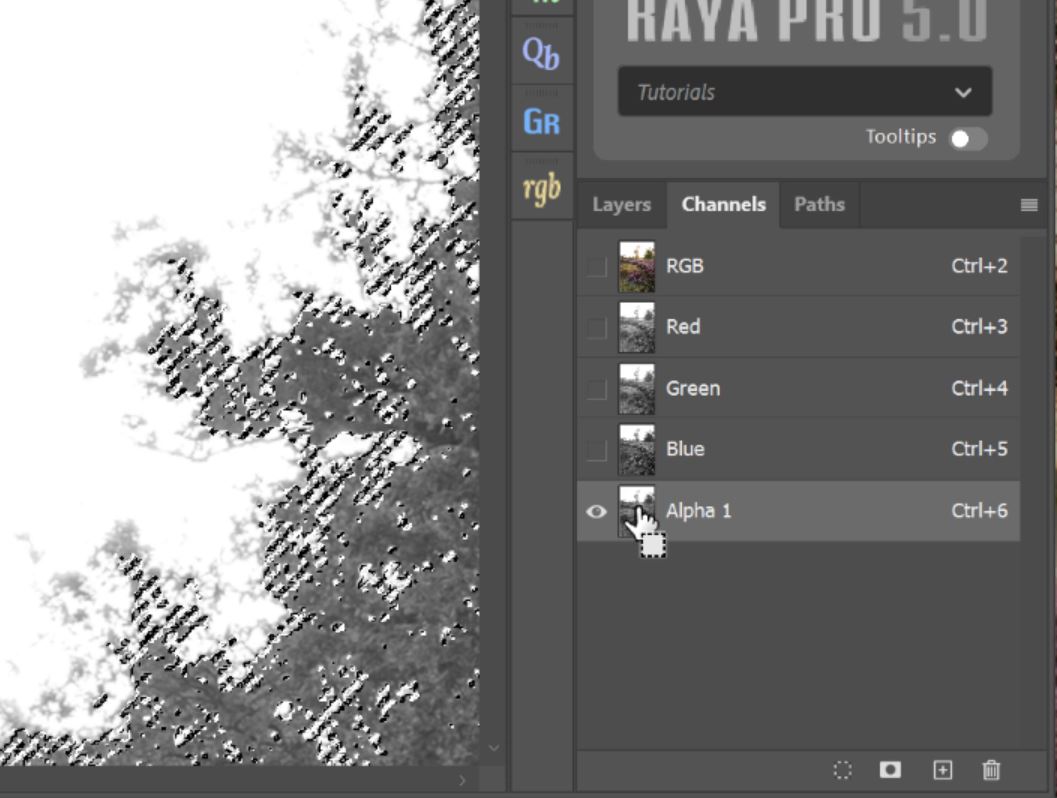
Go back to the Layers panel and make the darker layer visible again.
Finally, now with an active selection and our darker layer visible, we click on the mask icon to apply our luminosity mask to our darker layer.
Refining A Luminosity Mask
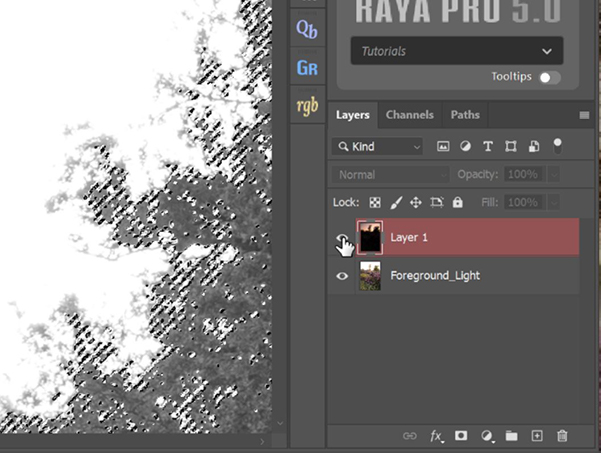
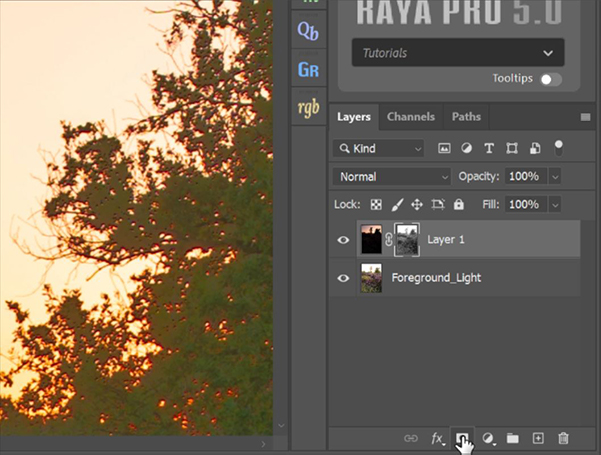
When you apply your luminosity mask for the first time it might look bad. This is normal and usually happens when there’s a big difference in exposures that we are trying to blend. To refine the mask all that we do is hold down the Ctrl (Cmd) key and click on the mask thumbnail to give us an active selection of the whites and lighter areas of the mask. Because we want to remove the darker image from our foreground, we select the Brush Tool (B), a black foreground, and with 100% brush opacity we paint over the foreground.

We then do the same with the sky but with a white foreground. This time I use a smaller brush, and opacity of around 30% to brush over the edges of the trees.

I will spend quite a bit of time going between touching up the foreground and background until I get the look and feel that I like.
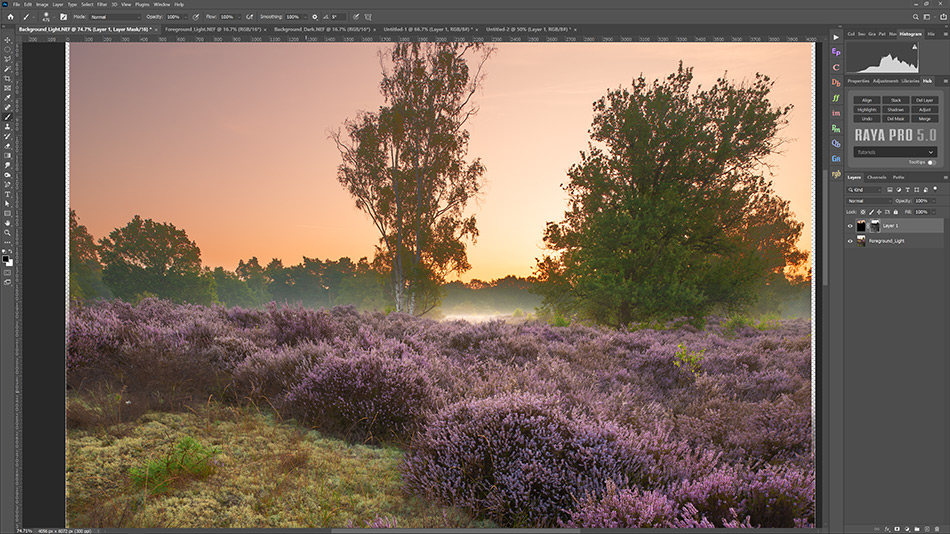
Finishing Touches
I continue to edit the image by adding a curves layer to add some more contrast, applying Selective Color to further boost some colours and adding a subtle vignette. I further sharpen the image by first merging all visible layers by pressing Shift+Ctrl+Alt+E (Cmd+Opt+Shift+E). Now I apply a High Pass filter by selecting Filter > Other > High Pass. I change the blending mode of this layer to Overlay and change the opacity to 15%.
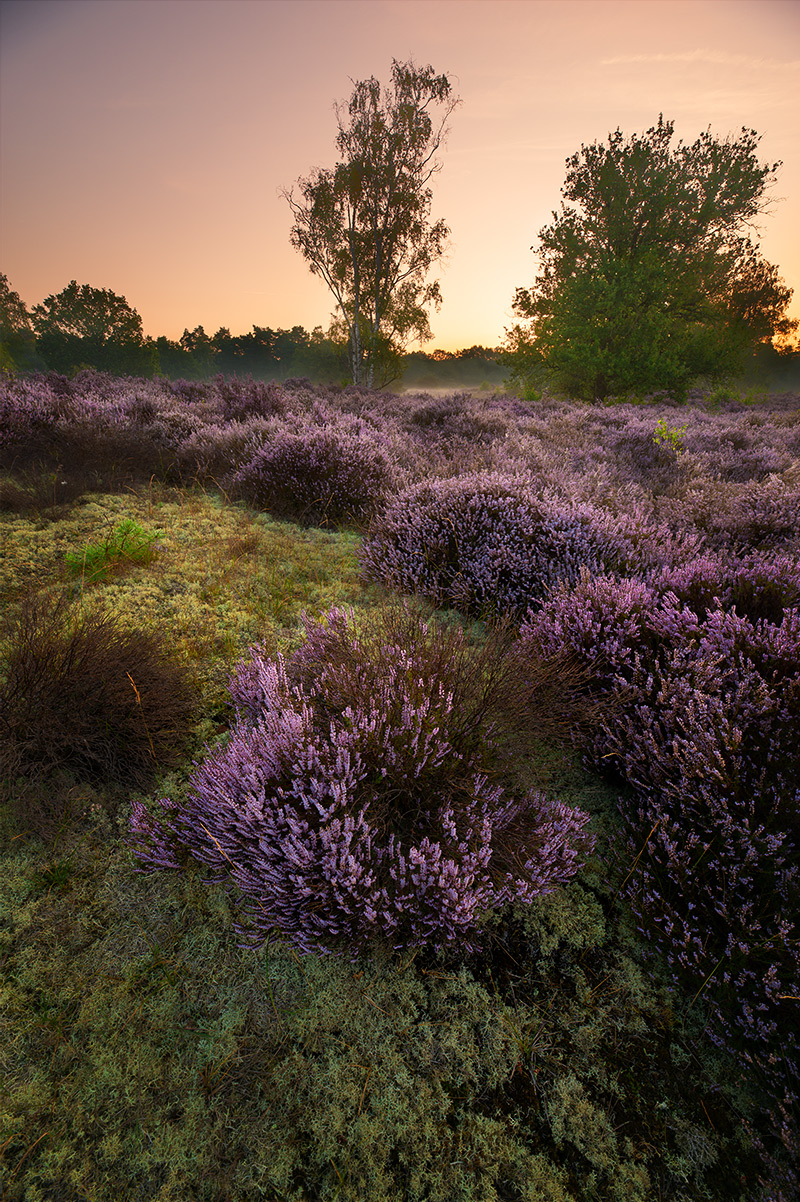
Finally, I crop the image so that the outer white edges disappear. The final image looks like this:
Summary
Starting with three individual photos we ended up with one photo that is sharp front to back and that is exposed correctly. No filters were needed and only the natural light available was used. I hope this article gave you all the knowledge needed to combine luminosity masking and focus stacking. By combining these techniques you can create a beautifully sharp and natural-looking image.
Thank you for reading this article on Combining Luminosity Masking With Focus Stacking, be sure to sign up for our newsletter for more tutorials and great offers.

Enter your email below and join our community of more than 100,000 photographers who have also
Subscribed to our newsletter.
Downloaded our FREE Photoshop Course.
Got our FREE Easy Panel for Photoshop.
And, have our FREE Essential Guide To Luminosity Masks E-Book.
FREE Photoshop Course

The Art Of Photography

Raya Pro for Photoshop

Other Luminosity Masking and Focus Stacking Articles
Using Focus Stacking to Extend Depth of Field
Focus bracketing and focus stacking for maximum DOF
Luminosity Masks
How to Create and Use Luminosity Masks in Adobe Photoshop