Essential Luminosity Masks Tutorial for Beginners

Since you’re reading this luminosity masks tutorial, you’ve probably already stumbled across the term ‘luminosity masks‘ and are wondering what on Earth these elusive things are. And more importantly, how you can use them in your digital workflow to come out with more beautiful photography. Follow along to this Luminosity Masks Tutorial for Beginners and you figure them out in no time at all.
The good news is, you’ve arrived at the right place. I’ve been teaching luminosity masks to eager photographers around the globe for years. And this tutorial will not only show you exactly how they work and how to create them, it will also guide you through their uses.
If you’re looking for something more advanced, visit part 2 of this guide: How To Exposure Blend With Luminosity Masks.
And at the very bottom of the page you will see the other parts in this 6-part luminosity mask guide.
For a complete course which covers everything you’ll need in your photography — including advanced luminosity masking — see my most popular course: The Art of Photography
What You’ll Need For These Tutorials
1. Luminosity Mask Software
It’s essential that you have a good luminosity mask panel to create masks for you. In this Luminosity Masks Tutorial for Beginners, I will show you how to make basic masks in Photoshop. But just as we don’t need to understand the algorithm behind a Curves layer to make a good contrast adjustment, we don’t need to learn the more complicated luminosity mask processes — like intersecting brights and darks to get mid-tone masks — in order to use them effectively.
Much better, and quicker, just to press a button and have one created for you. If you don’t have a luminosity mask generator, that’s okay. I’ve got a couple for you.
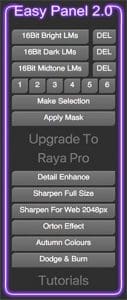
The Free Option — Easy Panel
You can download my Easy Panel for free which, with over 100,000 downloads, is probably the most used 16 bit Luminosity Mask panel in the world.
Premium Option — Raya Pro
Raya Pro, used by over 25,000 photographers, is the daddy (and mammy) of luminosity mask panels. It’s also a total workflow solution, where you can access advanced PS features with just one click.
2. Basic Photoshop Knowledge
After you’ve chosen your Luminosity Mask panel, you will need one more thing: a basic understanding of Photoshop.
If you’re new to Photoshop, don’t worry: I’ve got you covered. You can download my free (It really is free) 2-hour Beginner’s Photoshop Course.
The link to this is included when you sign up for the Easy Panel.
With those two things ready, let’s carry on with the Luminosity Masks Tutorial for Beginners.
-Tutorial Continued Below-
What Are Luminosity Masks?
Put simply, luminosity masks are selections based on brightness. They allow us to select — and make changes to — bright, dark or mid-tones in our image. This opens up a whole new world of processing, not to mention an effective way to blend exposures.
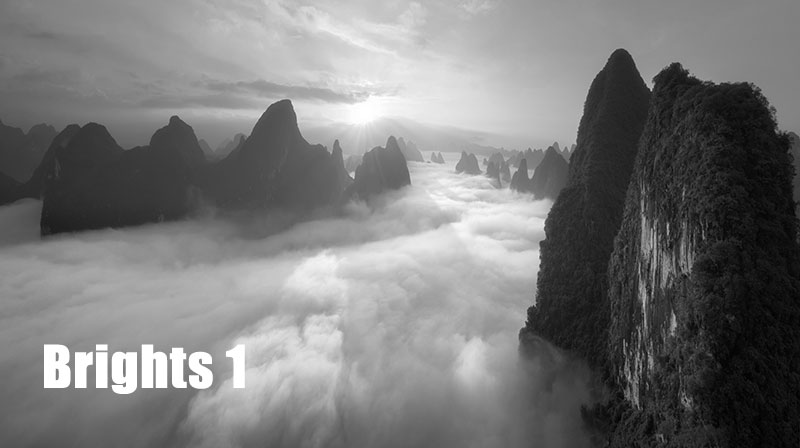
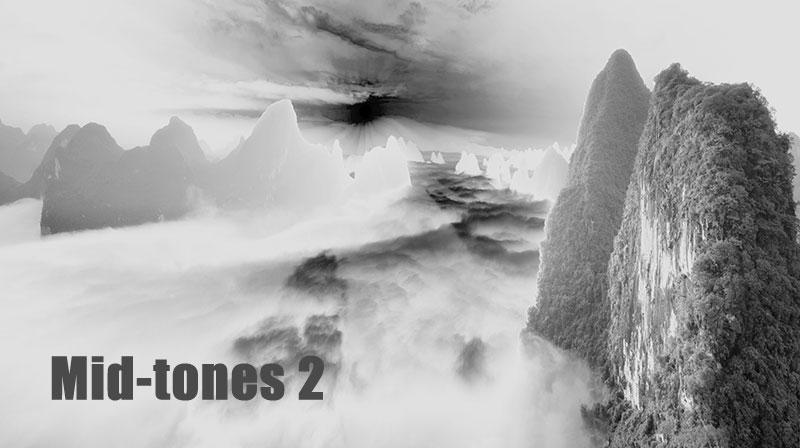
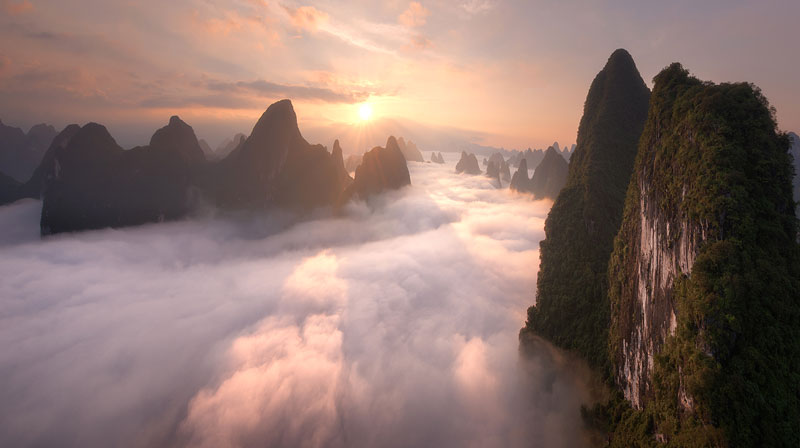
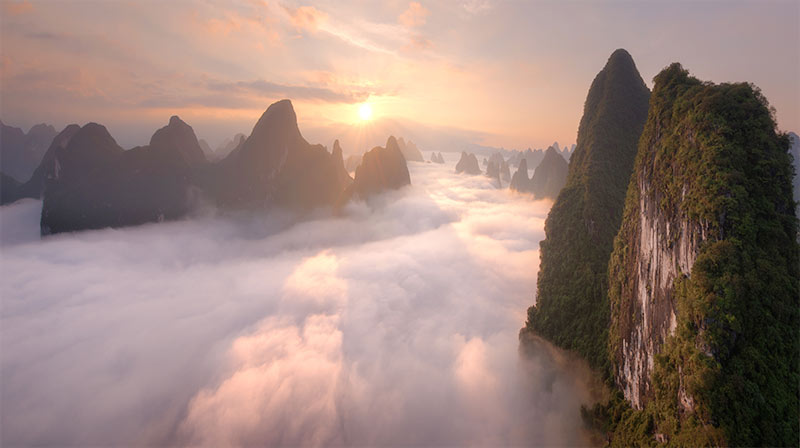
For example, below you can see one colour image and three monochromes. The monochromes are luminosity masks. Whatever is white or grey in the mask is a ‘selected’ area, meaning any changes we make will only affect those areas. The lighter the grey the more affected that area will be. Dark areas will be unaffected by any changes.
Why are Luminosity Masks useful?
Let’s say we want to add more contrast to an image, but we don’t want to affect the shadows because they’ll become clipped. We just want to add contrast to the highlights and mid-tones. The brights mask you see above can be added to a Curves layer where we’ve made a simple S-Curve. That will give the photo a contrast punch but keep our shadows nicely exposed.
To the left you see the before image, and to the right after the S-Curve is applied. The effect is a little strong here, threatening to overexpose the highlights, but it’s just for demonstration purposes. Notice how the shadows are completely unaffected by the Curves layer.

What is Masking?
That’s a little bit more basic for this luminosity masks tutorial, but essentially masking is a non-destructive way of interacting with layers in Photoshop. For a better understanding, download my Beginner’s Photoshop course (see link above), or click on the video link below, or follow the written tutorial here: What is Masking in Photoshop?
How Do You Create Luminosity Masks?
The old way to create luminosity masks involved a more complex method of working within the Channels palette. We’ve largely moved on from that in favour of quicker, less resource-hungry processes. But if you’re curious, click on the button below to see the older method.
The Newer Way to Create Luminosity Masks
We have a few different ways to create luminosity masks. To make a basic one it’s a fairly simple process.
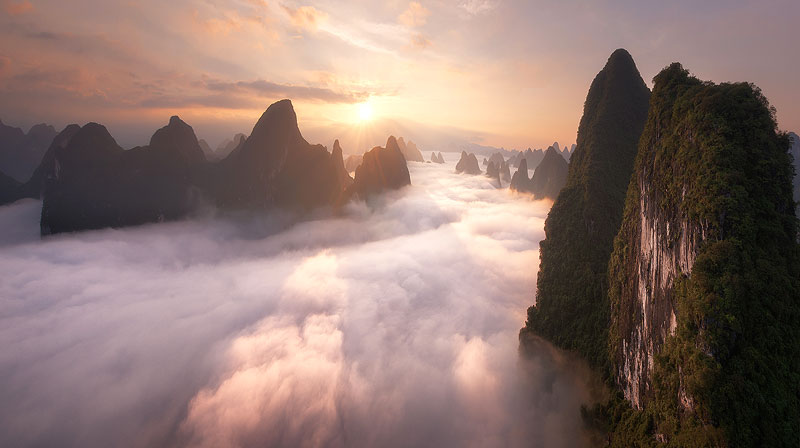
But first, feel free to download this image as our practice photo: Example Luminosity Mask Image
Step 1 — After loading your photo into Photoshop, create a Curves Layer.
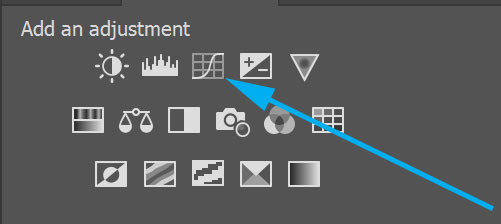
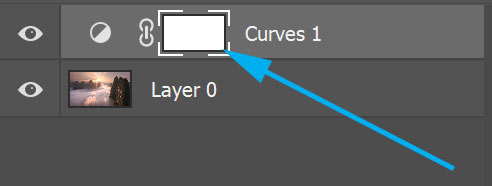
In your layers panel you should now have a new layer called Curves 1 (or something similar).
Step 2 — Select the white mask of the Curves layer.
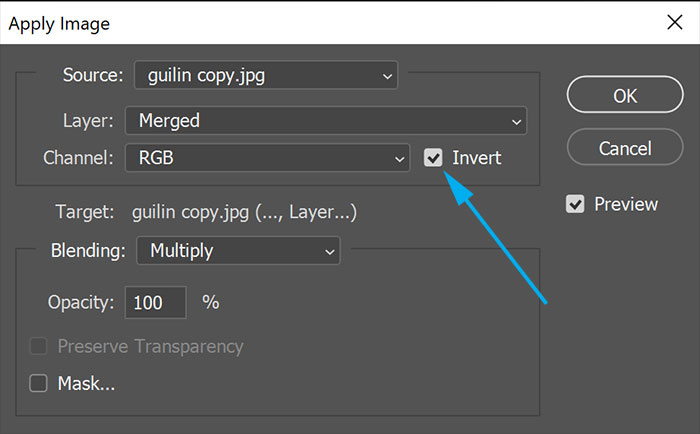
Step 3 — Go to the top menu in Photoshop called Image, then down to Apply Image.
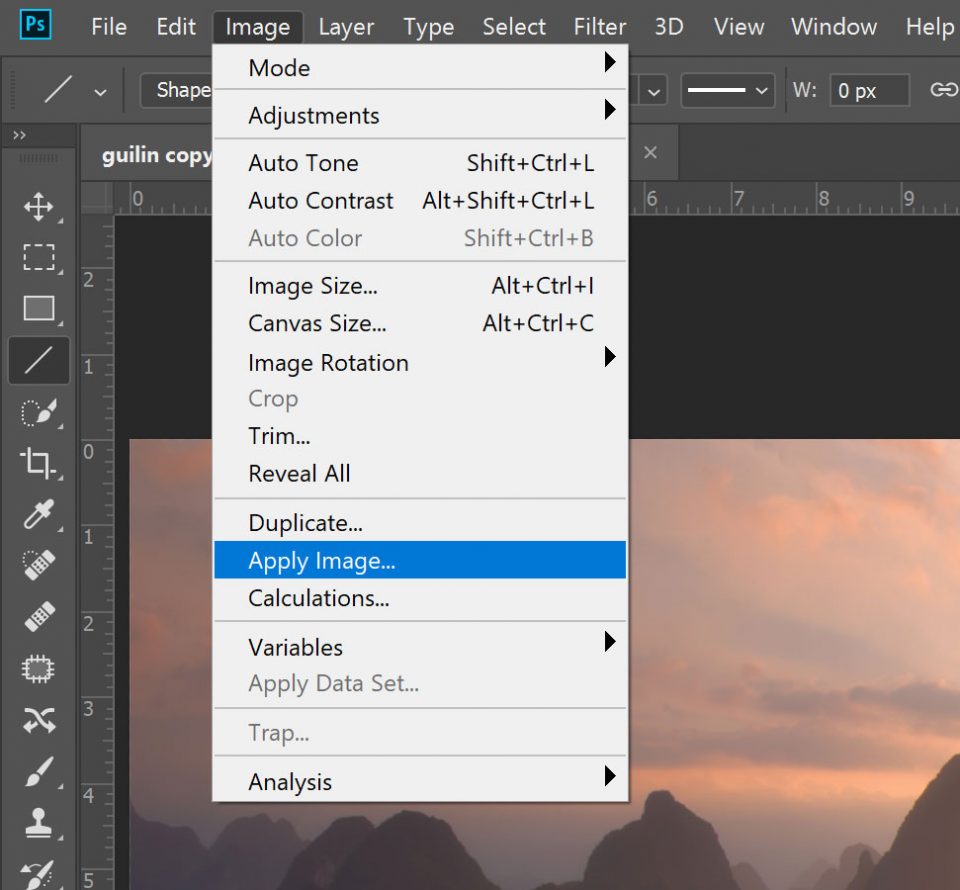
Step 4 — Mask sure your settings are the same as mine (ignore the ‘guilin copy.jpg’ name. Yours will be different) and press OK.
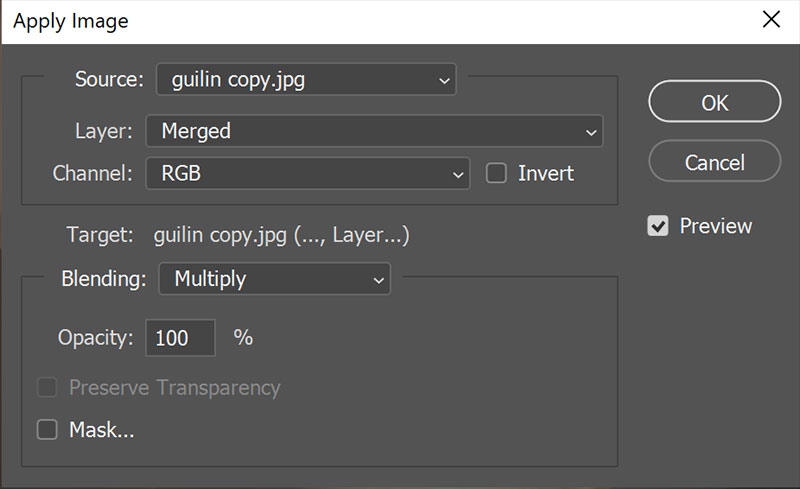
That’s it! You’ve created a luminosity mask. If you look at the mask of the Curves layer you’ll see it’s no longer white. It should now be a little black and white thumbnail of your photo.
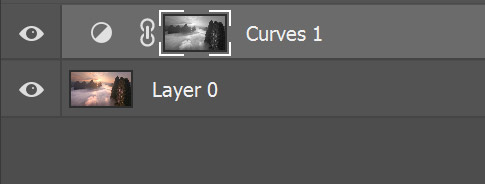
To look at your mask, hold Alt (Option on a Mac) and left-click on the Curves layer mask. This will make it large on the screen.
Your mask should look like this:
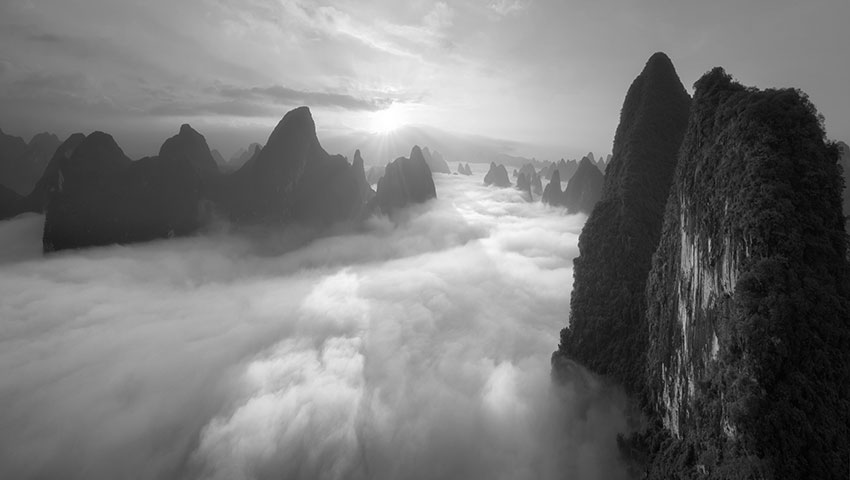
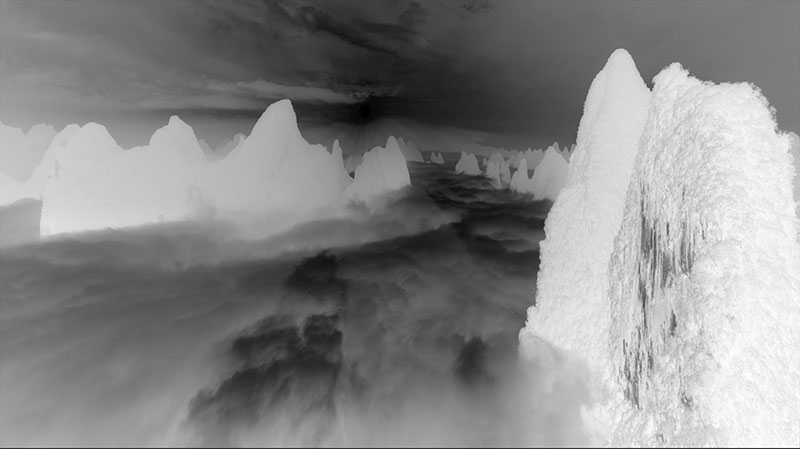
This is what we call a brights 1 mask because it’s targeting the brighter parts of the image. Remember that whatever is white or grey in the mask is part of the selection. Since the mountinas are dark in the mask, they are not selected.
How To Use Luminosity Masks
So we have a brights 1 luminosity mask now sitting on our layer but what next? What do we do with it?
First of all, why don’t we turn that brights 1 mask into a darks 1 mask. Just click on the mask and press Ctrl+I (Command+I on a Mac). Or go to Image>Adjustments>Invert. Now you should have a mask that looks like this:
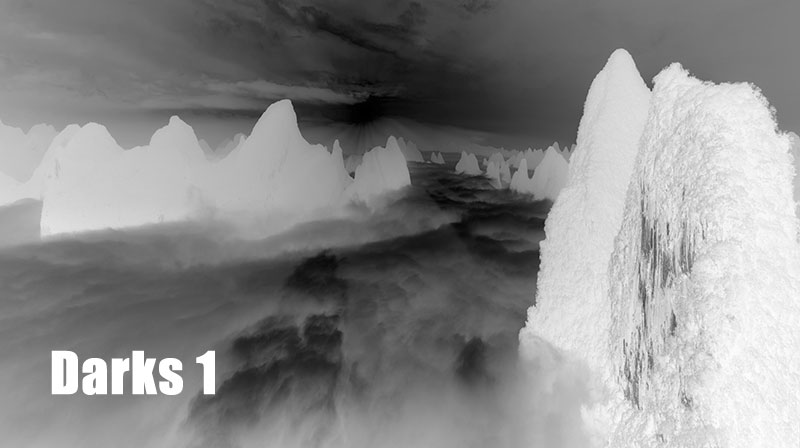
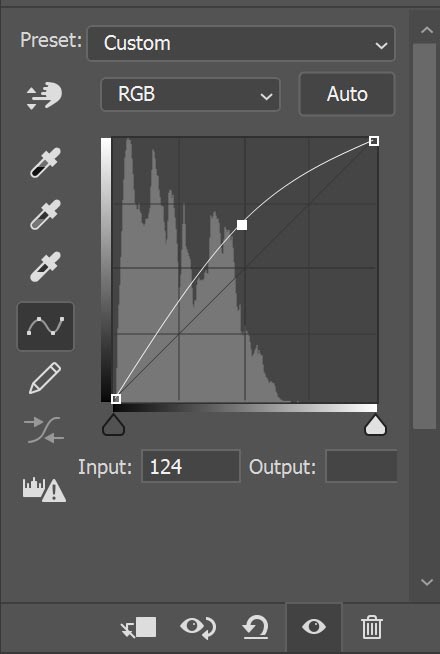
With this new darks 1 mask, let’s create a targeted contrast that brightens up the shadows but doesn’t affect the highlights.
Step 1 — Click on the Curves layer icon to bring up the curve.

Step 2 — Select the lower mid-tones and raise them a bit. Our image, especially the shadows, should be brighter now.
Step 3 — To see what effect the mask is having, right-click on the mask and choose Disable Mask. Watch the main image as you do this.
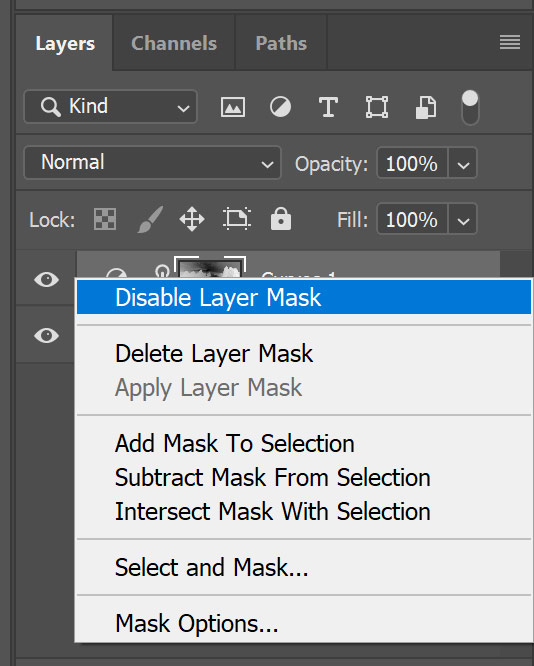
Step 4 — Then to activate the mask again just click on it and see the difference. Here’s what mine looks like
Before Curves layer is to the left, after Curves to the right.

How To Make a More Targeted Mask
As you can see, quite a few mid-tones are affected by this mask because it is a general mask. What if we want to make a much more targeted adjustment so only the shadows were affected? That’s easy.
Step 1 — Hold Alt (Option Mac) and left-click the mask again to make it large on the screen.
Step 2 — Go back to Image>Apply Image. Your settings should be the same as last time, but now you check the Invert button. Since we’re working with darks masks, we use the invert button. If we were making a more targeted brights mask, we would not have Invert selected.
Step 3 — Look at your new mask. Notice how mainly the shadows are selected (white and light grey) and far fewer mid-tones are selected. This is a darks 2 mask.
Left is the darks 1 mask from earlier. Right is darks 2.
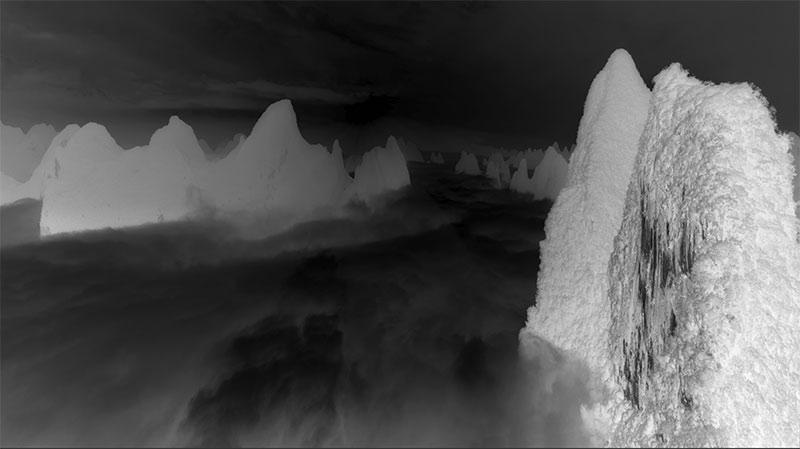
Step 4 — Do the process again. Image>Apply Image and press OK. Look at the mask once more, which is now a darks 3 mask. Only a narrow range of shadows are now selected in the photo.
Darks 2 to the left. The new darks 3 to the right.
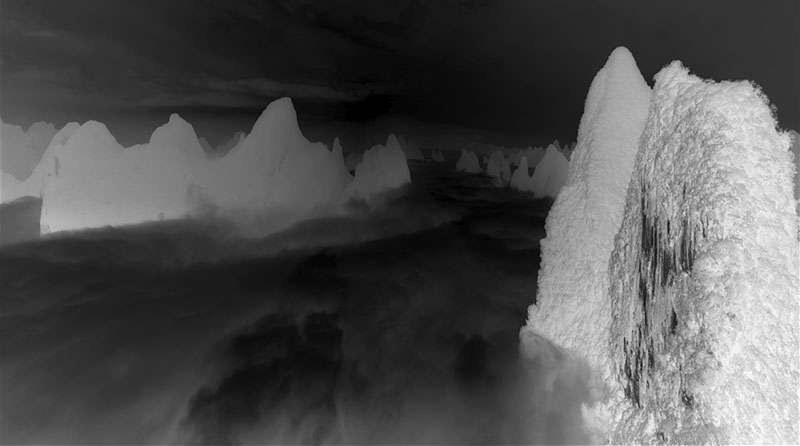
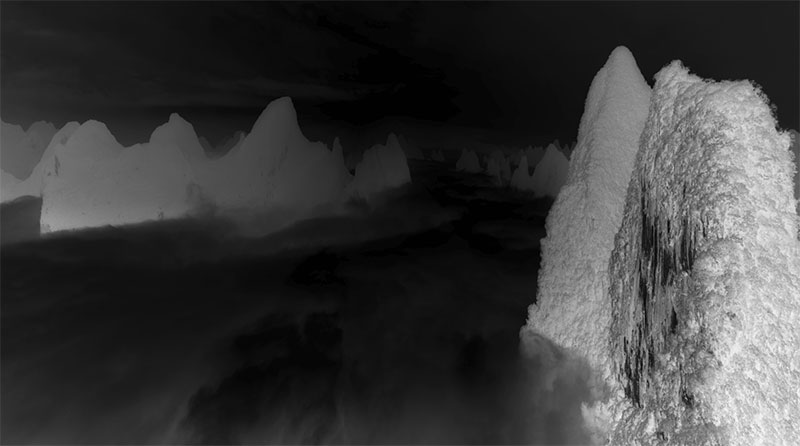
Step 5 — Toggle the mask on and off (disabling it with right-click and Disable Mask) to see the difference it is making to your Curves layer. You should now notice that only darkest parts of the image are being affected by the contrast adjustment.
Before contrast adjustment to the left. On the right, after contrast adjust targeting shadows.

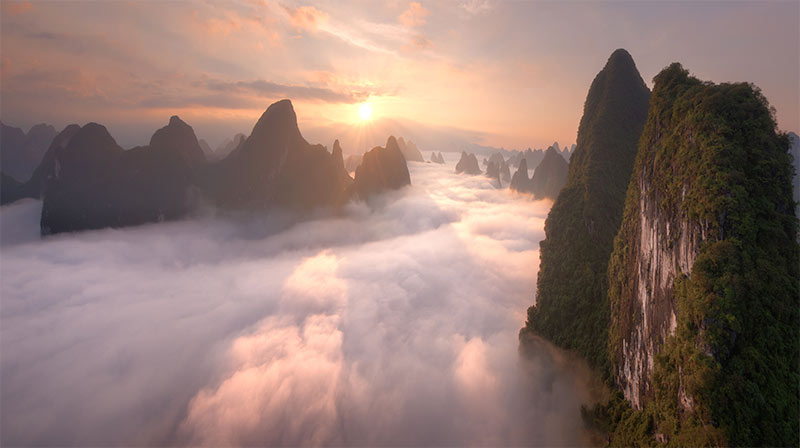
So as you can see, luminosity masks allow us to make extremely fine changes to our image that we couldn’t have made without such a targeted mask.
What Other Layers Can We Apply Luminosity Masks to?
We can use luminosity masks on pretty much any layer we want. Take a look at the videos below
Bring out beautiful warmth and vibrancy in a sunset
You could be even more creative and pull out some beautiful warmth and vibrance from your golden hour sky just as I did in the video below.
Craft the perfect Orton Effect
Or you could use a mask to target things like the Orton Effect.
Luminosity Mask FAQ
Luminosity masks have been available since Photoshop CS3, but panels like Raya Pro and the Easy Panel work in later versions (CS6 and CC).
No, just Photoshop and other similar image processors.
Of all the post-processing tools available to us, luminosity masks are certainly more advanced. But I believe, with a little patience, that anyone can learn to use the.
Both. Set your workspace to whichever you like and the luminosity masks created will reflect that. But 16 bit luminosity masks will be higher quality.
That’s right. All active selections, which we haven’t covered in this tutorial, are 8 bit. So if you make a selection from a 16 bit luminosity mask, the resulting selection will be 8 bit.
End of Part 1
That concludes part 1 of the Essential Guide To Luminosity Masks for beginners. Then next phase teaches you: How To Exposure Blend With Luminosity Masks for a more advanced journey into the world of Luminosity Masks. This can be followed with our FREE e-Book The Essential Guide To Luminosity Masks
Part 2: How To Blend Exposures With Luminosity Masks in Photoshop
Part 3: How To Deal With Moving Objects in Exposure Blending
part 4: How To Shoot for Exposure Blending
Part 5: How Many Exposures Do We Need For Exposure Blending
Part 6: Luminosity Masks — Why Can’t I Paint Inside The Selection?
Other Luminosity Mask Resources
Creating Luminosity Masks in Affinity Photo: https://lenscraft.co.uk/photo-editing-tutorials/creating-affinity-photo-luminosity-masks/
Creating Luminosity Masks in Gimp: https://www.gimp.org/tutorials/Luminosity_Masks/

