Focal Length Blending in Photoshop Tutorial
Sometimes when taking photos the dimensions of the scene become distorted. Have you ever taken a photo of an incredible scene, only to look at it in post-processing and think, that’s not how it looked! This will mostly be down to Lens Distortion which warps our perception of depth. Far away features seem further away and those grand subjects that we have composed our image around often don’t come across as grand as they really were in real life. Yes, we can correct some of this in Photoshop by selecting the subject and using the various Transform tools to exaggerate the image. But, the problem we have with that is, we can lose texture and detail by stretching too far, and we run the risk of upsetting the proportionality of the image. A great way to avoid this is in-camera, by taking multiple images and using Focal Length Blending in Photoshop.
As well as showing you how to do Focal Length Blending, we’ll also help to explain what is Focal Length Blending?

WE HAVE USED RAYA PRO TO GENERATE OUR LUMINOSITY MASK, YOU CAN ALSO USE OUR FREE EASY PANEL IF YOU DON’T HAVE RAYA PRO
What Is Focal Length Blending or Perspective?
Focal Length Blending or sometimes called Perspective Blending is a technique that is quite commonly used by those who know-how. It is a great way to fill the frame with excitement and interesting things. It can be quite tricky but can be a real game-changer for producing those EPIC photos. To be able to try Focal Lenght Blending you will need at least two images of the same subject, from the same perspective, but taken at different focal lengths. We then take elements from each exposure and blend them into one. In the example below, we keep the outer framing and sky from the 17mm, and from the 23mm exposure, we use the sea stack. So we blend different elements from exposures with different focal lengths to create one image.

17mm Exposure 
23mm Exposure 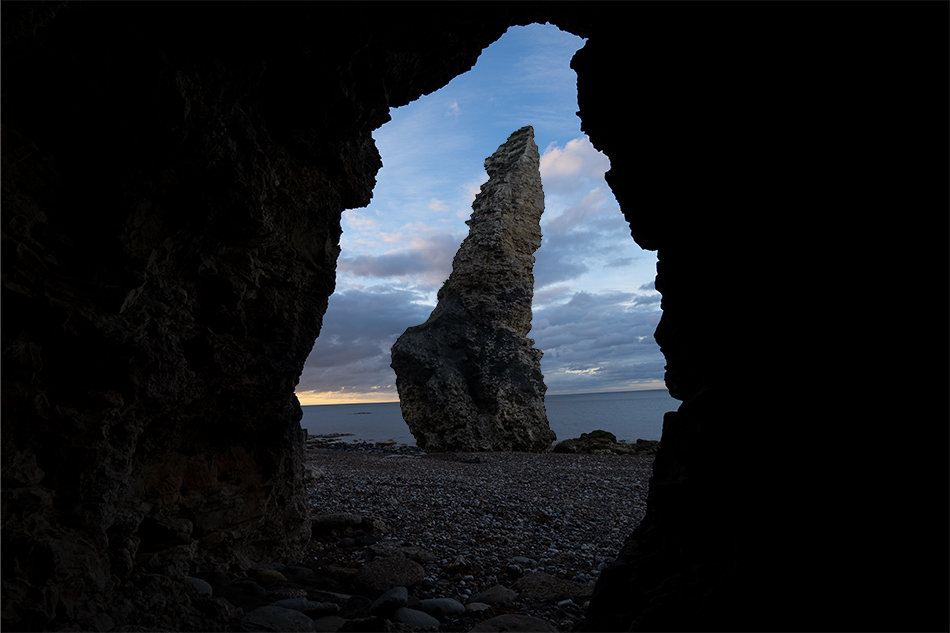
Blended Exposure
Once we have taken your multiple exposures at different focal lengths, we then head into post-processing and do all of our focal length blending in Photoshop.
– Tutorial continued below –
Enter your email below and join our community of more than 100,000 photographers who receive regular tutorials and have also

Subscribed to our newsletter,
Downloaded our FREE Photoshop Course
Got our FREE Easy Panel for Photoshop
And have our FREE Essential Guide To Luminosity Masks E-Book
How To Do Focal Length Blending In Photoshop
We used Raya Pro to create a precision luminosity mask which gave us a very accurate selection to use for the foreground. We used a luminosity mask because of the complexity of the images. Of course, you could use the different selection tools as well. For example, the images above with the 17mm, 23mm, and the blended image. Because they were simple images to use just for a quick example, I used the Quick Selection tool to grab the stack from the 23mm exposure.
1. To begin with we need to make the layer that has the more powerful subject present the top layer and make it visible so we can’t see the layers below.
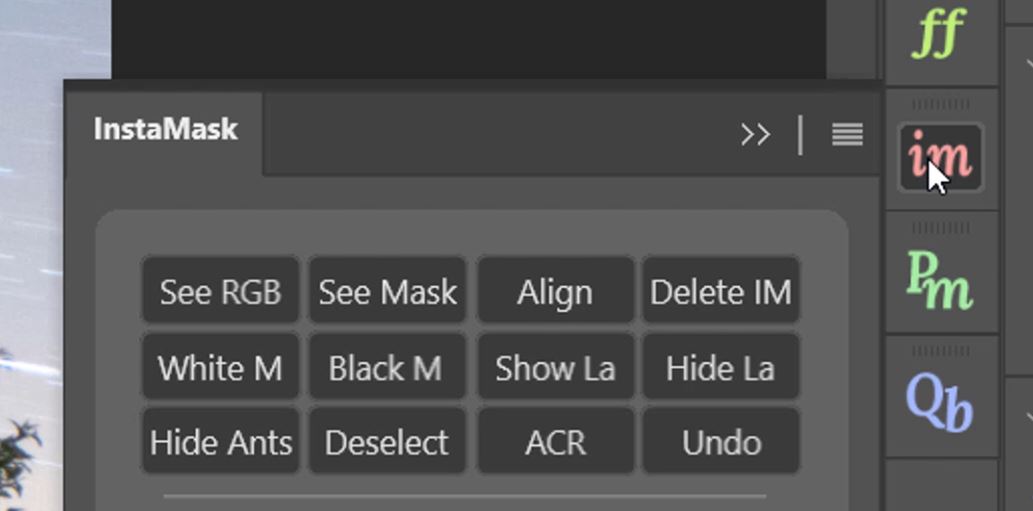
2. Left-click on the im icon to open Raya Pro’s InstaMask panel.
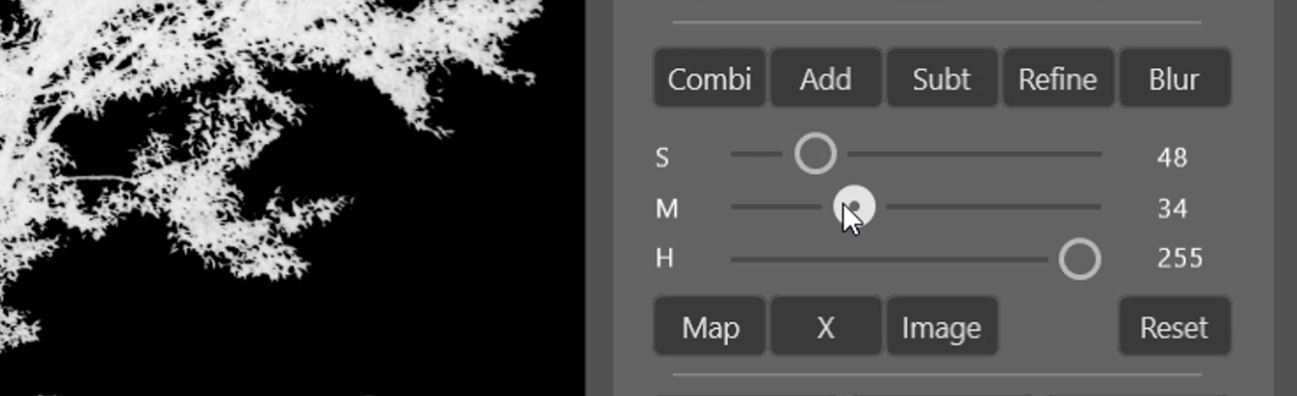
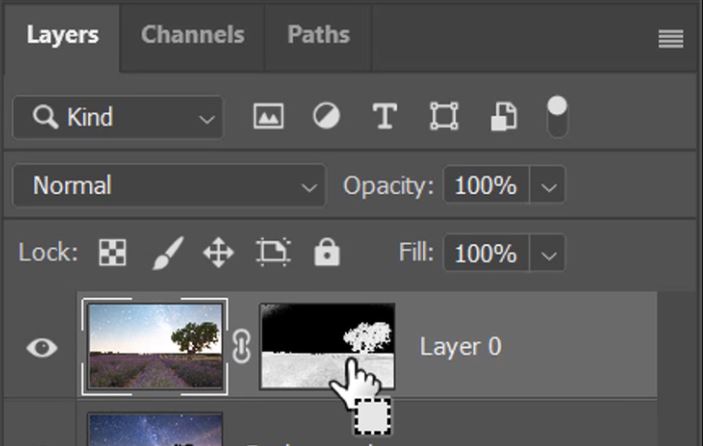
3. Because we want to use the darker areas of this exposure and lose the sky, we make a darks mask selection by clicking D 2.

4. We then use the Midtones and Shadows sliders to make the mask more precise for what we need it for, which is separating the darker parts of the image from the lighter ones.
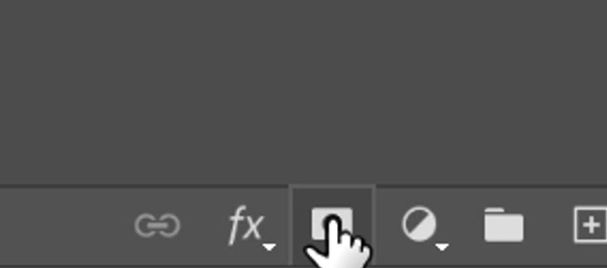
5. Once we’re happy that the mask gives us the correct selection, we need to then click on the layer that we want to apply the mask to.
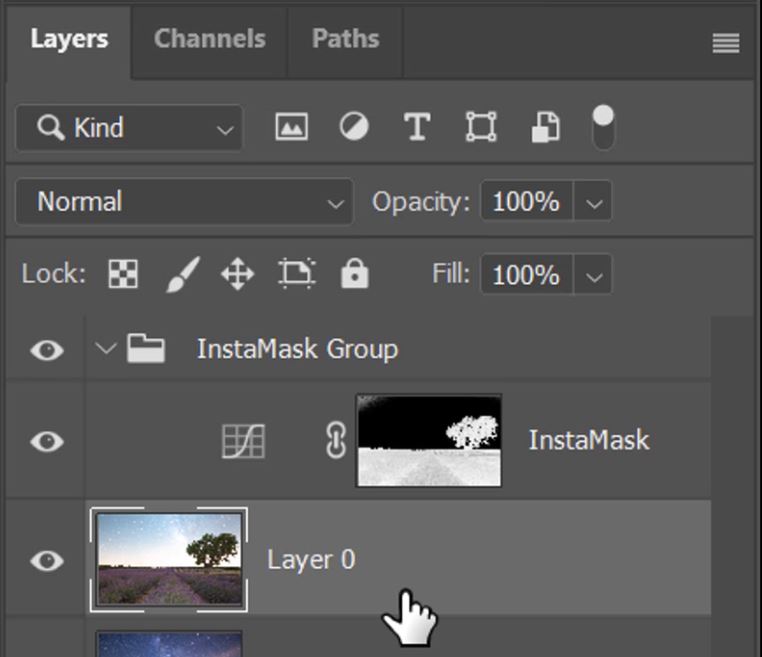
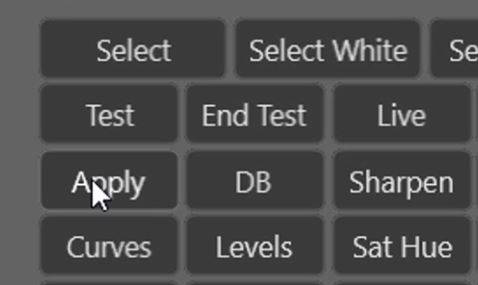
6. Now that the layer is selected we’re ready to apply the mask to the layer. This will make the bright areas of the mask visible and hide the darker areas of the mask, click on the Apply button to apply the mask to the selected layer.
Editor’s Choice plugin on Adobe marketplace

Raya Pro, the most rated plugin on Adobe Marketplace.
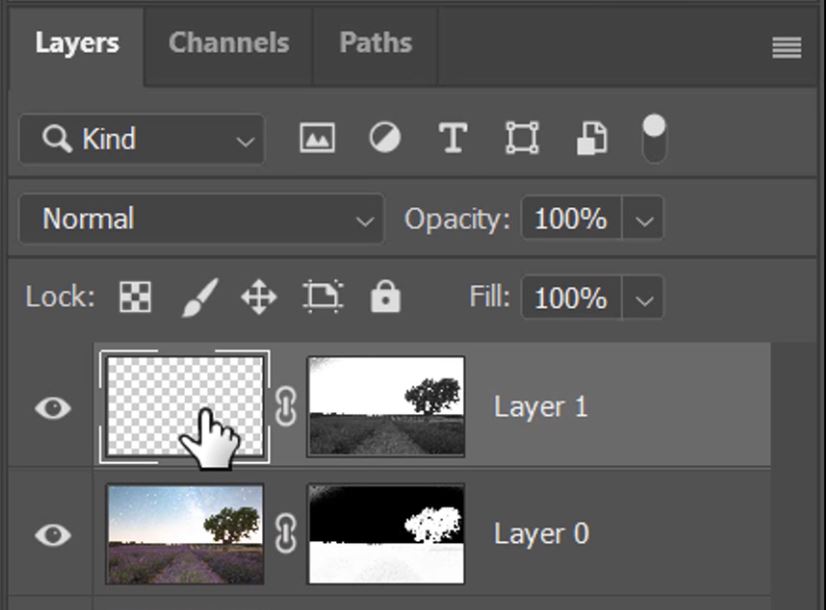
7. Hold down the Ctrl (PC) or Cmd (Mac) key and left-click on the mask that you just applied to layer. This will give you an active selection of the white parts of the mask.
8. Select the Brush Tool and a white foreground with a 100% brush Opacity. We’re going to paint over the mask to strengthen the selection more and hide any unwanted residual appearance of the layer underneath.
9. Before you begin painting, make sure you have the Mask Thumbnail selected and not the Layer Thumbnail.

10. Paint over the image to make the selected area stronger visibly.

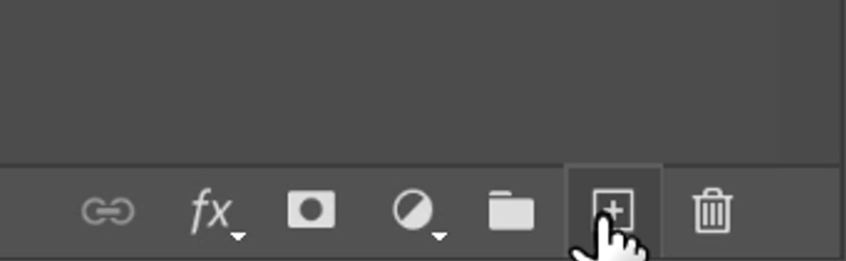
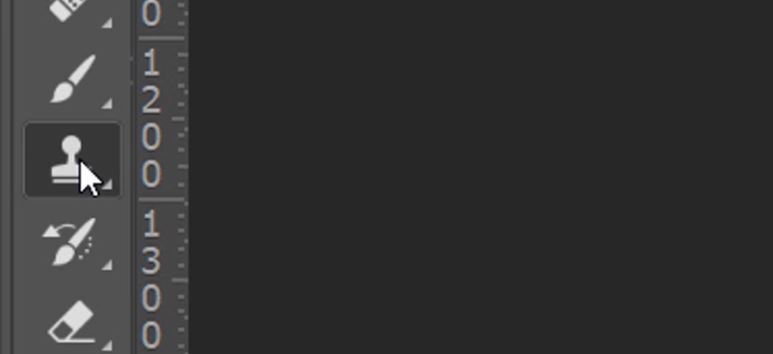
11. To hide the tree from the bottom layer we’ll use the Clone Stamp Tool. But first, we need to prepare a new layer. Click on the Add a new layer icon at the bottom of the layers panel.
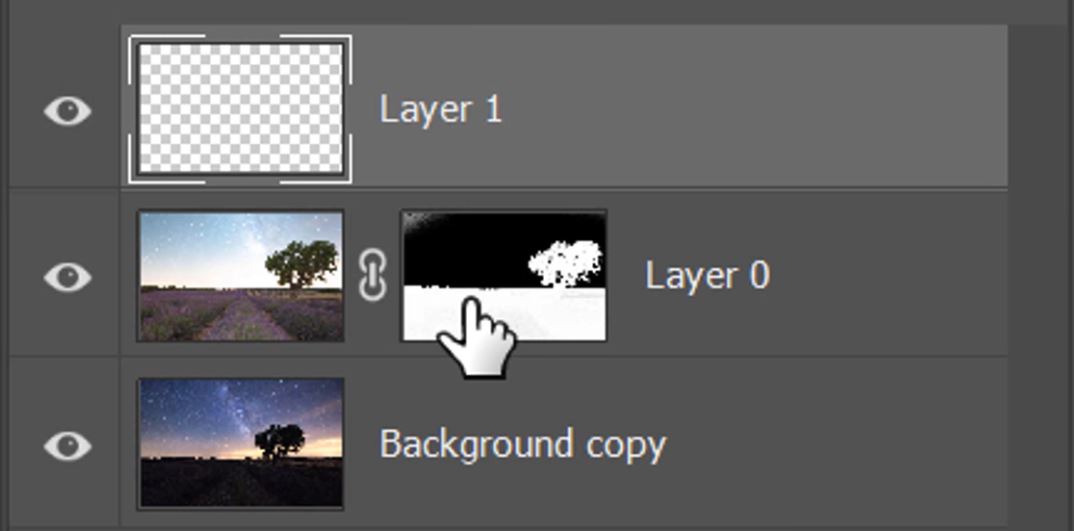
12. Just like we did earlier (step 7), hold down the Ctrl (PC) or Cmd (Mac) key and left-click on the mask that you just applied to the foreground layer. This will give you an active selection like before.
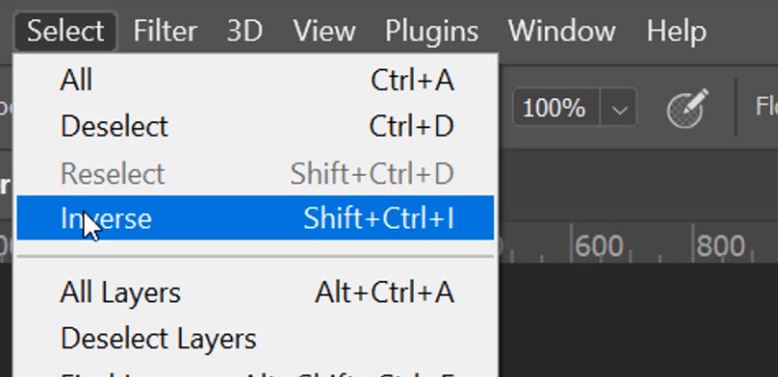
13. We will use this selection to make a new mask. However, this mask will need to reverse what will be visible. So the foreground won’t be affected by this layer. To reverse the selection we go to the Select menu and choose the Inverse option.
14. To apply our inverted selection to a mask on the new blank layer, just click on the Add a Mask icon.
15. Left-click on the thumbnail of the blank layer to ensure that we’re working on the layer and not the mask.
16. Select the Clone Stamp Tool.
17. Hold down the Alt (PC) or Opt (mac) key to change the cursor to a target. Position the target over the area that you want to clone from, this will be your source. When selecting your source you need to be very conscious of colour tones and shades. Because when you go to stamp later, if the tones are different it looks really bad. I chose a source by holding down ALT and left-clicking on the diagonal line where both golden and purple tones are present.
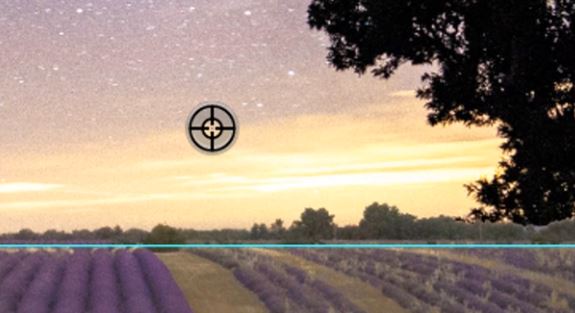
18. When I go to stamp, I position the cursor on the same diagonal line just higher up and to the right, just on the tree that I want to remove.
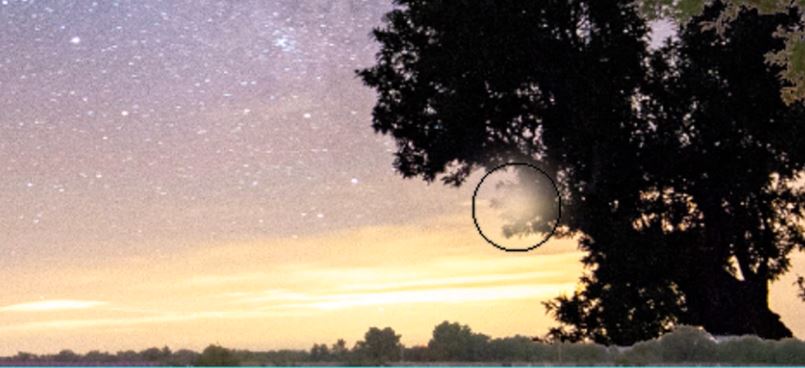
19. Now press the left mouse button and paint over the tree.
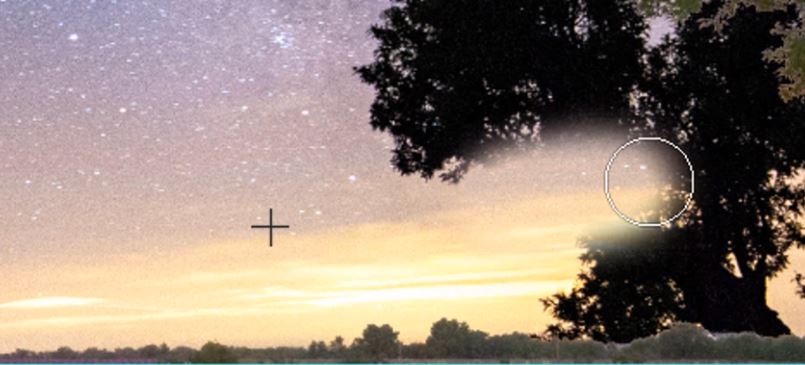
20. You should have two cursors on the screen. One looks like a crosshair. This indicates the distance from the source to the stamp. It’s important to keep an eye on this. If the source cursor goes beyond the point that you started to stamp over, you will start to stamp the area you just moved, so essentially, moving everything to the right and slightly up.
21. Where this would be really apparent is, because stamping started higher than my source, if I begin to stamp lower than the source I will stamp the horizon higher up, just like this.
22. It’s easy to fix by just selecting a new source and stamping over the problem areas again.
23. Even when you stamp inside difficult areas like in the gaps of this tree, I have kept the angle of the source and the stamp the same to give continuity of color and tones throughout the whole scene.

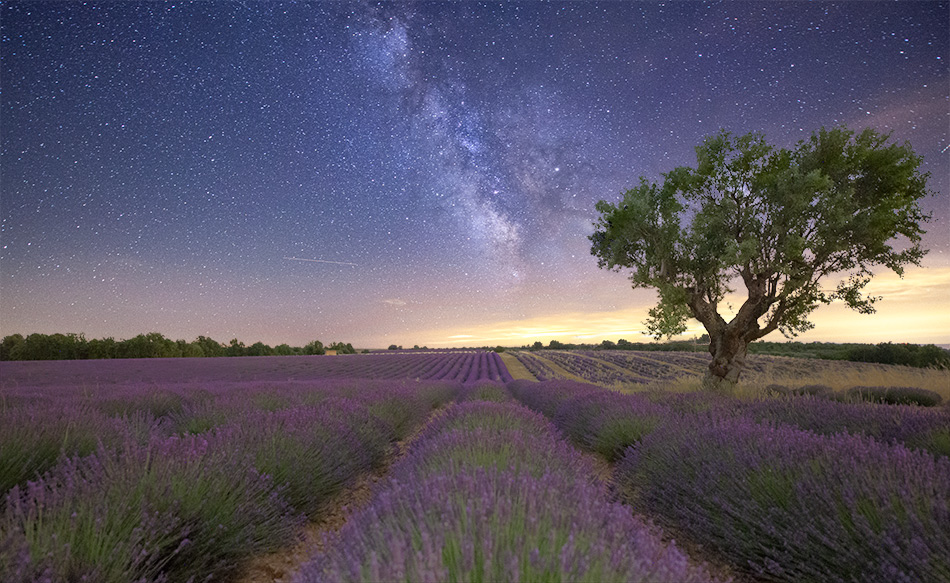
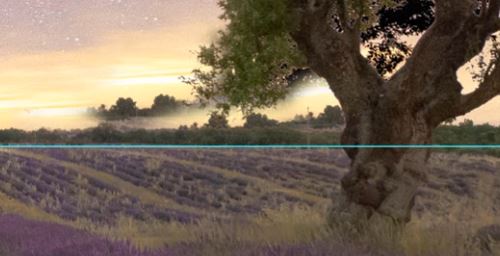
The image with the Milky Way was taken with a 14mm Focal Length. For the foreground image, the Focal Lenght was 19mm. After Focal Length Blending in Photoshop we have a balanced image with a more prominent lone tree as an interesting subject.
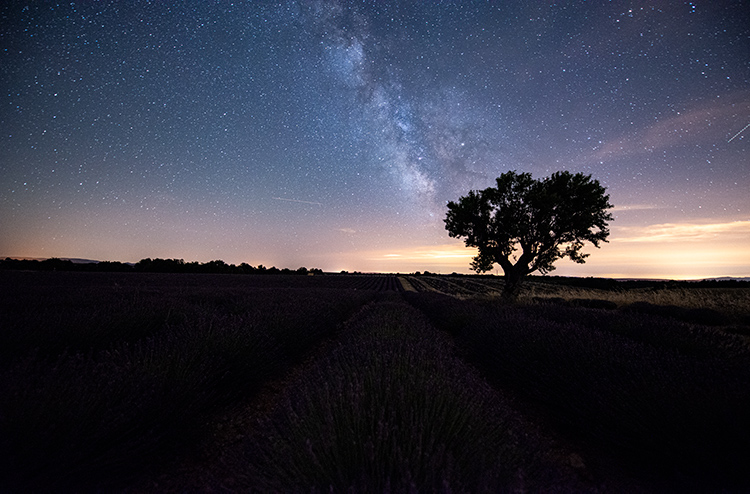
14mm 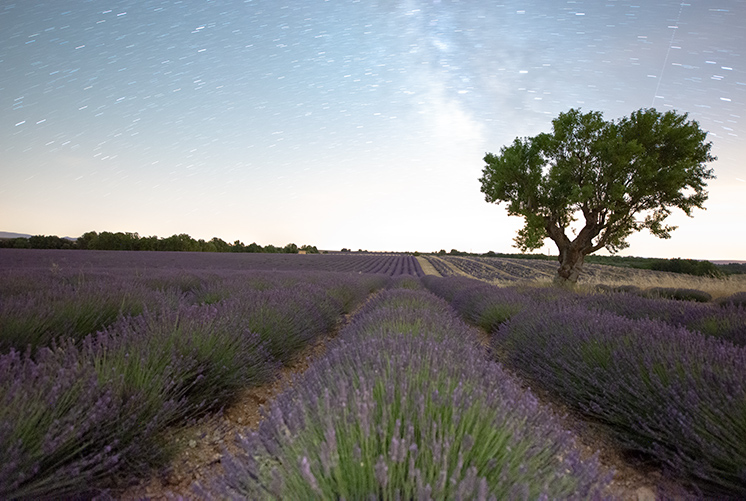
19mm