
Give Your Photo A Dreamy Look Using The Orton Effect
This article on Give Your Photo A Dreamy Look Using The Orton Effect is by Grey Chow, If you would like to write for us, please read here.
You will have seen those photos that have a soft and dreamy, glowing look. This dreamy feel is often added during the post-processing using a technique called the Orton effect. The Orton effect was developed by a Canadian Photographer, Michael Orton in the 1980s. The technique adds a soft glow to the photo. Originally, the technique involves sandwiching two or three images of a scene, one is well-exposed and in focus, and another one is out of focus and overexposed. Nowadays, it is a lot easier to give your photo a dreamy look by replicating the Orton effect using post-processing software like Adobe Photoshop or RAYA PRO.
If you wish to experiment with this, I would really appreciate it if you included my name (Grey Chow) and www.shutterevolve.com when you publish your image. If you post your published image on our Facebook page I’d be happy to check it out.
When to apply the Orton effect?
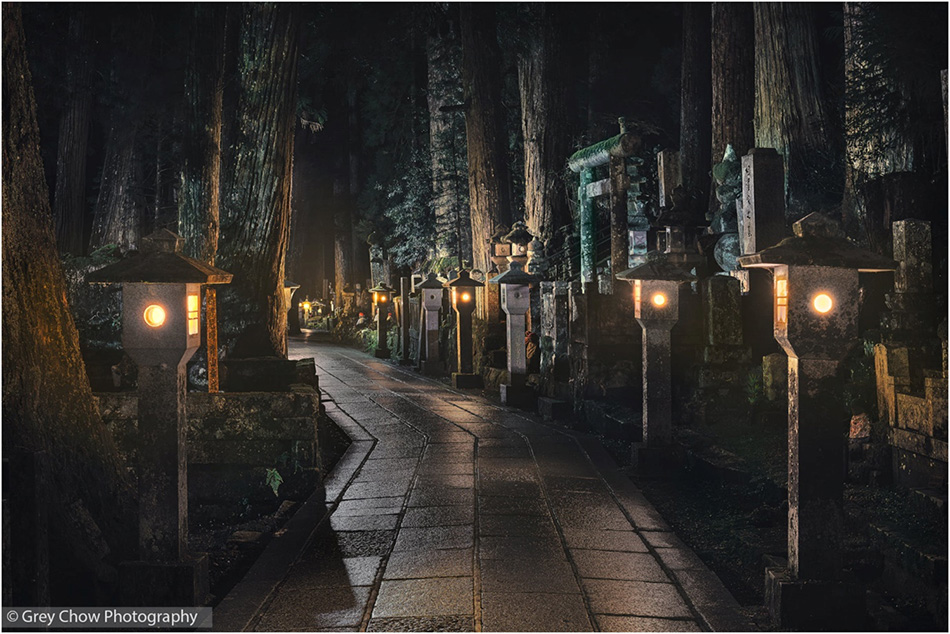
The objective of the Orton effect is to add a soft glow to a photo. Personally, I found out it works very well on any photo with nice highlights on the scene, especially a scene that contains orange/yellow colour. However, I would suggest giving it a try on any of your photos. Then, you will have a better idea of what works and what doesn’t.

– Tutorial continued below –
Enter your email below and join our community of more than 100,000 photographers who receive regular tutorials and have also

Subscribed to our newsletter,
Downloaded our FREE Photoshop Course
Got our FREE Easy Panel for Photoshop
And have our FREE Essential Guide To Luminosity Masks E-Book
How To Give Your Photo A Dreamy Look Using The Orton Effect in Photoshop
There are many ways to create the Orton effect, and I will share the two methods below using Adobe Photoshop. When to apply the Orton effect, I suggest doing it only after you have applied all your usual editing to the photo. You only apply the effect to give a final touch to your photo before exporting it for printing or posting.
Method 1: Gaussian blur + adjustment layer
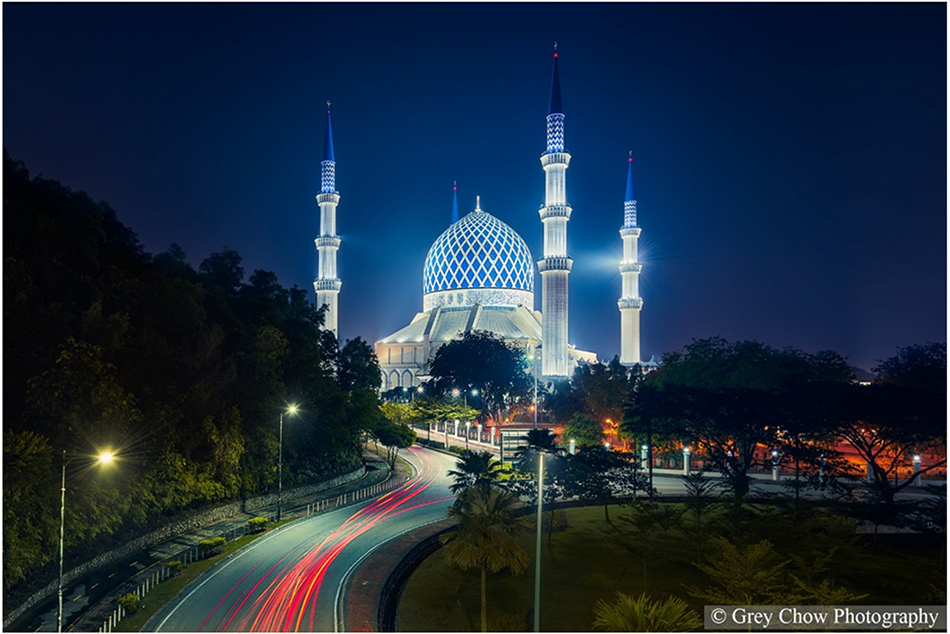
Below is the photo that I already edited and merged all the layers into one single image layer.

Alternatively, you can choose to use Ctrl+Alt+Shift+E (PC) or Cmd+Opt+Shitf+E (Mac) shortcut keys to merge all the adjustments into a new layer instead of discarding all of them.
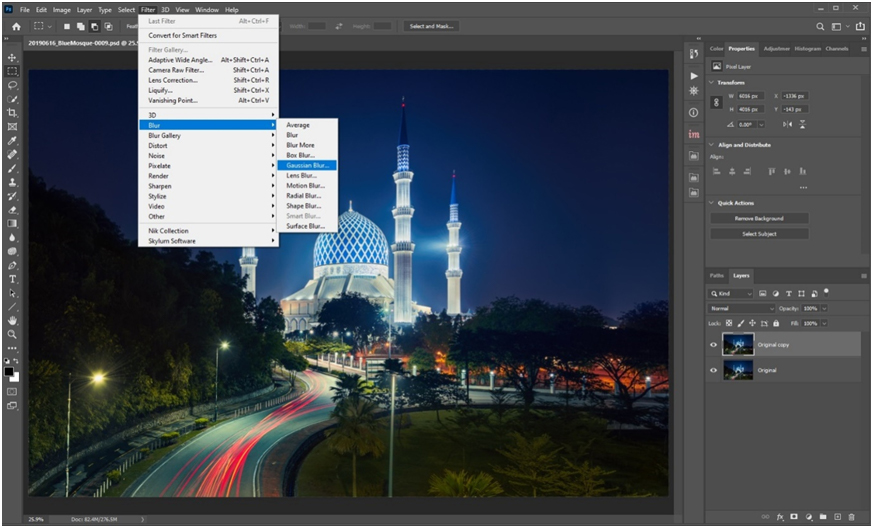
1. To start with, I’m going to duplicate this layer by selecting the layer and press Ctrl/Cmd + J buttons. Then, select the newly created layer, go to Filter > Blur, and click on the Gaussian Blur option on the menu.
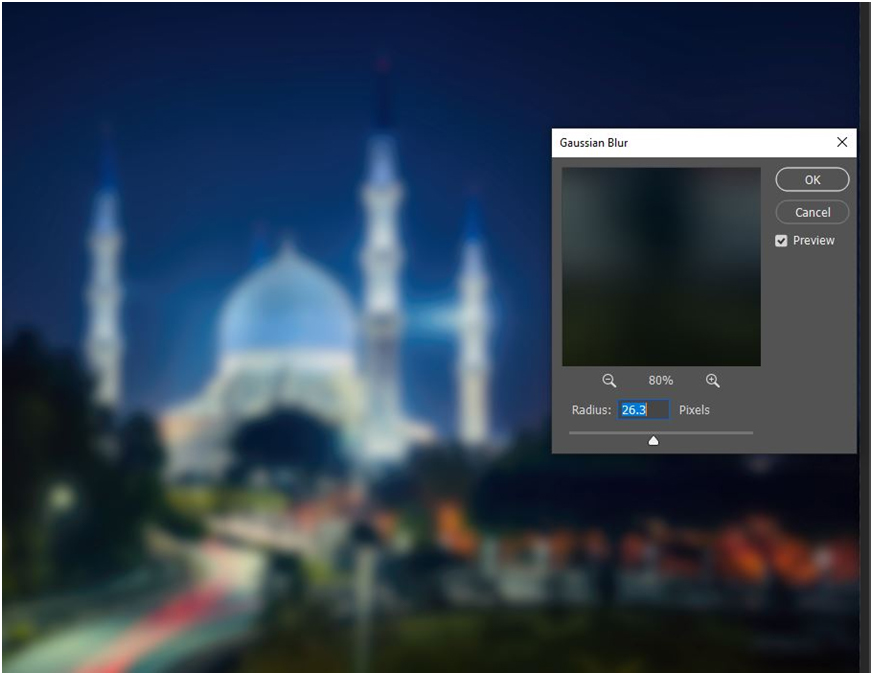
2. A new dialogue will prompt on your screen, enter the Radius value and click OK. The number of the pixel should you set for the Radius value is depending on your camera megapixel. For your reference, I usually set somewhere between 15-30 for a 24megapixels image.
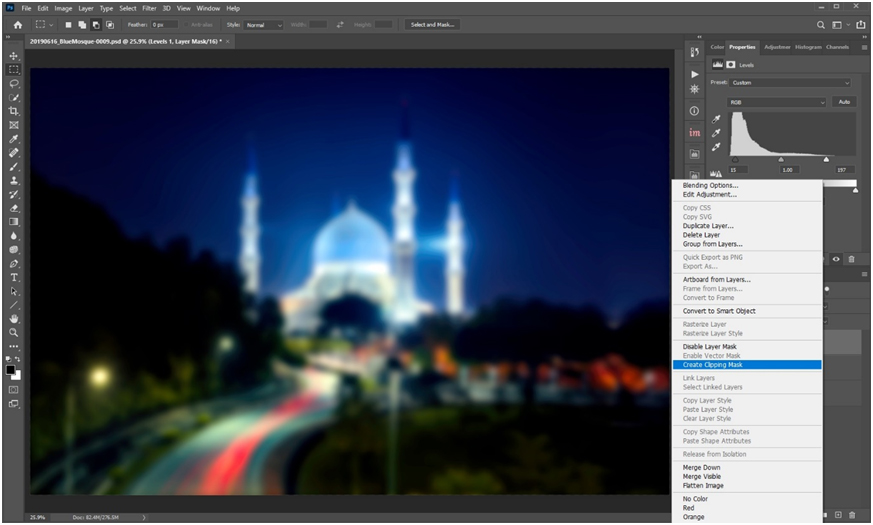
3. Then, right-click on the adjustment layer and choose Create Clipping Mask. By doing so, whatever adjustment you make here will only apply to the layer below it, which is the blurred layer.
4. Then, right-click on the adjustment layer and choose Create Clipping Mask. By doing so, whatever adjustment you make here will only apply to the layer below it, which is the blurred layer.
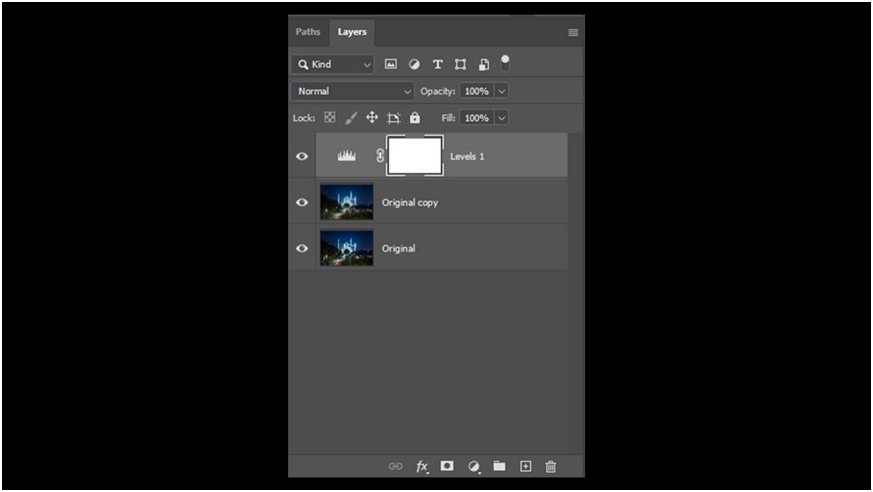
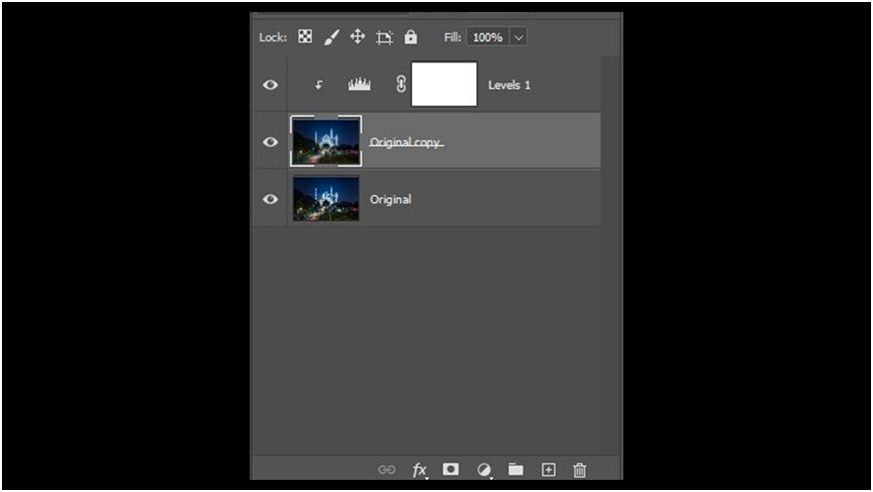
5.This is how the Layers panel should look like after making the Level adjustment layer a Clipping Mask.
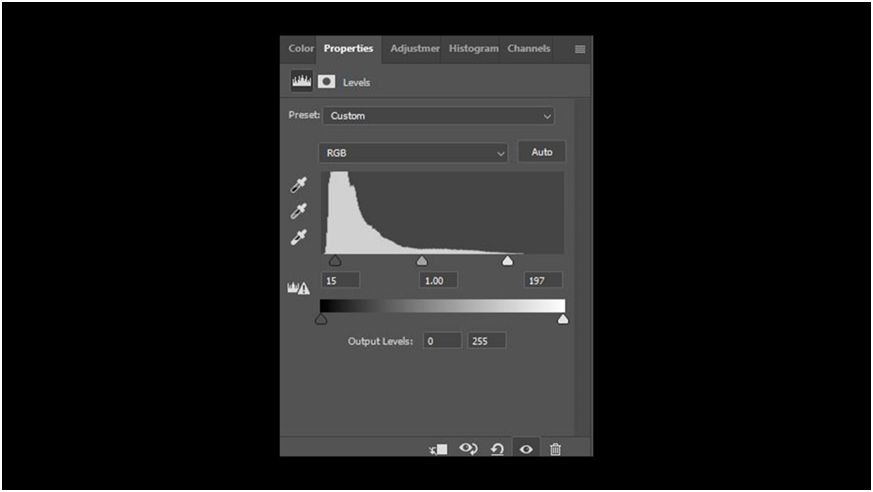
6. Now, double-click on the Levels adjustment layer to open its property panel. Then, push both the white and black points toward each other to add more contrast to the photo.
7. The last step is to change the Opacity of the blurred layer to reduce the effect, to keep the photo looking natural. For demo purposes, I set the Opacity at 28%, making it easier for you to notice the difference, but usually, I tend to keep the value somewhere between 10 to 20%.

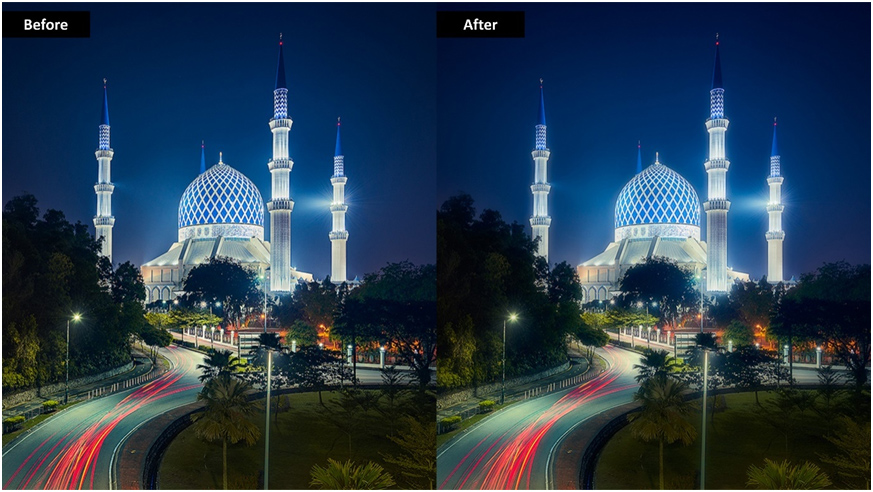
Here’s the before and after comparison. Notice that the soft glow is more obvious around the highlight areas.
As well as being a world-leading exposure blending panel, Raya Pro also has some excellent touch-up functions built-in. This includes the Orton Effect which can be applied in just a few mouse clicks.
Editor’s Choice plugin on Adobe marketplace

Raya Pro, the most rated plugin on Adobe Marketplace.
Method 2: Gaussian blur + blend mode + adjustment layer
The 2nd method is similar to the first one. The difference is that we will change the blend mode of the layer to add contrast and then use the adjustment layer to finetune the result.
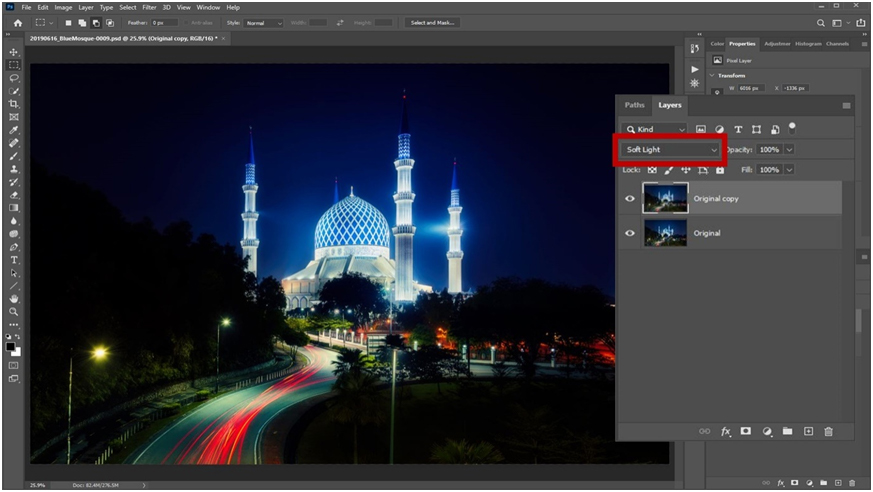
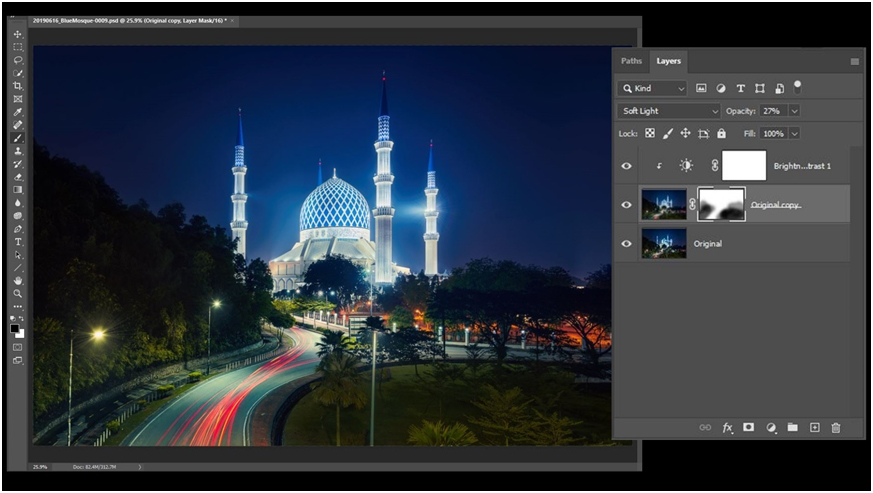
1. First, duplicate the layer or merge all the layers into a new layer. Then, adding Gaussian Blur to the newly created layer. After that, change the Blend Mode to Soft Light, which will add contrast to the photo. Some may prefer to use Overlay Blend Mode for more contrast.
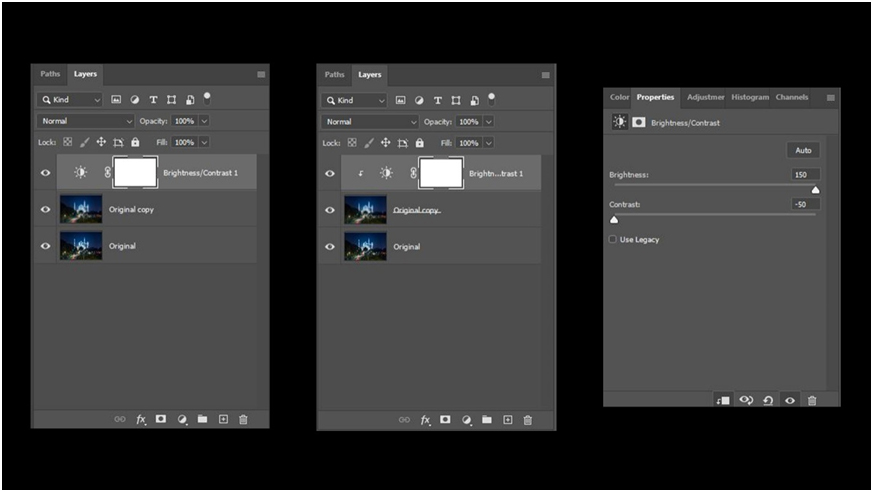
2. Next, add an adjustment layer. This time I will use Brightness/Contrast adjustment. Then, same as the previous method, right-click on the adjustment layer and make it a Clipping Mask. Now, set the Brightness and Contrast value to finetune the effect.
3. After that, reduce the Opacity of the blurred layer to have a more natural result.

– That’s How You Give Your Photo A Dreamy Look Using The Orton Effect in Photoshop –
Final Touch Up
As I mentioned before, these are just two of the many ways to create the Orton Effect. There’s no such thing as which one is better, but it is more to your personal preference. Regardless of which method you choose, you may need to remove the effect from certain areas of your photo. For example, you want to restrict the soft glow to only the highlight areas of this photo. To do that, select the blurred layer and add a Layer Mask to that layer. Then, use a black brush to paint on the shadow areas to remove the effect.
This is how the layer panel looked like after the painting.
Although, Orton Effect helps add a dreamy look to your photo but bear in mind that this will also decrease the details/sharpness of your subject. Try not to overdo it.
That’s all for this article. Happy shooting!
Grey is an award-winning travel photographer based in Kuala Lumpur, Malaysia. Passionate in Nature Landscape and Astronomy photography. Be sure to check out his website and Facebook page.