How To Make A Fake Long Exposure Image In Photoshop
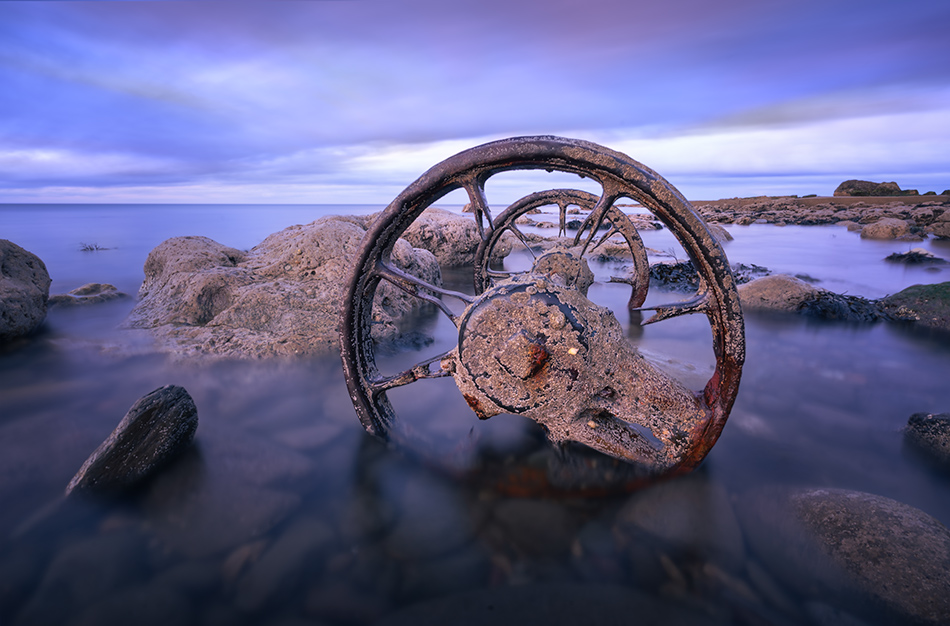
Sometimes the odds are stacked against us and we might not be able to capture the long exposure that we wanted. Why not fake it? Conditions have to be right for long exposure photography, especially the lighting. Long exposure images are much more likely to be successful at early sunrise, or late sunset, where the light is dimmer than through the day. That is of course if you don’t have any ND filters at hand. The reason why this scene wasn’t captured as a single long exposure was for a couple of reasons. These old minecart wheels are only visible for a short period of time when the tide is low. The sun was rapidly setting and the tide was beginning to rise again. But the main problem were the limpets that were moving over the wheels. With a long exposure, it would have come out too blurry. Watch How To Make A Fake Long Exposure Image In Photoshop.
If you wish to experiment with this, I would really appreciate it if you included my name (Duke McIntyre) and www.shutterevolve.com when you publish your image. If you post your published image on our Facebook page I’d be happy to check it out.
How To Shoot For A Fake Long Exposure
In order to create a fake long exposure, you need to have multiple images of the same scene taken a few seconds apart. The more shots you use, and the greater the difference between shots will determine the effect on the final image. In this example, the clouds were quite fast-moving but the sea was really calm. So I only needed to blend 8 exposures to get the right look that I was going for. As I explained in the opener, the limpets were problematic, so it’s always necessary to ensure your shots are sharply in focus. You can afford to be complacent. With a nice sharp image, you can recover some lost detail that might occur once the exposures are blended. In moving water it can be difficult to get that sharp base image if you stick to the normal rules (f11-13, ISO 100). Bend the rules a little where necessary, zoom in to the area that requires sharp focus, crank the ISO up to 400 and widen the aperture to f8. That will give you a faster and cleaner shot to use as your recovery image.
– Tutorial continued below –
Enter your email below and join our community of more than 100,000 photographers who receive regular tutorials and have also

Subscribed to our newsletter,
Downloaded our FREE Photoshop Course
Got our FREE Easy Panel for Photoshop
And have our FREE Essential Guide To Luminosity Masks E-Book
Simulate A Long Exposure Image In Photoshop
1. To create a fake long exposure in Photoshop we first need to have all of our exposures stacked as layers. I did this using the stack button in Raya Pro which puts images from all open windows into one window as stacked layers by clicking the stack button.
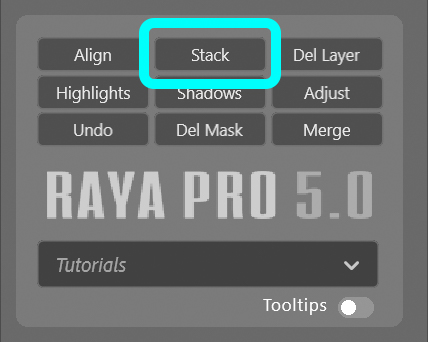
2. Because there were slight movements between exposures I also had to align them all. Again, I used the built-in align function in Raya Pro by pressing the Align button which automatically aligned all of the layers.

3. With all of the layers now stacked and aligned I selected all of the layers that I wanted to blend by left-clicking on the top layer, holding down Shift, and left-clicking on the 2nd bottom layer. This selects all 8 layers that I’m going to blend.
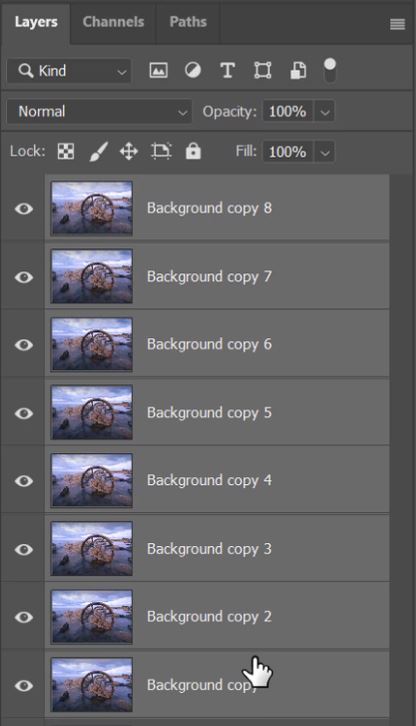
4. I’ve intentionally left the bottom layer because I used that after blending to recover some texture and detail.

5. So, with the layers selected that you want to blend, head up to the menu bar and left-click on the Layer Menu.

6. When the menu opens up, scroll down about halfway and hover over the Smart Objects option.
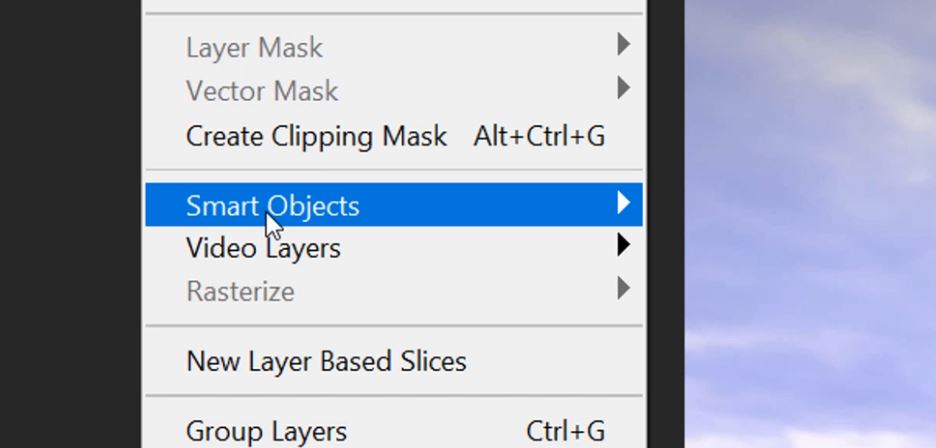
7. A sub-menu should appear to the right. From that sub-menu, left-click on Convert to Smart Objects.
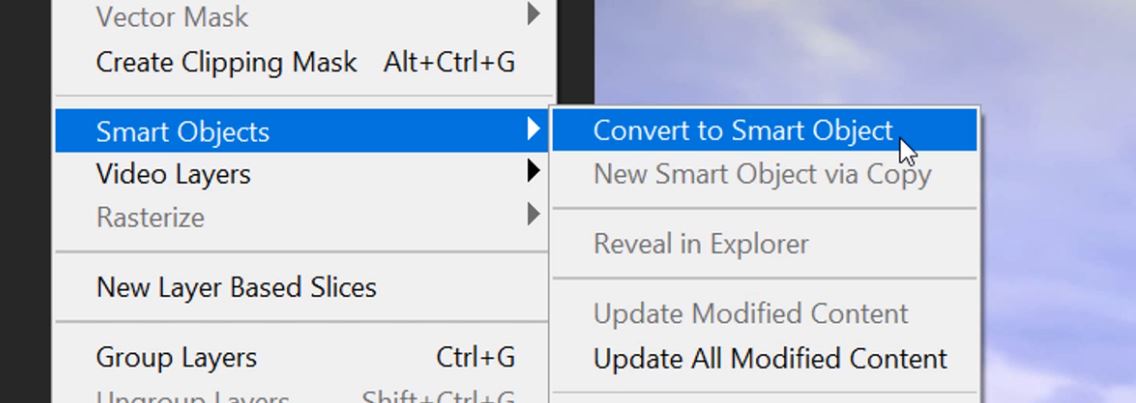
8. Be patient. The process of converting multiple layers into one Smart Object can take a few moments. But, when it is complete you should have all of the previously selected layers condensed into one Smart Object layer. You will know if it a Smart Object, as it will have a document icon in the layer thumbnail.

9. Now that we have our Smart Object and it is selected, head back to the Layer menu just like before. We going back into the Smart Object option but this time we hover over Stack Mode and when the sub-menu appears, select Mean.
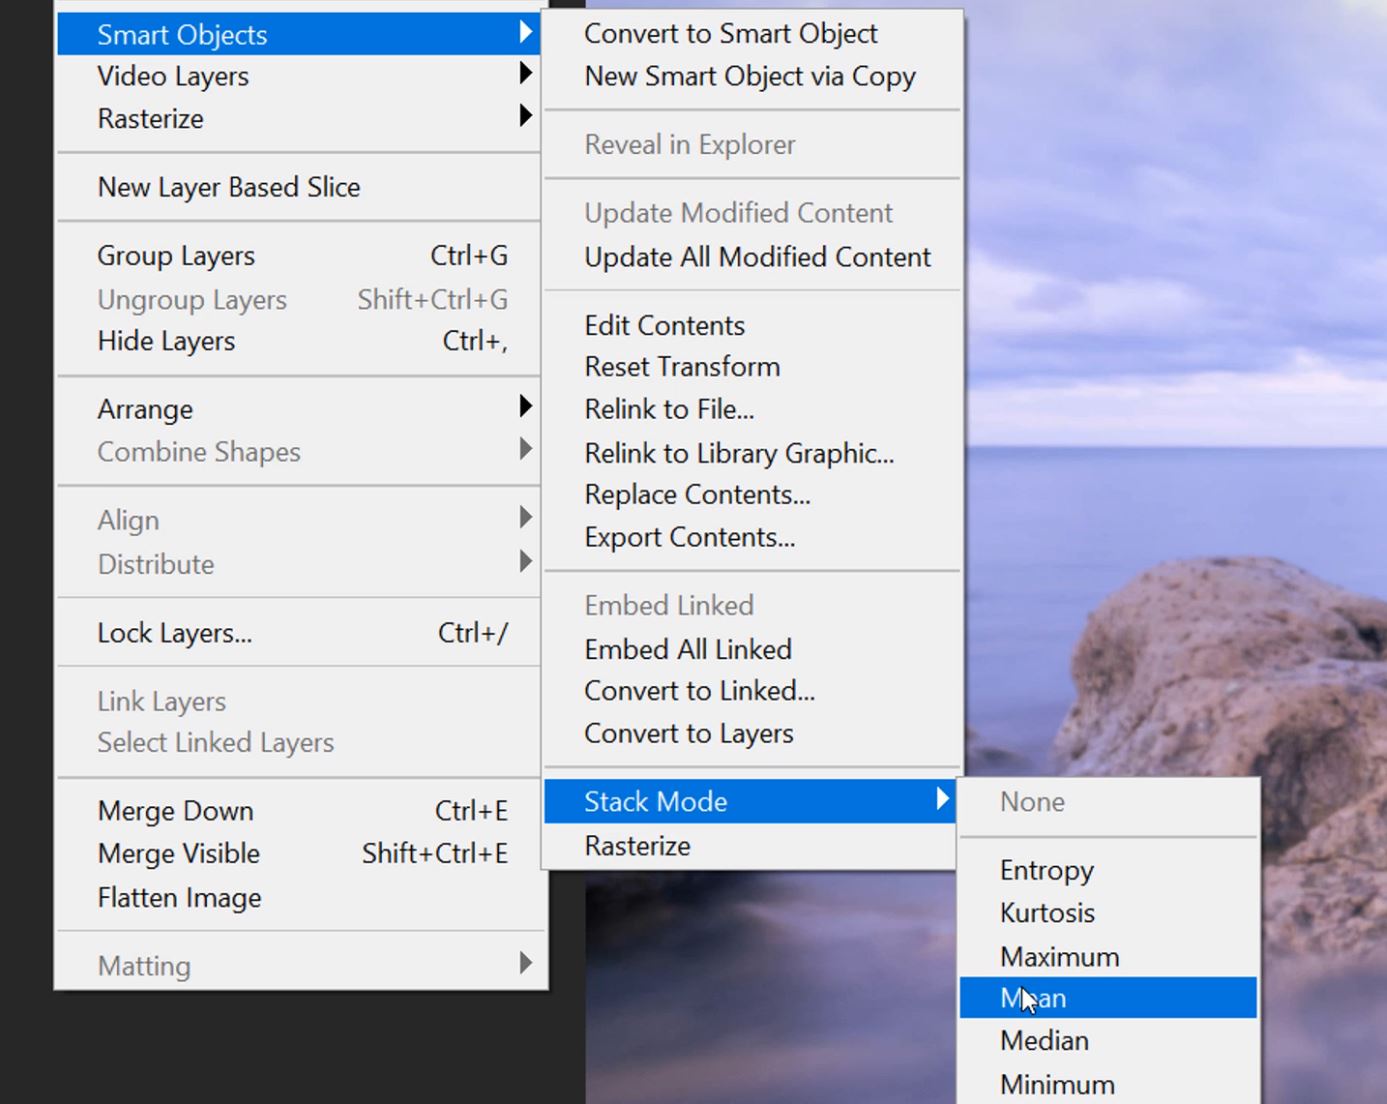
10. This can also take a bit of time to process. What Photoshop is doing, is looking at the pixels on every layer and adding their values together. It then divides the overall value by the number of layers and only displays the mean average value.
11. After stacking the image displayed will resemble a long exposure. In this example, the water has lost its distracting sheen, and the clouds in the sky have been drawn out, exactly like they would have been in a 30-second exposure.
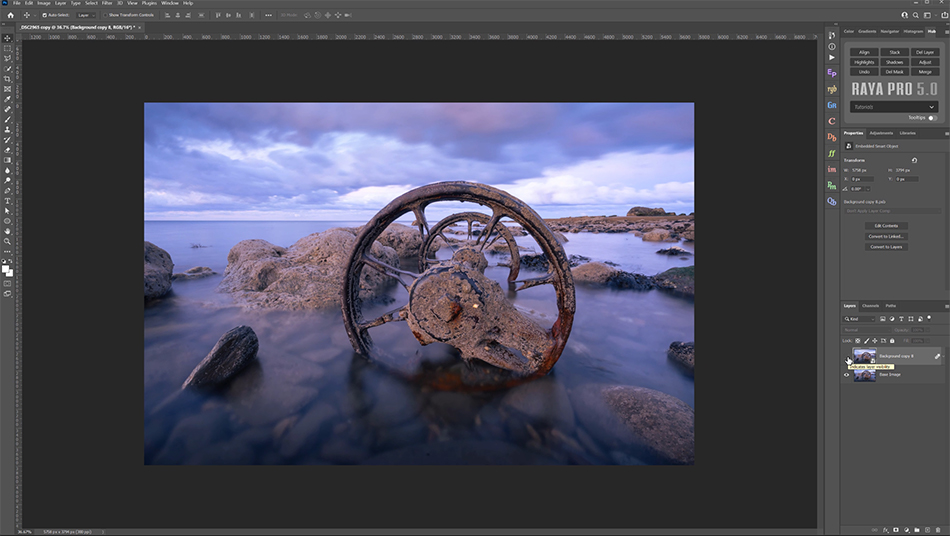

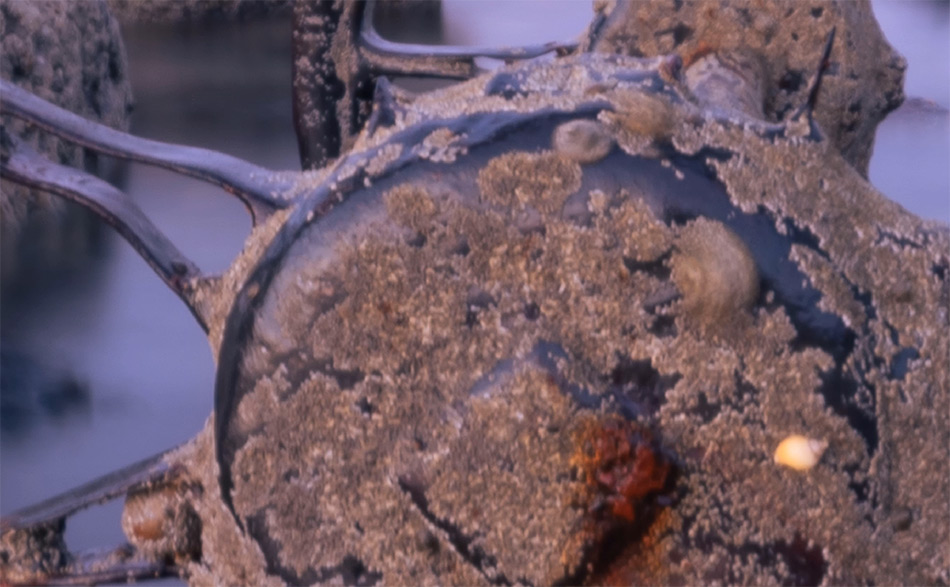
12. When you blend this way you have to review the image meticulously because anything that has moved between exposures will become blurred. In the center of the wheel, the limpets have moved between frames. So I used Raya Pro and a luminosity mask to restore details by focus stacking from the base layer.

Editor’s Choice plugin on Adobe marketplace

Raya Pro, the most rated plugin on Adobe Marketplace.
I also used Raya Pro to add a cooling effect, vignette, and to clean up clean sensor dust.
