How To Align Stars in Photoshop Manually
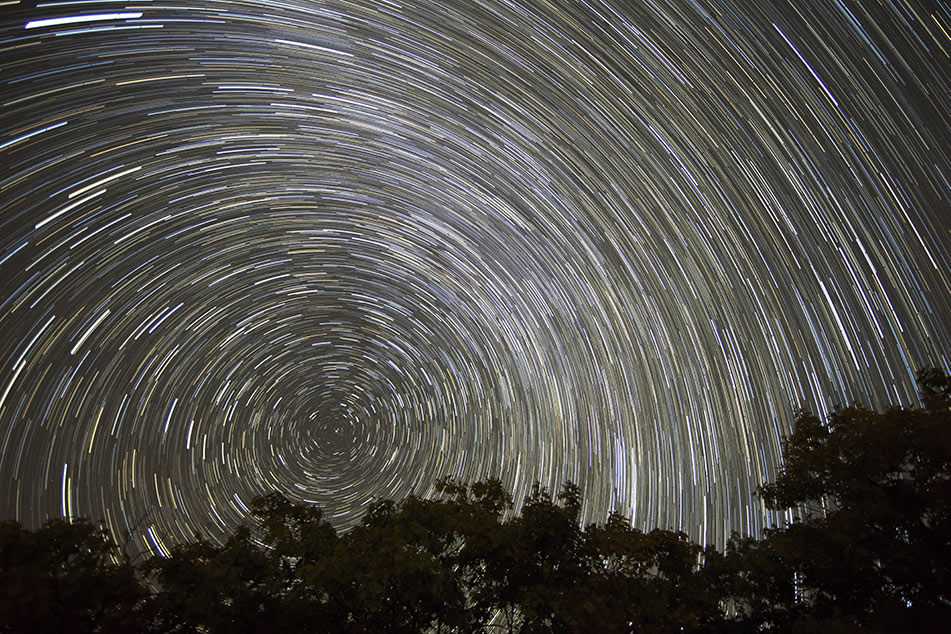
In this tutorial, we’ll look at how to align stars in Photoshop manually and why we have to do it this way. The world is constantly moving, this can be seen quite easily in Astrophotography when we point our cameras at something fixed and take a series of photos over time. The fixed objects will stay in the same place but the stars will forever creep. Stars rotate around an axis close to the North Star (Polaris), we can see this from wonderful star spiral images such as in this image by Adrian Pelletier:
Start spiral images are made by blending multiple long exposures images together. But, what if we didn’t want star trails? What if we wanted sharp stars?. In this article, we will show you the process of manually aligning stars in photoshop to prepare multiple images for blending. Here’s is a short video tutorial to show you how followed by a more detailed explanation on why.

Why Do We Need To Manually Align Stars In Photoshop
We know the stars rotate around the north celestial pole, very close to the North Star. So it almost seems logical to try to find the north celestial pole and simply rotate the individual exposures around the same fixed axis to align them. However, this isn’t possible, for the simple fact that the stars aren’t rotating on a flat X and Y-axis. And, because of the tilt of the earth in relation to the celestial equator the rotation of the star is only very rarely perfectly circular, it is more often elliptical. Another major contributing factor to the need to manually align the stars is lens distortion or barrel distortion. When shooting with a wide-angle lens in particular objects further from the centre will be distorted more than object nearer the centre.
If your image is complex with a lot of stars in it you will have to manually align your exposures. No matter how hard you try in Photoshop they will not align automatically. In the images I have chosen for this demonstration I tried every single auto method known in photoshop and none of them worked well enough. So I had to manually align each layer. It is labour intensive but worth it in the end.
Align Stars For Blending And Noise Removal.
The reason for needing to align the stars in post-processing is to prepare the layers for stacking. Shooting the stars at night without the use of a star tracker usually requires a lot of short exposures being taken to avoid star trails. Because the exposures are short we have to crank up the ISO which throws a lot of noise into our images. To remove this noise we stack our aligned images and blend them using a mean or median blending technique. This removes the noise and sharpens the stars (if they are aligned). If we stacked and blended our layers without the stars being aligned, they would almost certainly be blended out of the image entirely.
Enter your email below and join our community of more than 100,000 photographers who receive regular tutorials and have also

Subscribed to our newsletter,
Downloaded our FREE Photoshop Course
Got our FREE Easy Panel for Photoshop
And have our FREE Essential Guide To Luminosity Masks E-Book
How To Align Stars Manually in Photoshop
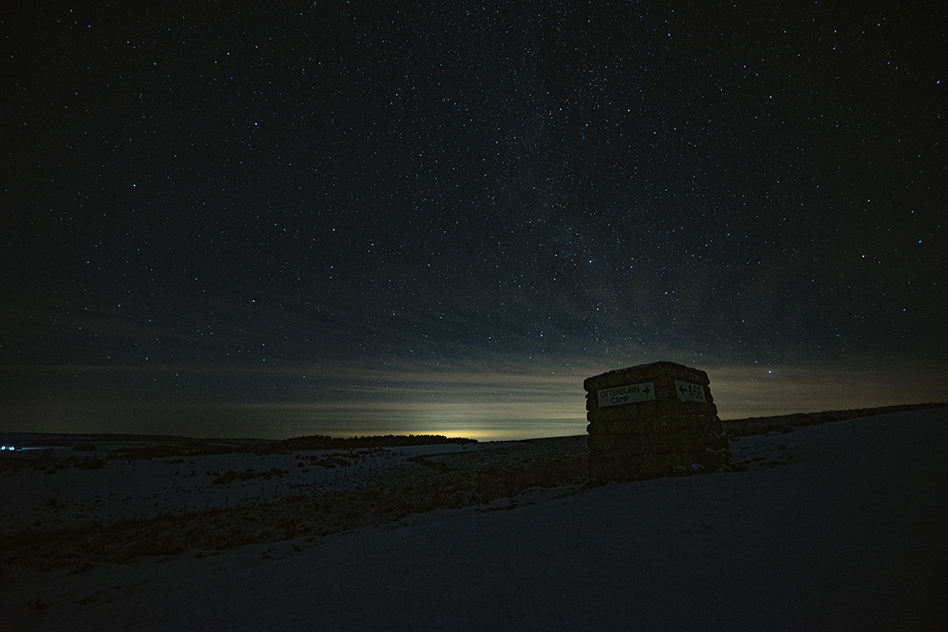
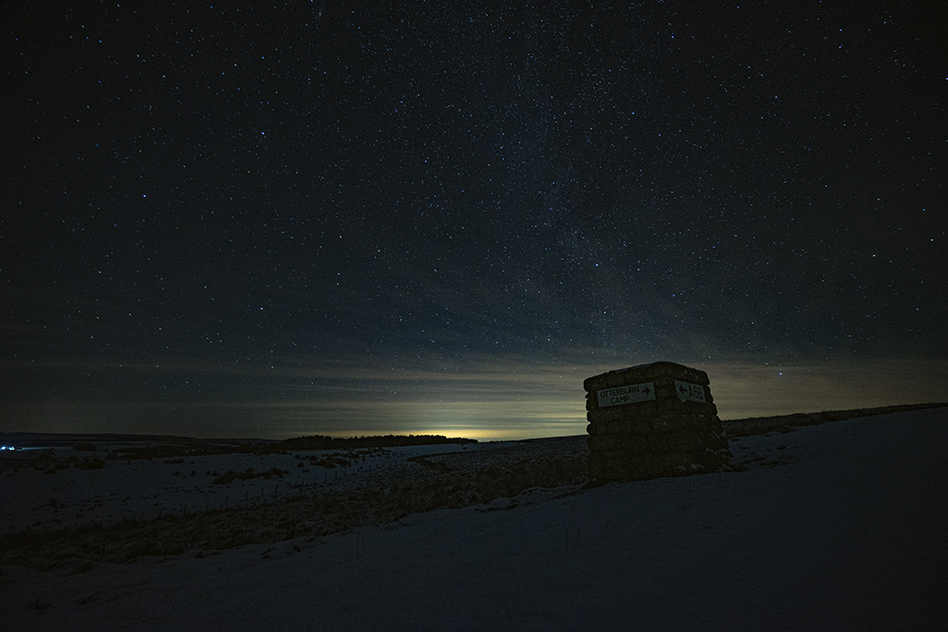
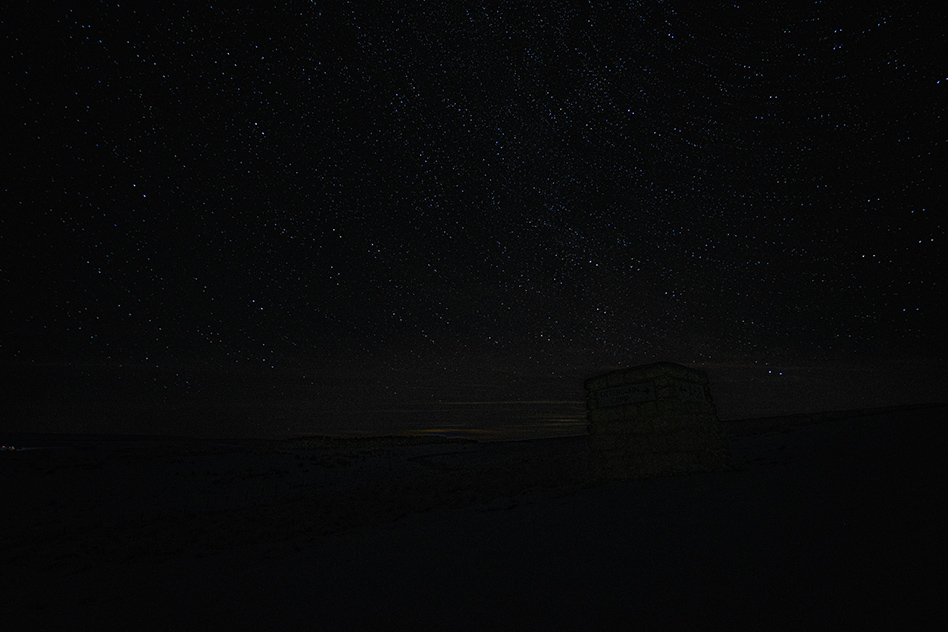
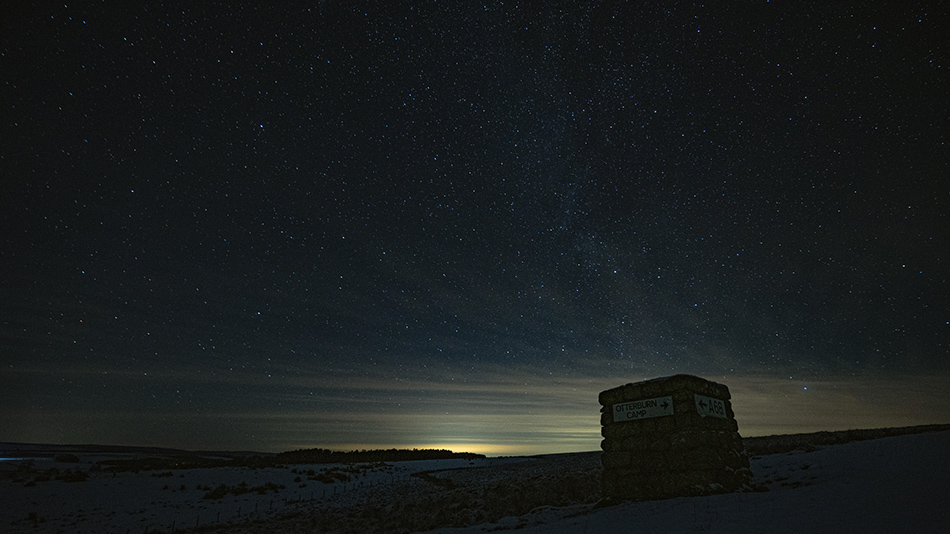
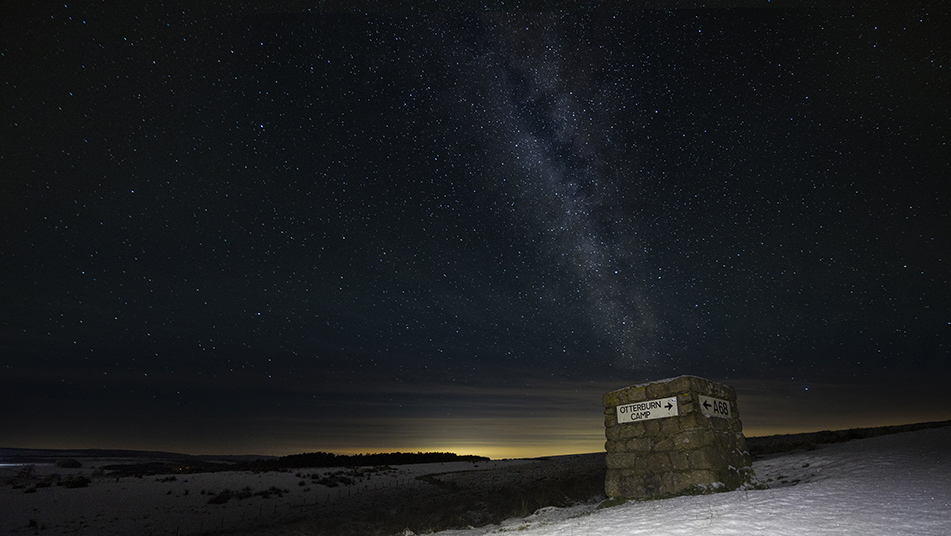
We’ve only used two images for this tutorial but the final image was blended using 20 exposures, all manually aligned and then stacked. The image on the left (Night Sky 1) was the first image in the set and the image on the right (Night Sky 2) was the last one taken of the same composition. The difference between the two shows the distance that the stars travelled in the whole 10-minute duration.
[compare]
[/compare]
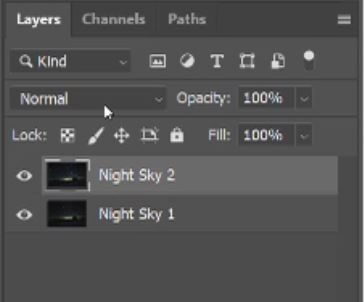
1. Stack you exposures on top of each other in one window in Photoshop.
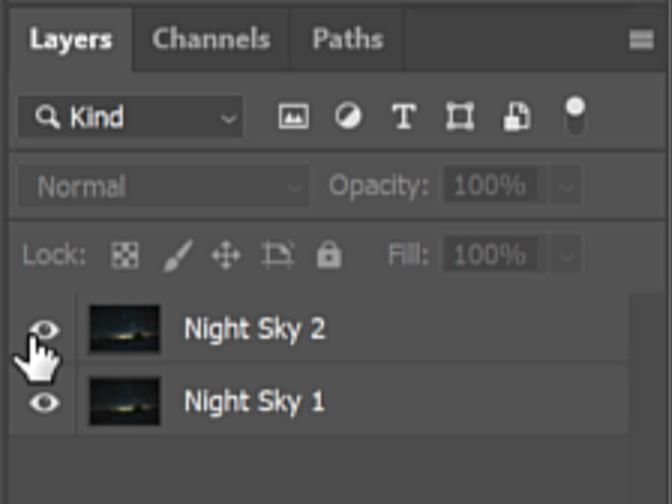
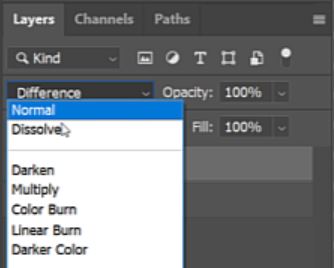
2. Select the top visible layer by left-clicking on it in the layer panel.
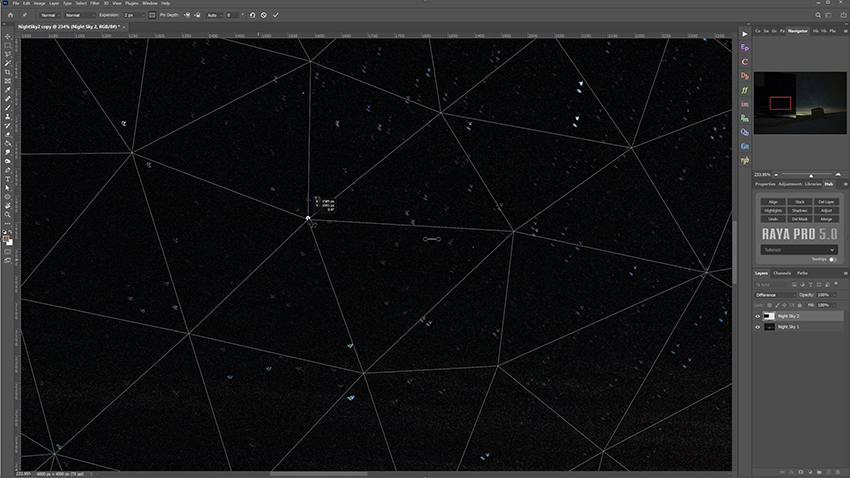
3. Set the Blend Mode to Difference.
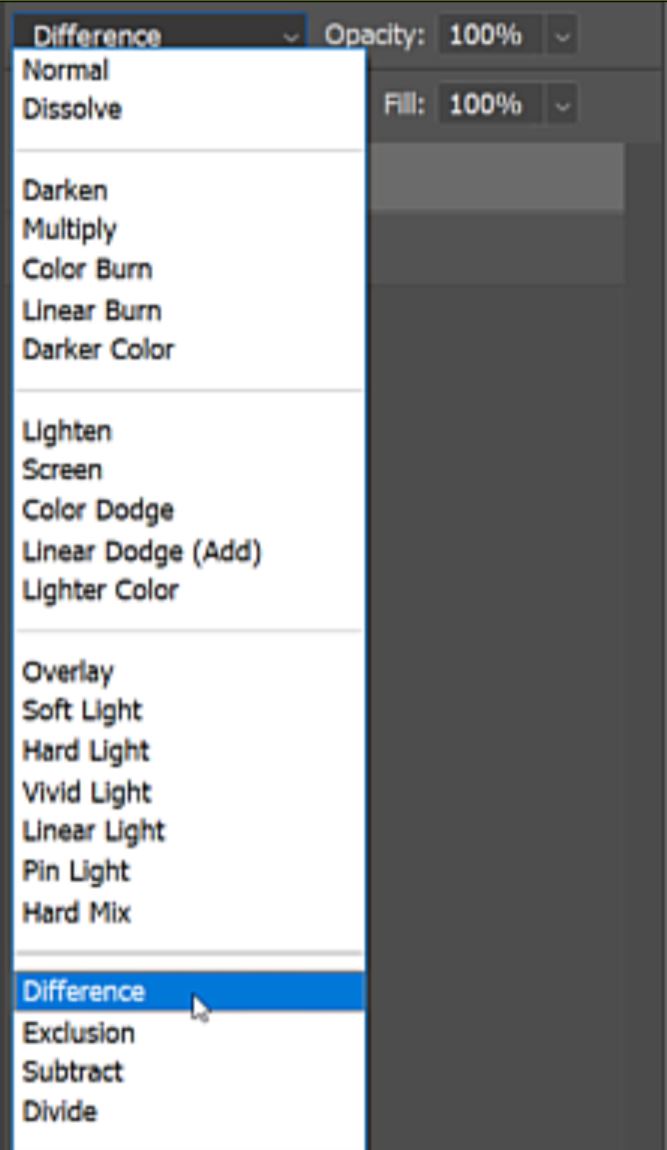
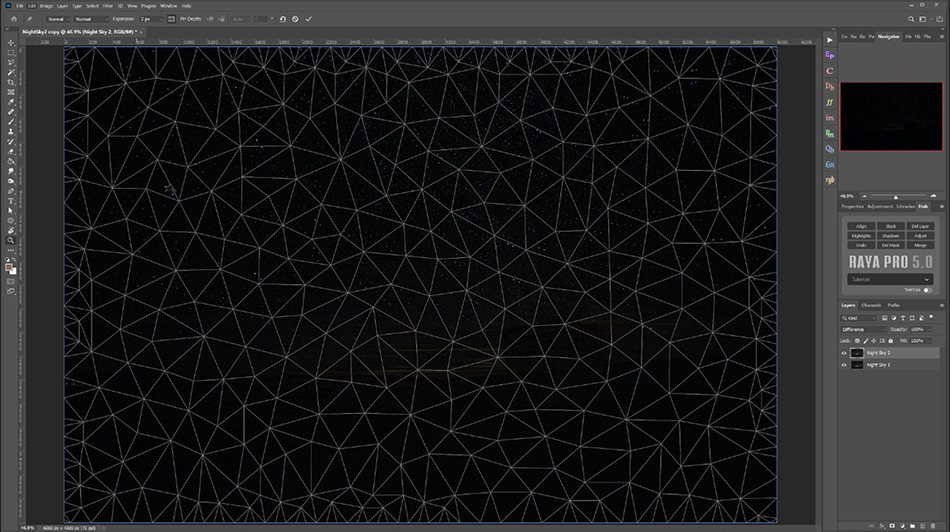
This will show the difference between the two layers by using brightness. Where there is a difference it will appear brightly and where objects are perfectly aligned it will be black. The number of stars has doubled because they are all in different places between frames. And the only thing that didn’t move between frames was the foreground, note how dark that area is.
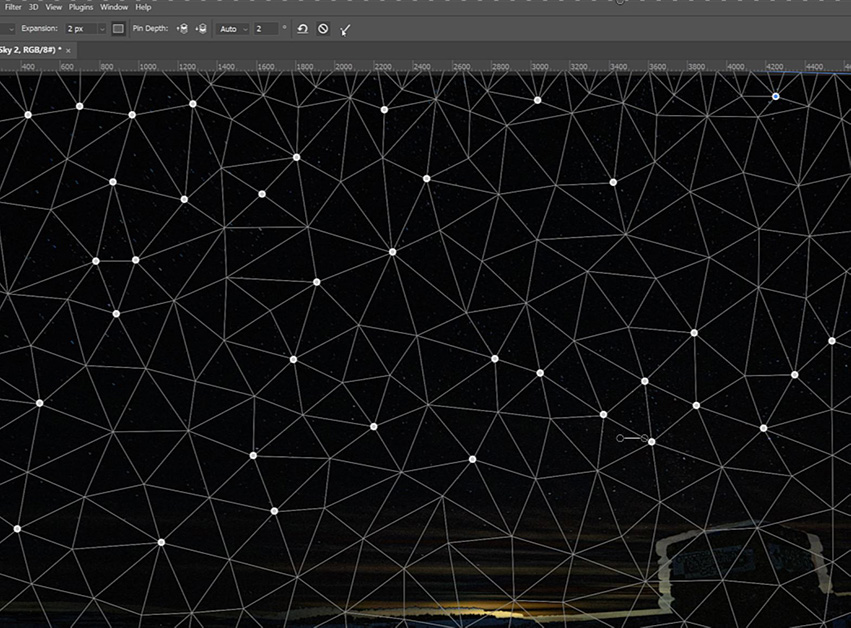
4. Now, go to the Edit menu and select Puppet Warp.
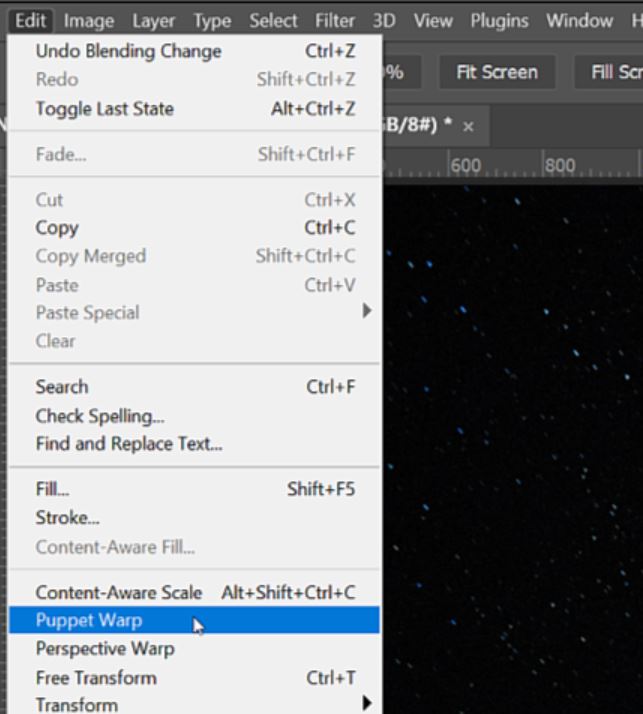
This will attach a mesh to the layer that you’re working on which is used to warp the image bit by bit to accurately align the stars manually.
5. Look for the brightest and biggest stars to align.
6. To start aligning pick one point by left-clicking on it.
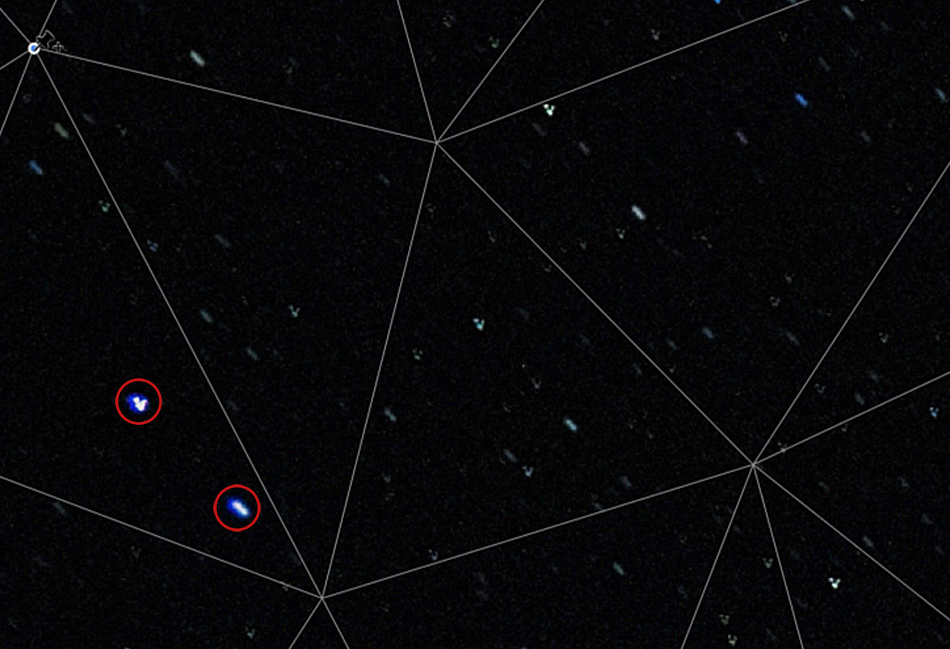
7. Now pick another point, this time left-click and drag.
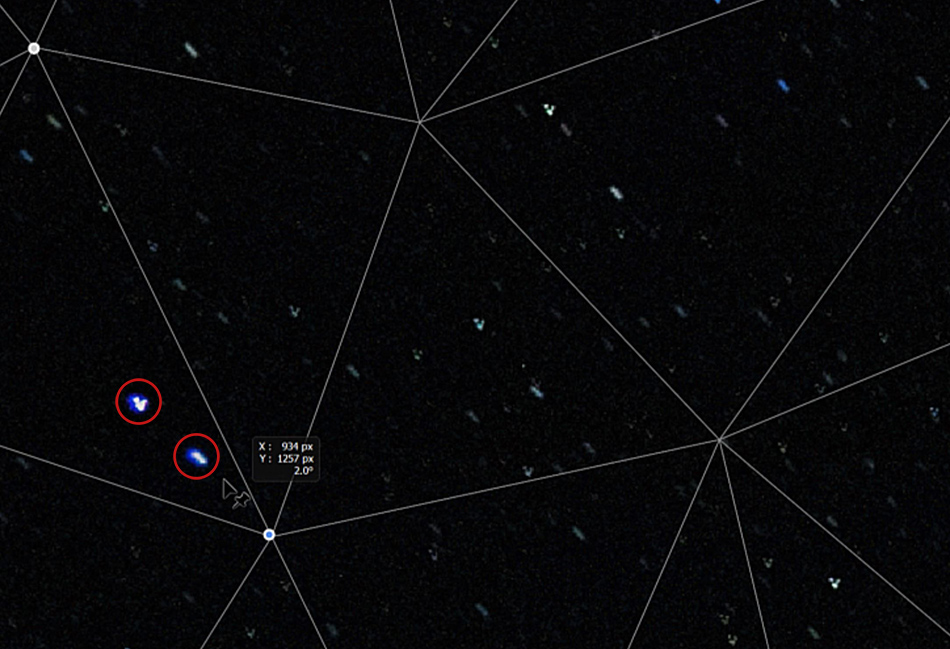
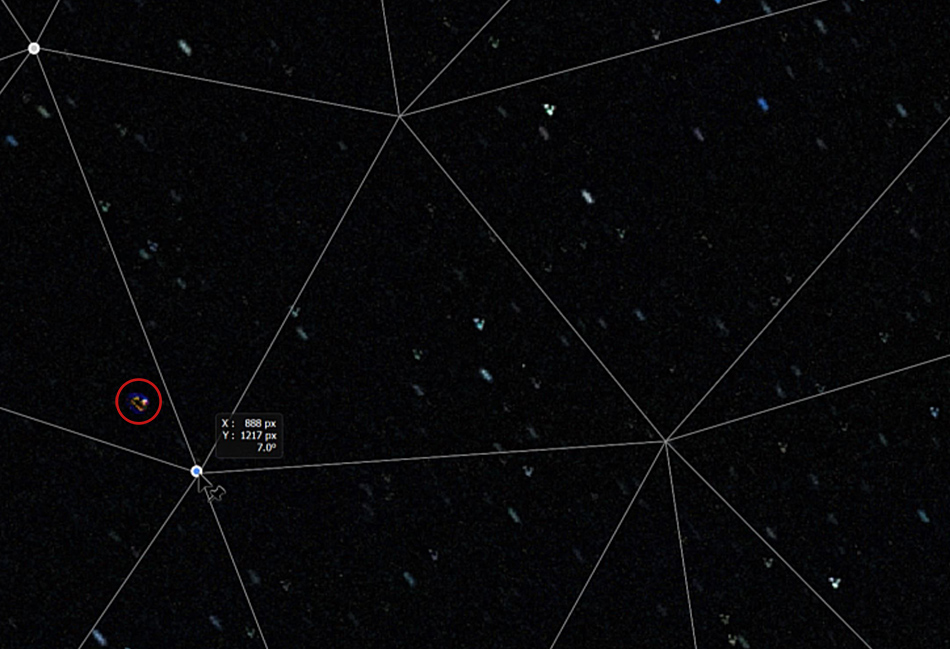
8. Drag the point until the bright star on the top layer aligns with the same bright star on the bottom layer. You will know when they are aligned because the area will darken. If they align perfectly the star will turn completely black.
9. There are a lot of adjustments needed so this can be time-consuming, especially with multiple layered images that all need aligning.
10. You are trying to get the stars in the sky to disappear as best they can. The darker the image the better the alignment.
[compare]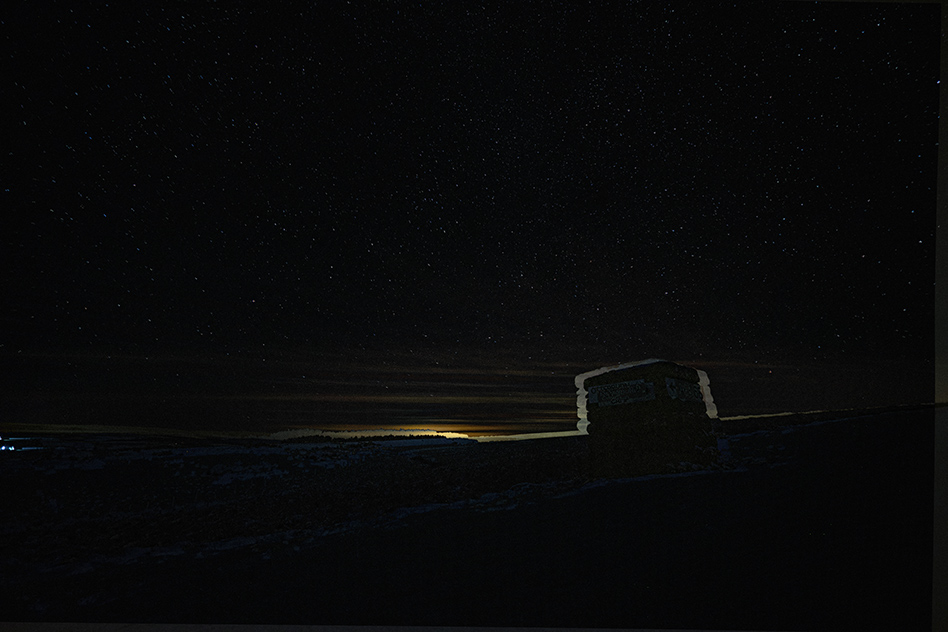
[/compare]
11. When your content with the overall alignment, click on the Tick icon at the top of the screen to apply the Puppet Warp to the layer.
12. Set the blend mode of the layer back to Normal.
By toggling the layer visibility you will see that the stars have been manually aligned. Your foreground will have moved. And that can be addressed in another tutorial. For now, your stars are aligned and ready to be blended.
[compare]

 [/compare]
IMPORTANT Points To Note When Aligning Stars Manually
Don’t worry if the stars aren’t perfectly aligned, as long as they are as close as possible that is fine. Often (like in this example) the shapes of the stars are different. some are straight lines, some are wiggly lines or blobs. Anything such as a slight breeze can cause this. As long as the majority of the star is aligned it will be fine. When it comes to stacking and using one of the stack modes such as Mean or Median to blend the images, the stars will shine brightly and the noise will all but vanish leaving a soft smooth sky.
Thank you for reading this article on How To Align Stars in Photoshop Manually, be sure to sign up for our newsletter for more tutorials and great offers.

Enter your email below and join our community of more than 100,000 photographers who have also
Subscribed to our newsletter.
Downloaded our FREE Photoshop Course.
Got our FREE Easy Panel for Photoshop.
And, have our FREE Essential Guide To Luminosity Masks E-Book.
FREE Photoshop Course

The Art Of Photography

Raya Pro for Photoshop

Other Articles That Might Interest You