Deconvolution Sharpening In Photoshop
What is Deconvolution Sharpening in Photoshop? It is an advanced and intelligent way of sharpening images. Instead of the usual methods of High Pass Sharpening or Unsharp Mask which all simply try to make images appear sharper. The way those methods work in their most basic form is by finding edges and increasing contrast where two edges meet by trying to move edged dispersion. Deconvolution sharpening uses calculations and algorithms to accurately enhance finer details and sharpen images by doing enhancing edges in small proximity of similar pixels. As well as finding edges it also looks at textures and tries to determine what they should look like. It sounds complicated but to use general users it made really easy in Photoshop.
There are two deconvolutions sharpening filters we can use directly in Photoshop, they are Smart Sharpen and Shake Reduction. But, for a better understanding and how to use Deconvolutions sharpening it’s best to use Camera Raw.

How To Use Deconvolution Sharpening In Photoshop
1. Drag your image layer down to the [+] icon at the bottom of the Layers panel and release the mouse key yo make a copy.

2. Now your Layers panel should have two layers, the original and the copied layer.
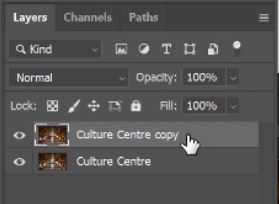
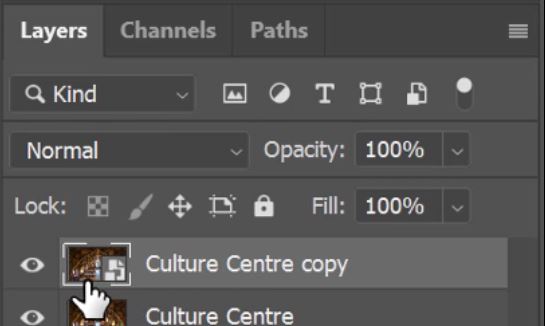
3. We’re going to leave the original and work on the copied layer. Right-click on the copy layer and select Convert to Smart Object.

Enter your email below and join our community of more than 100,000 photographers who receive regular tutorials and have also

Subscribed to our newsletter,
Downloaded our FREE Photoshop Course
Got our FREE Easy Panel for Photoshop
And have our FREE Essential Guide To Luminosity Masks E-Book
4. This may take a while depending on the image size. Once it is done a small symbol will appear in the copy layer image thumbnail to show it is a smart object.
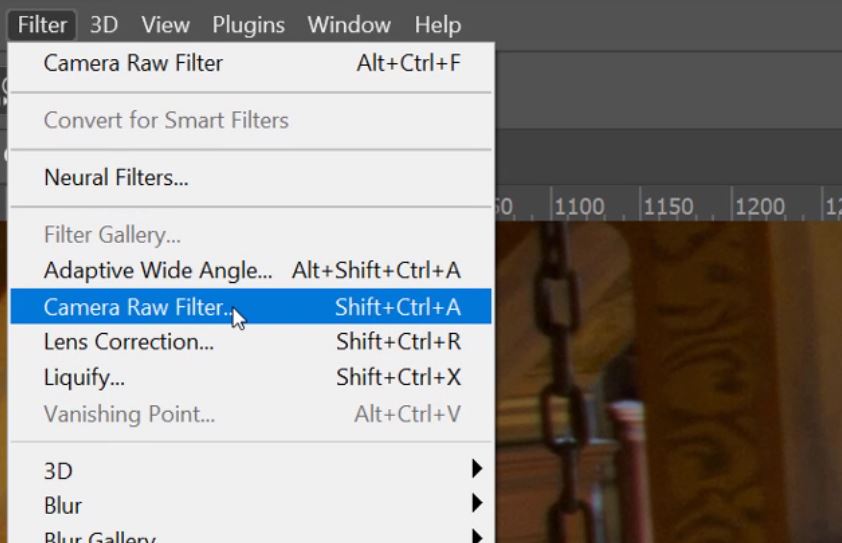
5. Go to the Top menu and into Filters, from there select Camera Raw Filter.
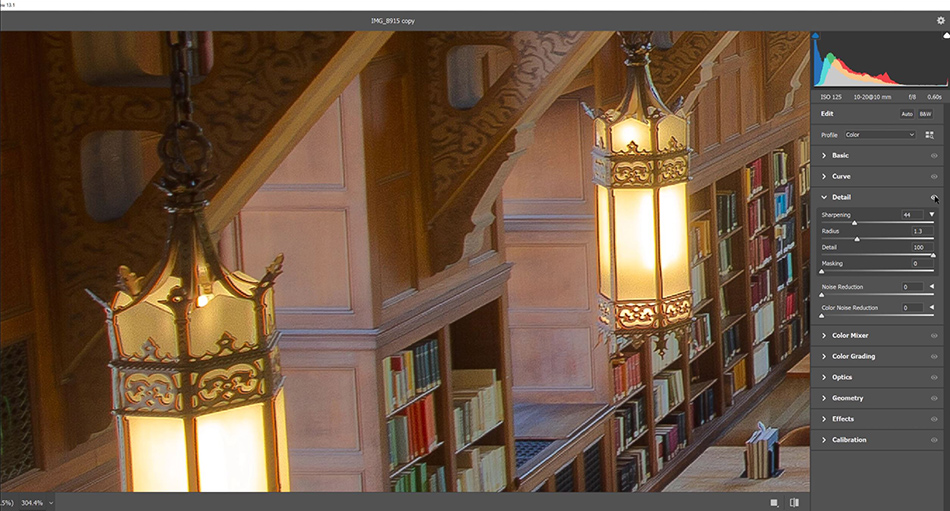
6. When the Camera Raw Filter loads, we’re going to look at the Details section. Slide the Sharpening slider to unlock the other sliders.
IF YOU CAN’T SEE THE RADIUS, DETAILS, AND MASKING SLIDERS. PLEASE CLICK ON THE SMALL ARROW TO THE RIGHT OF THE SHARPENING SLIDER SO THAT IT POINTS DOWN AND REVEALS THE HIDDEN SLIDERS.
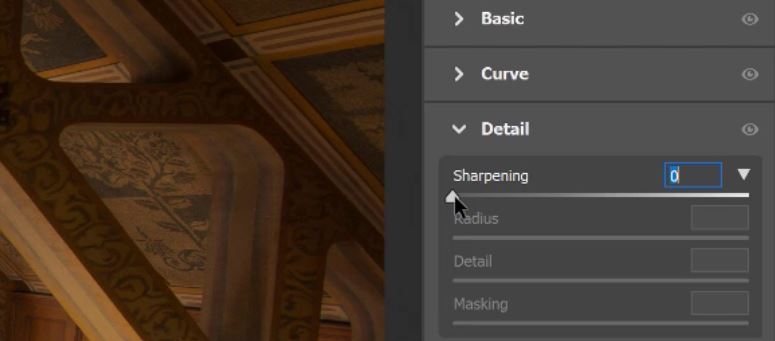
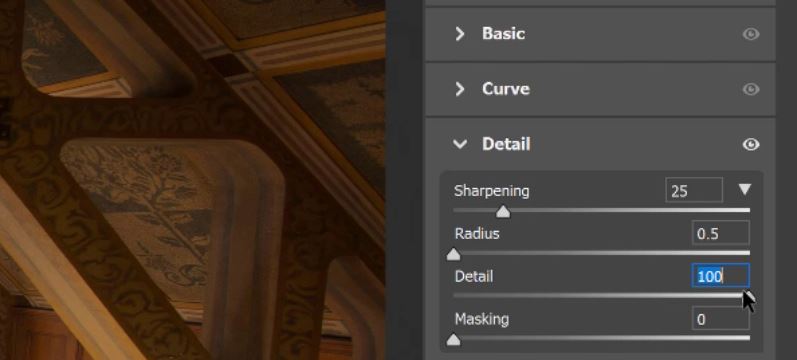
7. To enable Deconvolution Sharpening in Photoshop, slide the Detail slider all the way to the right (100).
8. Now by moving the Sharpening slider and the Radius slider Deconvolution Sharpening will be applied.
[compare]

 [/compare]
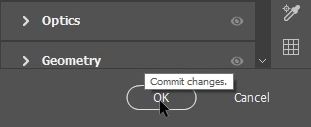
9. To apply Deconvolution Sharpening to your image click OK when you’re done.
IMPORTANT To Note About Deconvolution Sharpening In Photoshop:
Deconvolution Sharpening In Photoshop is not for making huge sharpening adjustments. More so it is used to enhance the finer details within our images. This is the beauty of it but it’s also it’s biggest negative. Because the adjustments are so fine it can only really work on an image that is already relatively sharp to start with. Of course, increasing the values of the Radius slider and the Sharpening slider will strengthen the effect, but be sure to look out for following problems that too much sharpening can produce, such as
- Black and white edging.
- A grunge HDR effect.
One of the biggest problems that we usually face when sharpening is Noise. Unlike the conventional sharpening methods of Smart Sharpen, High Pass Sharpening or Unsharp Mask. Deconvolution sharpening adds only a little bit of noise if done right. By having the Radius slider at its maximum value of 3 the addition of noise will be reduced as much as possible.
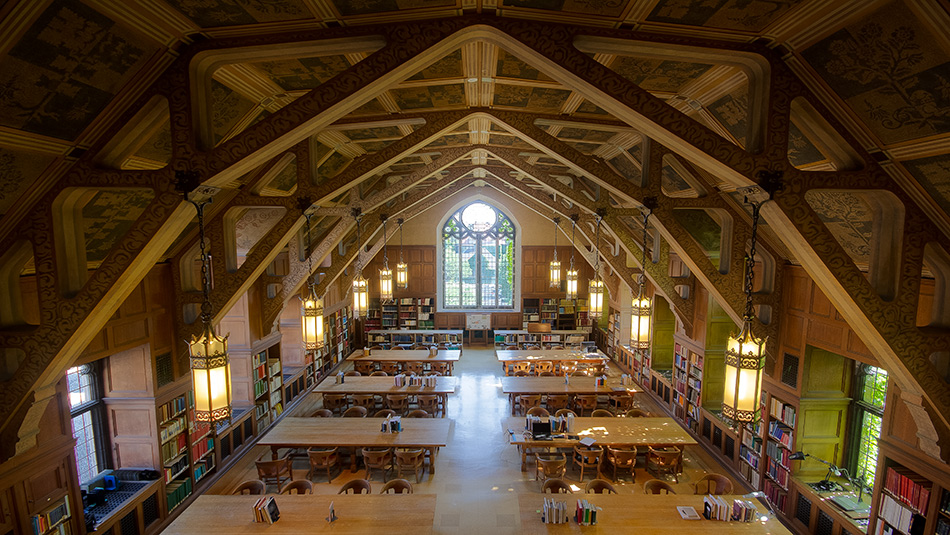
Deconvolution Sharpening in Photoshop works very well in both Landscape and Cityscape I’d certainly recommend you give it a go.
[compare]

[/compare]
Thank you for reading this article on Deconvolution Sharpening In Photoshop, be sure to sign up for our newsletter for more tutorials and great offers.

Enter your email below and join our community of more than 100,000 photographers who have also
Subscribed to our newsletter.
Downloaded our FREE Photoshop Course.
Got our FREE Easy Panel for Photoshop.
And, have our FREE Essential Guide To Luminosity Masks E-Book.
FREE Photoshop Course

The Art Of Photography

Raya Pro for Photoshop

Other Articles That Might Interest You
Reality Check: Deconlovution Sharpening
Advanced Post-Processing Tips: Three-Step Sharpening