
How To Auto Color Match in Photoshop
If you’re ever making a composite image in Photoshop, one is the most common obstacles to overcome is colour matching. Fortunately, Photoshop has a load of features that can help us with this. From manual colour correction to hue and saturation layers. There’s a hidden way in Photoshop that allows balancing colour and tone automatically. Watch the tutorial video to discover how to auto color match in photoshop and in the description we go through it step-by-step.

How To Auto Color Correction in Photoshop
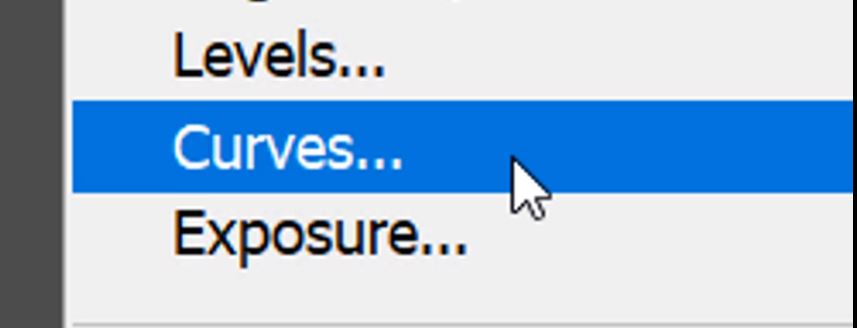
1. Click on the Create new fill or Adjustment layer Icon.

2. Select Curves.
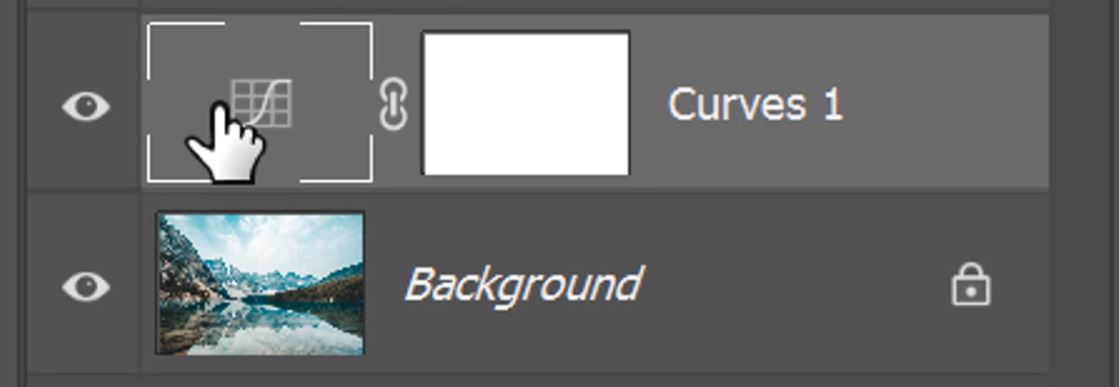
3. On the Curves layer make sure you have the Curves icon select and not the mask.
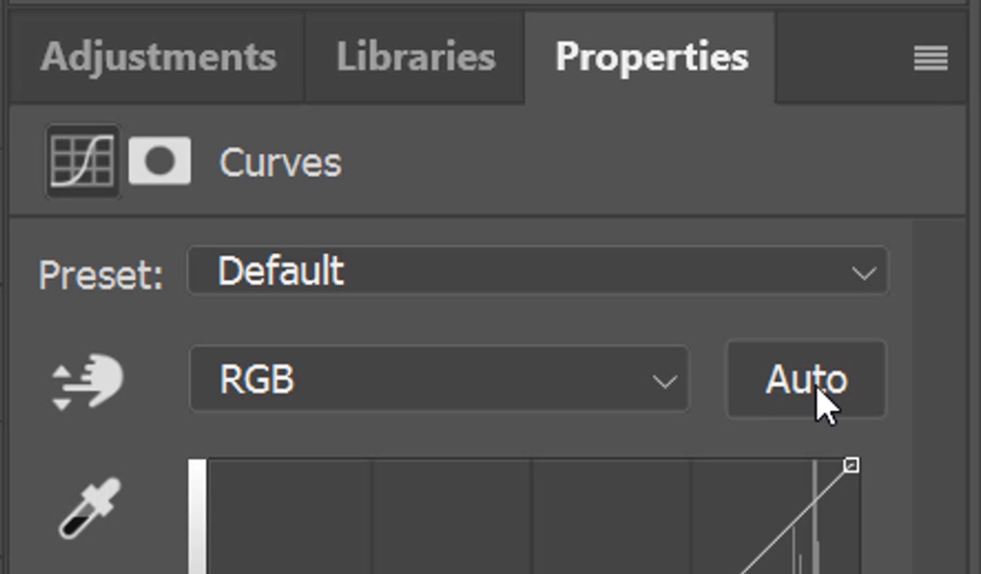
4. In the Curves Properties panel hold down Alt (PC) or Option (Mac) then left-click on the Auto button.
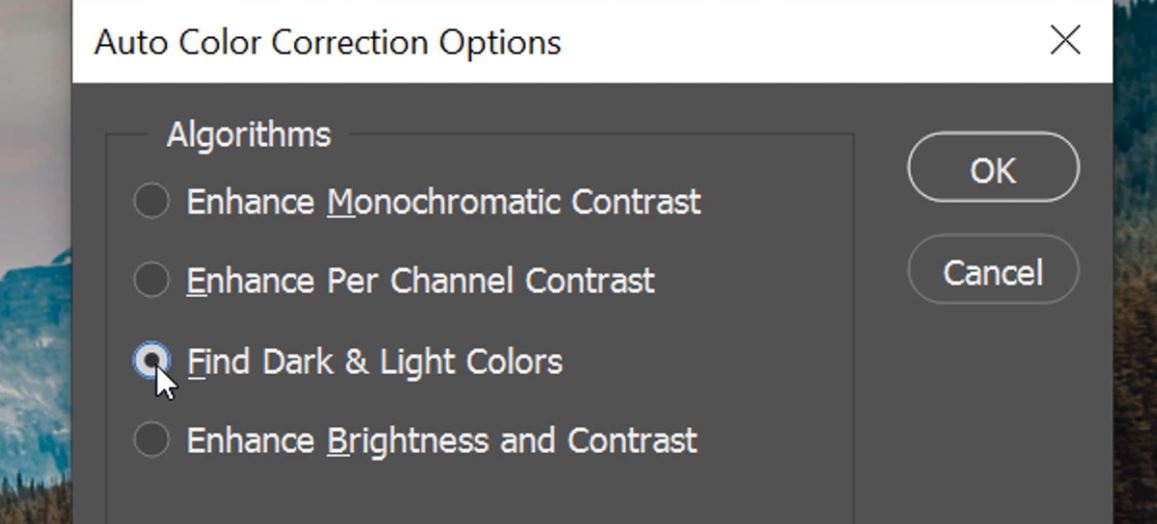
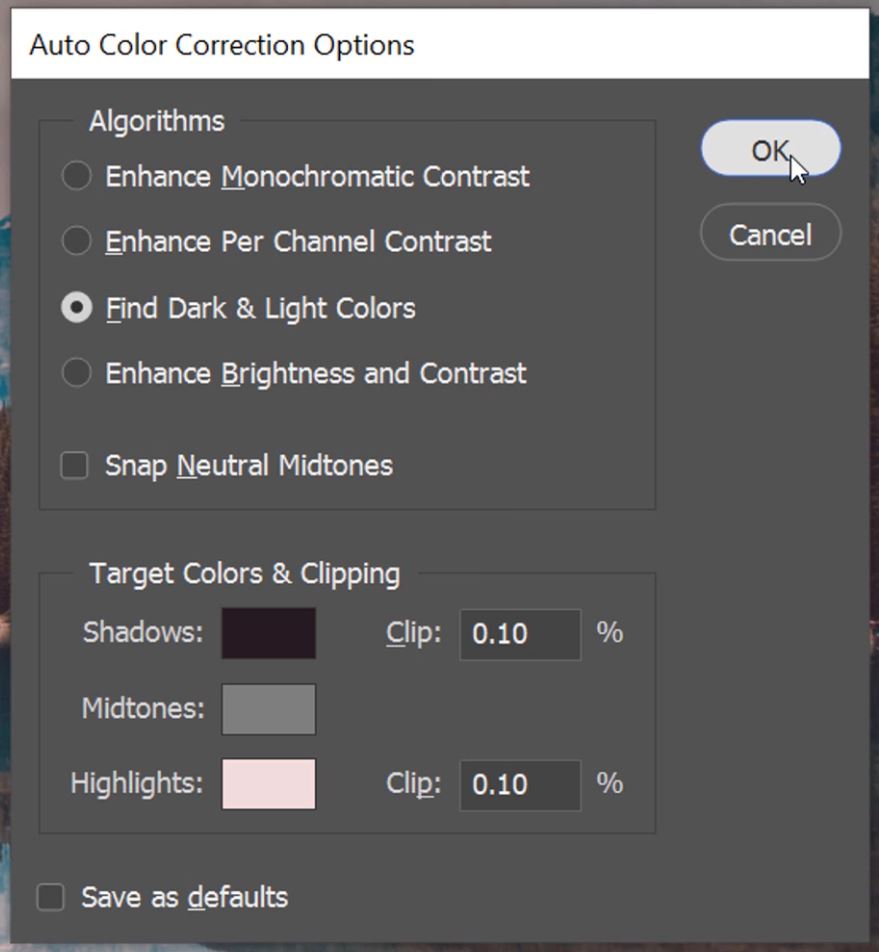
5. A hidden Colour correction option panel will appear.

6. Select the option to Find Dark & Light Colours.
– Tutorial continued below –
Enter your email below and join our community of more than 100,000 photographers who receive regular tutorials and have also

Subscribed to our newsletter,
Downloaded our FREE Photoshop Course
Got our FREE Easy Panel for Photoshop
And have our FREE Essential Guide To Luminosity Masks E-Book
How To Color Correct in Photoshop
7. Now, under the Target Colours and Clipping click on the box next to Shadows.
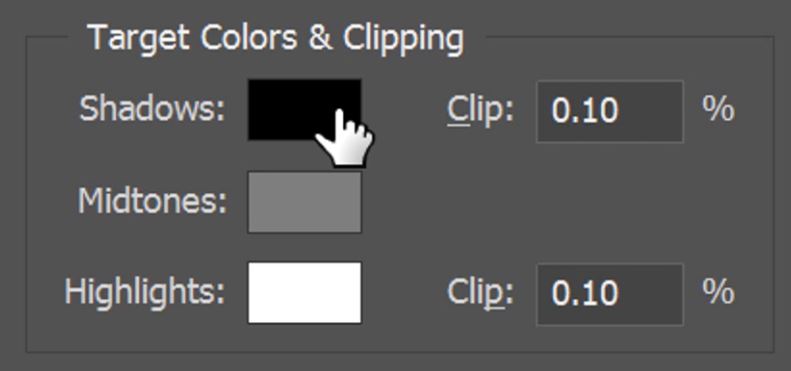
8. The Colour Picker window will appear to Target Shadow Colors.
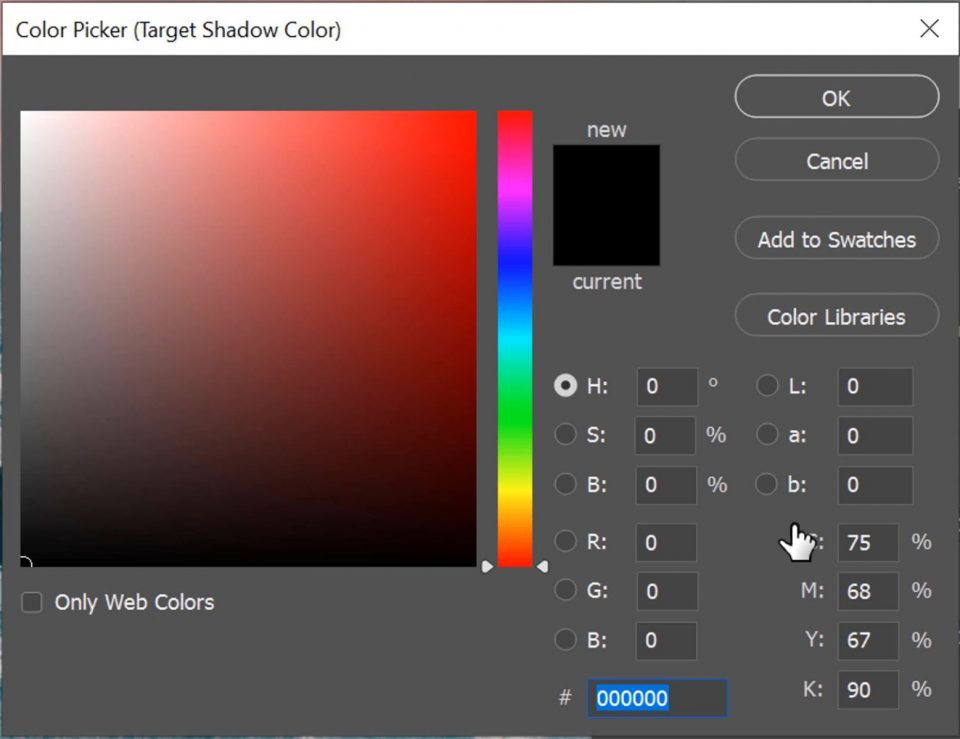
9. Find the darkest colour in the selection that you want to match from.
10. If, like in this example, the darkest colour is not dark enough, you can adjust it by moving this small circle around. Moving down darkens, up lightens, left de-saturates, and right saturates.

11. Once you’ve got a nice dark complimentary shadow colour click OK.

12. Now do the same for the highlights.
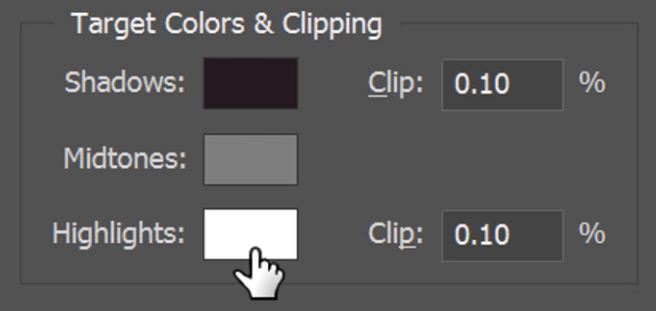
13. Try to keep the highlights nice and bright with only a hint of colour when you Target Highlight Colors.
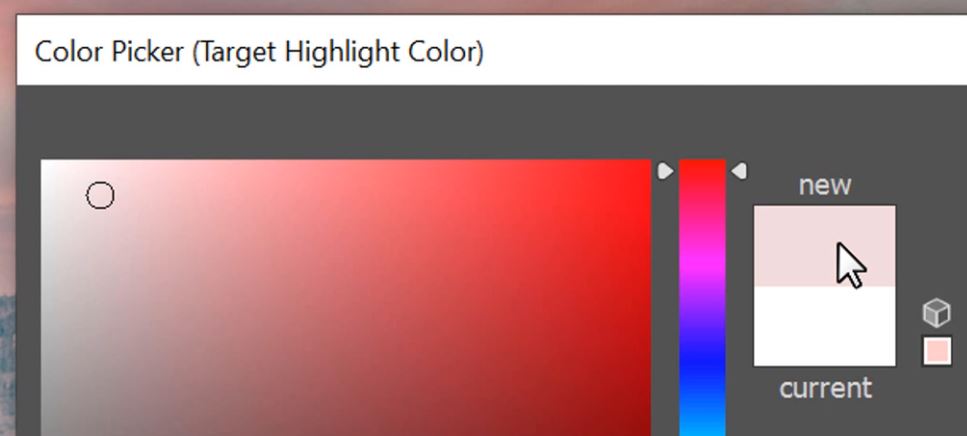
14. Click OK when you’re happy with the colour of your highlights.
15. If you want to change the colour of your shadows and highlights again just repeat the above steps.
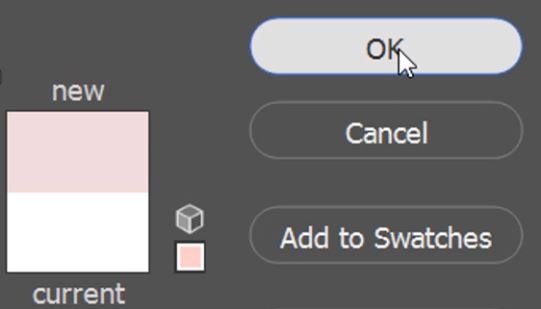
16. Once you’re happy with both Shadows and Highlights click OK.
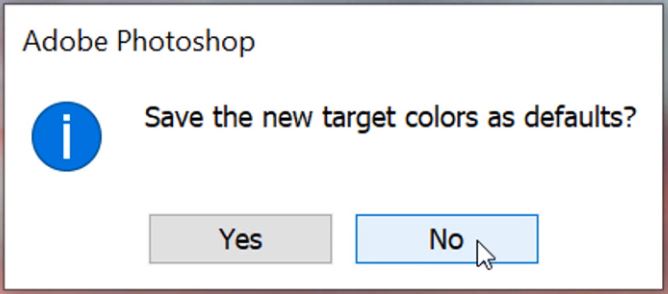
17. We don’t want to save these changes as default so click No.
The before image on the left has a strong blue, cold feel to it. But, after using this Auto Color Match feature in Photoshop, you can see the pinks and purples have bled into the foreground. If the Auto colour correction is too strong, all you need to do is lower the curves layer opacity to soften its effect.

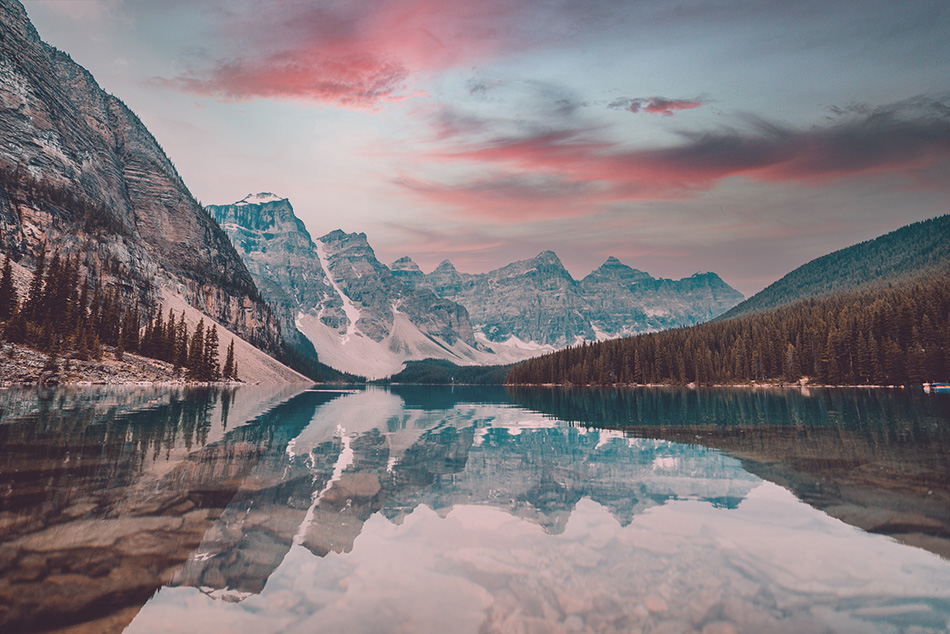
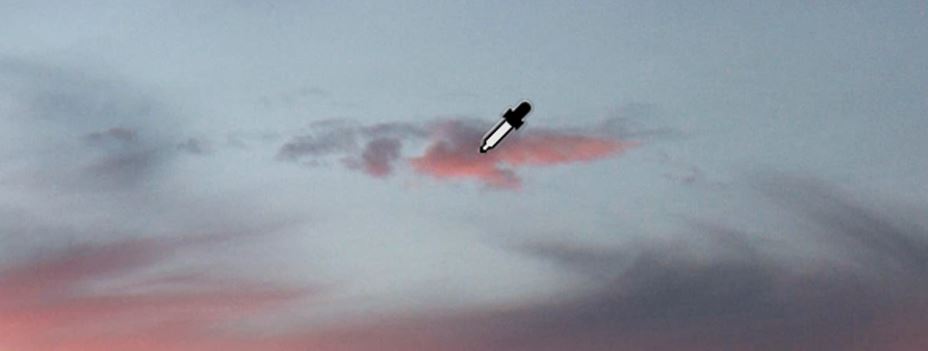
Photo by bantersnaps on Unsplash
Other Color Match Articles That Might Interest You
Automatic Color Correction in Photoshop Elements
Automatic Color Correction in Photoshop CS6
Color Correction with Photoshop in 7 Easy Steps
Thank you for reading this article on How To Auto Color Match in Photoshop, be sure to sign up for our newsletter for more tutorials and great offers.

Enter your email below and join our community of more than 100,000 photographers who have also
Subscribed to our newsletter.
Downloaded our FREE Photoshop Course.
Got our FREE Easy Panel for Photoshop.
And, have our FREE Essential Guide To Luminosity Masks E-Book.
FREE Photoshop Course

The Art Of Photography

Raya Pro for Photoshop
