How To Desaturate Color Cast in Photoshop
This tutorial will show you probably the most effective way to neutralise colours in Photoshop. If you’ve ever taken a picture with has an unusual colour tint or saturation to it, you will have experienced the frustration of fixing it. In this example, the colour cast could not be avoided because of the huge neon sign. Sometimes in our images colour saturation is too strong, and in some cases, we struggle to improve the oversaturated parts without damaging the overall image. We end up giving up on these difficult images. You needn’t give up on colour correcting those difficult images any more. Here is a very quick and easy method on how to desaturate colour cast in Photoshop.

Step-by-step Guide To Removing Unwanted Colour in Photoshop
1. Select the image layer that you want to remove the unwanted colours from.

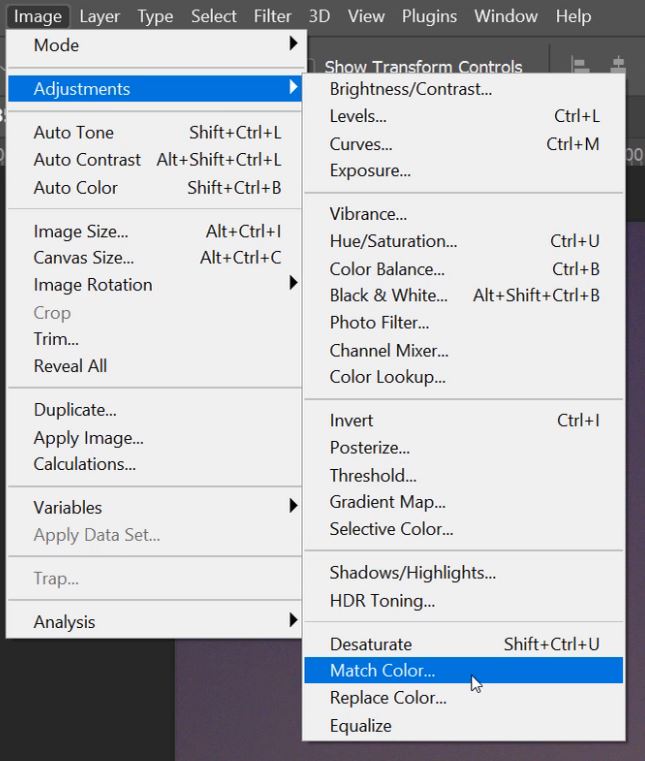
2. Go up to the Image menu and under Adjustments, you will find Match Color, click on that.
3. To neutralize a strong colour cast tick the little box next to the word Neutralise.
 This will remove most of a really strong colour cast.
– Tutorial continued below –
Enter your email below and join our community of more than 100,000 photographers who receive regular tutorials and have also

Subscribed to our newsletter,
Downloaded our FREE Photoshop Course
Got our FREE Easy Panel for Photoshop
And have our FREE Essential Guide To Luminosity Masks E-Book
4. We can make further adjustments with these three sliders.

5. Moving the Luminance slider right will brighten the colours, whereas sliding it left will darken them.

6. Then we have the Colour Intensity Slider which acts the same as saturation. Forcing the slider right increases the intensity and bringing it left lowers intensity.

7. The last slider we will look at is the Fade slider. By increasing the value of Fade we bleed back some of the original colours, only if you want to though.

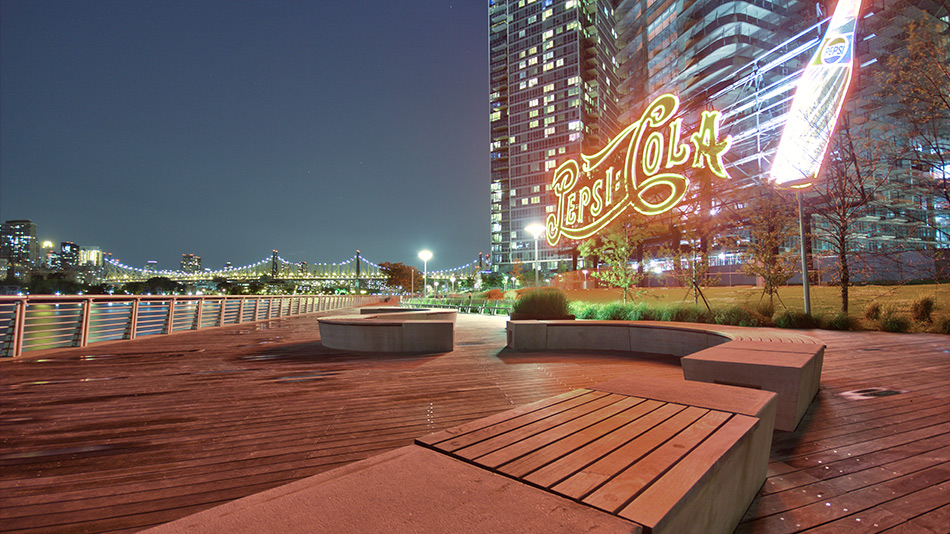
As usual, there is more than one way to colour correct in Photoshop. There’s the method using Curves or Levels which can be a bit hit and miss. You could also use the Auto feature in ACR. Or where possible, adjust your camera White Balance (WB) settings to minimise colour cast. The abundance of red was unavoidable in this image because of the MASSIVE neon sign, so the method we demonstrated was best solution for this scenario.
There are also two fully-automatic colour corrections built into our Gradiate ‘Colour Grading Plugin’ for Photoshop, they work very well when desaturating colour cast click HERE for more information.

Thank you for reading this article on How To Desaturate Color Cast in Photoshop, be sure to sign up for our newsletter for more tutorials and great offers.

Enter your email below and join our community of more than 100,000 photographers who have also
Subscribed to our newsletter.
Downloaded our FREE Photoshop Course.
Got our FREE Easy Panel for Photoshop.
And, have our FREE Essential Guide To Luminosity Masks E-Book.
FREE Photoshop Course

The Art Of Photography

Raya Pro for Photoshop

Other Articles That Might Interest You
Removing a Color Cast in Photoshop
How To Match Colors In Photoshop
Learn How To Instantly Remove Color Casts In Photoshop
A Better Way to Fix Snow’s Blue Color Cast in Photoshop