How to Find And Fix Under Saturation in Photoshop
Balancing saturation is always tricky. Especially if you don’t have an amazing high spec computer with 5k, FHD or Retina display. A lot rests on having a correctly calibrated display. Once you have that, the rest is down to you. Colour is something that is very important to our images, it can create mood and atmosphere as well as drama and wonder. The saturation levels are an absolute priority for creating this balance. Too much saturation can startle a viewer and cause offence to the eyes, whereas not enough saturation can suck the energy out of an image and reduce its appeal. In a previous tutorial, we showed you a technique on how to avoid, find and fix over saturation. Well now, let us show you how to find and fix under saturation in Photoshop.

If you wish to experiment with this, I would really appreciate it if you included my name (Duke McIntyre) and www.shutterevolve.com when you publish your image. If you post your published image on our Facebook page I’d be happy to check it out.
Under Stauration in Photography
Saturation refers to the strenght colour tones. The best way to describe this would be if you opend an image in Photoshop, added a Hue/Saturation layer and reduced the Saturation to -100. An image with -100 saturation would be monochromatic (black and white, or grayscale). On the flip side, an image with +100 Saturation would be a vibrant mess.
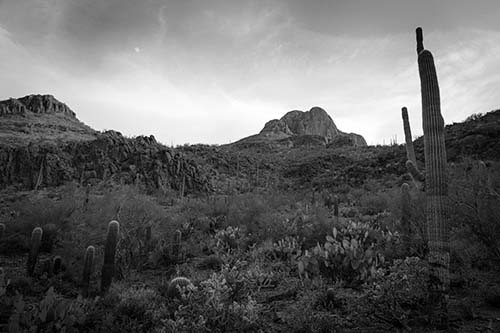
-100 Saturation 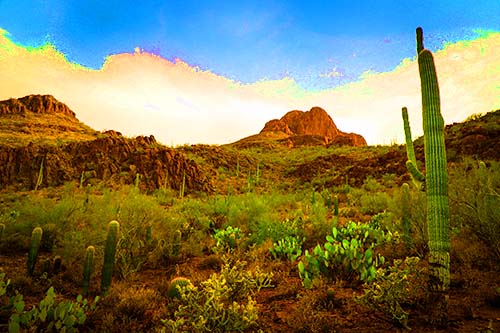
+100 Saturation
If we are striving for our images to look natural and exactly as they were when we captured the scene in the camera, we need to be somewhere in the middle. When it comes to landscape photography there may be elemets that we do want to over saturate such as the purple of a lavender field etc. but for the main bulk of our images we should try to have good middle ground. There is no one-click solution in Photoshop, but by following our steps below, you can ensure that your photos are never unintentionally under saturated.
-Tutorial Continued Below-
Enter your email below and join our community of more than 100,000 photographers who receive regular tutorials and have also

Subscribed to our newsletter,
Downloaded our FREE Photoshop Course
Got our FREE Easy Panel for Photoshop
And have our FREE Essential Guide To Luminosity Masks E-Book
How to Find And Fix Under Saturation in Photoshop
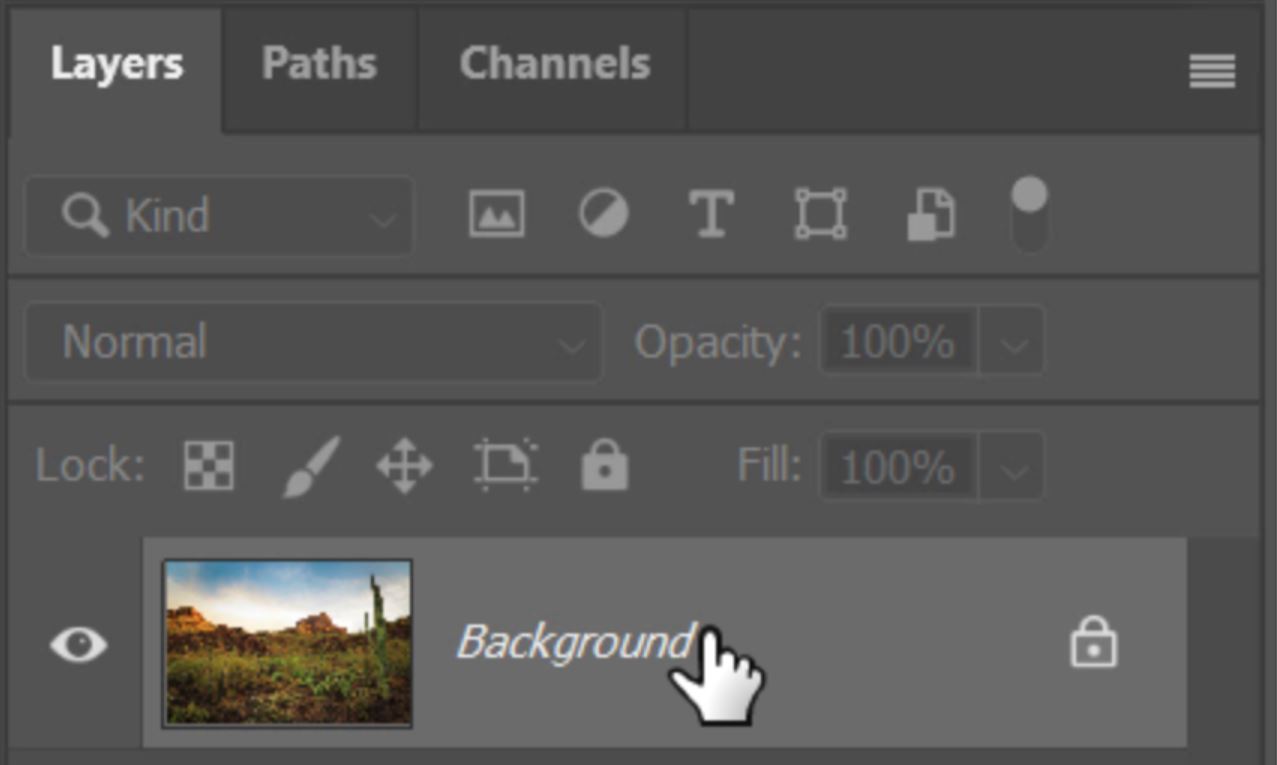
1. Because we don’t like to work destructively, we duplicate what we have. If you have edited and have multiple layers press CTRL+SHIFT+ALE+E (Cmd+Shift+Opt+E mac) to merge visible. Or, if you only have one layer that you have just opened select the background layer.
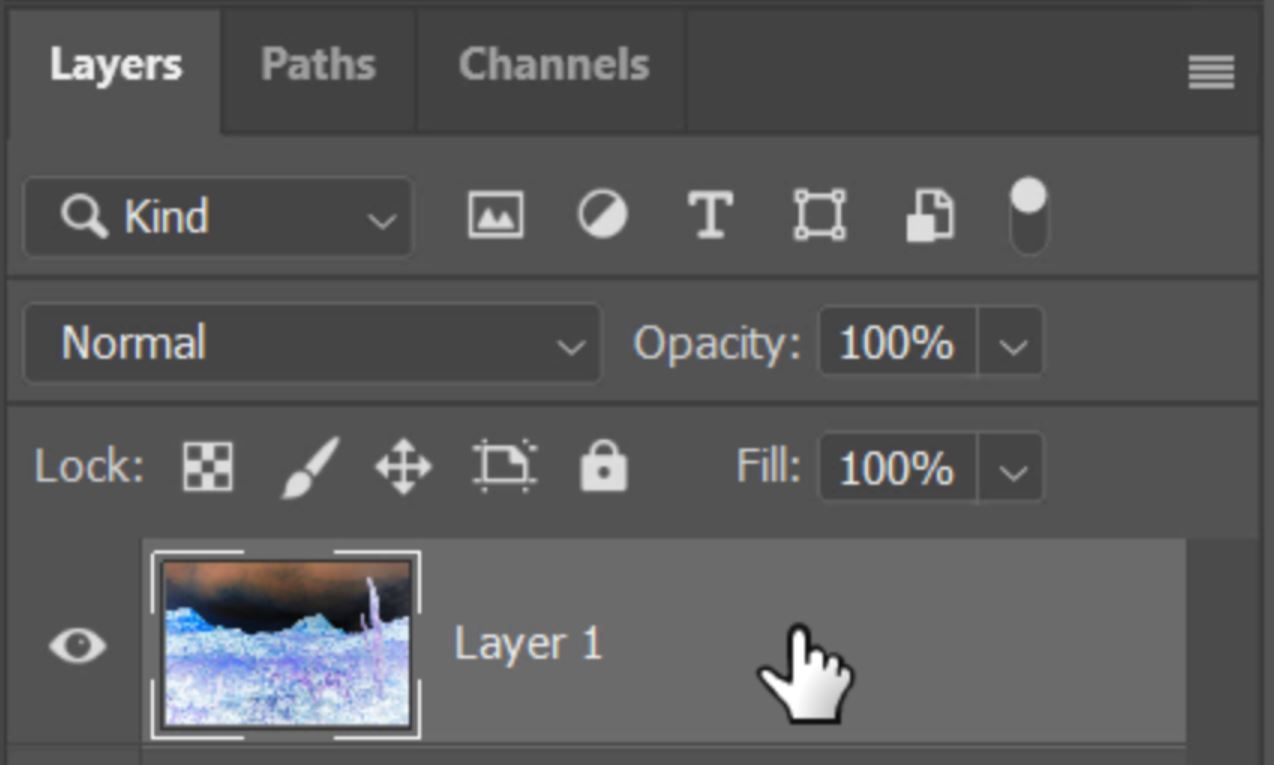
2. Press Ctrl+J (Cmd+J Mac) to create a New Layer Via Copy.

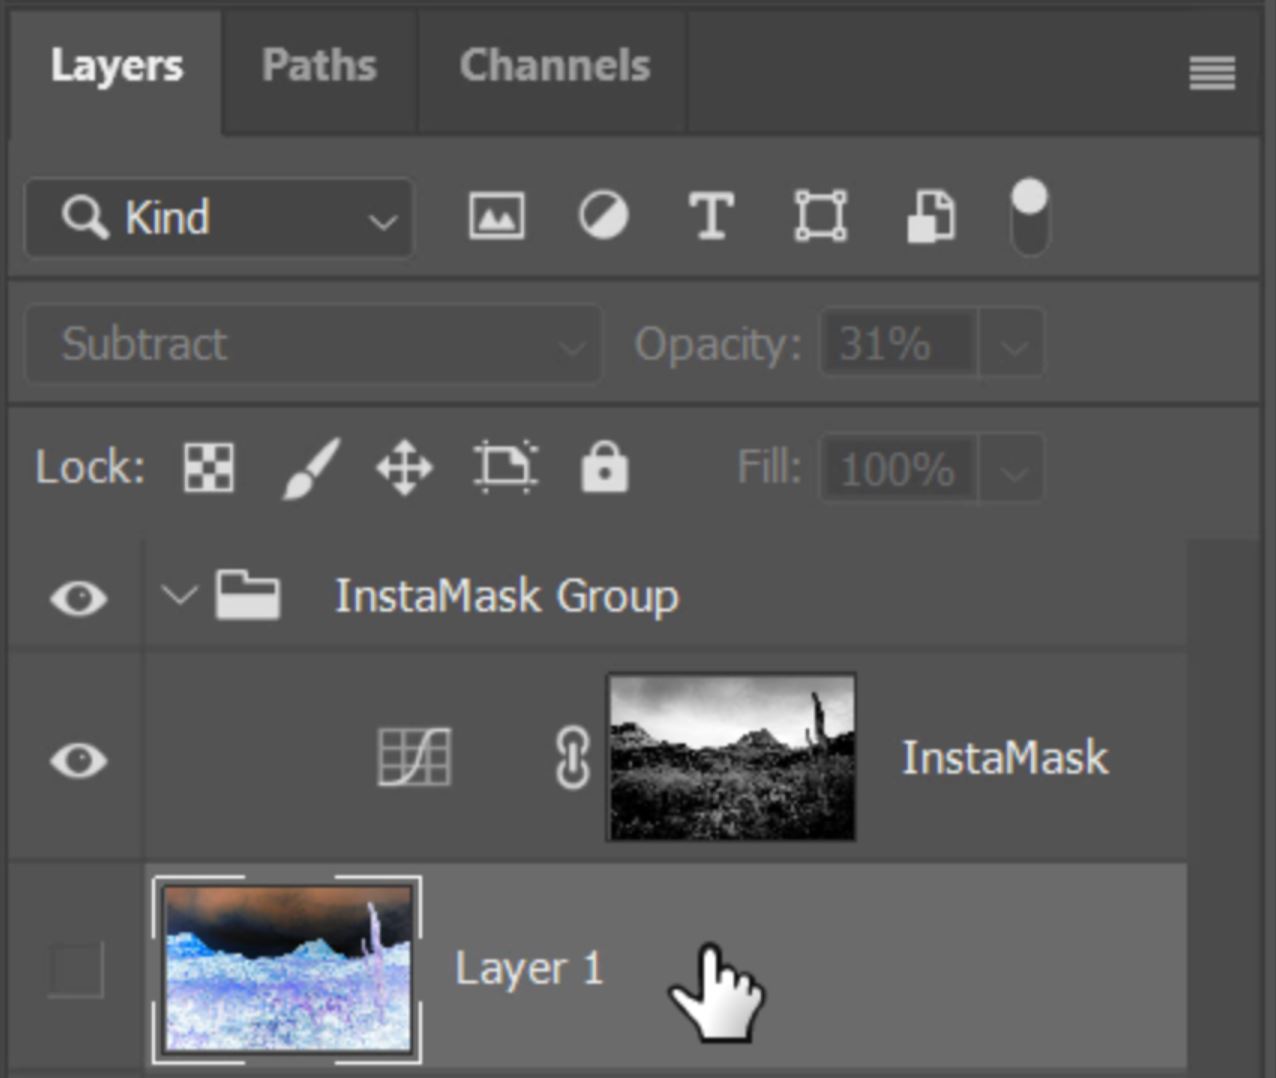
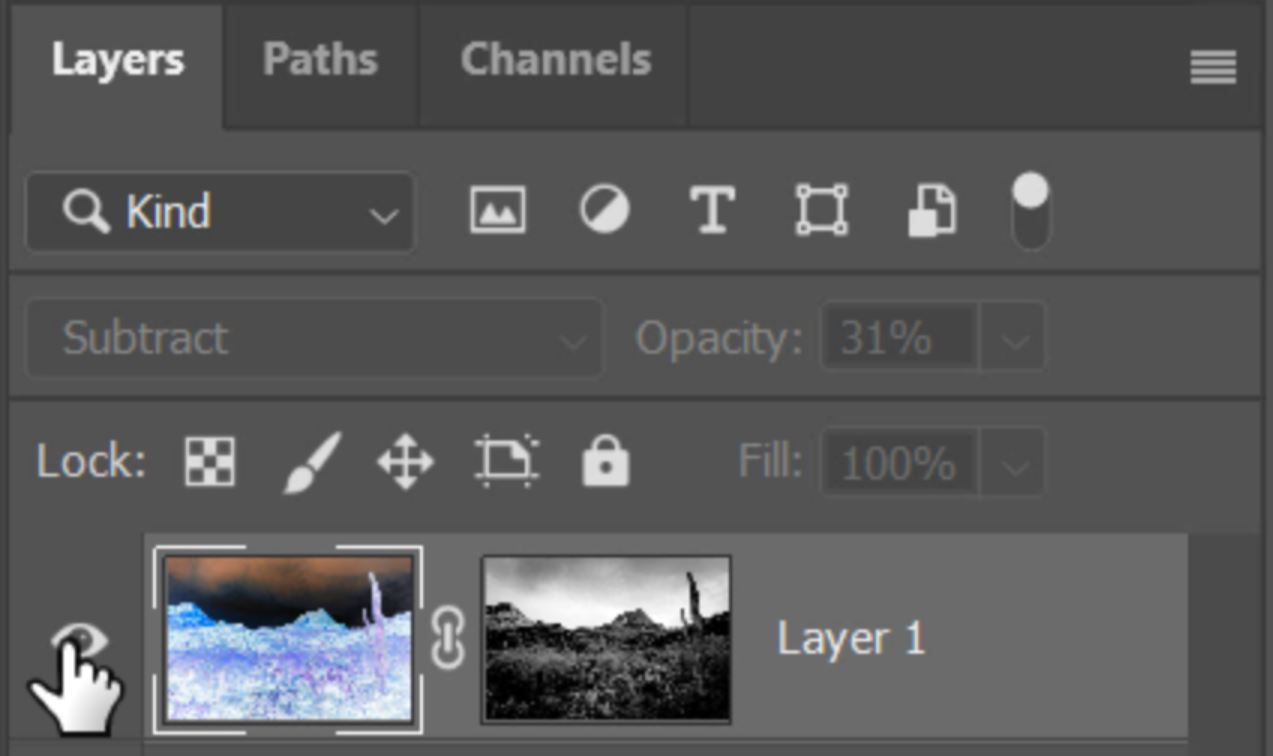
3. With the new layer selected press Crtl+I (Cmd+I mac) to Invert the layer.
4. Click the drop-down window to change the blending mode,
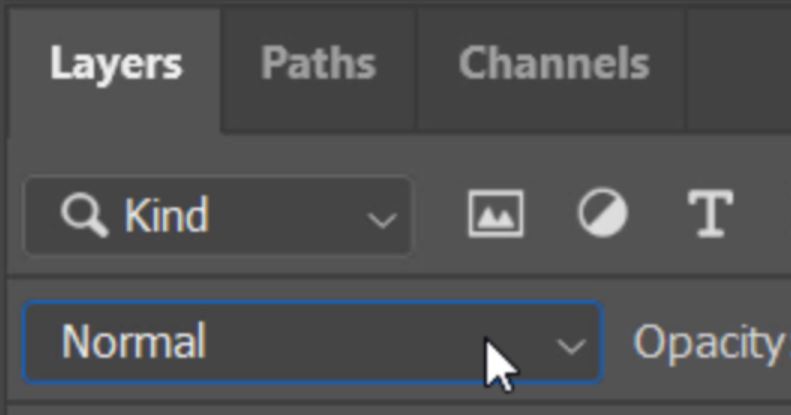
5. The Blend Mode that we need to use is Subtract.
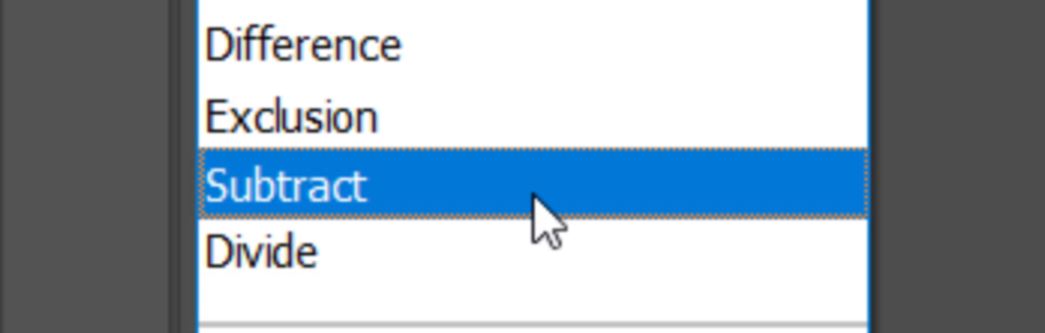
6. This will darken the image and you will only see a few areas of over-saturated colours. These are the areas that are under-saturated in your image. Reduce the opacity of the inverted layer to blend the two layers together.

7. While looking for under saturation, some areas of your image will have been adversely darkened.
8. To fix this I used InstaMask in Raya Pro.
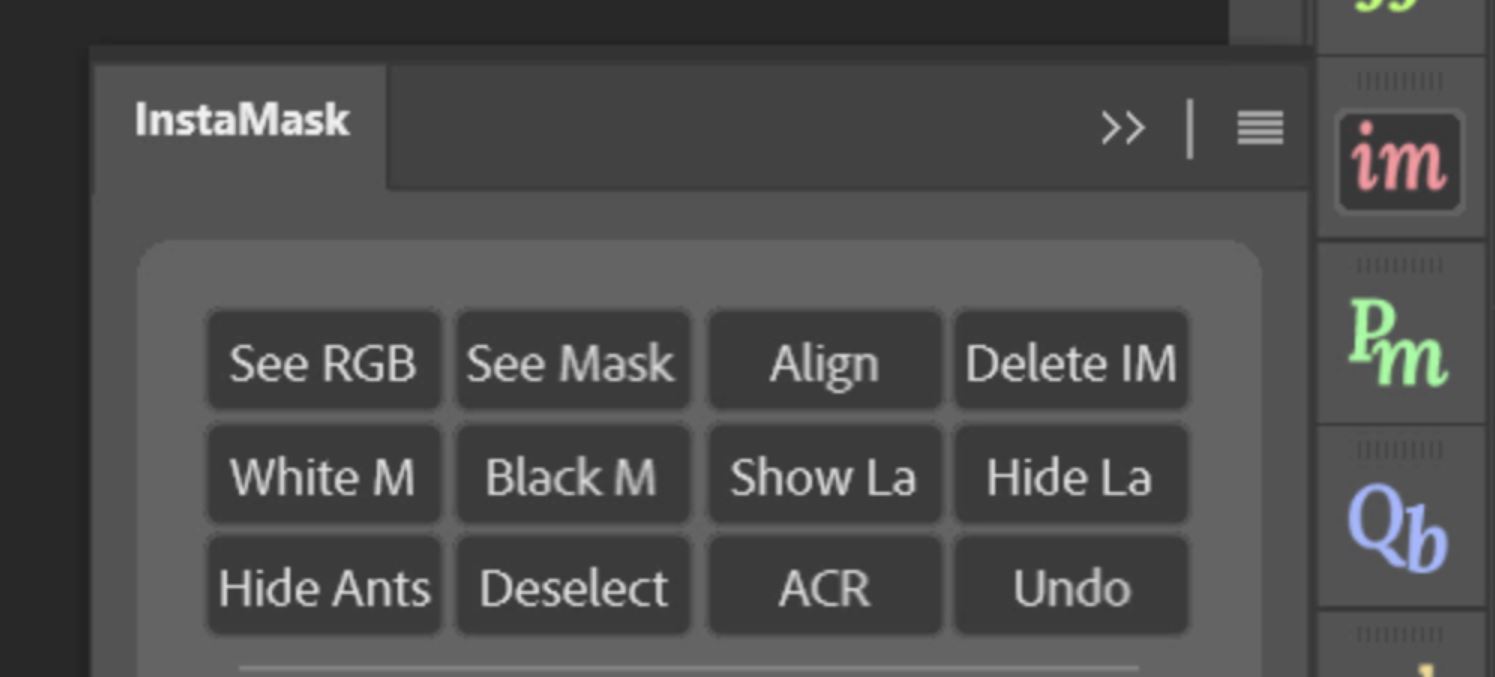
9. Hide the inverted layer.

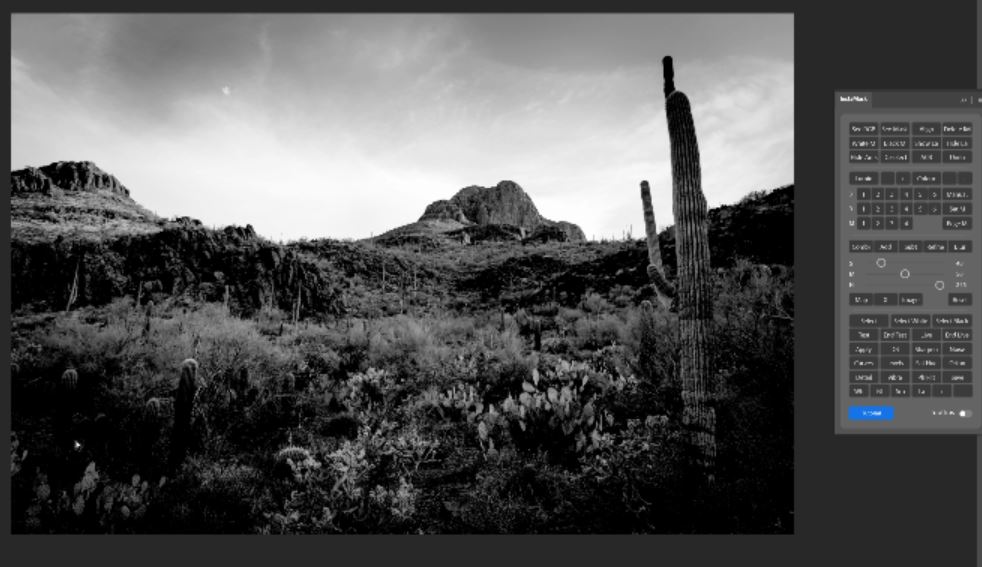
10. Then create a Brights 1 mask.
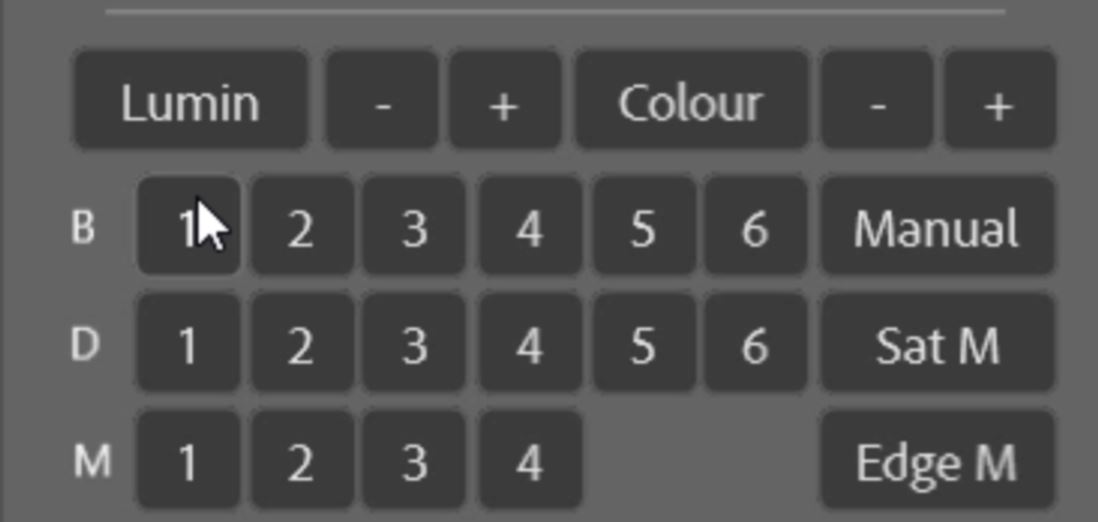
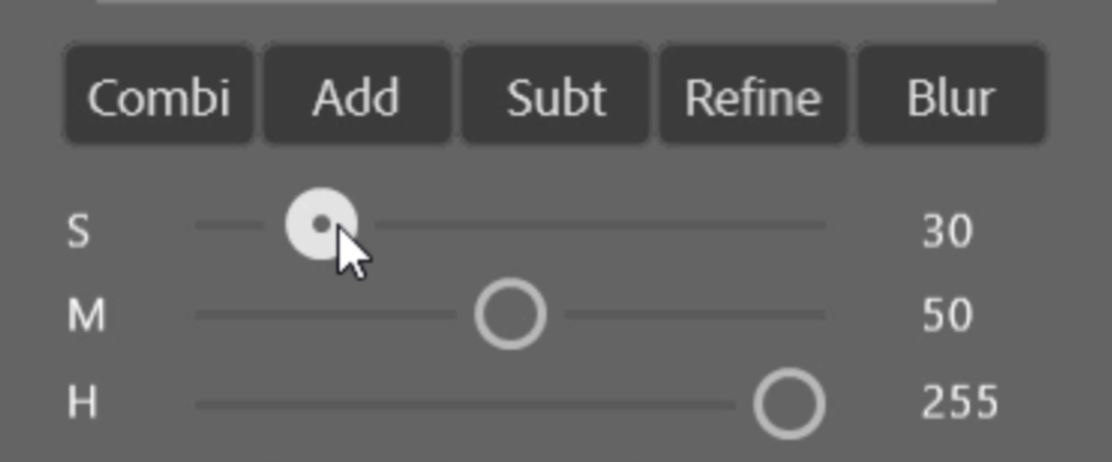
11. Adjust the sliders to refine the luminosity mask.
12. So now the dark areas that were adversely affected should appear black.
13. Make sure that you have the inverted layer selected.
14. Select Apply in InstaMask.

15. Make the inverted layer visible again.
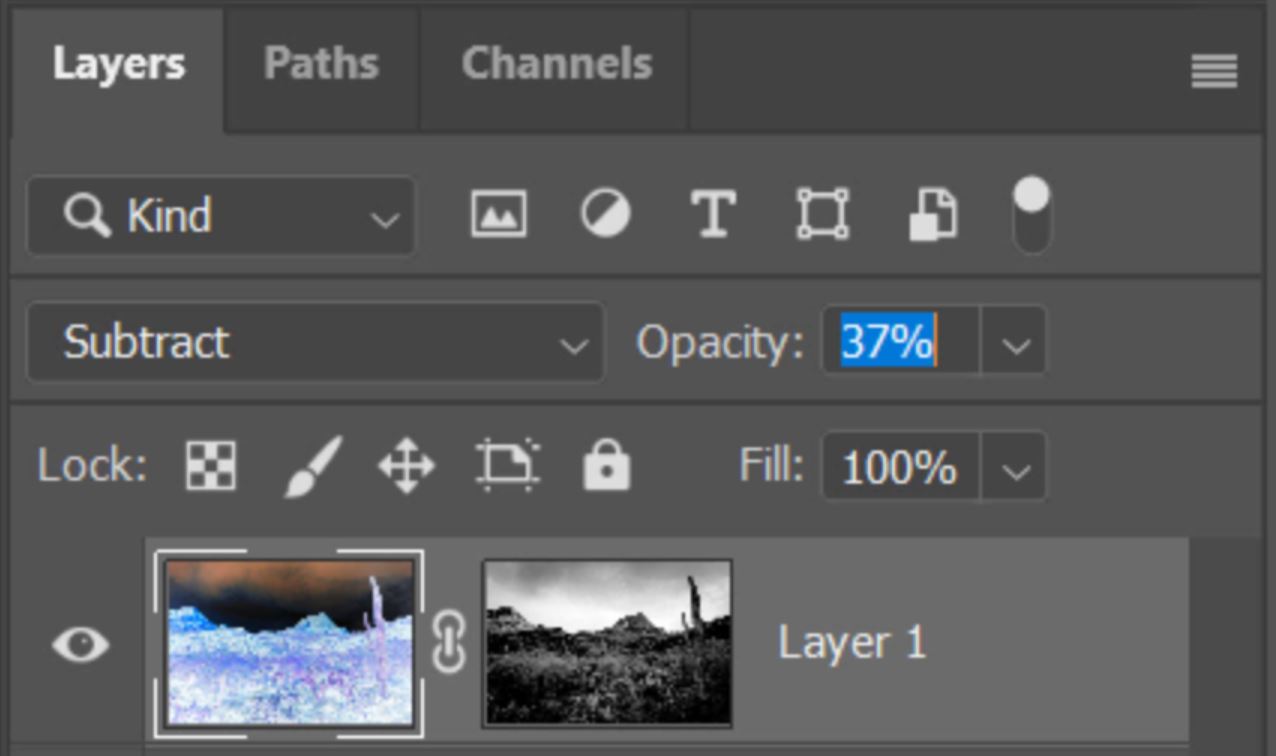
16. And finally, adjust the Opacity of the inverted layer again to bring some strenght back into the under saturated areas of your image.
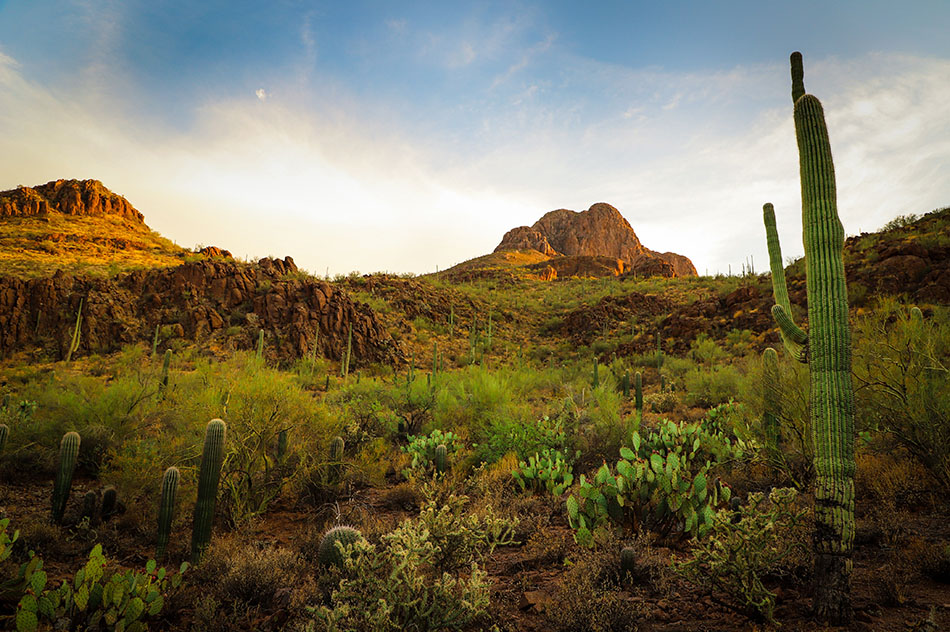
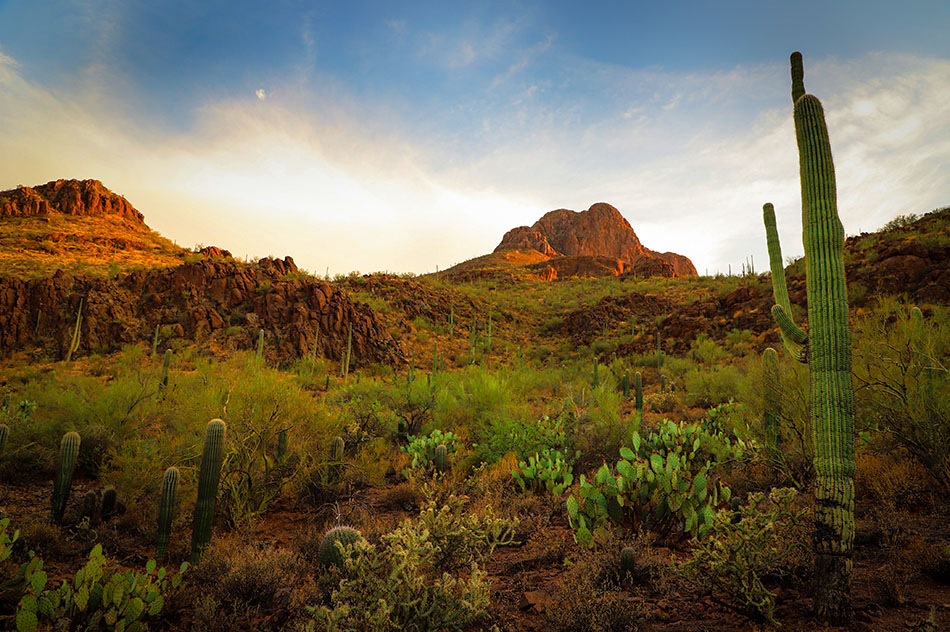
Take a look at the before and after images below. The difference is subtle and brings a better balance after we find and fix under saturation in Photoshop .
[compare]
[/compare]