How To Perfectly Expose For Any Area When Using ND Filters
ND (Neutral Density) filters can add wonderful dynamism to your images through capturing the beautiful movement of clouds and water, or any other interesting element. They can also help you come out with clean images, free from people or unwanted moving objects.
They can be a little tricky to get used to. One you master them, however, you’ll be amazed at how a scene that previously didn’t excite you, suddenly comes alive with the movement you’re able to capture.
The biggest challenge with ND filters is that it can be difficult to exposure correctly for certain elements. Sometimes we’ll take a shot with our ND filter attached and after 3 minutes or so, when we check the image, we’ll find that the most important areas are horribly under or over exposed.
In this tutorial, we are going to learn a step-by-step method of making sure your long exposures are correctly exposed for and sharp (another challenge with NDs) every time. It may look like a lot to take in, but with a little bit of practice it takes very little time to set up.
How To Perfectly Expose For Any Area When Using ND Filters
1. Take shot(s) normally. I always like to bracket my images normally, without an ND filter first. This ensures I have exposures to work with regardless of what I produce with the ND filter.
Sometimes I just want to capture the movement of one small part of an image, like a waterfall, with my ND. In this case, most of the image will be made up of the normal exposure, and I will just mask in the waterfall, for example, from the long exposure image.
2. Go To Manual Mode. It isn’t possible to shoot long exposures beyond 30 seconds in any other shooting mode. In some cameras you may have to go to Bulb Mode instead.
3. Decide how long you want the exposure. Are you looking to capture long sweeping cloud movement or silky smooth water, which require longer exposures? Or are you trying capture smaller movement/changes that need shorter exposures? How quickly are the elements moving in your image? If they’re moving very quickly, then sometimes shorter exposures will still capture long, smooth movement, too. Have a quick think about how long your exposure needs to be.
Related Article: Reflections, Smooth, Frothy – How To Photograph Water To Get Different Effects
4. Set optimal aperture and ISO. The reason I use the term optimal here, is because we should first start with the settings that will give us the cleanest possible image. With most lenses/cameras, this would be an aperture between f/8 – f/11 and an ISO of 100. Soon we are going to switch metering modes, and look at required exposure times, so these settings will probably change a little later.
5. Change to spot metering. Spot metering will help us choose a particular area in our scene which we want to exposure for. It will give us far greater control than any other metering mode.

6. Choose your spot. With spot metering, you will now see a little dot, or similar, on your live view. On the back of your camera there should be a dial which, when touched, will move the spot to anywhere in the scene. To test this, move the spot to the brightest part of the scene. You will see that the rest of the image darkens, as this part is exposed for. Choosing the darkest are will do the opposite; everywhere else will brighten up.
Firstly, place the spot on the area you wish to manually focus on(with ND filters, particularly strong ND filters, it is essential that you manually focus) and move the focus ring until your image is nice and crisp.
Now, choose the area of your image you wish to exposure for. Where you choose to place your spot is dependent entirely on your needs. If I just wanted to capture the flowing movement of a waterfall, which I planned to blend into a normal, short exposure image I captured earlier, I would just need to place the spot on the waterfall. If, however, you wish to capture cloud movement, you would place the spot in that area.
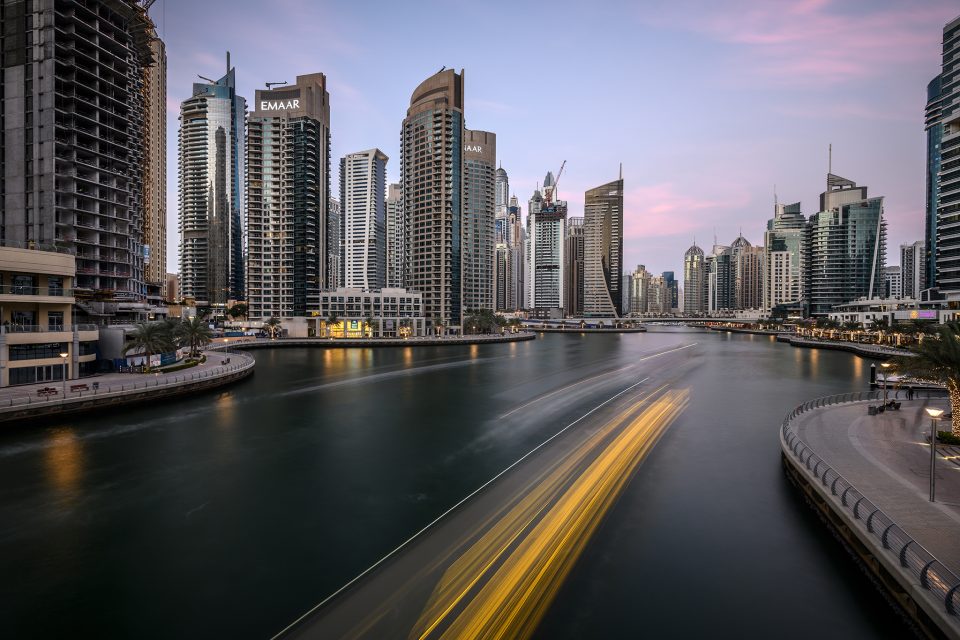
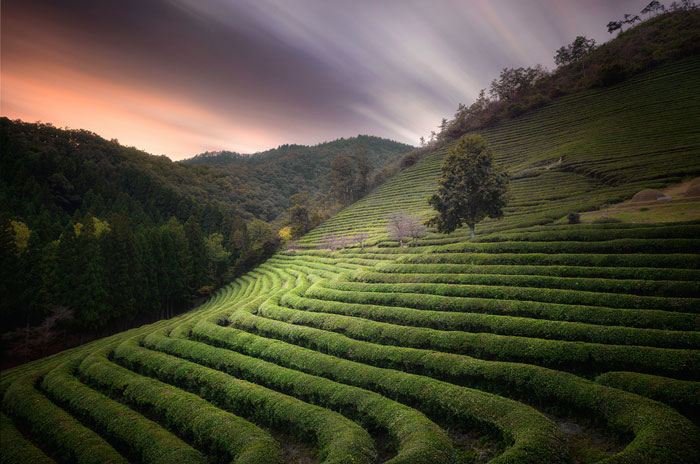
In this image I placed the spot in the sky and captured it correctly in the first attempt
If your image is low in contrast and you think you can capture everything in a single exposure, then place the spot in an area that you consider to be neither dark nor bright, somewhere in the middle. Or, in this case, you could switch to a different metering mode which will work out an average for you.
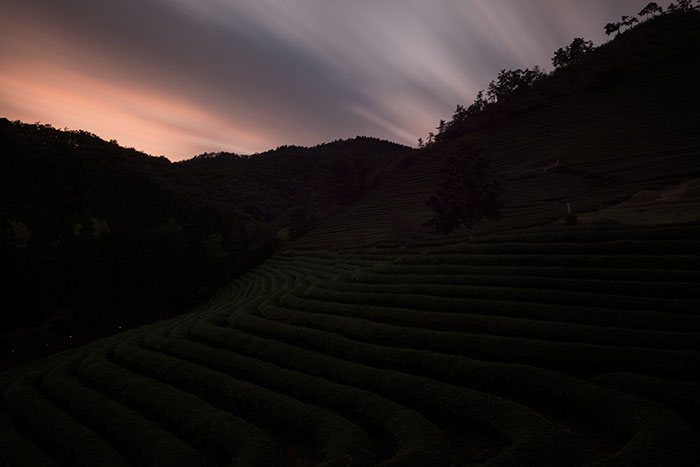
Since this image was high in contrast, I shot one image for the sky, and another for the foreground. Below I explain why I used a long exposure foreground instead of the foreground from the brackets I shot earlier.
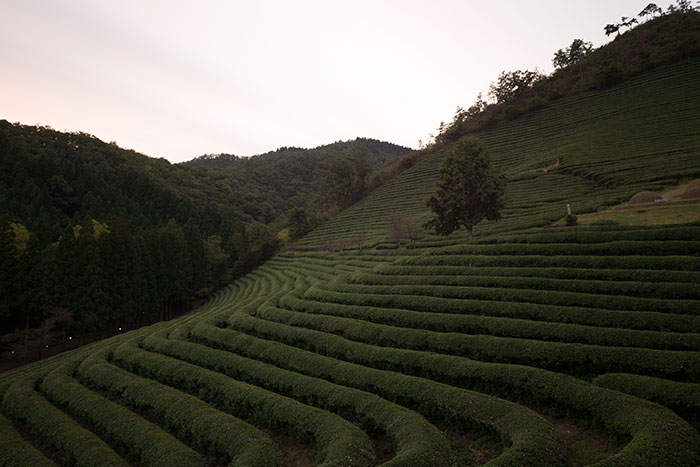
The Final Image Made Using Raya Pro
7. Cover viewfinder. In some cameras there is a little shutter which you can place over the viewfinder so no light enters the camera. This is known as light leakage and regular ruins long exposure shots. If you don’t have a built in door/shutter, bring some black tape along to cover the eyepiece with.
8. Steady tripod. This is an absolute must. If your camera shakes during a long exposure it can destroy the image, leaving it soft and blurry. Since long exposures can take a few minutes to capture, with each mistake and re-shoot, you are losing precious light. We have fewer opportunities to get it right with long exposures; making sure your tripod is nice and sturdy is vital.
9. Exposing correctly. Now we have everything ready, we need to just confirm that our spot is in the area we wish to expose for. Next we need to look at the exposure gauge to tell us if our settings are correct. Below you can see the exposure gauge, which is telling us that with our current settings, our area of focus will be almost 2 stops over exposed.
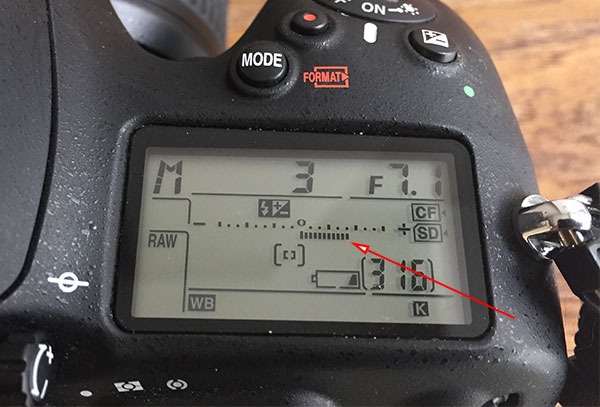
We need to bring the exposure gauge down to 0 which is very easy. All we need to do is reduce the exposure time from 3 seconds, to something lower until the gauge is all the way back to 0. Now, just to make sure we are exposing correctly for that area, we can take a quick test shot.
10. ND Calculator. If our test shot confirms that we have exposed correctly, then we need to work out how long to expose for with the ND attached. Some photographers choose to wing it and see what happens. You can do this too, but you will get consistently better results if you work out the time correctly. I have an app called Longtime Exposure Calculator where I simply input the ND filter I’m using (10-stop etc.), and the current shutter speed I have chosen on my camera. The app then tells me what the appropriate shutter speed should be.
You may find that the required shutter speed isn’t long enough. Maybe you wanted a two minute exposure but the current settings require only 1 minute. To get around this you can use a smaller aperture (larger f-stop). The smaller the aperture the longer the required shutter speed.
Alternatively, if the shutter speed is too long, because the scene you are shooting is low in light, you can use a larger aperture (smaller f-stop) or increase the ISO to quicken the required shutter speed.
If you don’t have a smart phone, these handy ND charts might come in useful for you: ND Filters Long Exposure Quick Reference Charts and Cheat Sheets
11. Shoot correctly. Finally, on my D800, I just scroll down the exposure time until it gets to ‘Bulb’. I place the ND on my lens. I take my shutter release remote, which has a timer, I input the time the app told me, and then I click the button. I have a little holder on my tripod for the remote. Instead of holding it for a few minutes, I can just rest it in the holder.
Added Note: In the tea fields image above I blended a long exposure foreground and a long exposure sky. But why didn’t I just blend a long exposure sky into one of my shorter exposure foreground shots that I shot earlier?
In reality, more often that not I blend long exposures with short exposures. However, out of habit I always try to capture multiple brackets using my ND filter so that the entire range of light is covered in the scene using just NDs. There are three reasons why I do this:-
Firstly, the B+W filters that I use, and love, produce a slightly ‘glossy’ effect so sometimes blending a B+W ND image with a short exposure looks a little bit off. And since I like this glossy look, I try to achieve it in the whole image.
Secondly, it is very difficult to blend a long exposure, like the tea fields above, into a short exposure image which has some clouds still in the sky, even if they are mostly blown out. Since the clouds in the short exposure will be light ad fluffy, the difference between that and the clouds in the long exposure will be significant, making it a harder blend. In fact, if the difference is too great, it will become a sky removal/swap process, rather than a simple blend. Since the clouds in the long exposure for the foreground were long and sweeping, they matched perfectly with the long exposure for the sky. The blending, using Raya Pro, took about 20 seconds.
The other reason is that after I shoot my normal brackets, and shift to Manual mode, I tend to shift the composition slightly simply by pressing buttons and screwing on the ND filter. I have non-screw Nd filters, too, but the quality isn’t the same. In the end the long exposures don’t always match up with exactly with the original brackets. Often this isn’t a problem as I can align them in Photoshop, but very occasionally, with a very tight composition, we tend to lose a little bit too much of the scene after alignment in PS.
I hope you’ve found this article useful.
Enter your email below and join our community of more than 100,000 photographers who have also
Subscribed to our newsletter.
Downloaded our FREE Photoshop Course.
Got our FREE Easy Panel for Photoshop.
And, have our FREE Essential Guide To Luminosity Masks E-Book.
To go directly to any of our products, simply click on the image below.


