Have a question about how to use Raya Pro?
Don’t see your question? Email us at helpshutterevolve@gmail.com and we’ll be happy to help
Are you looking for help with an error? Click here
Exposure Blending
How can I add more than one image in layers?
How can I make sure multiple images are aligned?
How do I use precision masks to exposure blend?
How do I use the Quick Blend sliders?
How can I blend the sky from a dark image onto a brighter one?
How can I blend a single exposure?
How many exposures do I need for exposure blending?
How do I deal with moving objects?
Luminosity Masking
How can I make a mask based on Bright areas?
How can I make a mask based on Dark areas?
How can I make a mask that will only apply to edges?
How can I make a mask to target very specific colours?
Why can I paint outside the selection?
How can I turn my luminosity mask into a black and white image?
How do I apply an InstaMask to a Curves (or Levels, DB, Hue/Sat) layer?
How do I use the Combi/Add/Subt buttons in InstaMask
Contrast
How can I dodge and burn with 50% Grey and Curves?
How can I dodge and burn with luminosity masks (Highlights/Shadows/Midtones)?
How can I dodge and burn destructively?
How can I Lighten the shadows in an image?
How can I change the brightness of specific colours?
How can I use Raya Pro to make targeted contrast adjustments?
How can I darken a sky or other bright areas?
What are luminosity masks?
Put simply, luminosity masks are selections based on brightness. They allow us to select — and make changes to — bright, dark or mid-tones in our image. This opens up a whole new world of processing, not to mention an effective way to blend exposures.
Check out the e-book in the link below which will give you a great idea of the practical applications of luminosity masks.
https://www.shutterevolve.com/the-essential-guide-to-luminosity-masks/
The Essential Guide To Luminosity Masks in Photoshop
Click here to return to the top of the page
How do I fix a bad blend?
When exposure blending, we may find that our final blend does not look clean and natural. This can happen for many reasons, like attempting to blend exposures that don’t have any over-exposed hilghlights and under-exposed shadows.
But the most common cause is that our exposures are too far apart in terms of stops of light. Trying to blend a really dark exposure with a brighter exposer always leads to problems. See the video to the right for how to fix that quickly with Raya Pro.
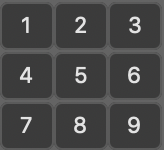
Or open the Precision Mask panel, select the dark exposure and press Fix under the Fix under the Fix Dark Blend section. Then cycle through the numbers to the right and find one that looks best. Finally, press Select to confirm your selection.
![]()
![]()
![]()
Video Tutorial

How can I add more than one image in layers?
When we load multiple images/exposures into Photoshop, we will notice that all of those exposures are open in separate windows. In order to exposure blend, we need to collapse those windows into one and layer our exposures. Use the Stack button in the Raya Pro Hub to do that.


Click here to return to the top of the page
Video Tutorial

How can I make sure multiple images are aligned?
To align layers with Raya Pro, just go to the Hub and click Align. If your layers are smart objects, Photoshop will not auto-align them. Instead, you need to manually align. check out the video to the right for instructions on how to do that.

Click here to return to the top of the page
Video Tutorial

How do I use precision masks to exposure blend?
See the video to the right for a demonstration of this.
Exposure blending with Precision Masks is very straightforward. Let’s say you have three exposures layered in Photoshop.
Put your middle exposure at the bottom, your dark exposure in the middle and your brighter one on top. Make the bright layer invisible by pressing the eye to the left of the layer.
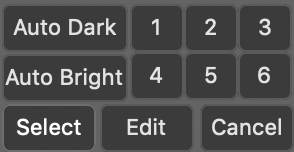
Select the dark layer, go to Precision Masks and choose Auto Dark.
Then cycle through the numbers to the right until you find a mask that looks good. Press select to confirm that mask.
If the blend looks bad, scroll up to the section on this page called How To Fix a Bad Blend.
Now select the bright layer, click Auto Bright and do exactly as you did with the dark layer. Cycle through the masks and then press Select. You may need to reduce the opacity of the bright layer for the blend to look natural.

Click here to return to the top of the page
Video Tutorial

How do I use the Quick Blend sliders?
See the video to the right for a demonstration of this.
Exposure blending with Precision Masks is very straightforward. Let’s say you have three exposures layered in Photoshop.
Put your middle exposure at the bottom, your dark exposure in the middle and your brighter one on top. Make the bright layer invisible by pressing the eye to the left of the layer.
Now select the dark exposure and go to the Dark section in the Quick Blending panel. There you can simply move any of the 4 sliders to the right and find a combination that works for you.
When you’re done, select the bright layer, make it visible, and start moving the sliders in the Bright section.
That’s it!
Click here to return to the top of the page
Video Tutorial

How can I blend the sky from a dark image onto a brighter one?
There are a few different ways to blend a sky from a dark image into a bright one, and you can see how to do that in Precision Masks by clicking here, or in the Quick Blending panel by clicking here.
Alternatively, why not visit the tutorial below and see how to useful luminosity masks are in this situation.
How To Blend Exposures With Luminosity Masks
Click here to return to the top of the page
How can I blend a single exposure?
Using a single RAW file (better to work with RAWs rather jpegs due to greater range of information to work with) in exposure blending is certainly possible, and can yield great results. This is known as double or triple processing and can be more effective than playing with the highlights/shadows sliders in Lightroom.
See the video to the right for how to do this.
Click here to return to the top of the page
Video Tutorial

How many exposures do I need for exposure blending?
The vast majority of the time I work only with 2-3 exposures. Exposure blending is not like HDR: more doesn’t equal better. And often more will overcomplicate matters. The most important thing is to make sure that your highlights are exposed for in your darkest exposure and your shadows exposed for in your brightest exposure.
The next important step is deciding which of your darker/brighter exposures to choose from if you have many. See the video to the right (skip ahead to 6:43) for that.
To find out more about exposures, here’s an old article on the subject.
Luminosity Masks – Why Can’t I Paint Inside The Selection?
Click here to return to the top of the page
Video Tutorial
Skip forward to 6:43 in the video for a discussion on which exposures to choose.

How do I deal with moving objects?
Exposure blending gives us certain advantages over HDR when it comes to moving objects and ghosting. See the article below for a detailed discussion:
How To Deal With Moving Objects In Exposure Blending
Click here to return to the top of the page
How can I make a mask based on Bright areas?
Please see the video to the right for a quick demo of how to make a luminosity mask that targets bright areas.
To do this, we open InstaMask and press one of the numbered buttons next to the letter ‘B’ which stands for Brights. Number 1 is a general brights mask. 2 is more targeted. And each number along becomes more restricted, more targeted.
Click here to return to the top of the page
Video Tutorial

How can I make a mask based on Dark areas?
Please see the video to the right for a quick demo of how to make a luminosity mask that targets dark areas.
To do this, we open InstaMask and press one of the numbered buttons next to the letter ‘D’ which stands for Darks. Number 1 is a general darks mask. 2 is more targeted. And each number along becomes more restricted, more targeted.
Click here to return to the top of the page
Video Tutorial

How can I make a mask that will only apply to edges?
To create an edge mask, press the Edge M button in InstaMask. The Levels dialogue that appears allows us to make a stronger selection of the edges. Move the sliders until the edges are black and the other areas are white. Then you will see a blur dialogue. Leave the settings as they are. This will thicken the edge selection.
Now you will have an InstaMask, however, in this mask the edges are not selected. They are excluded. So hold down ctrl+I (cmd+I on a Mac) and that will invert the mask.
To find out how useful edge masks can be, check out the video to the right.
Click here to return to the top of the page
Video Tutorial

How can I make a mask to target very specific colours?
We can make colour selections in InstaMask by pressing the Colour button which is above the number buttons. Then we select a colour on our image with the eyedropper tool. And we can use the +/- buttons left of the Colour button to increase or decrease our selection.
See this in action in the video to the right.
Click here to return to the top of the page
Video Tutorial

Why can I paint outside the selection?
After you create a mask and turn it into a selection, you may find that you can still paint outside of your selection into areas you didn’t want to affect. This always happens because our mask is not contrasting enough. Remember, whatever is white in our mask is selected 100%. Whatever is grey is partially selected, and will therefore be affected when painting. Areas that are black are not affected. Please see the link below for a more in-depth discussion.
Luminosity Masks – Why Can’t I Paint Inside The Selection?
Click here to return to the top of the page
How can I turn my luminosity mask into a black and white image?
Sometimes, when creating a luminosity mask, we might find that our mask would be a great black and white image. To turn your InstaMask into a black and white photo, go into InstaMask, create your mask (B1, B2 etc.), then press the Image button. And now you have a black and white photo.
See a demo of this in the video to the right, and also how to turn that new B&W photo into a layer on your workflow.
Click here to return to the top of the page
Video Tutorial

How do I apply an InstaMask to a Curves (or Levels, DB, Hue/Sat) layer?
Applying a luminosity mask created in InstaMask is very easy. First create your luminosity mask by pressing one of the numbered buttons in InstaMask. Then go down to the bottom of the Instamask panel where you will see Curves, Levels, Hue Sat, Ph Filter (Photo filter), Vibrance etc. Press one of these to apply the mask to an adjustment layer.
See a demo of this in the video to the right, and also an alternative method.
Click here to return to the top of the page
Video Tutorial

How can I dodge and burn with 50% Grey and Curves?
Both the 50% and Curves buttons in the Dodge & Burn panel are non-destructive ways of dodging and burning, just like the Highlights/Shadows/Midtones buttons.
To see how to use both functions, please watch the video to the right.
Click here to return to the top of the page
Video Tutorial

How can I dodge and burn with luminosity masks (Highlights/Shadows/Midtones)?
Dodging and Burning with luminosity masks is done through the Highlights/Midtones/Shadows buttons in the dodge & Burn panel.
To use them, click on one of the buttons and refine the mask that pops. Whatever is white will be selected in the mask, whatever is black will not be.
Then you will see a new empty layer created which contains your luminosity mask.
In the Dodge & Burn panel, press the Brush button, and select either the white or black buttons beneath the Brush button.
Black will burn. White will dodge.
Now select your new layer (don’t select the mask), and simply paint in the areas you wish to dodge/burn.
You can see this demonstrated in the video to the right.
Click here to return to the top of the page
Video Tutorial

How can I dodge and burn destructively?
The Dodge and Burn buttons within the dodge & Burn panel utilize Photoshop’s native dodge and burn functions. While they are destructive, they are also very effective.
To see this demonstrated, please skip ahead in the video to the right until 5:38
Click here to return to the top of the page
Video Tutorial

How can I lighten the shadows in an image?
If we want to quickly lighten our shadows, we can go to the Dodge and Burn panel and press Lighten Shadows, as demonstrated in the video to the right.
Click here to return to the top of the page
Video Tutorial

How can I change the brightness of specific colours?
In the Colour Centre we can target specific colours and make them brighter or darker. We do that with the Colour Adj button, as seen in the video opposite.
Click here to return to the top of the page
Video Tutorial

How can I use Raya Pro to make targeted contrast adjustments?
Often we don’t want a contrast adjustment to sweep across the entire image. It would look better, and give us greater control, if we could target, and apply contrast to, very precise tones.
In the Dodge & Burn panel, we can that by pressing Zone Contrast. We’ll be left with a new group, in which 6 Curves layers can be found, each one targeting a unique set of tones.
Watch the video opposite to see how this is done.
Click here to return to the top of the page
Video Tutorial

How can I darken a sky or other bright areas?
We can darken brighter parts of our image, and leave them with deeper colours by going to the Dodge & Burn panel and choosing Dark Sky. Of course, if the effect is too strong or too weak, you can adjust the opacity of the Dark Sky layer until you’re happy.
Click here to return to the top of the page
Video Tutorial

How can I add light bleeding into my golden hour?
Light Bleeding is an awesome way of adding more energy and mood to your photos. By watching the video opposite, you will see how easy and effective it is.
Click here to return to the top of the page
Video Tutorial

How can I make an image soft and dreamy?
The Orton Effect has long been a popular tool for landscape photographers. It can give an otherworldly feel to our scenes. In Raya Pro, we have 4 Orton Effects. They are at the bottom of the Dodge & Burn panel. Give them a try and remember to lower the opacity of the Orton Effect layer. You don’t want this effect to be too strong.
Click here to return to the top of the page
Video Tutorial

How can I remove unwanted objects and make it look natural?
In the Filters and Finish panel in Raya Pro you will see two options: Freq Sep 16 and Freq Sep 8.
If you’re working in 8 bit, you use Freq Sep 8. If you’re in 16 bit, use Freq Sep 16.
And please watch the video provided to see how useful Frequency Separation is when it comes to cleaning up your photos.
Click here to return to the top of the page
Video Tutorial

How can I craft a powerful manual vignette
We cannot underestimate how important a great vignette is. And in Raya Pro we can craft truly beautiful ones. One is found in the Filters & Finish panel (the top video to the right – skip to 2:43), while the other uses the Glow Free function in the Dodge & Burn panel (bottom video).
Click here to return to the top of the page
Video Tutorials
Skip ahead to 2:43

Colour Vignette

How can I make a really dramatic black and white image?
If you want to create a really dramatic black and white image, open the Filters & Finish panel and click on BW Drama. Don’t forget that you can reduce the opacity of each layer within the BW Drama folder in order to create a result you like.
Click here to return to the top of the page
How to clean sensor dirt?
In Raya Pro there is very useful function that will show you where even the most subtle sensor dirt is hiding. This function is in the Filters & Finish panel and Reveal Dust. BUT to use this, we first must press the Merge button in the Hub. Then we can press Reveal dust.
Please see the accompanying video for how to do this, and how to remove dirt.
Click here to return to the top of the page
Video Tutorial

How can I change the temperature of an image?
We can instantly change the temperature of our image by pressing one of the Cold/Colder/Coldest/Warm/Warmer/Warmest buttons in the Colour Centre. Skip ahead to the 3:56 in the video to see this done.
Click here to return to the top of the page
Video Tutorial
Skip ahead to 3:56 in the video.

How can I change the temperature of highlights or shadows?
We can be extremely selective about where we can add warm or cold tones, like adding warmth just to a sunset/sunrise (highlights) or applying colder tones to our shadows.
These functions are in the Colour Centre panel under Cold Shadows/Highlights and Warm Shadows/Highlights. See video for how these work.
Click here to return to the top of the page
Video Tutorial

How can I saturate/desaturate all colours or just certain colours?
It’s possible, not only to desaturate/saturate our entire image with one click, but also to do the same to individual colours. We do this in the Colour Centre by pressing Saturate All/Desaturate All or by pressing the colour buttons, as shown in the video (skip to 4:25).
Click here to return to the top of the page
Video Tutorial
Skip ahead to 4:25 in the video.
How can I use Raya Pro to help colour correct my images?
We can colour correct with a single click in Raya Pro. In the Colour Centre we have Correct1, 2 and 3. The reason we have three options is that the results differ depending on the image you’re working on. Sometimes Correct 1 will work, other times Correct 2 or 3 might be the better options.
See the video opposite for a quick demo of those functions.
Click here to return to the top of the page
Video Tutorial

How can I enhance the details in my photo?
We have two different ways to enhance details in our photos, but probably the most effective one can be found in the top right-hand corner of the Filters $ Finish panel under Detail Enhance.
Please watch the accompanying video for how to use this.
Click here to return to the top of the page
Video Tutorial

How can I reduce noise?
To reduce noise in Raya Pro, simply open the Filters and Finish panel and click the Reduce Noise button. This brings up Photoshop’s native noise reduction tool.
Click here to return to the top of the page
How can I remove Chromatic Aberration in my images?
The very first line of defense against Chromatic Aberration should always be the Remove Chromatic Aberration option in Lightroom or Adobe Camera RAW.
However, an alternative way is to open the Filters & Finish panel and press Clean CA. Click OK when the pop up appears, choose a white brush and select the mask of the Clean CA layer. Then start painting where the CA is. This should clean it effectively. For a quicker, more advanced way of combing Clean CA and Instamask, see the video to the right.
Click here to return to the top of the page
Video Tutorial

How can I target areas to enhance detail in specific places?
In the Dodge & Burn panel we have two options: Detail Shads/Lights. These will add a detail enhance layer that will target only your shadows or highlights, as demonstrated in the video opposite.
Click here to return to the top of the page
Video Tutorial

How can I sharpen images for the web?
In the Filters and Finish tab, we have two options under Sharpen and Resize for the Web: by width and by height.
This tool will not just resize and sharpen your images, it will also convert the colour profile to sRGB, which is optimal for online viewing.
See the video for a demo of these tools
Click here to return to the top of the page
Video Tutorial

How can I sharpen full size images?
There are two ways to sharpen images in Raya Pro. Firstly, we can go to the Filters & Finish panel and choose Sharpen Full.
Or we can create an edge mask in InstaMask (click here see the edge mask tutorial) and apply that to a sharpened layer in order to avoid edging. You can see that demoed in the video to the right.
Click here to return to the top of the page
Video Tutorial
How do I use the Combi/Add/Subt buttons in InstaMask
The Combi/Add/Subt buttons in Instamask allow us to intersect masks. This is just a fancy way of saying they let us add or subtract one mask from another. The process is simple, and is demonstrated in the video to the right at around 8:15, but see the steps for how to use them below:
Create an InstaMask (numbered buttons, Lumin, Colour, Manual etc.)then press Combi. This will save that mask. Now create a new InstaMask. When you’re done, you can press Add. This will add the selection in your new mask to the selection of the first mask. You’ve combined selections.
Or if you press Subt, you will have subtracted your new selection from the original selection.
Click here to return to the top of the page
Video Tutorial
Skip ahead to 8:15
httpv://www.youtube.com/watch?v=nBiB5tP–h0