LAB Saturation Layer in Photoshop
This LAB Saturation Layer in Photoshop Article by Brian Knott. If you would like to write for us, please read here.
Today we take a look at adding a LAB saturation layer to our images. There is a saturation slider built into photoshop but instead, I will be using an alternative method that gives me more control and better results than the saturation slider.
The problem with the saturation slider is that it can affect the brightness of color tones. It can also add noise. By using a LAB layer we have more control. We can avoid the side effects of the standard saturation slider.
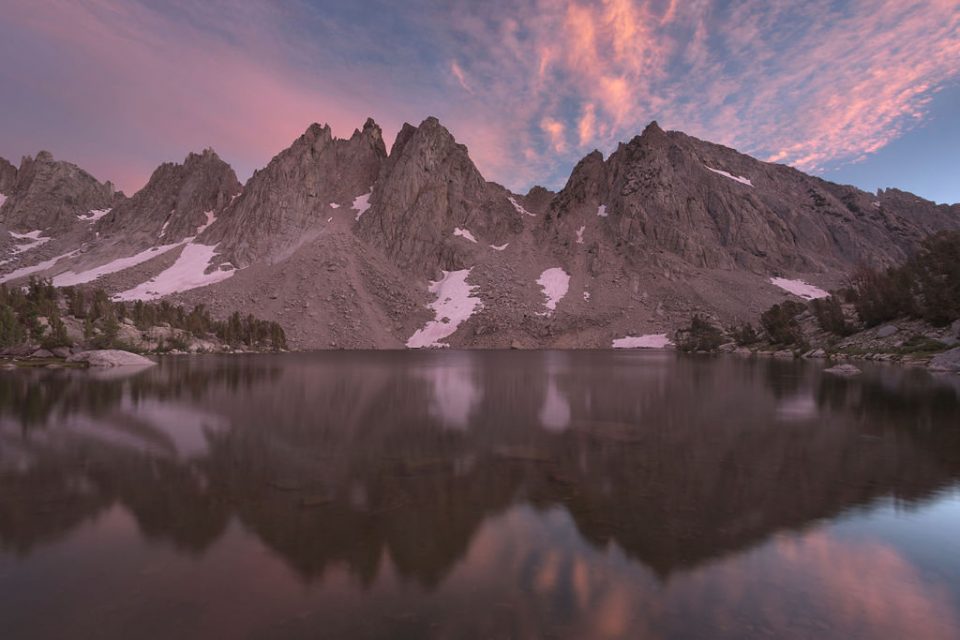
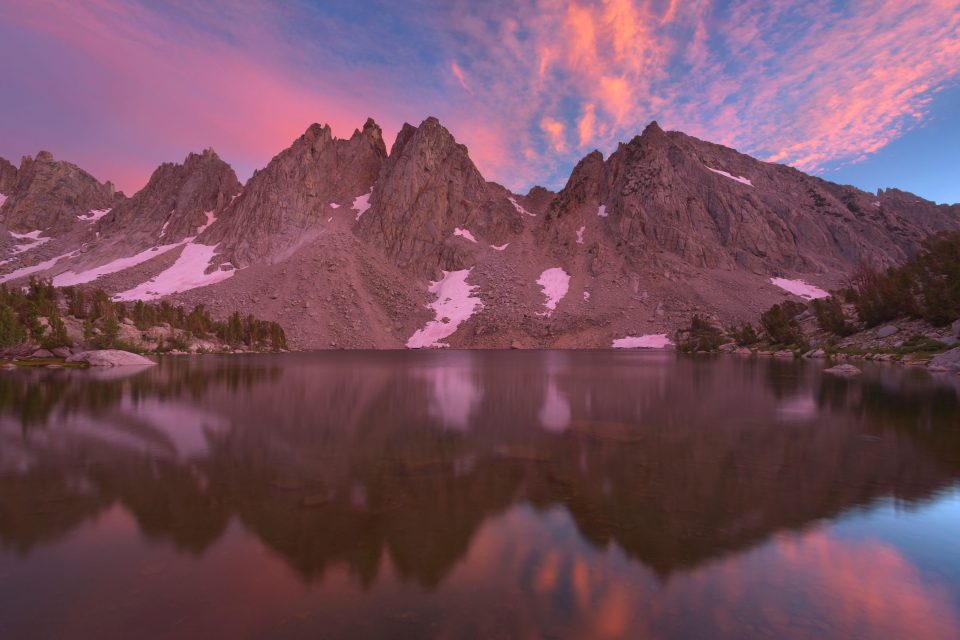
Original file before saturation adjustments.
How To Apply a LAB Saturation Layer
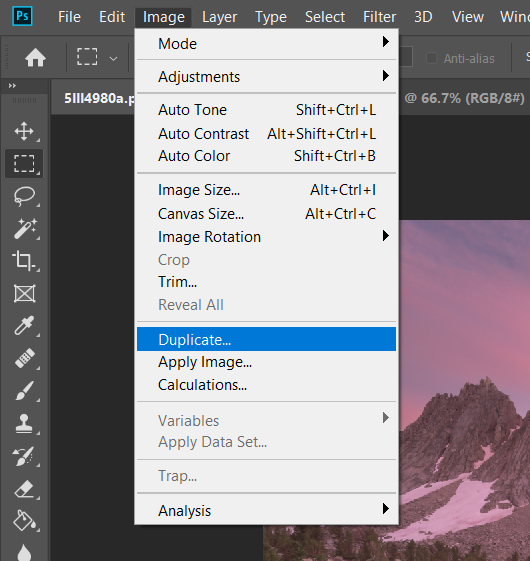
1. Duplicate the image via the top menu Image>Duplicate. In the dialogue box select Duplicate Merged Layers Only if you had multiple layers. Click OK.
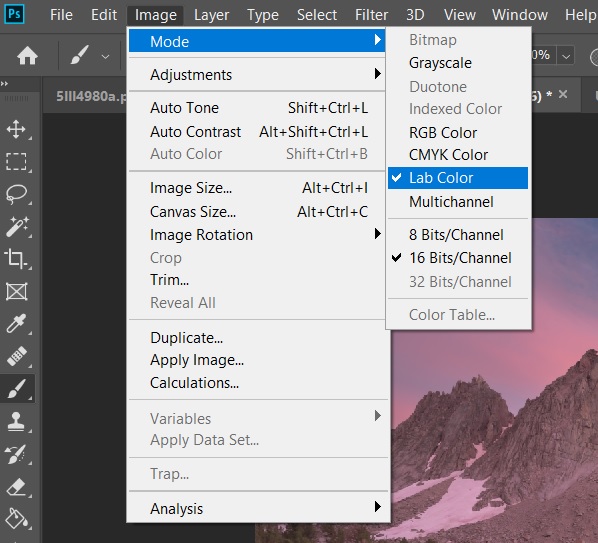
2. Change the color mode to LAB by going to Image>Mode>LAB Color.
3. Duplicate the background layer by using Ctrl+J (Cmnd+J in Mac) or in the menu by selecting Layer>Duplicate Layer.
4. Change the blending mode of this new layer from Normal to Overlay. Using the drop-down menu at the top of the layers panel. The effect will have overly exaggerated contrast now but we’re not done.
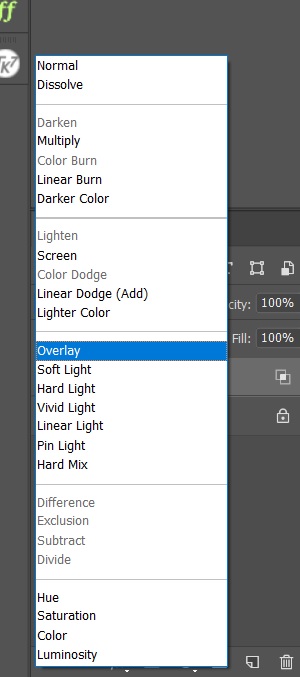
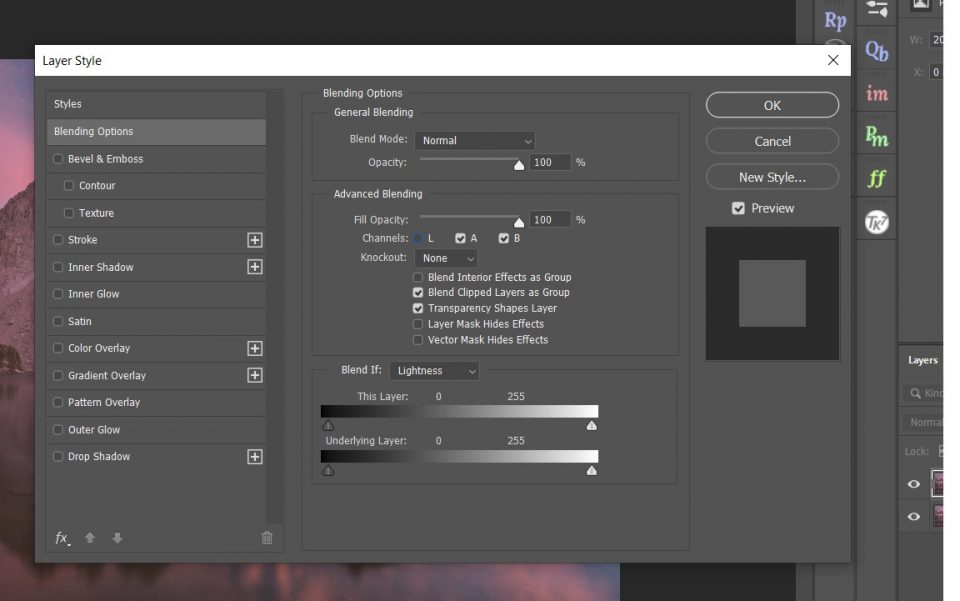
5. We now need to open up the Blending Options dialogue by double clicking the duplicated layer or right clicking the layer and selecting Blending Options. Under Advanced Blending you will find channels L, A and B checked off. Uncheck the L channel and click OK and see the saturation effect.
If you like the overall results skip to Step 7. But if the saturation needs tweaking go to the next step.
In this example, there are areas where the pink clouds are so oversaturated that they are losing detail so I will make some adjustments.
Enter your email below and join our community of more than 100,000 photographers who receive regular tutorials and have also

Subscribed to our newsletter,
Downloaded our FREE Photoshop Course
Got our FREE Easy Panel for Photoshop
And have our FREE Essential Guide To Luminosity Masks E-Book
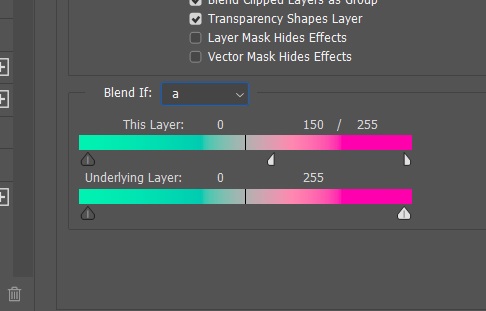
6. If any particular color channel is oversaturated, we can adjust them individually to balance out our saturation needs.
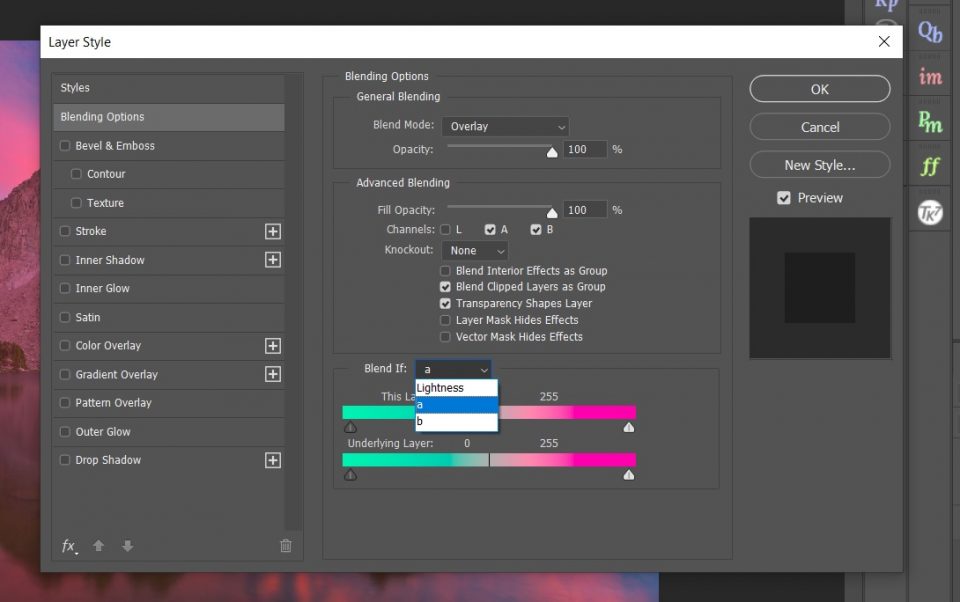
- Go into Blending Options. First, in the drop-down menu in Blend If, you’ll need to select channel A and/or B to make each adjustment.
- Channel A is Cyan/Magenta, Channel B is Blue/Yellow. For example, if you want to desaturate the blues then select the B channel.
- Use the This Layer slider to make the adjustments.
- Hold down Ctrl and Alt (Cmnd and Opt in Mac) and drag the slider from the blue over towards the yellow until you are satisfied (you can watch the effect in real-time on the image).
- Similarly, if you need to desaturate the magentas then, again holding down Ctrl and Alt (Cmnd and Opt in Mac), drag the magenta slider towards the cyan side in channel A.
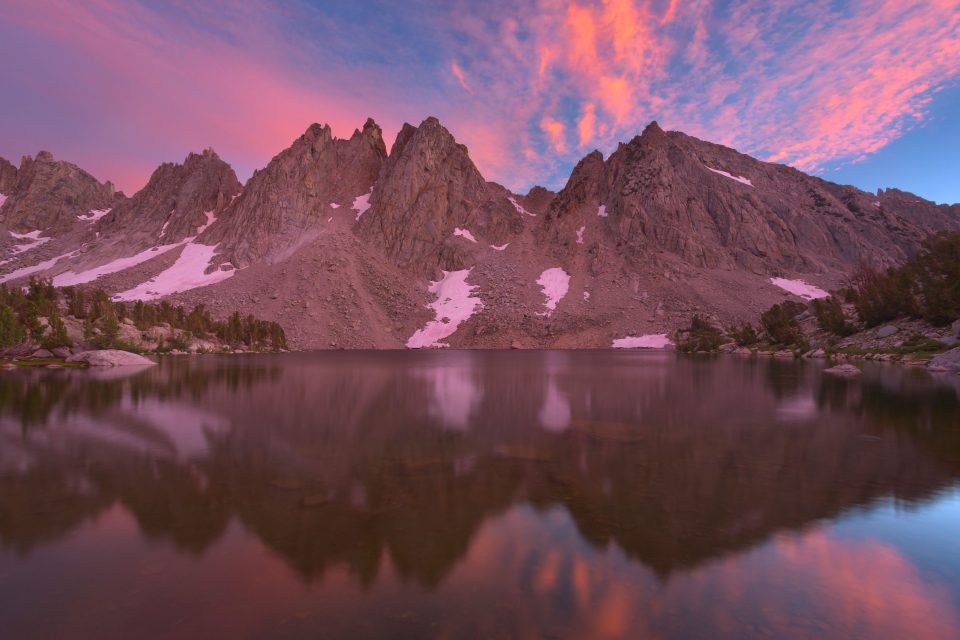
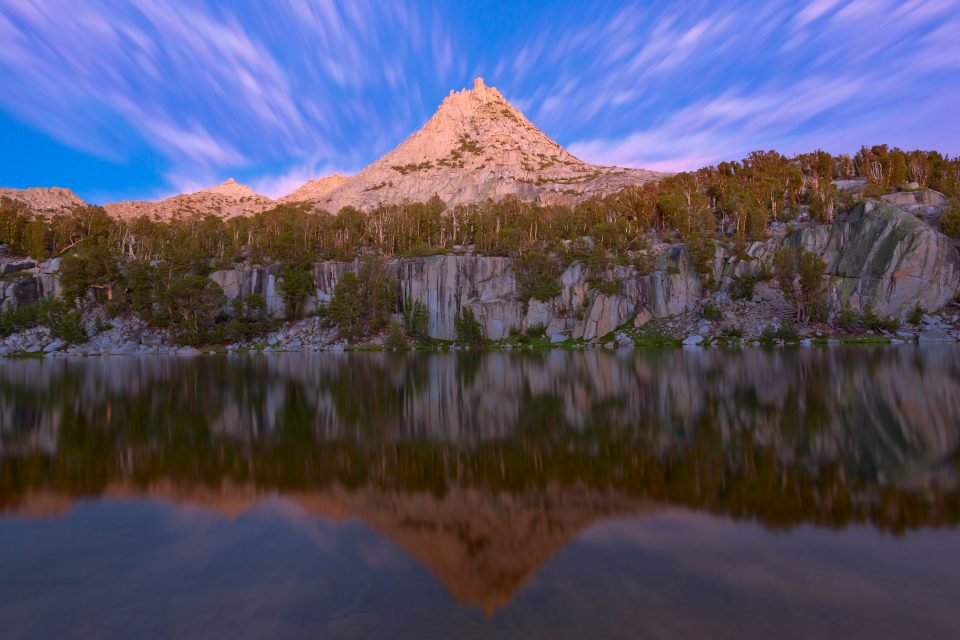
Here is the result of dropping down the magenta tones. You can now see the clouds are still a nice pink but we have restored the detail in them.
I wanted to keep the magenta saturation in the mountains though so I painted out that area with a black mask.
6a. Furthermore, if you want to completely desaturate one color but keep the rest of the channels saturated.
Drag the end of that slider to the middle until it reads 128, this time without holding down CTRL and ALT (this will render the saturation for that color to zero while leaving the others untouched).
6b. On the contrary, if any color is still lacking in saturation, you can just duplicate the saturation layer and the effect will be doubled.
Each layer can be duplicated as many times as you need (each duplication amplifying the previous effect). Once you get a good baseline saturation on whatever color was lacking, you can repeat the action above of desaturating other color channels if they have over saturated with the duplicated saturation layers.
7. When our adjustments are done, simply flatten the image by right clicking a layer and selecting Flatten Image.
Now hold down shift and drag this saturated duplicated image onto the original file or use Ctrl+A (Cmnd+A) and then Ctrl+C (Cmnd+C) to copy the image and then use Ctrl+V (Cmnd+V) on the original file to paste it as a new layer. This will put your saturation layer on top of any original layers you might have had. Adjust opacity as desired. Rename the layer appropriately.
If you need to make any further adjustments to your image you can either add new layers above the saturation layer or you can change the blending mode of the saturation layer to Color and you can now adjust any layer beneath and the results will be visible.
Here’s Another Example
Let us show you another example where a LAB Saturation Layer has been applied.

I think you’ll find that the blues are too saturated and not very natural looking.
To resolve this oversaturation, I opened up the Blending Options again and, while holding Ctrl + Alt (Cmnd + Opt), I dragged the cyan slider towards magenta and the blue slider towards yellow until it looked more natural and gave us a balanced LAB Saturation Layer
Here is the final result that I am happy with.
Additional Resources
This tutorial was written by Brian Knott. Website | Facebook
Thank you for reading this article on LAB Saturation Layer in Photoshop, You might also be interested in the articles below. Be sure to sign up for our newsletter for more tutorials and great offers.
Enter your email below and join our community of more than 100,000 photographers who have also
Subscribed to our newsletter.
Downloaded our FREE Photoshop Course.
Got our FREE Easy Panel for Photoshop.
And, have our FREE Essential Guide To Luminosity Masks E-Book.
Online Resources
This is Brians second article for us. Here you can read his first article A Hidden Way To Add Precision Contrast To Your Photos.
To find out more about LAB I found this post which explains What Is Lab Color Space? (And How to Use It in Photoshop)