

PS Secrets 24: How To Dodge & Burn in Photoshop Effectively
In this week’s tutorial we will look at one amazing way to dodge and burn with precision in Photoshop, while maintaining a non-destructive workflow and without affecting the colours in our image. We’ll also look at a great way to increase local contrast similar to Nik Color Efex’s Pro Contrast filter, while targeting those changes specifically to our highlights or shadows.
The traditional Dodge and Burn tools found in Photoshop require us to use destructive workflow, while over-saturating the colours in our image. There are many different ways to dodge and burn in Photoshop that offer cleaner results.
The techniques in this tutorial use a mixture of blend modes, the paintbrush, and masks. If we combine a white or black paintbrush with a layer that has a blend mode set to Overlay or Soft Light, we can often dodge and burn very cleanly. Combing this with accurate masks, will give us a beautifully clean result. Don’t worry if this sounds confusing, the video will explain all.
Step-by-Step Guide to Dodging and Burning
1. The first thing we need to do is to add a new layer.
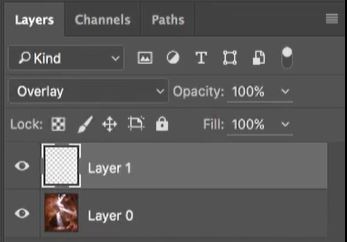
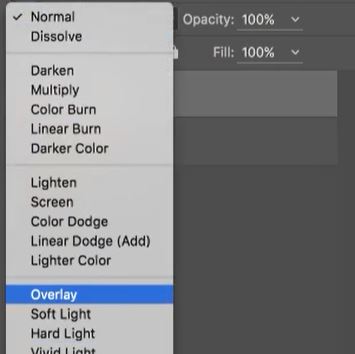
2. We need to set the blend mode for the new layer to Overlay or Softlight.
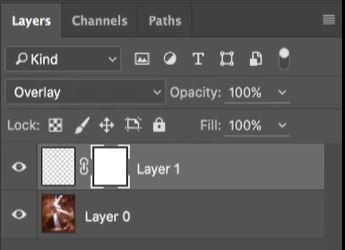
3. Add a Mask to the new layer.
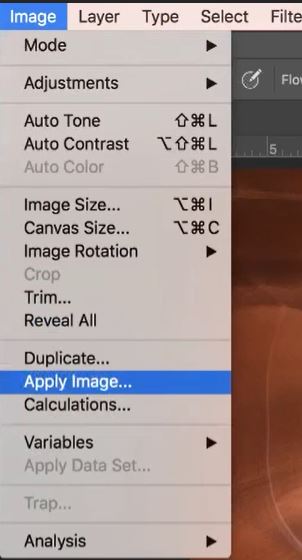
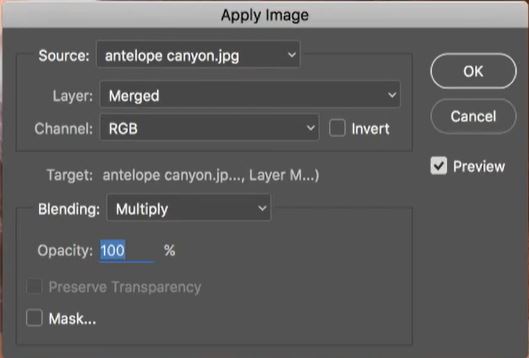
4. Now go to Image>Apply Image
5. If you want to target the highlights make sure your settings are the same as below:
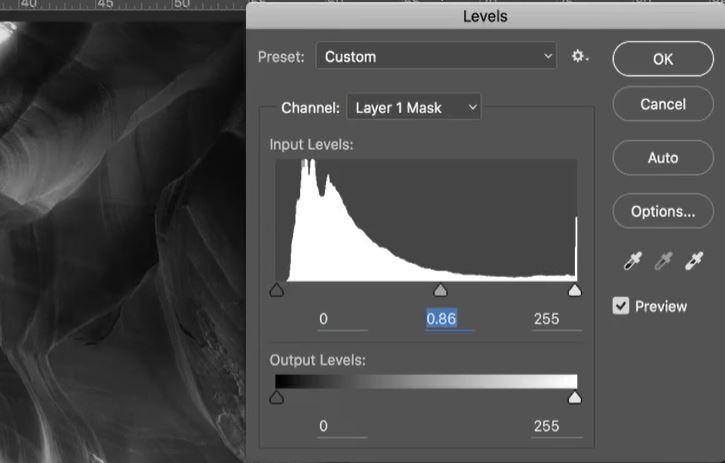
6. To make your mask more targetted to highlights use a Levels adjustment by pressing Ctrl+L on a PC or Cmd+L on a Mac then moving the sliders. The brighter areas will be affected the most.
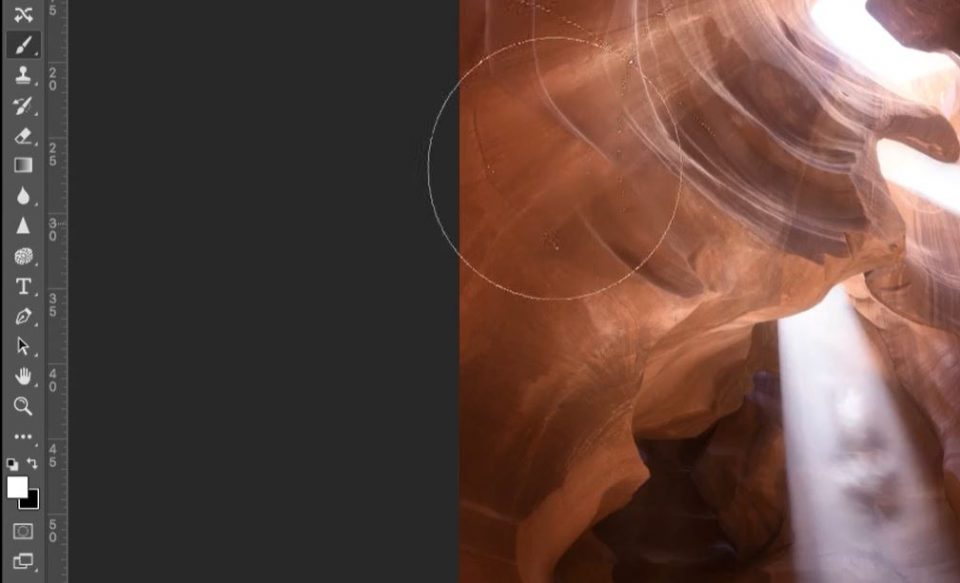
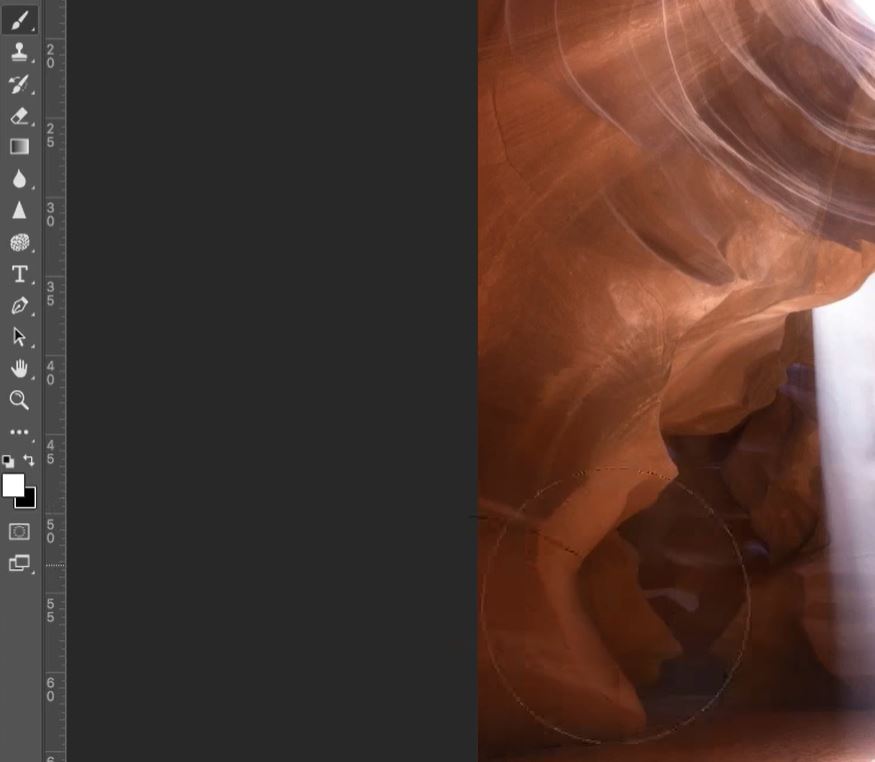
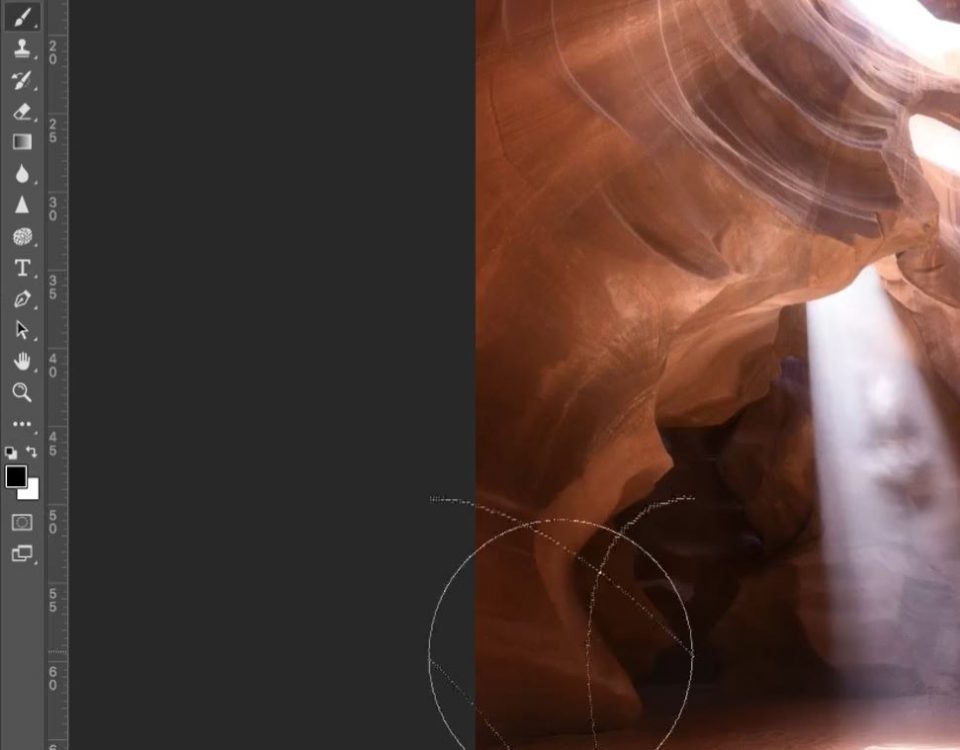
7. Now, select your brush tool and a white foreground colour. Then paint the area that you want to brighten (Dodge)
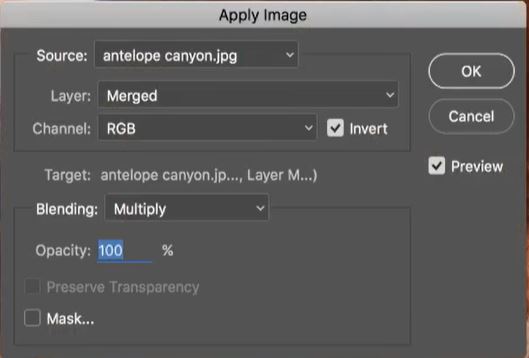
8. If you want to target the shadows use the same settings as below making sure you tick the box to Invert the image.
9. To Dodge (brighten) we use the brush tool with a white foreground. To Burn (darken) we use the brush tool with a black foreground. colour.
More Photoshop Secrets
Click to discover more Photoshop Secrets
Enter your email below and join our community of more than 100,000 photographers who have also
Subscribed to our newsletter.
Downloaded our FREE Photoshop Course.
Got our FREE Easy Panel for Photoshop.
And, have our FREE Essential Guide To Luminosity Masks E-Book.
To go directly to any of our products, simply click on the image below.


