
A Truly Transparent Blur Layer In Photoshop
Recently a Raya Pro user got in touch with us to ask for help in his workflow. They wanted to know how to make a transparent blur layer in photoshop using Raya Pro or Lumi32. Here is the email we received.
I have a question that maybe you can shed some light on and maybe a new feature you could design into your app if it doesn’t exist.
In photoshop I will often use a blur effect on water and clouds. Unfortunately, the only method that I can find to blur using photoshop, in-effect just paints a new blur layer like a clone stamp (or like a stamped visible layer for the blurred part of the photo) on a layer that is the new blurred layer which prevents me from making any adjustments under that layer that will show on the blurred layer. I’m sure this sounds confusing.
Is there a way using Raya Pro or Lum 32 (I have both) that I can have a blur layer that is not a clone/stamped visible layer that will allow me to make changes below the blur layer that will still show on the blur layer? In effect, this would be like a semi-transparent blur layer that still allows adjustment below to show through.
I have literally scoured youtube and it seems like it can’t be done. Is there ever was a designer that could make this happen I’m sure it would be you.

How To Make A Transparent Blur Layer In Photoshop
We had to think a little bit different with this one by using a well-known technique for the wrong reasons. The technique we used was Frequency separation. Because frequency separation separates texture from colour, we knew this would be a good platform to start from. Here are the steps we took to make a transparent blur layer;
-
Duplicate the background layer twice by pressing Ctrl+J (PC) or Cmd+J (Mac) two times.
-
Double-click on the name of the top layer and change the layers name to Local.
-
Now, double-click on the name of the middle layer and change that layers name to Global.
-
Select the Local (top) layer and go to Filters > Other > High Pass.
-
Adjust the slider to give just enough contrast on the edge with the minimum halo effect then click OK.
-
Change the blend mode of the Local layer to Linear Light.
-
Hide the Local layer by clicking on the eye icon.
-
Select the Global layer and go to Filter > Blur > Gaussian Blur.
-
Move the radius slider to blur your image then press OK.
-
Click on the eye icon of the Local layer to make it visible again.
-
The image should look very similar to what you started with originally. If the image looks really bad it means the Radius settings on your Gaussian Blur was too high. You might have to redo this layer using a smaller setting.
-
Select the Local layer and go to Layer > Layer Mask > Reveal all.
-
Press B to select the Brush Tool and set your foreground colour to black and the opacity to 100%.
-
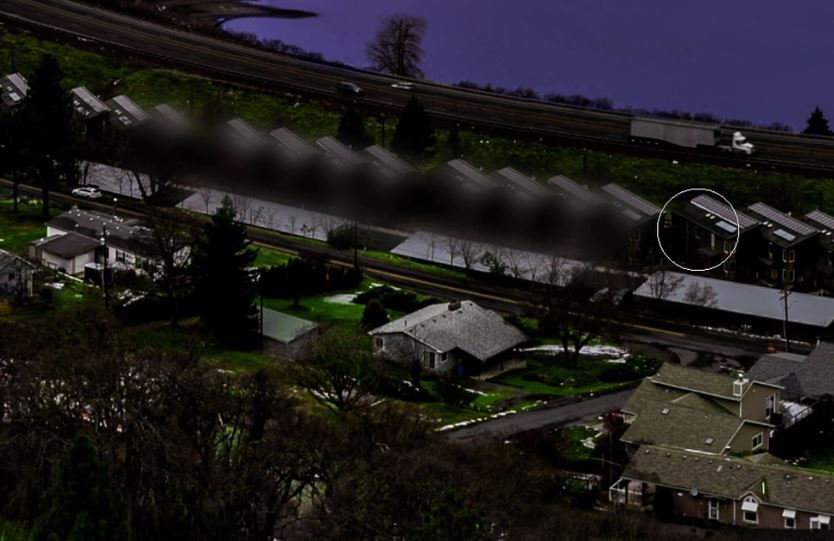
Now paint over the areas that you want to blur by holding down the left mouse button and dragging your cursor over your image.
-
If you make a mistake you can change the foreground to white and paint back over the area that you don’t want to be blurry.
-
Any adjustments that you need to make to your image must be made in between the Local and Global layers.
The Best Way To Make An Transparent Blur Layer In Photoshop
This whole process is made so much easier with the use of Raya Pro.

– Tutorial continued below –
Enter your email below and join our community of more than 100,000 photographers who receive regular tutorials and have also

Subscribed to our newsletter,
Downloaded our FREE Photoshop Course
Got our FREE Easy Panel for Photoshop
And have our FREE Essential Guide To Luminosity Masks E-Book
Making A Transparent Blur Layer In Photoshop
1. Select the layer that we will be working from.
![]()
2. Open up the Filters and Finish panel.
![]()
3. Click on one of the Freq Sep buttons, either 16 or 8.
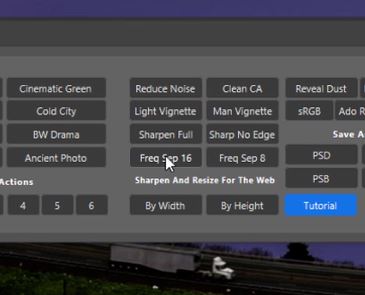
4. Adjust the Gaussian Blur Radius slider and click OK.
![]()
5. A new group will appear in the layers panel called “JM Frequency Separation”.
![]()
6. Expand the group by clicking on the small down-arrow next to the visibility icon.
![]()
7. Select the Local layer inside the group and add a layer mask.
![]()
8. Press B to select the Brush tool, set the opacity to 100% and the foreground to black.
![]()
![]()
![]()
9. Begin to paint onto the layer mask in the areas that you want to be blurry. To undo any mistakes set the foreground to white and paint over the mistake to undo it.
10. Any adjustments that you need to make to your image must be made in between the Local and Contrast layers.
![]()
You might be thinking this is unnecessary. Why don’t you just blur the image and make adjustments above the blurred layer so that they are all effected evenly. I asked the same question and here was the answer that I got:
You raise a great question about having the adjustment layer at the top above the blur layer, and I will clarify. The video I sent you was on a flattened Photoshop file. I flattened the file so that I would have enough cpu power to video capture my screen when making adjustments to a large file. My original file with all my adjustment layers has 39 layers. This is why having a stamped visible layer causes problems as it effectively makes the edit destructive and difficult to go back and make changes. I often need to go back and make changes to many adjustment layers to dial in the look that I like.
Thanks again for helping me with this. I’ve never thought of using your technique for blur purposes. I have used this to separate out skin color and texture layers to do a face retouch but never have considered using this for blur adjustments. I have literally scoured Youtube and no one has shown how to do this blur technique with placing all the adjustment layers between the “color” and the “texture” layers. All the Youtubers (that I have found) only show the destructive stamped visible layer method and never place any other layers between a “color” and the “texture” layers when doing skin or landscape adjustments.
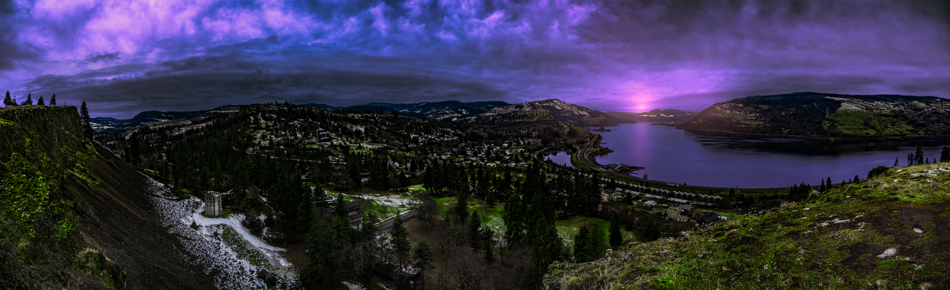
The Artist is @evadoccubart
Thank you for reading this article on Transparent Blur Layer In Photoshop, be sure to sign up for our newsletter for more tutorials and great offers.

Enter your email below and join our community of more than 100,000 photographers who have also
Subscribed to our newsletter.
Downloaded our FREE Photoshop Course.
Got our FREE Easy Panel for Photoshop.
And, have our FREE Essential Guide To Luminosity Masks E-Book.
FREE Photoshop Course

The Art Of Photography

Raya Pro for Photoshop

Other Articles That Might Interest You