How To Use the Warp Tool to Balance Composition in Photoshop
It’s a fact that the human brain is pleased by symmetry. So if we can create a composition based on symmetry, it is easier to create an image that is pleasing to the viewer. The problem we have in landscape photography is that sometimes the scene just isn’t symmetrical. I mean it doesn’t have to be perfect but have a similar balance to both sides of an image can make a real difference. It also helps to frame a scene and bring completion to your photo. We’ll share some examples of symmetrical completion and show you how to use the warp tool to balance the composition of landscapes in photoshop.

If you wish to experiment with this, I would really appreciate it if you included my name (Duke McIntyre) and www.shutterevolve.com when you publish your image. If you post your published image on our Facebook page I’d be happy to check it out.
Examples Of Symmetrical Completion in Photography Composition
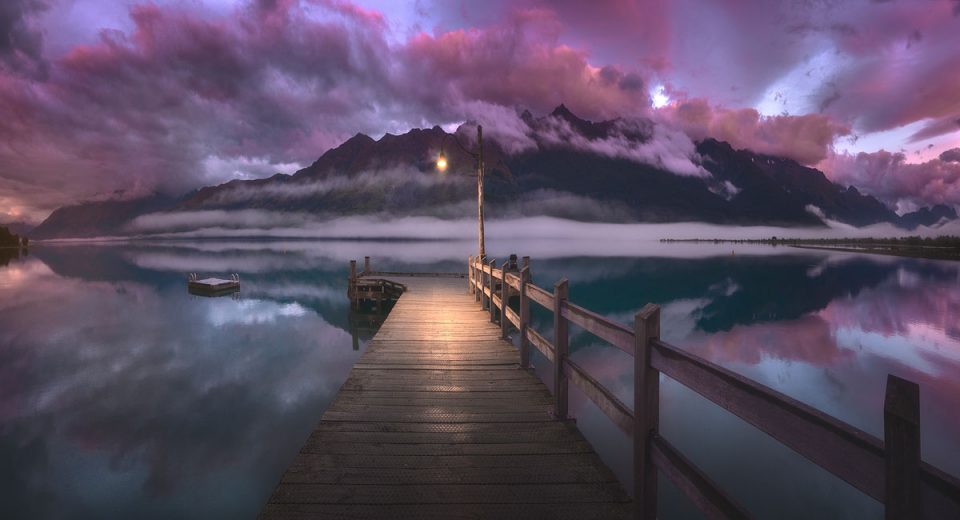
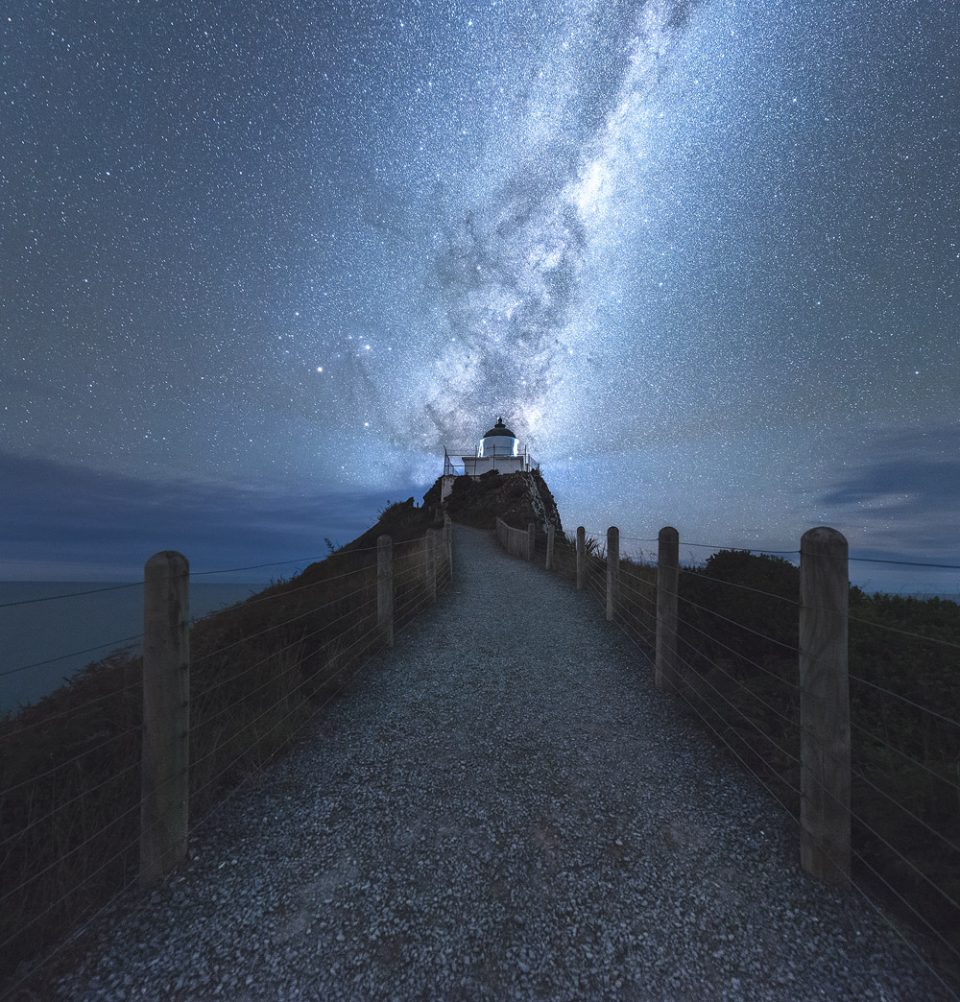

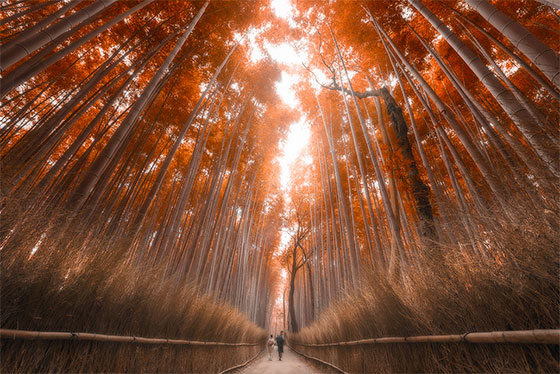
All of the above images are from our portfolio. They’re all good examples of symmetry in landscape photography.
Mother nature rarely offers us symmetry, but when it does we feel compelled to photograph it. Fortunately for us, if the landscape doesn’t provide us with perfect symmetry we can manipulate it in Photoshop. The warp tool in Photoshop is a really easy tool to use for this.
Things To Look Out For When Using The Warp Tool In Photoshop
- Every time you warp a section of the image you need to look for any adverse effect. A good example of this is in this very tutorial. When we warped the image to straighten the centre line and level the bushes, the horizon became heavily warped and had to be severely corrected.
- You can easily get carried away. You can use the warp tool to enhance hills and peaks when trying to balance a scene. Don’t get overzealous and disfigure the landscape too much or the scene will look unnatural.
- It is hard to make a tutorial in 2-minutes. But it’s easy to get quick results with the warp tool. Take your time. Instead of making a few large adjustments, make many finer adjustments.
– Tutorial continued below –
Enter your email below and join our community of more than 100,000 photographers who receive regular tutorials and have also

Subscribed to our newsletter,
Downloaded our FREE Photoshop Course
Got our FREE Easy Panel for Photoshop
And have our FREE Essential Guide To Luminosity Masks E-Book
How To Balance Landscape Composition in Photoshop
1. If you have been editing an image and to finish off you just want to level out the scene, the first thing you need to do is merge all the visible layers onto a target layer. You do this by selecting your top layer.

2. Now press Ctrl+Alt+Shift+E (PC) or Cmd+Opt+Shift+E (Mac). This will create a new stamp visible layer. Click on the new layer to select it.

3. We’re going to transform this layer by pressing Crtl+T (PC) or Cmd+T (Mac). Your image should now have transform controls on the corners and edges.

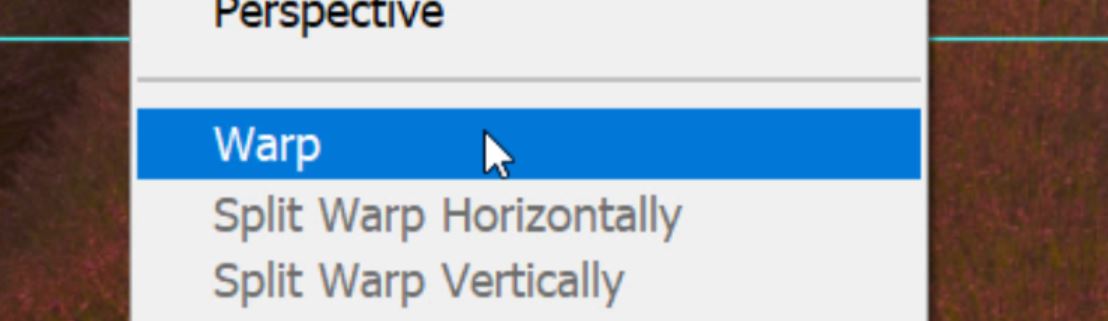
4. Right-click anywhere on the image to bring up the Transform options.
5. From the options list that appears select Warp. You can also access this by going through the Edit menu (Edit>Transform>Warp).
6. Now instead of having transform controls on the corners and edges of your image, you should have warp controls.

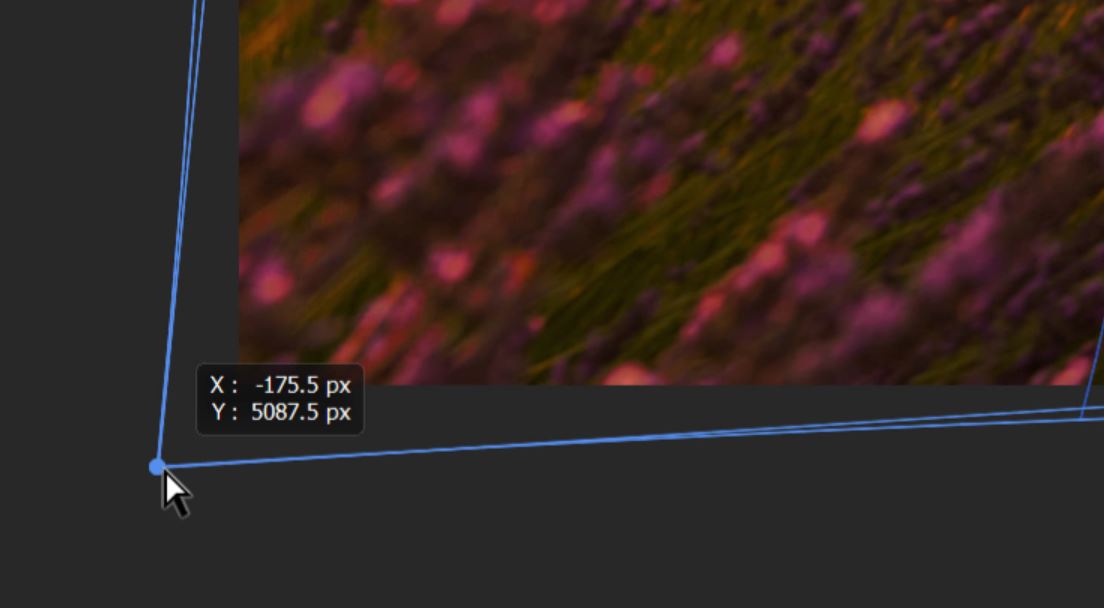
7. To begin warping your image, simply hold down your left mouse button anywhere on the image and start to drag your cursor. As soon as you start to warp the image, blue lines will appear to help show you how far the image has been warped.
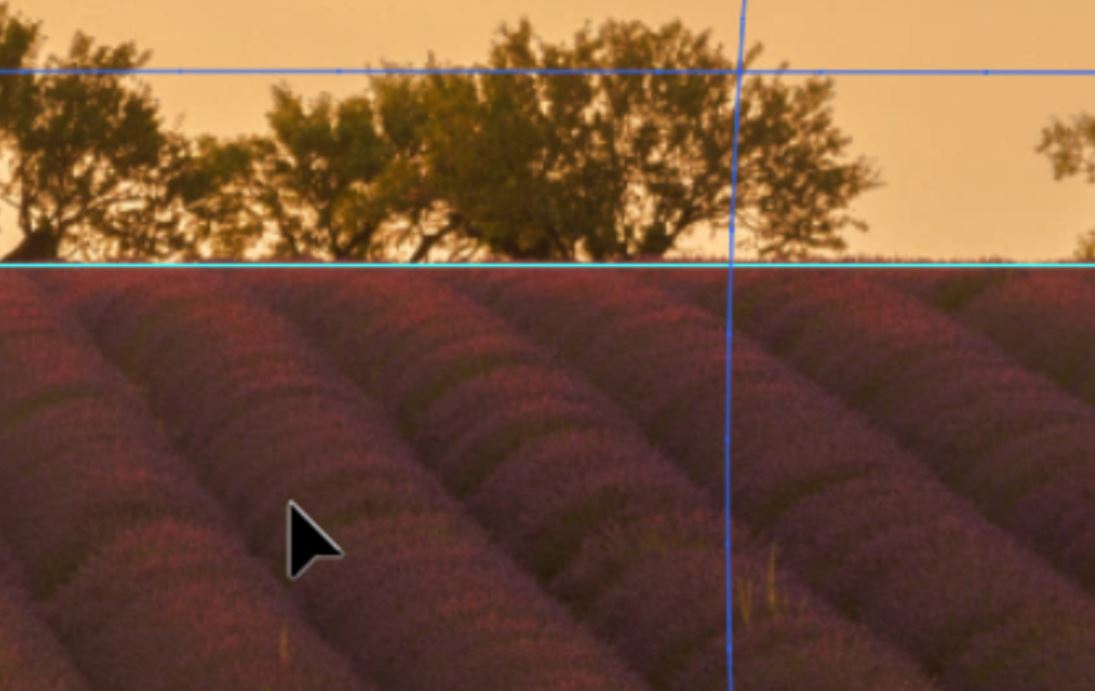
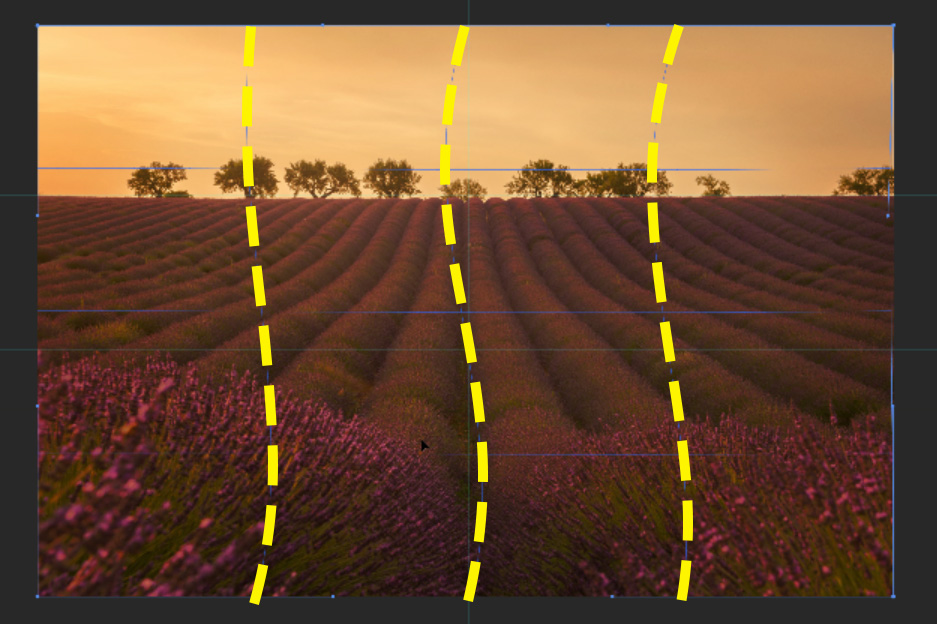
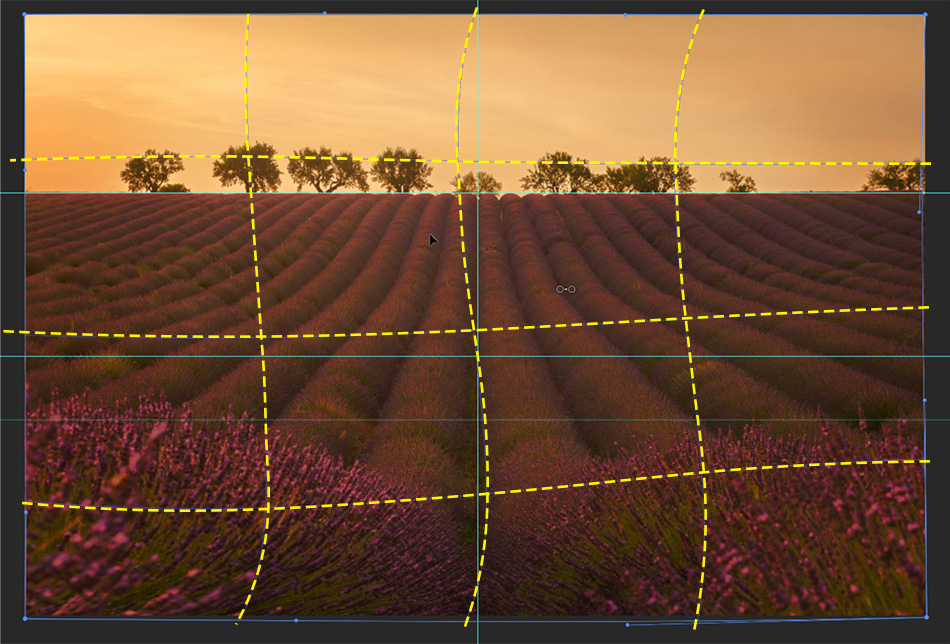
8. I started the warping process this correcting the vertical centre line. The image below shows how much I needed to warp the vertical composition to get it to line up how it wanted it to. I’ve highlighted the adjustments in yellow.
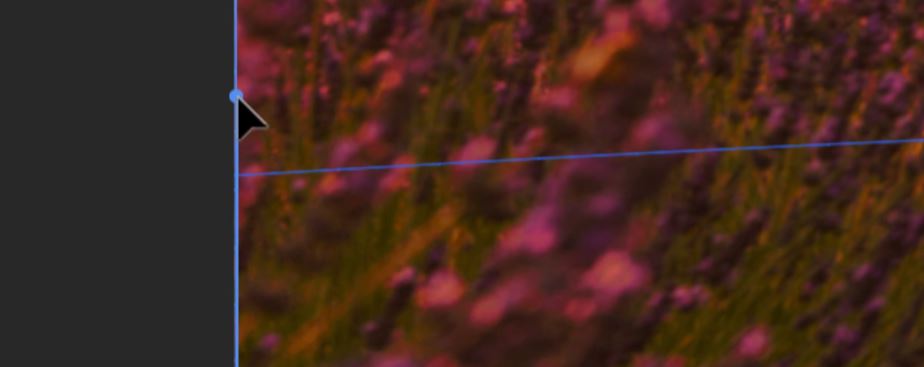
9. You can also warp the image by dragging the corner controls around.
10. And by doing the same with the edge controls.
11. As I mentioned earlier, you need to watch out for any adverse effects when warping. Whilst sorting out my vertical orientation the horizontals have been massively distorted. The horizon is supposed to match the blue horizontal line.

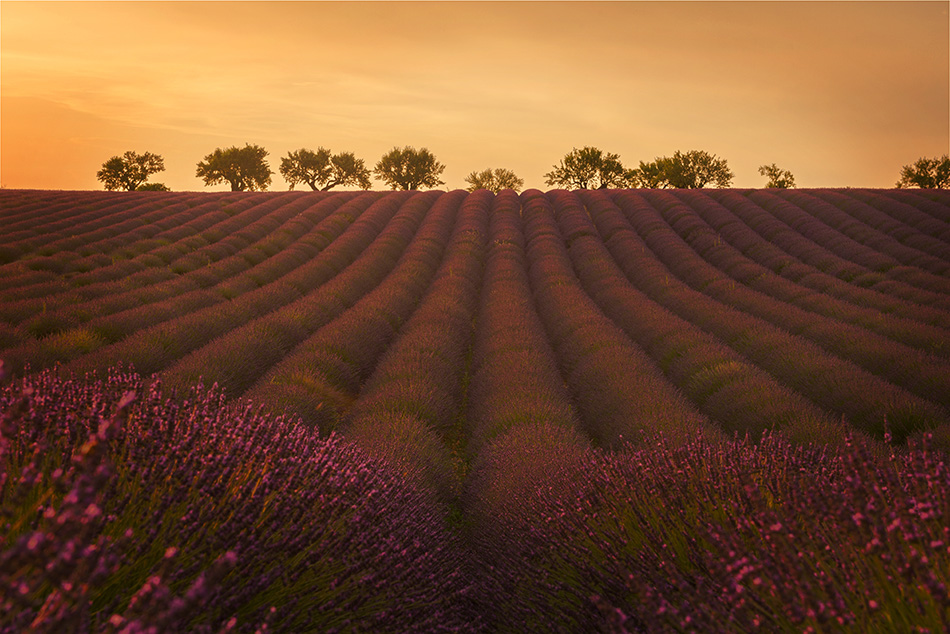
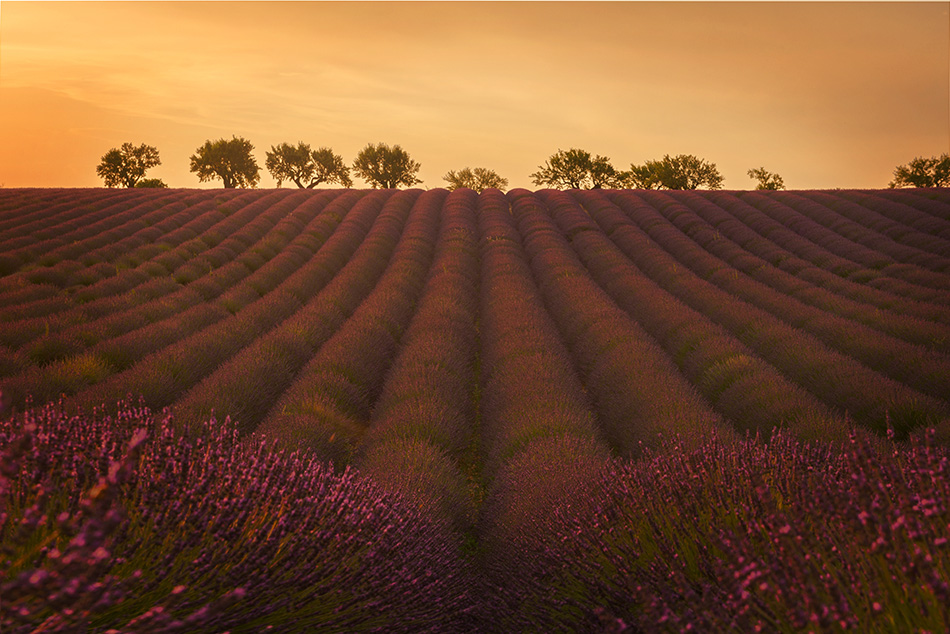
12. It’s easily fixed with the Warp Tool, but it’s something you need to watch out for constantly. In no time at all, we have straightened out this lavender field. And here is the warp adjustments that were needed to balance this composition.
Take a look at the before and after images.
[compare]
[/compare]