Using The Dodge & Burn Tool Non-Destructively in Photoshop
A powerful, yet easily destructive set of tools in Photoshop, are the dodge & burn tools. With just a few whisks of your mouse or tablet pen, you can deepen shadows and extend highlights thanks to these great options. They can be one of the best tools for selective contrast adjustments, intensifying the mood within your photos. And you can equally increase mood through using the Burn tool to create a vignette.
What is the best way of using the dodge & burn tool non-destructively in Photoshop?
When we first start using Photoshop, we’re tempted to duplicate the layer on which we’re working and apply the tools directly. Or worse, we don’t even duplicate our base layer, and end up with a completely destructive workflow.
However, one of the cleanest, least destructive ways of using the Dodge & Burn tools is through a new layer filled with 50% gray. In this way we can still make specific contrast adjustments with minimal colour degradation.
Photoshop Steps
1. Open your image in Photoshop. Duplicate the layer (this isn’t necessary but it is always good practice). Make sure the duplicated layer is selected.
2. Go to Layer>New>Layer. A new layer will be created. You can also do this by pressing the Create New Layer option at the bottom of the layers panel.
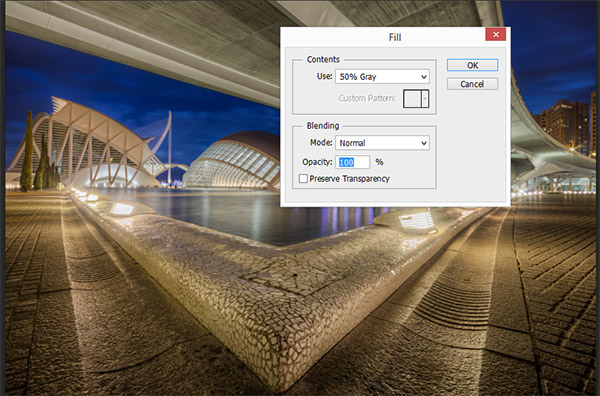
3. Now go to Edit>Fill. A dialogue box will appear like the one below. Make sure your settings are the same as the one below and press OK. This is where we fill the new layer with 50% gray.
4. The new layer will now be gray. Just above the new layer, you will see the word Normal. This is the blend mode. Click on this and scroll down to Soft Light or Overlay. For this image we’re using Soft Light, which has a softer effect.
5. Now you’re ready to dodge and burn. Simply select either the dodge or burn tool, as you normally would. And with the gray layer selected, you apply the dodge or burn tool on that layer.
That’s it! By dodging & burning on this new layer, we create the same changes we would have otherwise, but we do it completely non-destructively.
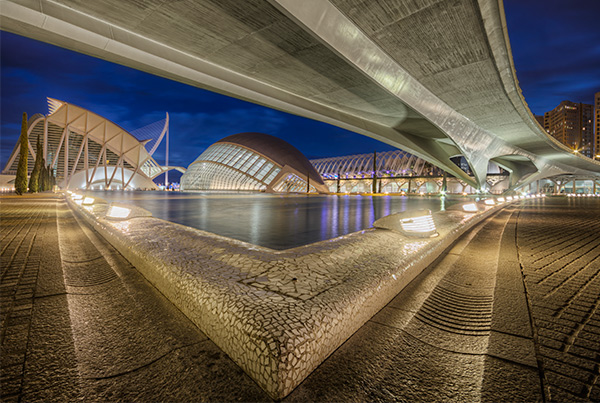
Before Dodge & Burning
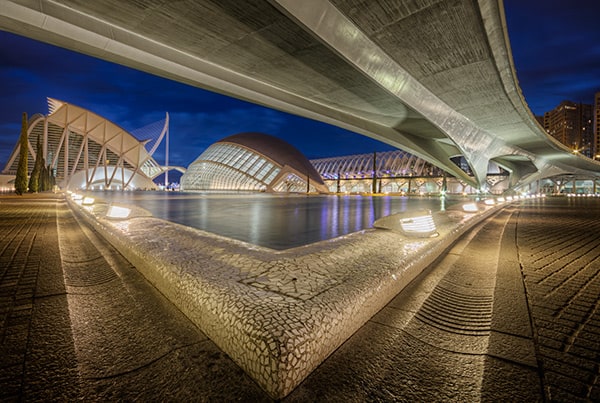
After Dodge & Burn
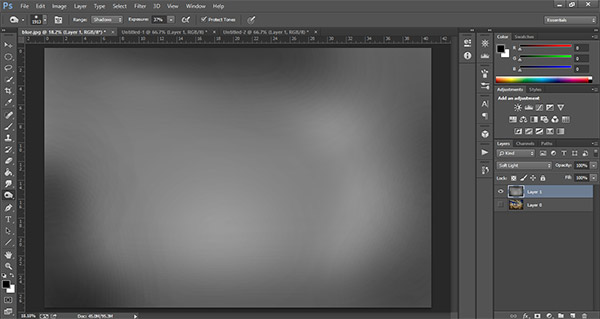
You can also see exactly where you’ve applied the dodge and burn, and how intensely, by making the new gray the only layer visible.
Dodge and Burn applied to image above
Alternative Dodge & Burn Tutorials Elsewhere On The Web
Enter your email below and join our community of more than 100,000 photographers who have also
Subscribed to our newsletter.
Downloaded our FREE Photoshop Course.
Got our FREE Easy Panel for Photoshop.
And, have our FREE Essential Guide To Luminosity Masks E-Book.
To go directly to any of our products, simply click on the image below.


