
How To Blend Exposures Without HDR
The techniques I’m going to show you in this article are truly powerful to the photographer who wishes to take their post-processing into their own hands, and learn how to blend exposures for the cleanest, most natural results. I hope you enjoy the information. There are many more free tutorials like this to come. And if there’s a photographer friend or photography group who you think would like to learn these techniques, please feel free to share this article with them.
A few years ago I was a constant user of HDR software. I even owned a rapidly-growing HDR magazine. And then one day I stopped using HDR software. I stopped tone mapping completely. That was over 2 years ago. And it was the best decision I took in my photography career.
I had reached a point where I simply wasn’t happy with the results I was getting. I knew that relying on HDR software to blend exposures, and create an ‘HDR-look’ was holding me back. I wanted to take full control over my workflow – both shooting and processing – to create sharp, dynamic, and natural images.
I understand the need for some to want an easier option – one click, a few sliders, and the image is done. After all, life can be hectic, and the quicker we can get things done, the better. But why not think of photography as that one thing where we don’t look for the quick solution, where we take our time and extend our skill set? This was the mindset that led me to Digital Blending and advanced post-processing in Photoshop, which forced me to slow down, and start to get more out my images.
Before we get into Digital Blending methods, I would like to make a point here. For those of you who truly enjoy using HDR software, and equally enjoy the results you get, I don’t want you to feel like I’m insulting your imagery or way of doing things. We all have different goals, and mine were in a different direction to the ones HDR companies were going in.
I don’t want anyone to think that I’m telling them what they should, or shouldn’t be doing. In fact, I wrote the following 3 years ago, and I still feel it’s applicable today:
“While guidance can help an individual find their true footing in a particular art from, the word ‘should’ seeks only to constrict creativity. When our imaginations begin to fire it is the word ‘should’ that dulls the flame. ‘Shoulds’ are the walls that we surround ourselves in every day of our existence. We ‘should’ go to work. We ‘should’ get a pension. We ‘should’ do our homework
“In art there can be only one ‘should’. We ‘should’ not be bound by the limitations set by others”
With this in mind, for those of you yearning for something more, below are 5 Digital Blending methods that I use to blend exposures naturally in Photoshop.
1. Luminosity Masks
Easily the most powerful Digital Blending method available, Luminosity Masks take some time to master, but will completely change your photography life once you do. There is a good selection of Luminosity Mask articles on ShutterEvolve.com which you can see here: Luminosity Mask Articles & Tutorials
I’ve written about the power of Luminosity Masks many times before, and have a popular Digital Blending course teaching advanced Luminosity Mask use, but for those of you who are new to Luminosity Masks, you can see them in action in my latest youtube tutorial. You can also download the free Easy Panel for creating luminosity masks here: The Easy Panel

2. Rapid Blend If
This technique, as the name suggests, is very quick, and is often the first exposure blending technique I will try before using Luminosity Masks. Sometimes it works brilliantly. Other times it isn’t so successful. But regardless, it is a very powerful technique to have in your digital blending toolbox.
Note to my Email Subscribers, two Rapid Blend If buttons will be added to the next update of the Easy Panel, for convenience.
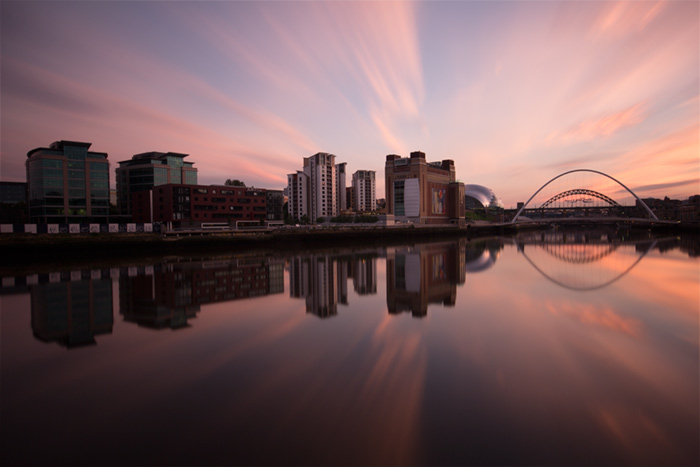
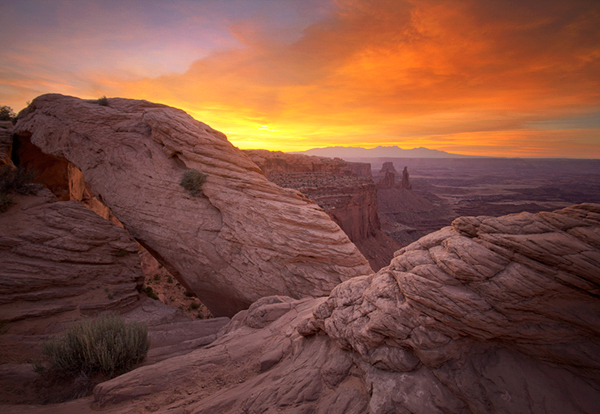
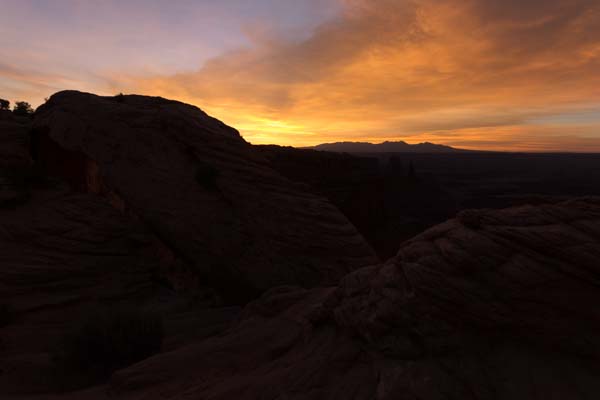
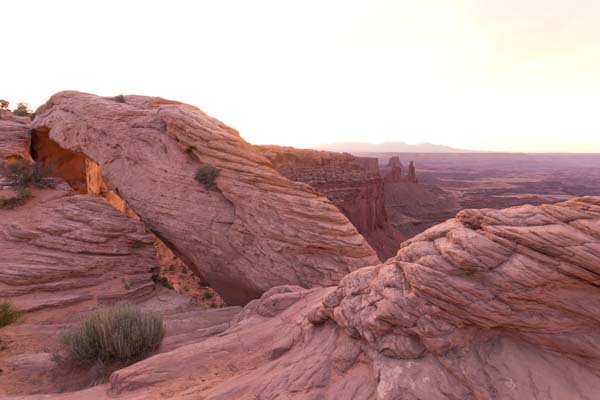
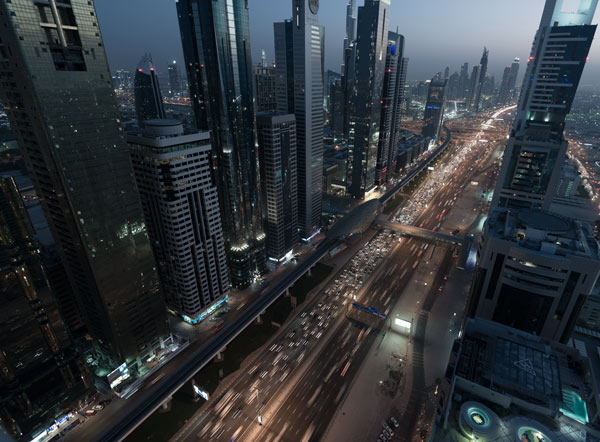
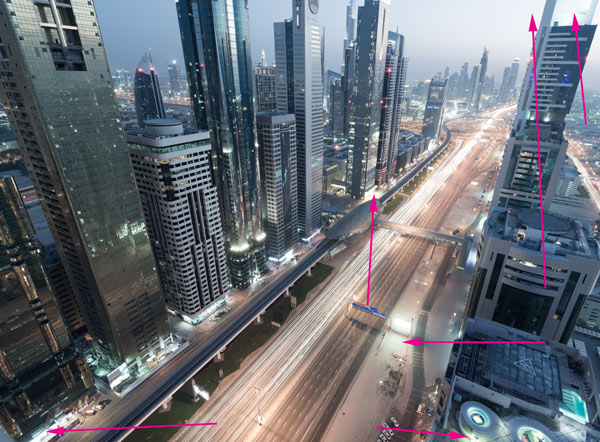
We’ll work with the two images below. One is under exposed for the sky, and the other contains information everywhere else.

The Method
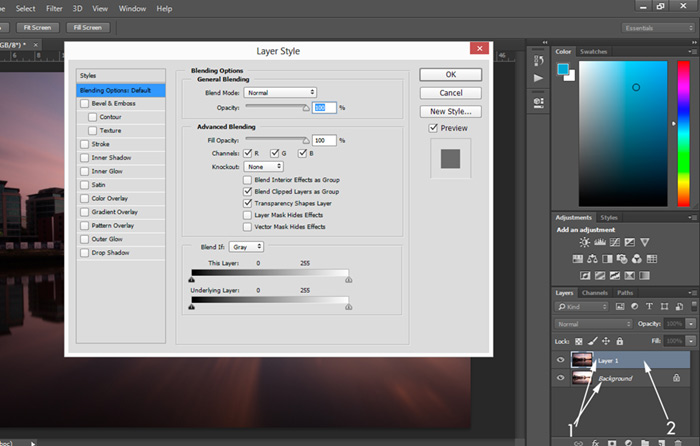
1. Layer your images in Photoshop, placing the base exposure, or brightest exposure at the bottom.
2. Next, double click on the top exposure, to the right of the layer thumbnail. The Layer Style box will appear.
3. Now go down to Underlying Layer. Hold down Ctrl & Alt, or CMD and Option on a Mac, left-click on the arrow to the left, and slide it to the right. You’ll see that the arrow splits in half. Drag the arrow all the way to the right.
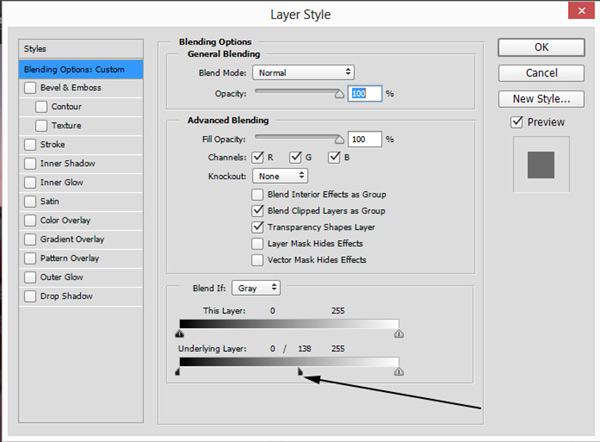
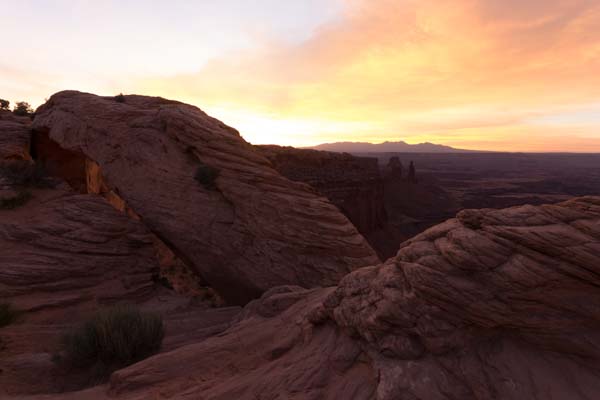
Press OK. This will have blended the two exposures. If the image is too dark, lower the opacity of the top layer until it’s bright enough.
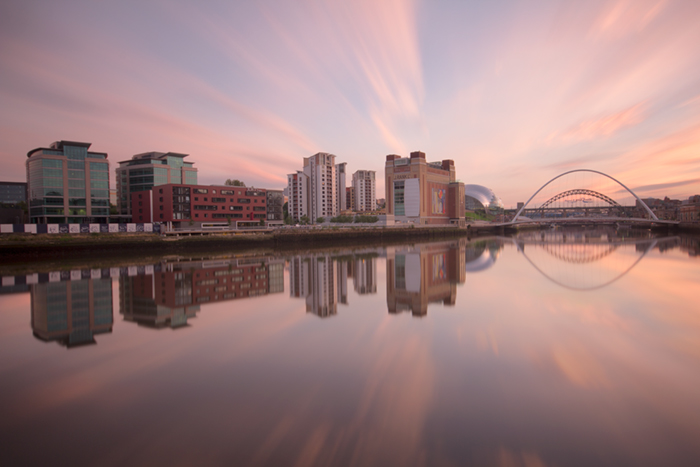
We now have an image with a greater range of light. It is lacking contrast, but a curves layer and some local contrast adjustments will give it extra life.
3. Apply Image
I’ve actually published a tutorial on using Apply Image already, showing you how to blend the three exposures below, to get to the final image. To see the tutorial, please visit here: Digital Blending Using Apply Image to Create Beautifully Natural Images
4. Gradient Masks
This is another very easy, very quick technique for blending exposures. However, it is only really useful if you are working with an image that has a flat horizon, otherwise you will end up with black edging. The video below will show you what I mean.

5. Brightness Range Selection
I haven’t spoken about this method before, but it can be extremely useful. While it isn’t as accurate as luminosity masks, it is very quick.
I’ll demonstrate with the two images below. The second one is the base exposure and we just want to recover some of the highlights by using the darker exposure below. Our goal here is not complete highlight recovery, we just want to recover enough so that our attention isn’t pulled away from the bright light trails.

The Method
1. Layer your exposures with the darkest exposure on top. Place a black layer mask on the dark exposure so it is now invisible.
2. Select the bottom exposure, and now go up to Select>Color Range. A box will appear. At the top of this box you will see Sampled Colors. Click on this to open the drop-down box and go down to highlights.
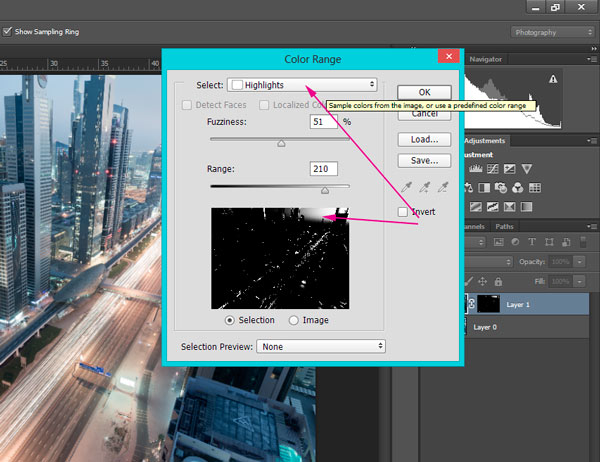
3. This option will automatically select a range of highlights in your image. You can alter this by using the Fuziness and Range sliders in conjunction with each other. The white shows you what is selected and everything else won’t be selected. When you feel you’ve gotten a good selection of the highlights, press OK.
4. You will now see lots of marching ants. Hold down CTRL+H, or CMD+H to hide the marching ants. Now select the black mask on the darker exposure, choose a white brush set at an appropriate opacity (I used 50% here), and start painting in the highlights from the darker exposure.
And voila! That is how you recover highlights with the Brightness Range Selection method.
And those are 5 powerful methods for blending exposures without HDR software. Digital Blending is a wonderful journey to take. If you’d like to fast-track your Digital Blending skills, please feel free to check out my Art of Digital Blending course.
Enter your email below and join our community of more than 100,000 photographers who have also
Subscribed to our newsletter.
Downloaded our FREE Photoshop Course.
Got our FREE Easy Panel for Photoshop.
And, have our FREE Essential Guide To Luminosity Masks E-Book.
To go directly to any of our products, simply click on the image below.


