How To Add Colour To Highlights in Photoshop
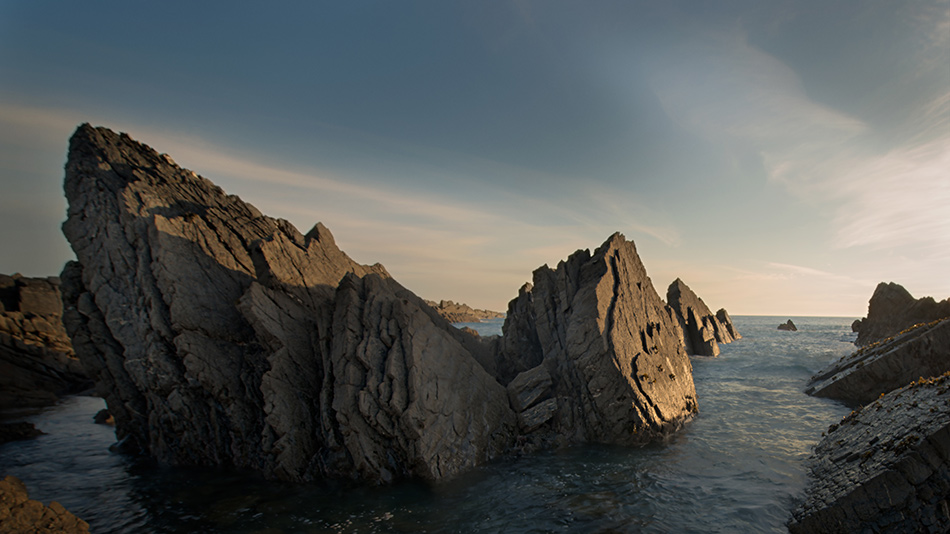
We can all take brilliant images. But, sometimes those images can seem flat. A brilliant way to bring them to life is to add colour to highlights in a photo. There are quicker ways to This can add depth, curiosity and even alter the perceived time of day. For example, a pink sky is seen more commonly at sunset than at sunrise. So, if you added a pink hue to the sky, viewers are more likely to think the shot was taken during sunset. In this tutorial, explain why used this method and, we’ll show you a way to bring colours into your image subtly. Follow our step-by-step guide for beginners.

Why Have We Used This Method
By using a luminosity mask to add colour to highlights we can control exactly where the colour presents itself. The colour blends and fades naturally with the tones of the image. There is a quicker method to simply add colour using the Blend If function but often the colour will spill into areas where we don’t want it. This by far is the best way to accurately control the colours we have added, with expert results.
Enter your email below and join our community of more than 100,000 photographers who receive regular tutorials and have also

Subscribed to our newsletter,
Downloaded our FREE Photoshop Course
Got our FREE Easy Panel for Photoshop
And have our FREE Essential Guide To Luminosity Masks E-Book
Step-by-step To Add Colour To Highlights
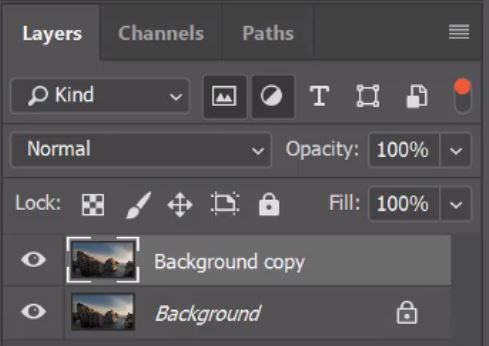
1. First, we need to duplicate our base layer or background layer. We do this by pressing and holding the left mouse button on the layer thumbnail and dragging it down to the ‘New Layer’ icon. Or, by pressing Ctrl+J on a PC or Cmd+J on a Mac.
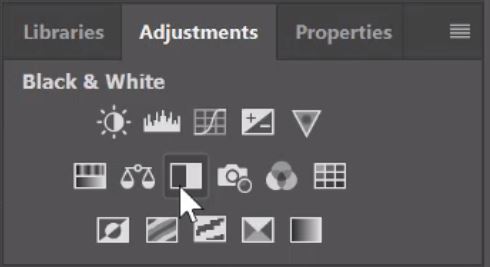
2. Next, we need to desaturate this new layer. Do this by opening a new Black & White Adjustment Layer. Either click on the icon or go to Laye>New Adjustment Layer> Black & White.
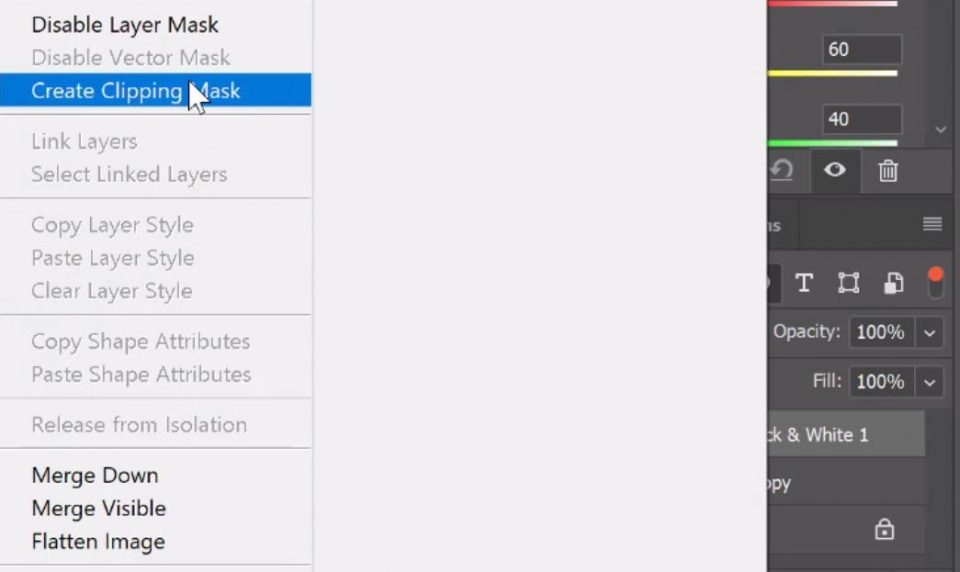
3. Richt-click on the Black & White Layer and select Create Clipping Mask. This will ensure the new adjustment layer will only affect the layer directly below it and nothing more.
4. Now we add a Curves Adjustment Layer.
This will help us fine-tune our black and white image. We want to brighten the areas we want to add colour to. The whiter an area is in the black and white image the more it will be affected by the added colour(s). The opposite principle applies to the darker parts of the image, these will be less affected.
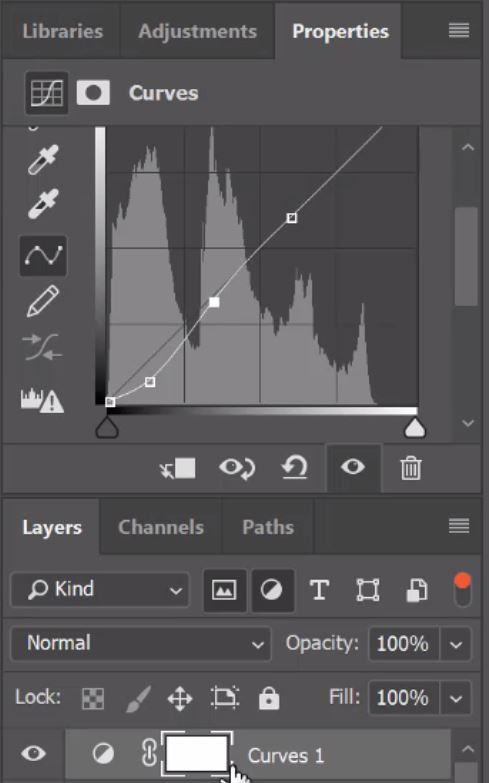
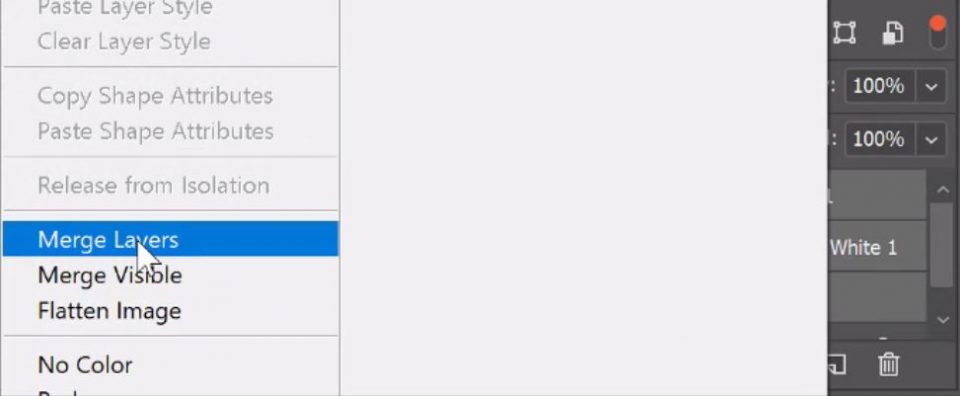
5. Select the Curves Layer, hold down the shift or options key and left-click on your Black and White layer.
This should select three layers (curves, black & white, and your duplicated image). Right-click on the selection and choose Merge Layers. This will combine them into one layer.
6. Add a new Layer by clicking on the Create New Layer icon or by going to Layer>New>Layer. Or, by pressing Crtl+Shift+N on a PC or Cmd+Opt+N on a Mac.
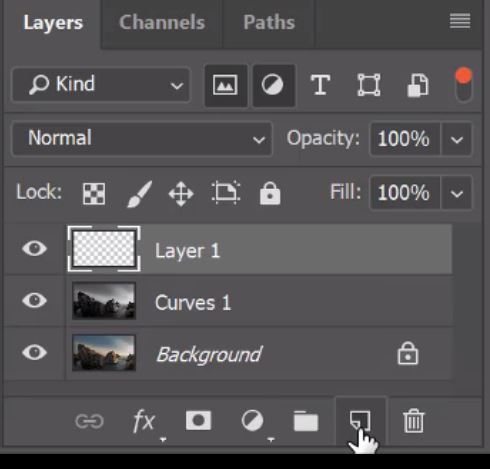
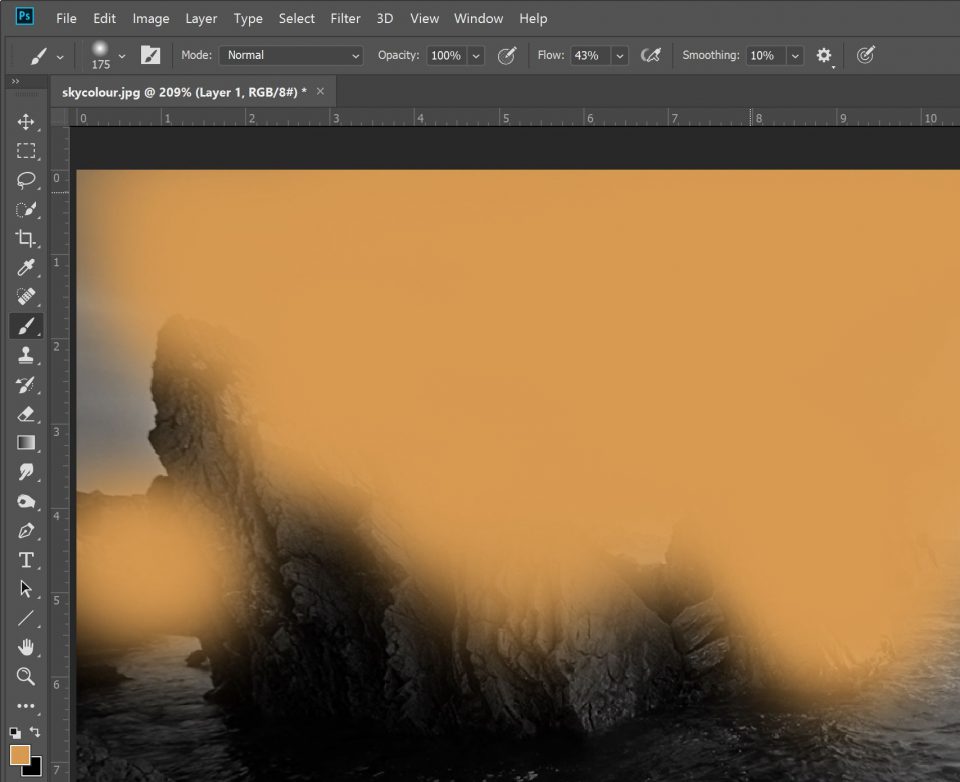
7. With your new layer selected, choose the Brush Tool.
Select the colour you want to add and simply paint over the image where you want the colours to be added. You can paint specific areas or all over. You can paint in a single colour or in multiple colours. It’s entirely up to you.
8. Once you have finished painting in the areas you wish to add colour, we need to add a mask.
Click on the Add Vector Mask icon or go to Layer>Layer Mask>Reveal All. This mask is what will allow us to precisely add colour to highlights.
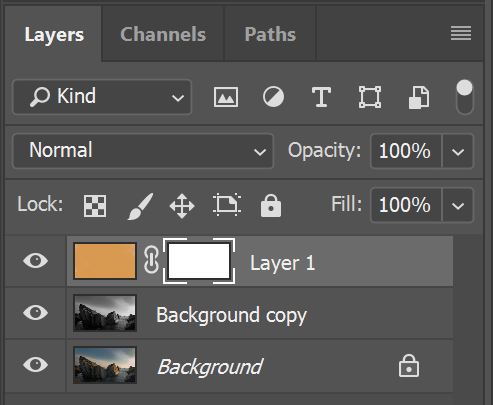
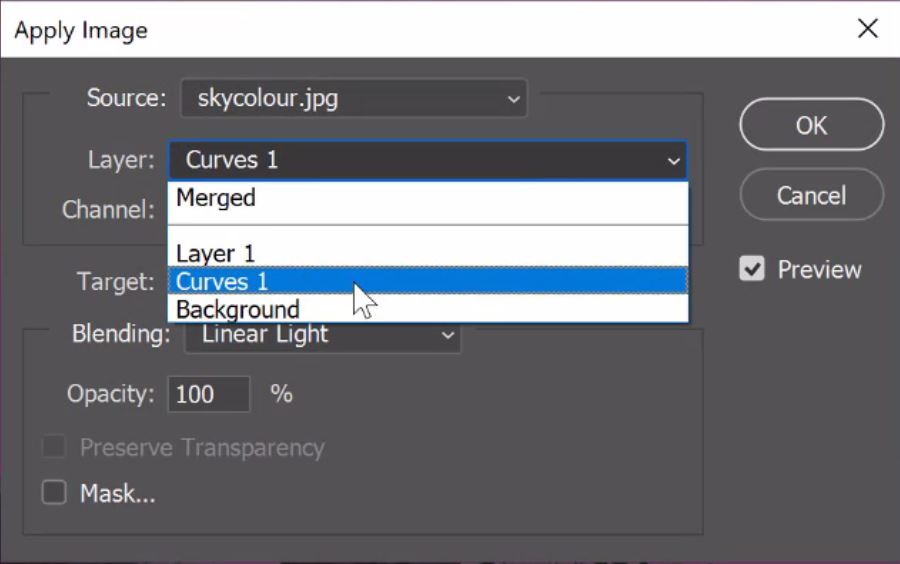
9. We want to apply the black and white to your new mask so we go to Image>Apply Image.
When the dialog box opens you will see a drop-down option for ‘Layer’. You need to choose the layer that contains your black and white image, then click OK.
10. Now you will see the white in the black & white image has been replaced with the colours you painted in and it is all blown out.
To blend it in naturally change the Blend Mode, try these Overlay, Soft Light, Hard Light, Vivid Light or Linear Light. They will all have different effects.
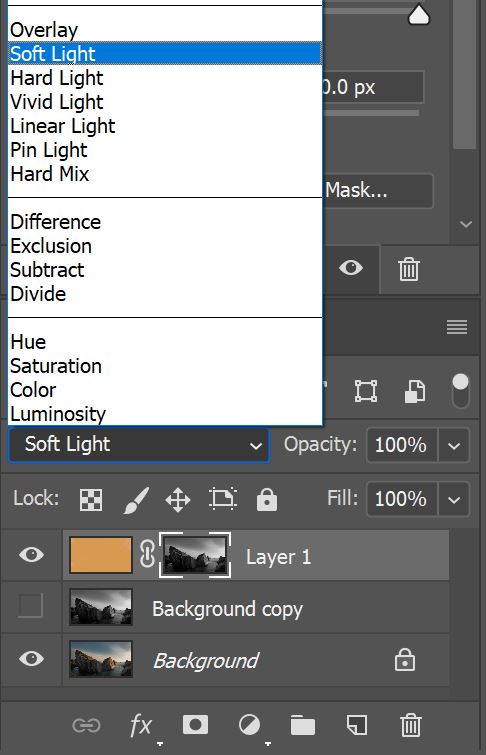
11. If the blend mode is not strong enough, simply duplicate the colour layer by pressing Crtl+J on a PC or Cmd+J on a Mac. If the blend is too strong reduce the opacity of the layer until you get the correct balance.
Additional Resources
If you liked this we also have other methods to try and of course, our Raya Pro method. Read our Add Awesome Colours In Your Photos article.
Thank you for reading this article on How To Add Colour To Highlights in Photoshop, be sure to sign up for our newsletter for more tutorials and great offers.
Enter your email below and join our community of more than 100,000 photographers who have also
Subscribed to our newsletter.
Downloaded our FREE Photoshop Course.
Got our FREE Easy Panel for Photoshop.
And, have our FREE Essential Guide To Luminosity Masks E-Book.
Online Resources
While looking for different methods and techniques to add colour to highlights. I stumbled across Glyn Dewis, a brilliant portrait photographer. Here is another method by Glyn using the Blend If technique on Youtube.