
Advanced Editing Tools in Lightroom
This article on Advanced Editing Tools in Lightroom is by Mike Ince, If you would like to write for us, please read here.
In my third Lightroom article here on Shutter Evolve, I am going to give you a look at four advanced tools I like to edit with. We started with getting familiar with Lightroom and the basic tools. Then, we focused on some catalog and file practices. Now, let’s talk about some of the advanced tools we can find within the program. Lightroom can serve most photographers quite well, especially those who need to edit in batches, or those that want a one-stop shop for all their organizing and editing.
We’re going to take a look at using advanced masks, custom curves, color grading, and fixing perspective, all without leaving Lightroom.
Range Masks – Color, Luminance, and Depth
As you have already probably used the common radial and linear masking options, and most likely the basic adjustment brush, let’s get a little more in-depth. This will open a few more options for you and may even save you a trip to Photoshop. Down near the bottom of your mask settings (after you’ve applied a filter/brush overlay),’ you will see these are off by default. Use the dropdown to select one of the three types.
You have three options for range masking within Lightroom. Remember to make sure your sliders are zeroed out and you can use the O key to show a mask overlay to see what you are brushing/masking.

Color Range Mask
This will let you select a color range based on using the eyedropper and the spots you sample. You can sample up to five areas of your target color, but you don’t need to necessarily use 5 samples. After using the eyedropper, you can slide the amount. This will increase or decrease the tolerance allowing for a more fine selection and determine just how much of the selected hue will be selected.
Luminance Range Mask
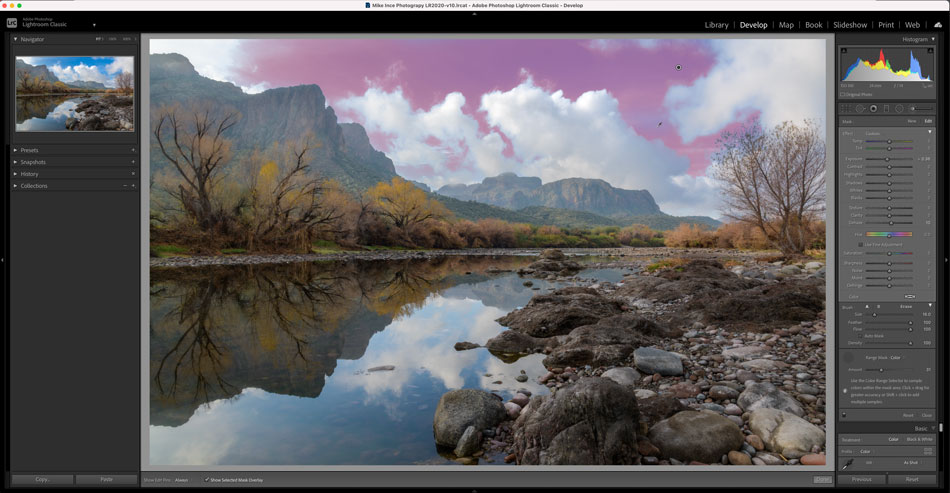
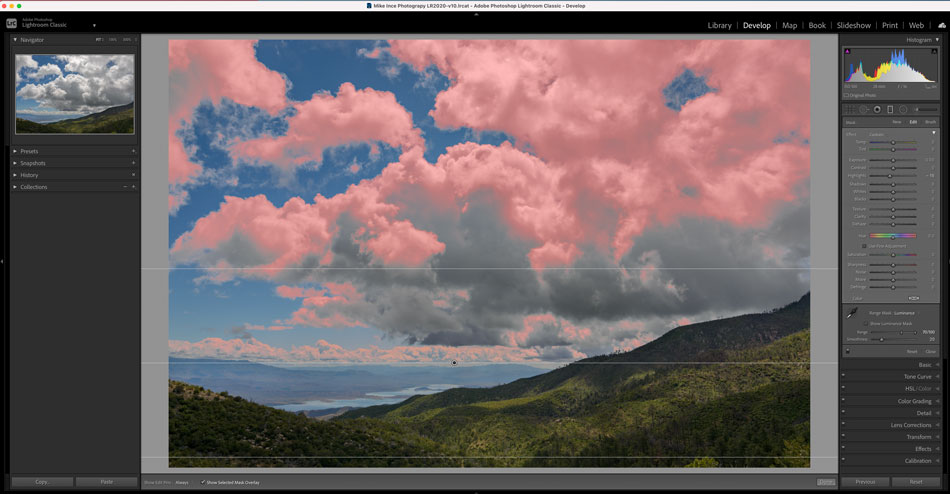
Using the luminance option will allow you to select areas of your photo based on luminance. This will target areas of similar exposure. Most often, I use this to edit my clouds above the deserts of Arizona. I find this is also, my most used, of the three options. Like with color, you can adjust your range slider to decide how lenient you will allow your selection to be.
One of the most powerful parts of this luminance option is that you can use the range slider to eliminate or confine your selection to a specific range of tones. So if you do not want the adjustment to affect the darkest parts of your image, you would slide the left triangle towards the right. Only the range in between the two triangles will be affected. And this works with the highlights and whites not being affected if you slide towards the left with the right triangle. To have a better idea of what’s going on while doing this, I suggest holding the alt/option key down while moving the sliders, and you can see the exact masked areas.
In the shot below I used the luminance masking option and adjusted my sliders to only select the brightest parts of the clouds. This way I make sure I kept all the detail by scaling my highlights back just a touch.
Depth Range Mask
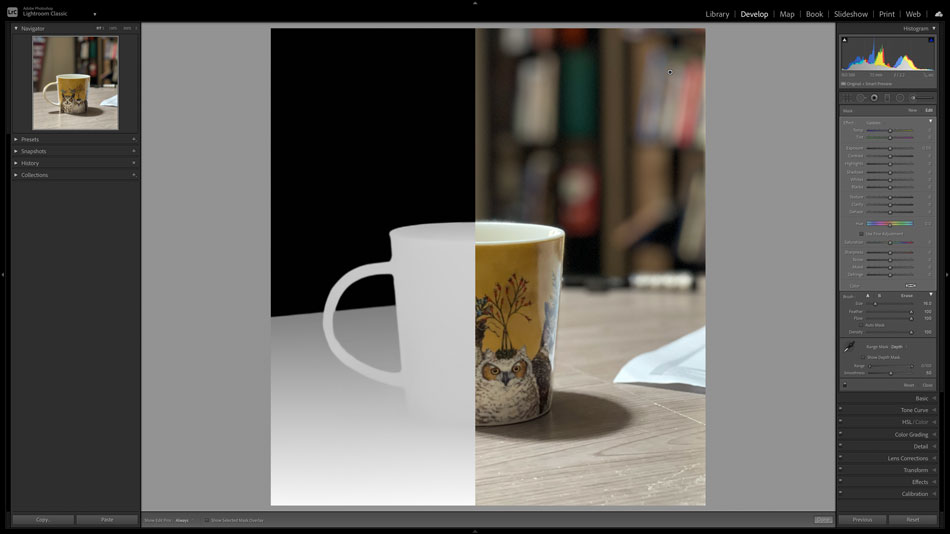
This option isn’t as commonly used, as it requires your camera to capture the depth map of a scene and many DSLRs do not do this. However, some of the iPhones and Androids do! In my split photo below you can clearly see my foreground to background and this option allows adjustments based on those depths. You can see my coffee cup on my desk appears white in the mask as it’s up close in my scene. The black is the back of my office which is the farther part of the scene. If you want to play with this, take a photo on your iPhone (if you have access to one) using portrait mode. Then drop the shot into Lightroom and try this. If your cell phone has multiple lenses on the back, you can most likely capture photos with depth maps.
-Tutorial Continued Below-
Enter your email below and join our community of more than 100,000 photographers who receive regular tutorials and have also

Subscribed to our newsletter,
Downloaded our FREE Photoshop Course
Got our FREE Easy Panel for Photoshop
And have our FREE Essential Guide To Luminosity Masks E-Book
Tone Curve – Point Curve
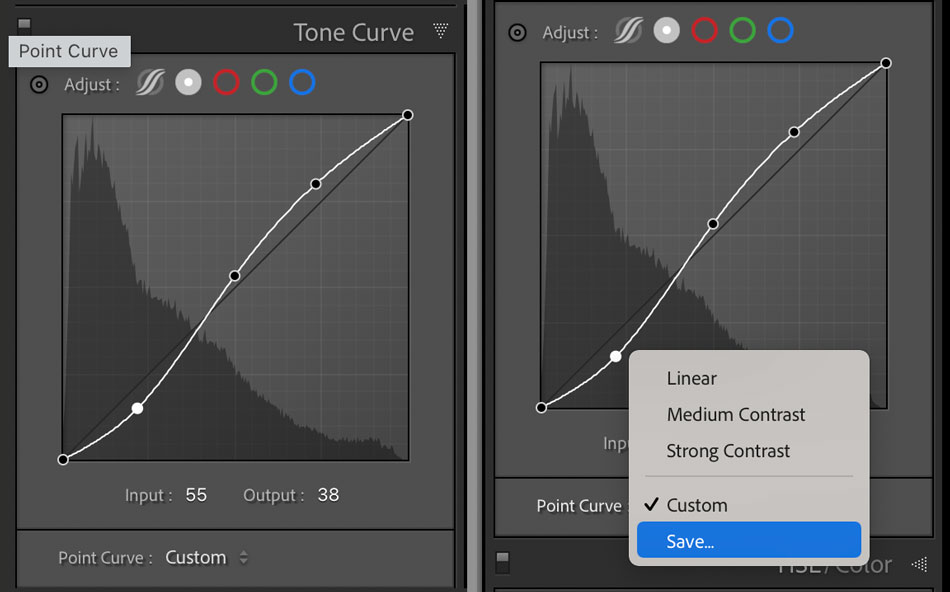
The tone curve by default is a little bit restrictive, which isn’t necessarily a bad thing. If you want full control though over your points on the curve and the precise placement of them, then choose point curve, next to the default parametric curve. This allows you to place points as needed, exactly where needed. If you need a kickstart and are looking for a place to start, use the dropdown below and select either medium or strong contrast to have a set of dots based on a typical S curve. You can then manipulate each dot specifically. You can right-click on the tone curve at any point to remove a single pin, or reset the line at any time. You can even save a point curve here.So you have something that’s a good starting point or commonly used for you, save it and have instant access to that curve at any time in the dropdown.
Note that you can create points and adjust each RGB channel individually if needed.
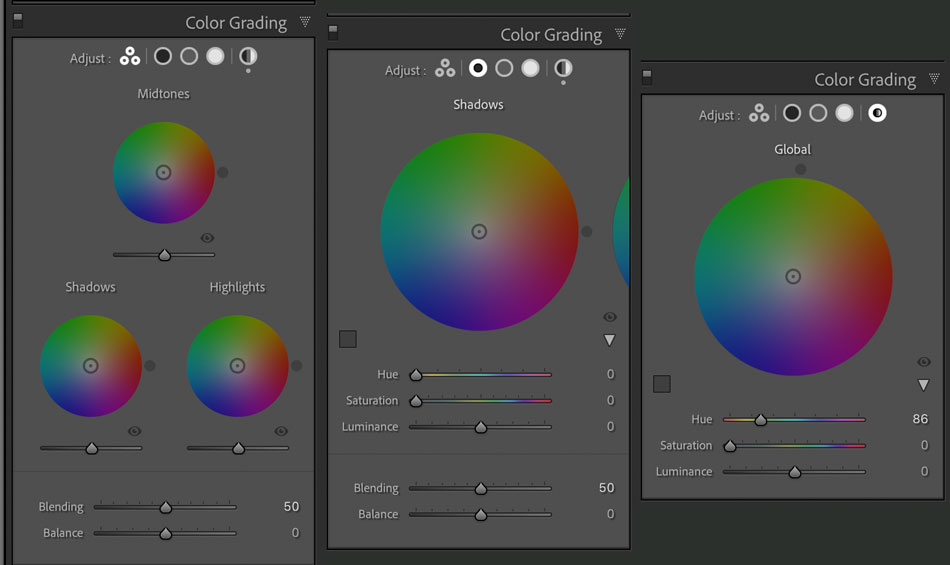
Color Grading in Lightroom
Color grading is the replacement for split toning in Lightroom as of a few updates ago. I use it for enhancing sunrises and sunsets, along with my nightscapes. Let’s first understand what we are looking at. When you open the color grading panel you will see three color wheels, representing midtones, shadows, and highlights. On the top next to Adjust you will see a few icons that allow for better viewing of each and a few more options are available. Each of the options can be viewed independently, which is also easier on the eyes as each wheel has more viewing room. Now under each wheel, you will see a small triangle on the bottom right. Clicking this drops down a few more options with hue and saturation and allows more precision not having to use your mouse on the color wheel, which can be touchy. There’s also a global wheel as the last option that would take a hue and apply it to all parts of the image at once.
I have found that a less is more approach is a great way to jump into color grading if you haven’t yet. Play with a dull sunset and give it some life. This is an awesome way to put your own touch on things, be it enhancing a scene or going a more creative route. The closer you are to the center of the circle, the less amount of color would be applied. As you move farther to the outside, the hue would become much heavier applied.
I wanted you to be aware of this option in Lightroom, which is just like the color grading in Adobe Raw. Check out Color Grading in Adobe Camera Raw for a more in-depth and very precise approach to color grading. It’s a quick watch and puts into perspective the potential this panel unlocks.
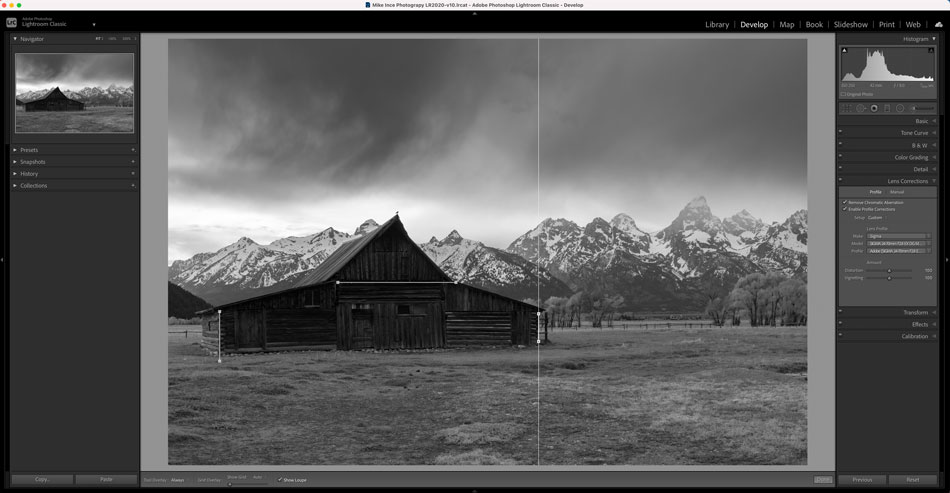
Transform – Adjusting Image Perspective
Remember to use your basic lens correction before venturing into this panel. You will find this panel quite useful for fixing architecture and very wide-angle shots. Feel free to also play with these settings creatively. Street photographers might enjoy exaggerating subjects and scenes here.
The biggest thing I would like to point out in the transform panel is the use of the Guided Upright Tool. Click the button with the 4 guidelines in the top left. Find a few edges in your photo that are supposed to run horizontal or vertical. Then click and drag along that edge. For example, this could be each vertical side of a building. You must drag out at least two guidelines for this to come into effect. And you can do one guideline vertical and another horizontal if needed, or both in the same direction, just try to run the guidelines apart from each other to achieve more accuracy. You can also use the preset buttons at the top instead of creating your guidelines. Hover over each button for a description of what each perspective fix does. I have seen very pleasing results with just the buttons.
In the shot below, I wanted to make sure the barn had straight vertical lines and even drew one on a horizontal line of the barn as well. Between where I had to stand for the shot to avoid distractions and the subtle lens distortion, this was an easy fix and compromise.
Advanced Editing Tools in Lightroom By Mike Ince
I enjoy editing in Lightroom and I hope that this article, along with previous ones here on Shutter Evolve, has demonstrated that Lightroom has come a long way over the years and is a great solution for a lot of people. There is a time and place for Photoshop and its immense powers, but it’s also nice to have a one-stop solution for your photography organization and editing.